

There is nothing better than on a sunny afternoon to put yourself into a hammock with a good book – or iPad for you new gen folk – kick back and enjoy the day. A hammock is the ultimate indulgence and one that says ‘chilling’ in anyone’s language.
With the hustle and bustle of life as we know it today, more and more we are being left without time to simply be. A hammock is the perfect answer to enabling this, you don’t need too much space and with our great design you don’t even need a tree! Just some know how, materials and tools – which funnily enough we can help you out with if you don’t have all on hand.
So let’s get started in creating the ultimate relaxation for your backyard or balcony – the hammock stand!
Firstly you will need to equip yourself with the following tools and materials to get cracking on your hammock stand.
Tools – if you don’t own them, why not borrow them!
- Circular saw
- Square
- Battery powered drill
- Drill bit set
Materials
- (2) Stainless steel eye hooks
- Hammock – these can vary in size, shape and comfort so pick the one that is right for you!
- Timber lock screws
- (7) 2x4x8 treated pine timber planks
- Liquid nails
Step 1
nPrepare your timber
Arguably the most important step of any build, cutting your timber to length and ensuring you have everything in place to get started. Take the time here to ensure all your timber is cut properly otherwise you will struggle towards the end of your project to get everything to match up.
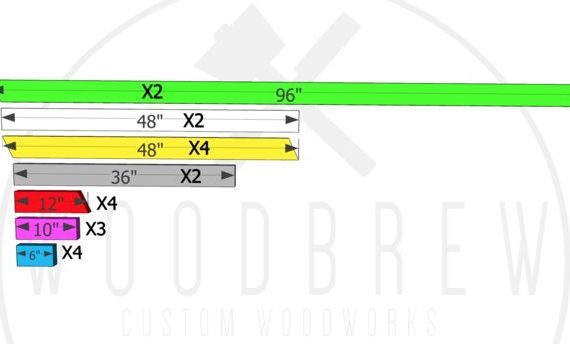
You will need the following lengths to make this hammock design work, ensure that you follow the image, as cutting the wrong angles will give you the wrong pieces all together.
- 2 x 96 inches – with 25 degree angles both cut inwards
- 2 x 48 inches – with squared edges
- 4 x 48 inches – with 25-degree angles cut one in, one out, creating a parallel shape
- 2 x 36 inches – with squared edges
- 4 x 12 inches – with left hand squared edge and right hand edge cut away
- 3 x 10 inches – with squared edges
- 4 x 6 inches – with squared edges
Step 2
nBuild you hammock arms
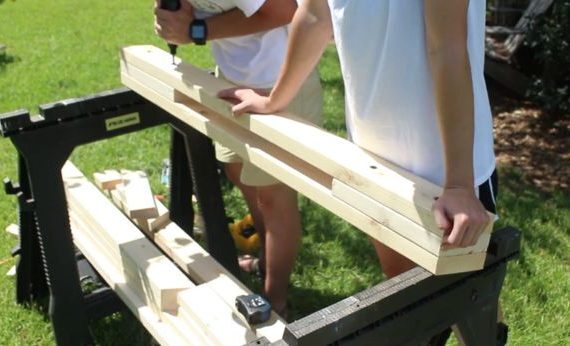
With your pieces cut, line up 1 x 48’ cut piece with 2 x 12” boards inside – see diagram – and then line up a second 1 x 48” board on top to create your arms.
Secure these boards together firstly with Liquid Nails, then with the timber lock screws. Repeat this process to give you both arms of your hammock.
As you – or someone you know – will be using the hammock, it is always best to use liquid nails to secure the hammock as well as your screws. This adds extra strength and integrity to your build, the last thing you want is your hammock not being able to carry your weight so use plenty of Liquid Nails to ensure it is super sturdy.
Step 3
nAttach the timber to the frame
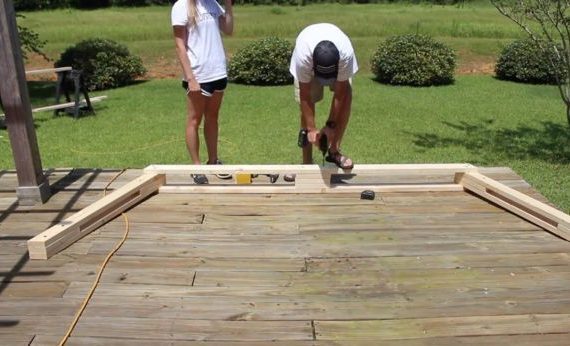
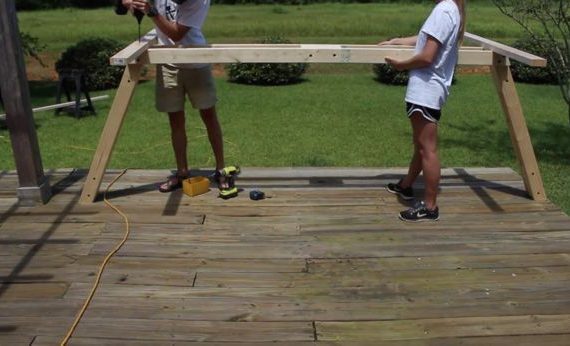
Lay out your two 96” pieces of timber; these will become the base of your structure. Line them up with the arms you have already built, ensuring that all the cuts line up. Attach the base to the arms again using firstly Liquid Nails, then the screws.
The frame then requires added support, which the 3 x 10” timber boards will create. Glue these together firstly with the liquid nails, and then place in the centre of the base, again adding more liquid nails and screws. This support will stop the base from flexing and keep it nice and strong.
Step 4
nAttach the feet
Taking your two 48” timber lengths and with the assistance of someone, flip over your structure allowing you to centre the 48” lengths to each end of the base at a cross section, creating a stable base and feet.
Step 5
nAdd support to the structure
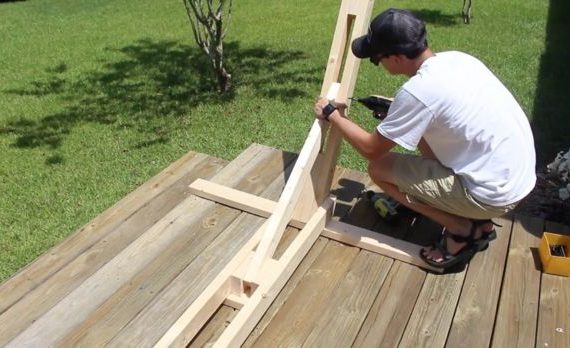
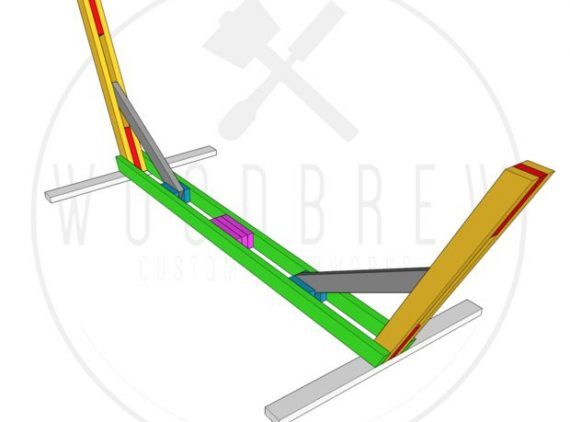
Firstly, you need to take your 2 x 36” lengths and your 4 x 6” lengths. These together will make up your support arms. To ensure the supports are straight, place an offcut of wood below the base, to ensure it is level with the feet to the ground.
With this in place, take 2 x 6” lengths and 1 x 36”, lining up the angle of the cut on the support with your arm, attach the support using again Liquid Nails and screws.
Secondly, you need to arrange the 2 x 6” timber on either side of your support, resting on top of the off-cut so it is level with the base of your frame. Secure these in place with liquid nails & screws. Repeat on the other side. This step will add increased stability to your structure.
Step 6
nSet up your eye screws to hang your hammock
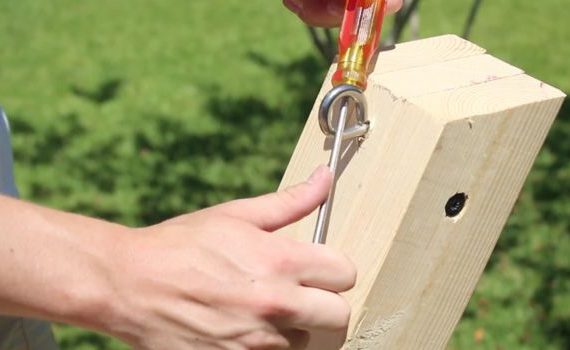
Ensure you are using the stainless steel eye screws, pre-drill your locations and screw into place. If it becomes too hard, use either pliers or a screwdriver to get the eye screws into place to hang your hammock.
Step 7
nHang your hammock
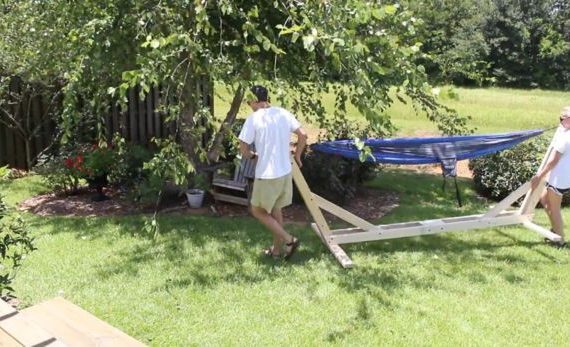
You are finally ready to hang your hammock. Ensure that you give yourself the right about of space on both sides which will provide enough give to ensure you relax, but tight enough so you don’t reach the ground. You may need to add some extension rope or tighten the ends to get the best results here. If you don’t get it right the first time you hang the hammock it’s best to have a play with this until it’s perfect.
Step 8
nEnjoy!
The next step is clearly the best, move your hammock to your outdoor (or indoor if you like) location, sit back, with your book – and maybe a beer or glass of vino – and enjoy wasting away the summer days.
It is amazing how such as simple idea can provide so many hours of enjoyment for the whole family. Remember, if you don’t have all the tools you need to get the job done, don’t worry about it visit www.toolmates.com.au and hire the tools you need from people in your local area.
Related Posts

Post a Comment