
 Hardwood floors are a stunning addition to any home, and if you live in a new house, or you are looking to renovate a newer property, being able to install your old flooring is going to save you a packet on tradesman and handyman fees.
While the process of tearing up and installing a new hardwood floor might be a long winded one, the results speak for themselves, and after a weekend of hard work you will be able to enjoy the fruits of your labour on your beautiful new floor.
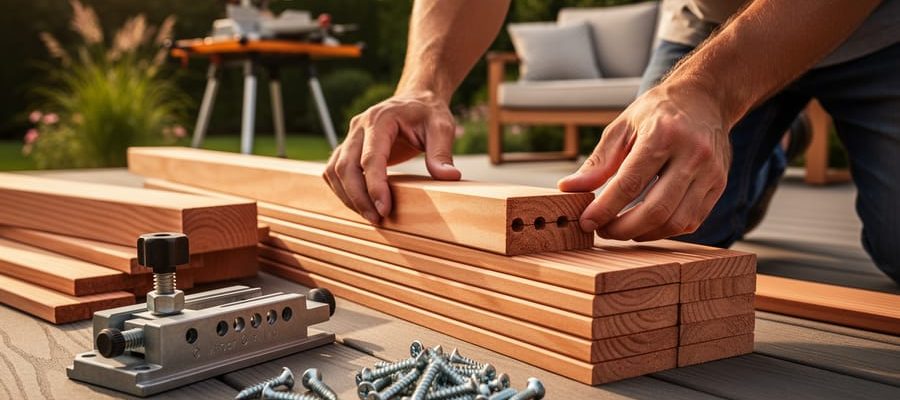
Materials needed to create your hardwood floors include:
- Flooring (measure to get an idea of the amount in square feet)
- Trim for the floor area
- Sheets of plywood for subfloor
- Multipurpose screws
Tools needed install the floors include:
Step 1: Tear up the old floorboards and sub floor area
This is a step that may require you to bring in a few friends. Based on what is already laid on the floor of your home, you will need to tear up what is there to ensure that you have an even surface before you start working on installing your new flooring.
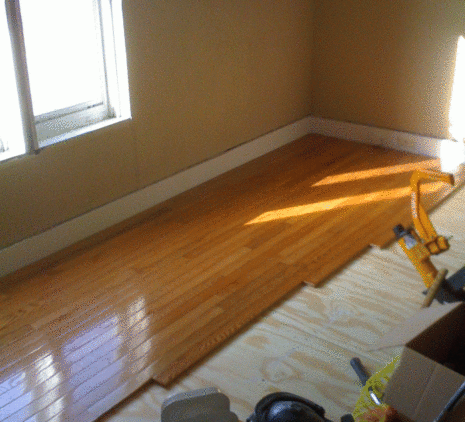
If you have existing floorboards, remove all of the old boards and replace them with plywood as a subfloor. We used a circular saw to cut through the floorboards that weren’t on the floor joists and cut the sheets of ply to size.

Step 2: Install new subfloor and start laying out your hardwood
Next, you will need to install all of the plywood for the subfloor and then ensure it is level before you start laying down the hardwood on top of it. Using 2-inch screws, screw the subfloor to the floor joists and then start installing the hardwood sections from the wall inwards, placing the nails in with the nail gun.

Step 3: Slowly check all the floor strips are tightly fitting together
Make sure that as you add in your pieces of hardwood flooring, you gently strike the side of each piece of flooring with the nail gun mallet to ensure each piece of flooring is securely in place.

Step 4: Line up the nail gun or pneumatic floor stapler
Use the floor stapler to ensure there is a tight fit against the new floorboard. Be sure to check and re-check as you go, as once you move along to the next piece of flooring, the chance has been missed to check your previous piece, and any errors will mean you will need to rip up the hardwood floor.

Step 5: Strike the staple driver to drive staples into the floor securely
Strike the stapler surface to drive the staples into the floorboards. The staples are 2-inches in length, so you will need to ensure they are securely in place and spaced every inch or two. Be sure you space the same distance apart to ensure the floorboards are even and look professionally installed.

Step 6: Cut strips to the correct length to fit your room
As you move across your room installing the flooring, you will get to the point where you need to cut the boards and trim them to fit. Use your circular saw to make the cut and ensure that you leave no more than a quarter of an inch of space between the board and the wall as this can be easily covered up with the trim later on.

Step 7: Finishing off your flooring
Continue with your flooring until you get to the end close to the edge of your room and then use your nail gun to nail all of your final pieces into place. Install 3/4-inch trim around the perimeter of the room, which will cover any slight gaps in the baseboard and make it all look schmick.
As a side note, you should consider leaving a small gap next to each wall to allow for any expansion during seasonal changes especially if you live in humid climates. You can also put insulation underneath the subfloor if you’re looking for a little more soundproofing or some insulation, it can also help to reduce the noise if you have a two-story house with people living on the lower floor area.
Laying your own floor is simple and with a couple of hired tools and a little bit of ‘know how’ we were able to save a bucket load on the cost of installing new flooring without the need to call in flooring installers and expensive handymen crew.
Whether you have a small DIY project or a big one, Toolmates have the tools you need to get the job done. Listing tools is easy! Simply log on, set up a profile and you’re away.
Do you own a bunch of tools at home, gathering dust that you hardly ever use? Instead, you should be letting them make you money by renting them out to people in your area. With ToolMates Hire you can now hire your own tools out whenever they’re not in use.
Simply register, add a tool, details and photo, add the dates the tool is available and confirm, and your tool is listed on ToolMates Hire as available.
Related Posts
Post a Comment