If you love the idea of a practical bench that doubles as a planter box, we’ve got just the thing for your next DIY project
Perfect for jazzing up your deck or making your outdoor patio a little more functional, this bench planter combination is a straightforward and useful DIY project that is perfect for a verandah or garden.
A useful seating area as well as a space to grow herbs or plants, the bench with planter boxes is made from wood and can be made to measure any space you have in your outdoor space, whether it be a unit balcony or an expansive outdoor area.
Materials needed to create and build bench and planter include:
- Wooden decking boards or wood from used pallets (about 4 pallets worth)
- Nails and screws
- Tape measure
- Decking paint / stain
Tools needed to build the bench and planter box:
The steps for how to create a bench and planter box combination are outlined below. Note the bench and planter that we’ve created is two benches, a longer bench with planter plus a smaller bench, all in an L shape formation. You can either make it to this style, or you can build it to suit the area you have, it all depends on the width of the boards and the space you’re building it for.
Step 1: Source your wood and plan your bench and planter
In this step you will need to take the time to lay out the structure of your planter box and benches, this will be made to scale for your outdoor area. It’s best to roughly draw up a plan so you can cut the pieces you need and figure out all the wood that is required.
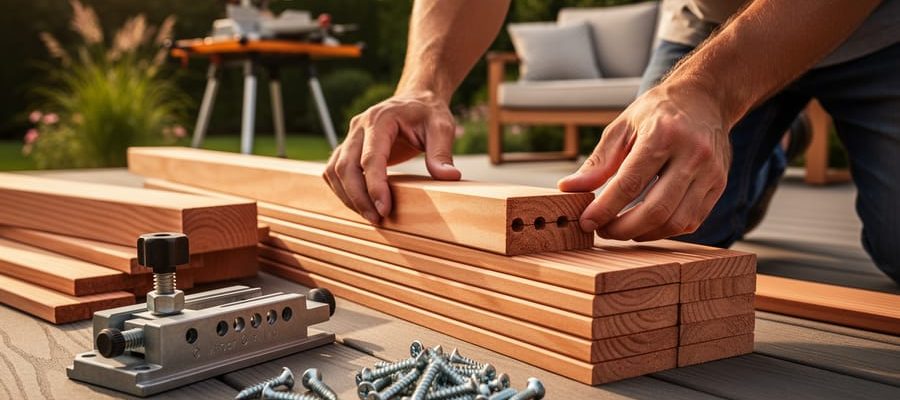
Step 2: Sand back all your pieces with an electric sander
Now that you have all of your pieces, you can sand back all of the pieces of wood for your bench and planters so that you have everything ready for assembly. It’s important to ensure all of the wood is sanded back thoroughly and you have removed any nails if you’ve sourced the wood from pallets.
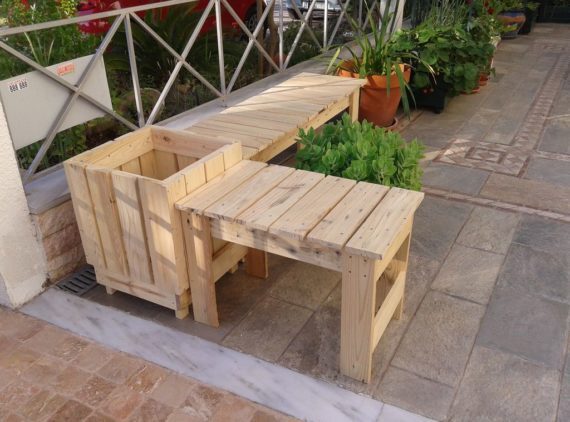
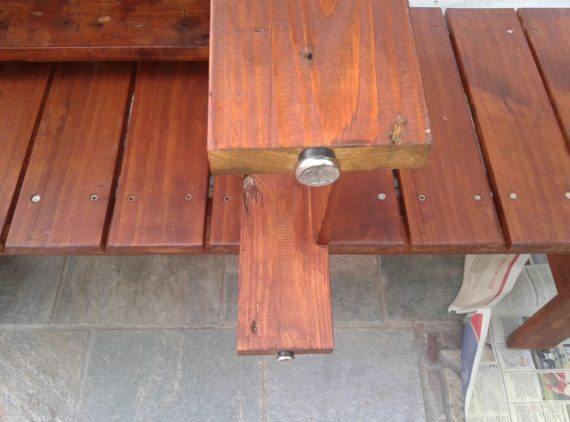
Step 3: Build your bench
In this step, you are going to use all the wood you have sanded to put the bench together. For this bench, we chose to build an upper seat with short cross pieces which consisted of twelve cross pieces for the longer bench and six for the smaller section of the bench.
Use two vertical beams of 120cm x 9 x 2cm to support the seating boards, which is 12 of 40 x 9cm x 2cm – taper all of them with two panels of 36 x 9cm x 2cm.
Then use two vertical beams of 60 x 9cm x 2cm to support the seating boards, which is 40 x 9 x 2cm and taper them with two panels of 36 x 9cm x 2cm.
Add some legs, we made these to be 45cm high each; the actual height is up to you and your space available, so create these to suit. If you like a higher bench, make the legs longer, or if you want benches that are closer to the ground, it’s totally your call.
Assemble everything with an electric screwdriver, take the time to ensure everything is really neat as this is the sort of piece you will keep for a long time, and you’ll want to make sure it is all straight and well made.
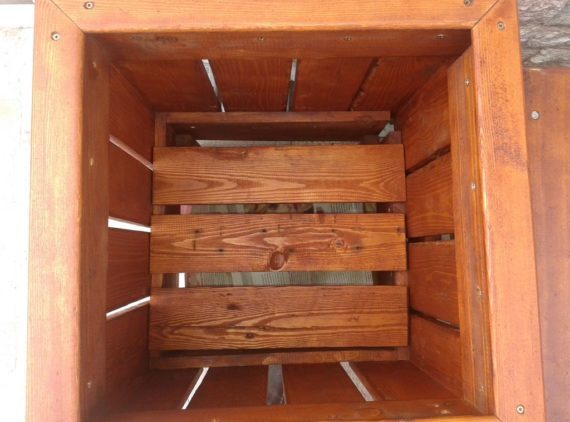
Step 4: Creating your planter pallet box
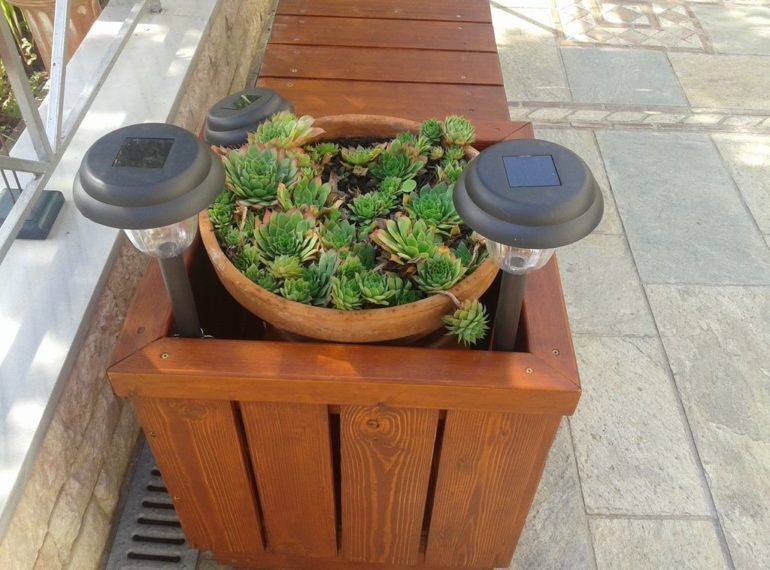
Using the same formation and width as your bench seat, create the planter box using pieces of sanded wood. You can add small legs of approximately 15cm to the bottom of the planter box and also reinforce the top of the planter box with wood to ensure it remains sturdy.
For our planter box, we cut four legs of the same length, then cut eight sidebars to the length of the width of the planter box. We then assembled a frame, adding in an inch or so at the bottom that works as a small leg, so the planter is not directly sitting on the ground. Using the four remaining side pieces, you’ll need to then construct a little cube and add in screws to keep it all in place.
Once the cube is assembled, you will then need to add the side panels using nails. To make the top look a little special you can cut four more pieces of wood and cut the ends at a 45-degree angle to make the top look schmick. Ideally, put a bin or barrel into the planter to plant your herbs or plants to protect the wood from rotting.
Step 5: Paint the benches and planter box with paint
In this final step, you can add an oil-based paint to cover the whole surface. This paint will protect the planter and benches and make it withstand the elements.
Once you’ve painted the bench and planter, you should have a fully functioning bench and planter combination that you can use for chilling out and growing some plants or herbs.
For an extra special touch, you can also add under heels to the bench and planter to protect the legs from damage on a hard surface if you ever need to drag them around a deck or outdoor area.
Whether you have a small DIY project or a big one, we have the tools you need to get the job done. Listing tools is easy!
Do you own a bunch of tools at home, gathering dust that you hardly ever use? Instead, you should be letting them make you money by renting them out to people in your area. With ToolMates Hire you can now hire your own tools out whenever they’re not in use.
Simply register, add a tool, details and photo, add the dates the tool is available and confirm, and you’re tool is listed on ToolMates Hire as available.
Related Posts

Post a Comment