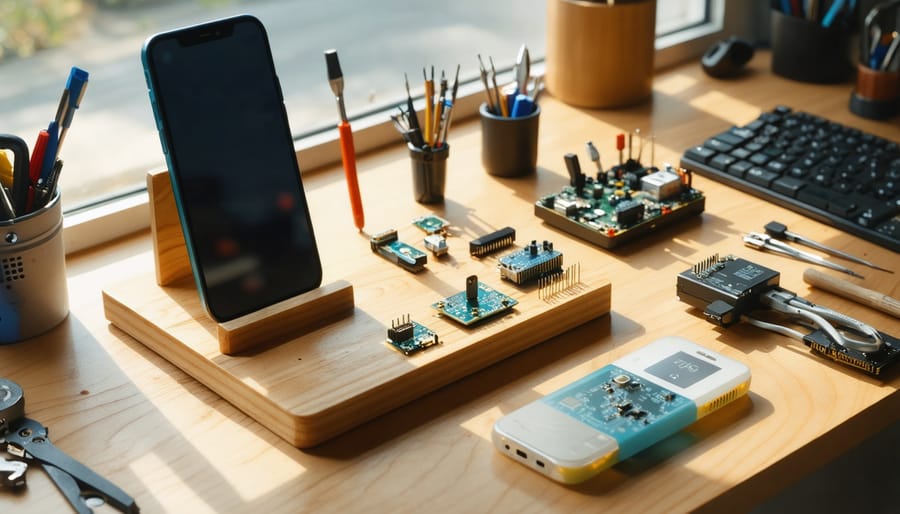
Transform your everyday tech devices into custom masterpieces through hands-on tech accessory projects that combine creativity with practical functionality. Armed with basic tools and readily available materials, you’ll discover how to craft professional-grade device stands, personalized charging stations, and custom protective cases at a fraction of retail costs.
Master fundamental electronics skills while building projects that enhance your daily tech interactions – from illuminated phone docks to wireless charging pads that complement your home décor. Whether you’re a beginner looking to start with simple tablet stands or an experienced maker ready to tackle advanced Arduino-based smart home controls, these DIY innovations deliver both satisfaction and practical value.
Join a growing community of tech craftspeople who are revolutionizing their digital workspace through custom-built solutions. Every project builds your skills while saving money, and the best part? You’ll learn transferable techniques that apply to countless future builds.
Safety Note: Always follow proper electrical safety protocols and use appropriate protective gear when working with electronics components.
Essential Tools and Materials
Basic Tool Kit Essentials
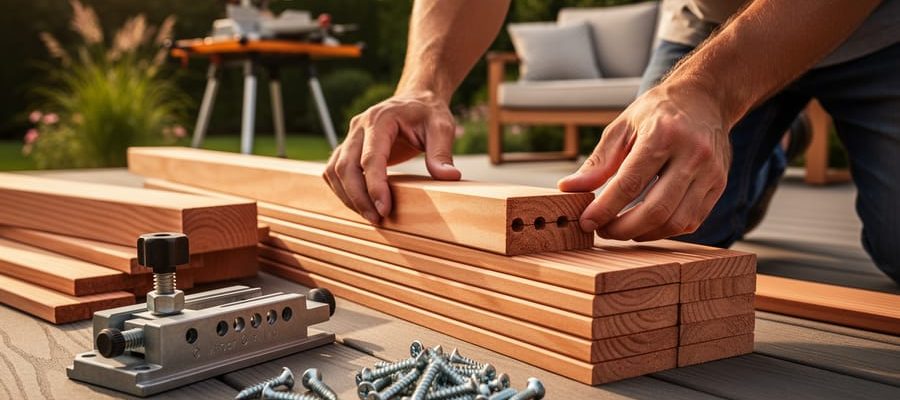
Every successful tech DIY project starts with a well-equipped toolkit. While specific projects may require specialized equipment, having these fundamental tools will prepare you for most basic to intermediate projects. Just as essential woodworking tools form the foundation for carpentry, these items are crucial for tech DIY work.
Start with a quality precision screwdriver set featuring both Phillips and flathead bits in various sizes. Include needle-nose pliers, wire cutters, and a multimeter for testing electrical connections. An anti-static wrist strap is essential to prevent damage to sensitive electronics, while a soldering iron with lead-free solder enables basic circuit work.
Keep a selection of zip ties, electrical tape, and heat shrink tubing for wire management. A magnifying glass or head-mounted magnifier helps with detailed work, and tweezers are invaluable for handling small components. Don’t forget safety equipment: protective eyewear and work gloves are non-negotiable.
Store everything in a compartmentalized toolbox to keep items organized and easily accessible. Consider adding a basic set of Allen wrenches and a rubber mat for protecting work surfaces.
Common Materials Guide
Common tech DIY projects rely on readily available materials that strike a balance between functionality and aesthetics. Wood remains a popular choice, with plywood and MDF offering excellent stability for mounting brackets, stands, and enclosures. Acrylic sheets provide a modern, transparent alternative perfect for LED-based projects and display cases, while being easier to work with than glass.
Recyclable materials deserve special attention in the DIY tech world. Old computer cases, smartphone screens, and circuit boards can be repurposed into new projects, reducing waste while adding a unique aesthetic. Aluminum and copper are particularly valuable for heat dissipation in electronics projects, while plastic bottles and containers can be transformed into protective casings.
For joining materials, hot glue works well for temporary fixes, while epoxy provides permanent bonds. Cable ties, velcro strips, and magnetic strips offer flexible mounting solutions. Consider keeping a stock of basic electronic components like LED strips, buttons, and switches, as these often form the foundation of tech modifications and improvements.
When selecting materials, always consider durability, heat resistance, and compatibility with your devices. Non-conductive materials are essential when working with exposed electronics, while proper insulation prevents short circuits.
Beginner-Friendly Projects
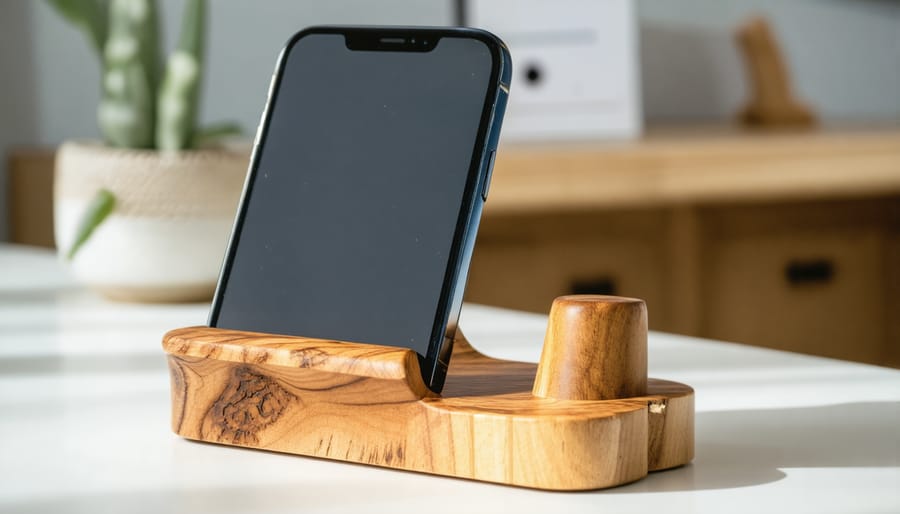
Custom Phone Stand
Create a versatile phone stand that adjusts to multiple viewing angles using common household materials. This project takes about 30 minutes and requires minimal tools.
Materials needed:
– 2 wooden craft sticks (large size)
– 1 rubber band
– Hot glue gun and glue
– Small piece of non-slip rubber pad
– Sandpaper (medium grit)
Step 1: Sand both craft sticks to remove any rough edges and splinters. This ensures smooth operation and prevents scratches on your phone.
Step 2: Place the craft sticks in a “V” formation, overlapping them about one-third from the top. The angle should be approximately 120 degrees.
Step 3: Secure the overlapping point with hot glue, holding the sticks firmly until the glue sets (about 30 seconds).
Step 4: Wrap a rubber band around the overlapping point several times to reinforce the joint and provide tension for adjustability.
Step 5: Cut small pieces from the rubber pad and glue them to:
– The bottom ends of both sticks to prevent slipping
– The top of the front stick where your phone will rest
To use your stand, simply adjust the angle by moving the legs closer together or further apart. The rubber band provides enough tension to hold your phone securely at various angles, perfect for video calls, watching content, or following recipes while cooking.
For added stability with larger phones, consider using wider craft sticks or adding a small lip at the bottom of the front stick to prevent sliding.
DIY Cable Organizer
Transform your cluttered desk into an organized workspace with this simple DIY cable management system. Using common materials from your local hardware store, you can create a professional-looking solution that keeps cables neat and accessible.
Materials needed:
– Rain gutter (plastic, 3-4 feet length)
– End caps
– Mounting brackets
– Screws
– Power strip
– Cable ties
– Double-sided tape
– Drill and bits
Start by measuring the space under your desk where you’ll mount the cable organizer. Cut the rain gutter to size using a hacksaw, ensuring smooth edges. Attach the end caps to prevent cables from slipping out.
Install the mounting brackets under your desk, spacing them roughly 16 inches apart. Position the gutter in the brackets and secure it with screws. Place your power strip inside the gutter, using double-sided tape to keep it in place.
Route your cables through the gutter, using cable ties to bundle similar cables together (keyboard, monitor, speakers). Label each bundle for easy identification. Leave enough slack for comfortable movement but avoid excess cable length.
Pro tip: Add a few small holes along the bottom of the gutter for ventilation and to thread cables through when needed. This creates a clean look while maintaining flexibility for future changes.
For extra organization, consider using different colored cable ties for various device categories, making troubleshooting easier when needed.
Wooden Tablet Case
Transform your tablet into a stylish masterpiece with this elegant wooden case project. You’ll need a sheet of 1/4-inch thick hardwood (maple or walnut work beautifully), wood glue, sandpaper, finishing oil, and basic measuring tools. Start by measuring your tablet’s dimensions, adding 1/4 inch for padding on all sides.
Cut two pieces for the front and back panels, ensuring they’re identical in size. For the sides, cut four strips that match your tablet’s thickness plus the wood thickness. Sand all pieces thoroughly, starting with medium-grit sandpaper and progressing to fine-grit for a smooth finish.
Assemble the frame by gluing the side strips between the front and back panels. Use clamps to hold everything in place while the glue dries (approximately 24 hours). Once dry, sand the edges to ensure they’re flush and smooth. Add corner reinforcements if desired for extra durability.
For the finishing touch, apply two coats of wood finishing oil, allowing proper drying time between coats. This will protect the wood and enhance its natural beauty. Consider adding felt padding inside to prevent scratches, and create a simple closure mechanism using elastic bands or magnetic strips.
Remember to test the fit with your tablet before applying the finish, and ensure all edges are smooth to prevent any damage to your device.
Advanced DIY Tech Projects
Wireless Charging Station
Transform your old charging routine with this DIY wireless charging station project. You’ll need a Qi wireless charging module, a USB cable, a soldering iron, some basic tools, and your choice of decorative housing material like wood or acrylic.
Start by carefully disassembling the charging module and identifying the positive and negative terminals. Strip one end of the USB cable and solder the red wire to the positive terminal and the black wire to the negative terminal. Double-check your connections to prevent any short circuits.
For the housing, cut your chosen material to size, creating a base approximately 4×4 inches and walls that will accommodate the charging module’s height. If using wood, sand all edges smooth. Create a shallow recess in the base to house the module and drill a small hole for the USB cable.
Secure the charging module in place using hot glue or mounting tape. Thread the USB cable through the hole and connect it to a power source. Test the charging pad with a compatible device before final assembly. Once confirmed working, secure the housing pieces together using wood glue or acrylic cement.
Consider adding rubber feet to prevent sliding and protect surfaces. For an extra touch, you can add LED indicators or customize the surface with paint or wood stain. Always ensure proper ventilation in your design to prevent overheating during charging.
Remember to test thoroughly and keep the charging surface clear of metal objects when in use.
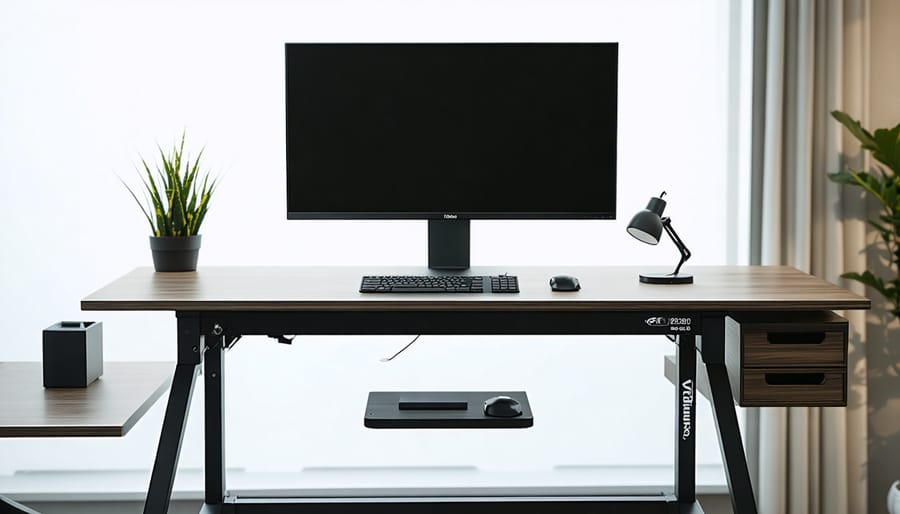
LED Backlit Monitor Stand
Transform your monitor setup with this sleek and functional DIY LED backlit monitor stand that not only elevates your screen to an ergonomic height but also adds ambient lighting to your custom workspace solutions. You’ll need a piece of 18mm thick plywood (600mm x 200mm), LED strip lights, a USB power cable, aluminum channel strips, wood stain, and basic tools.
Start by cutting your plywood to size and sanding all edges smooth. Create a shallow channel along the back edge for the LED strip using a router or chisel. Apply your chosen wood stain and allow it to dry completely. Install the aluminum channels to house the LED strip, ensuring clean corners for a professional finish.
Mount the LED strip inside the aluminum channel, being careful not to bend it too sharply at corners. Wire the USB power cable to the LED strip, using heat shrink tubing to protect connections. Test the lighting before final assembly.
Add rubber feet to the bottom corners to prevent scratching and provide stability. Optional features include a built-in USB hub or wireless charging pad integration. The finished stand supports up to 27-inch monitors while providing subtle, eye-friendly backlighting that reduces eye strain during extended screen time.
For safety, ensure all electrical connections are properly insulated and keep the USB cable away from any heat sources. This project typically takes 2-3 hours to complete and costs around $50 in materials.
Smart Speaker Enclosure
Transform your smart speaker into a conversation piece with a custom-built enclosure that enhances both aesthetics and acoustics. This project combines woodworking with basic electronics to create a unique housing that complements your home décor while protecting your device.
Start by selecting materials that match your interior design – hardwood offers excellent sound qualities, while bamboo provides a modern, eco-friendly alternative. You’ll need a piece measuring roughly 12x12x12 inches, depending on your speaker’s dimensions. Essential tools include a jigsaw, drill, sandpaper, and wood finish.
Begin by creating a template of your speaker’s dimensions, adding an extra inch for ventilation. Cut the wood panels according to your design, ensuring precise 45-degree angles for clean corners. Don’t forget to drill holes for power cables and include a mesh panel for unobstructed sound transmission.
The enclosure should feature strategic ventilation slots to prevent overheating. Position these on the back panel, keeping them subtle yet functional. Consider adding rubber feet to minimize vibration and protect furniture surfaces.
For advanced makers, incorporate LED strips that sync with your music or add a wireless charging pad on top for your smartphone. Apply several coats of finish to protect the wood and enhance its natural beauty.
Remember to test the speaker’s functionality before final assembly, ensuring all voice commands work through the enclosure and sound quality isn’t compromised.
Tips and Troubleshooting
When working on DIY tech projects, you’ll likely encounter some common challenges. Here’s how to troubleshoot effectively and avoid typical pitfalls:
Always double-check polarity when working with electronics. Reversed connections can damage components or prevent your project from working. Use a multimeter to verify voltage and current before powering up your creation.
Static electricity can be a silent killer for electronic components. Work on an anti-static mat or wear an anti-static wrist strap when handling sensitive parts. If these aren’t available, regularly touch a grounded metal surface to discharge static.
For 3D printed accessories, ensure proper bed adhesion by maintaining a level print bed and using appropriate surface preparation. If prints keep failing, try adjusting the nozzle height or using a light coating of adhesive spray.
When soldering, remember that cold joints are a common issue. The solder should flow smoothly and appear shiny when cool. If it’s dull or grainy, reheat and add fresh solder. Keep your soldering iron tip clean and properly tinned.
For projects involving LEDs, use appropriate resistors to prevent burnout. A simple LED calculator can help determine the correct resistance needed based on your power source.
Document your progress with photos and notes. If something goes wrong, you’ll have a reference point to trace back to. This documentation also helps when sharing solutions with the DIY community or revisiting projects later.
Embarking on tech DIY projects is more than just creating cool gadgets – it’s about developing valuable skills, understanding technology better, and joining a vibrant community of makers. Whether you started with a simple phone stand or tackled a more complex smart home device, each project builds your confidence and technical expertise. Remember that every experienced maker started as a beginner, so don’t be afraid to experiment and learn from mistakes. Start with basic projects, gather your essential tools, and gradually work your way up to more challenging builds. The DIY tech community is incredibly supportive, so share your creations, ask questions, and contribute to the growing knowledge base. Your next project could be the beginning of an exciting journey into the world of tech DIY – so grab your tools and start creating!
Related Posts
Post a Comment