
Choose low-voltage outdoor lighting systems (12V or 24V) over standard 120V options to significantly reduce electrical hazards, simplify installation without requiring a licensed electrician in most jurisdictions, and lower energy costs by up to 75%. These systems use a transformer to step down household current, making them ideal for DIY projects while still delivering the outdoor lighting benefits you’re seeking.
Map your lighting layout before purchasing equipment by walking your property at dusk, identifying key areas like pathways, architectural features, and landscape focal points that need illumination. Calculate total wattage requirements by adding individual fixture loads, then select a transformer rated at least 20% above this total to prevent overloading.
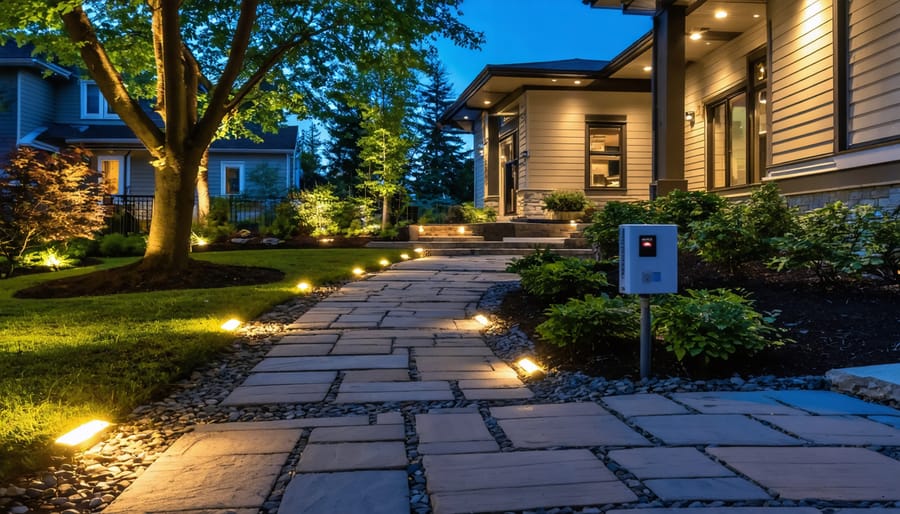
Install transformers in weatherproof locations near GFCI-protected outlets, keeping them elevated above ground level to avoid water damage during heavy rain or flooding. Run low-voltage cable along property lines using burial depths appropriate for your climate, typically 6 inches minimum, and always call before you dig to locate underground utilities.
Test your system section by section as you install to troubleshoot voltage drop issues early, which commonly occur when cable runs exceed manufacturer specifications or wire gauge is undersized for the distance. This methodical approach prevents the frustration of rewiring completed installations.
What Low Voltage Outdoor Lighting Actually Means
When you see “low voltage” on outdoor lighting packages, it’s referring to systems that operate at 12 volts instead of the standard 120 volts that comes directly from your home’s electrical outlets. Think of it like the difference between a car battery (12V) and a household outlet (120V). This lower voltage makes outdoor lighting safer to install and maintain, especially in wet conditions where electrical hazards are a bigger concern.
Here’s how it works: A transformer steps down the 120-volt power from your home to a safer 12 volts before it reaches your outdoor lights. You plug the transformer into a standard outdoor outlet, and it does all the conversion work automatically. The low voltage wire then carries this reduced power to your landscape lights, path lights, or deck lighting fixtures.
The key advantage for homeowners is safety. Because 12-volt systems carry much less electrical current, the risk of serious shock is significantly reduced. This makes low voltage lighting an excellent DIY project since you won’t need an electrician for most installations. You can even cut into low voltage wire while it’s energized without major risk, though we don’t recommend it.
A common misconception is that low voltage means dim lighting. That’s not true. Modern LED low voltage fixtures produce plenty of light while using minimal energy. The “low” only refers to the voltage, not the brightness or quality of illumination.
Another benefit: low voltage wire doesn’t require conduit burial in most areas. You can typically run it just below the surface or secured above ground, making installation faster and more flexible. However, always check your local electrical codes before starting any project, as requirements vary by location.

The Real Benefits That Matter to Your Project
Safety First: Why You Can Actually Install This Yourself
Good news: low-voltage outdoor lighting is genuinely DIY-friendly, and here’s why. Systems operating at 12 volts pose minimal shock risk compared to standard 120-volt household current. While you should always exercise caution, the reduced voltage means you can safely handle connections without the same hazards present in line-voltage electrical work.
That said, understanding code requirements matters. Most jurisdictions don’t require permits for low-voltage landscape lighting installations since they’re considered Class 2 circuits. However, you’ll typically need a permit if you’re installing the transformer connection to your home’s main electrical system or adding a new outdoor outlet. Check with your local building department before starting—requirements vary by location.
The transformer installation is the critical junction point. If you’re plugging into an existing GFCI-protected outdoor outlet, you’re usually in DIY territory. Running new electrical lines from your breaker panel? That’s when you should call a licensed electrician.
Community feedback consistently confirms that homeowners with basic tool skills successfully complete low-voltage lighting projects in a weekend. The key is respecting the line between truly low-risk tasks and those requiring professional expertise. When in doubt, consult local codes and consider posting questions to experienced DIYers who’ve tackled similar projects.
Cost Breakdown: Installation and Long-Term Savings
Understanding the true cost of low-voltage outdoor lighting helps you make informed decisions for your project. Let’s break down what you’ll actually spend and how quickly you’ll recoup your investment.
Upfront costs for low-voltage systems typically run $200-$600 for a basic DIY kit covering 8-12 fixtures, plus a transformer. That’s roughly 20-40% more than equivalent standard voltage fixtures initially. However, installation costs tell a different story. Since low-voltage systems don’t require an electrician in most jurisdictions, you’ll save $300-$800 in professional labor fees. Many homeowners rent specialized tools like wire strippers and landscape augers for around $30-50 per day, making this a manageable weekend project.
The energy savings become apparent quickly. A typical 12-fixture low-voltage system using LED bulbs consumes approximately 60 watts total, compared to 300-400 watts for standard voltage. Running your lights 6 hours nightly, that’s a difference of about $85-$115 annually in most regions. Add in the longer bulb lifespan (LED low-voltage bulbs last 25,000-50,000 hours versus 1,000-2,000 for standard incandescent), and you’re saving another $40-$60 yearly on replacements.
Most DIY installers report breaking even within 2-3 years, with some community members sharing payback periods as short as 18 months when factoring in avoided electrician costs. After that initial period, you’re looking at pure savings for the next 10-15 years of system life, potentially totaling $1,200-$2,000 in reduced energy and maintenance costs.
Essential Components You’ll Need (And What They Do)
Choosing the Right Transformer Size
Selecting the right transformer size prevents system failures and ensures your outdoor lighting performs safely. Here’s how to calculate your needs accurately.
Start by adding up the wattage of all your planned light fixtures. For example, if you’re installing ten 5-watt LED fixtures, that’s 50 watts total. This is your base load calculation.
Next, apply the 80% rule for safety. Transformers should never run at full capacity, as this causes overheating and premature failure. Divide your total wattage by 0.8 to find your minimum transformer size. Using our example: 50 watts divided by 0.8 equals 62.5 watts, so you’d need at least a 75-watt transformer.
Planning for expansion is smart. If you might add more lights within the next few years, build in extra capacity now. Many DIYers recommend sizing up one transformer level to accommodate future additions without replacing equipment.
Don’t forget to account for voltage drop over distance. Longer cable runs require slightly higher initial voltage, which affects transformer selection. As a general rule, keep low-voltage runs under 100 feet from the transformer for optimal performance.
Community members often suggest documenting your calculations and keeping records of fixture locations and wattages for future reference when troubleshooting or expanding your system.
Wire Gauge and Cable Runs: Getting It Right
Voltage drop is the silent troublemaker in outdoor lighting installations. When electricity travels through wire, it loses strength over distance, causing lights to dim or fail entirely. For low-voltage systems, this becomes critical beyond certain distances.
Here’s your wire gauge roadmap: 12-gauge wire handles runs up to 100 feet for most residential low-voltage lighting, while 10-gauge extends that to 150 feet. For shorter runs under 50 feet, 14-gauge works fine but leaves less room for future expansion. Standard 120-volt systems use 12 or 14-gauge depending on load, following local electrical codes.
Calculate your total wattage before buying wire. Add up all fixtures on a single run, then check manufacturer voltage drop charts. Most systems perform best when drop stays under 2-3 volts.
Common troubleshooting tips from our community: If distant lights appear dim, your wire gauge is too small or runs too long. Flickering often indicates loose connections rather than voltage issues. Some DIYers report success splitting one long run into two shorter branches from the transformer, which reduces individual wire length and improves performance.
Always use direct-burial rated wire for underground runs, and consider conduit for added protection. Testing voltage at various points along your run with a multimeter helps identify problem areas before they become expensive fixes.
Installation Walkthrough for Common Scenarios
Tools and Equipment You’ll Need to Rent or Own
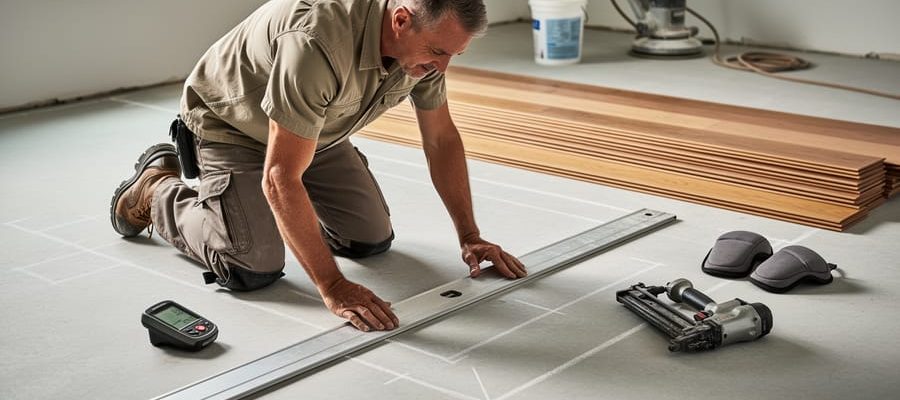
Installing low voltage outdoor lighting requires fewer specialized tools than standard voltage systems, making it an accessible DIY project. Here’s what you’ll need:
Essential tools include wire strippers for preparing cable connections, a voltage tester to verify your transformer output (typically 12V for low voltage systems), and a spade or trenching tool for burying cables 6-8 inches underground. You’ll also need a drill with appropriate bits for mounting fixtures, a screwdriver set, and waterproof wire connectors designed for outdoor use.
For the transformer installation, a stud finder helps locate secure mounting points, and a level ensures proper positioning. A multimeter proves invaluable for troubleshooting electrical issues and confirming proper voltage throughout your lighting run.
Consider renting rather than purchasing: Heavy-duty trenching tools or sod cutters are perfect rental candidates since you’ll only need them during initial installation. A quality multimeter and wire strippers, however, are worth owning for ongoing maintenance and future electrical projects.
Before starting, check your platform’s community reviews to find highly-rated tools from local renters. Many users share helpful tips about which equipment worked best for their outdoor lighting installations, potentially saving you time and money. Always prioritize safety by wearing protective gloves when handling electrical components and digging.
Common Installation Mistakes to Avoid
Learning from others’ experiences can save you time and frustration. Here are the most commonly reported installation mistakes from DIY community members and how to avoid them.
One frequent issue involves cable burial depth. Many homeowners bury low voltage cables only an inch or two deep, but proper installation requires at least 6 inches of depth. Shallow cables are vulnerable to damage from garden tools, foot traffic, and animals. Mark your cable routes on a property map to prevent accidentally digging them up during future landscaping projects.
Connection problems rank as the second most reported issue. Water infiltration at wire junctions causes flickering lights and complete system failures. Always use waterproof wire connectors specifically rated for outdoor use, and apply silicone sealant for extra protection. Avoid twisting wires together and covering them with electrical tape, as this method fails quickly in outdoor conditions.
Transformer placement errors also cause headaches. Positioning your transformer too far from fixtures creates voltage drop, resulting in dim lights at the end of your run. Keep the transformer within 100 feet of your farthest fixture for 12-volt systems. Additionally, mounting transformers on wooden surfaces that absorb moisture can lead to premature failure. Install on metal or concrete surfaces with proper ventilation, and ensure easy access for future maintenance.
Maintenance and Troubleshooting Your System
Regular maintenance keeps your outdoor lighting system performing reliably for years. Start by inspecting fixtures monthly for signs of wear, corrosion, or damage. Clean lenses with a soft cloth and mild soap solution to maintain brightness, especially after storms or heavy pollen seasons.
For seasonal upkeep, check wire connections before winter and after spring thaw when ground movement can loosen fittings. Community member Jake R. from Minnesota recommends applying dielectric grease to connections: “I’ve been doing this for three years and haven’t had a single corroded connection, even through harsh winters.” Trim vegetation around fixtures quarterly to prevent moisture buildup and ensure proper light distribution.
Common troubleshooting starts with simple checks. If lights dim or flicker, test your transformer output with a multimeter (many hardware stores rent these). Low voltage systems should read within 10% of their rated voltage. One flickering light usually indicates a loose bulb or connection at that fixture. Multiple lights failing suggests checking the transformer or a damaged main wire, often caused by landscape work or settling soil.
User tip from Sandra M.: “I map my lighting zones and photograph connections during installation. When troubleshooting at night, this saves so much time finding the right junction box.”
Know when to call a professional. Immediate electrical concerns include burning smells, sparking, or tripped breakers that won’t reset. These indicate serious safety issues requiring licensed electrician attention. For standard voltage systems, any work involving your home’s main electrical panel should always be handled by certified professionals.
Between professional visits, keep spare bulbs and wire connectors on hand. Document your system layout and transformer settings for quick reference during seasonal adjustments or when troubleshooting becomes necessary.
Design Ideas and Creative Applications
Low-voltage outdoor lighting opens up countless creative possibilities for transforming your property after dark. For gardens, consider uplighting feature trees or illuminating garden beds with strategically placed path lights to create depth and visual interest. This technique works particularly well when integrated with proper ambient lighting design principles, balancing functionality with atmosphere.
Patios and entertaining areas benefit from layered lighting approaches. Install post cap lights on deck railings for safety while adding string lights or recessed fixtures overhead for ambiance. Many DIYers successfully combine these with landscape design elements like retaining walls, using integrated lighting strips to highlight architectural features.
Driveways and pathways are ideal beginner projects. Space pathway lights every 2-3 meters along walkways for consistent illumination without over-lighting. For driveways, consider bollard lights at entry points or discrete in-ground fixtures that won’t interfere with vehicle traffic.
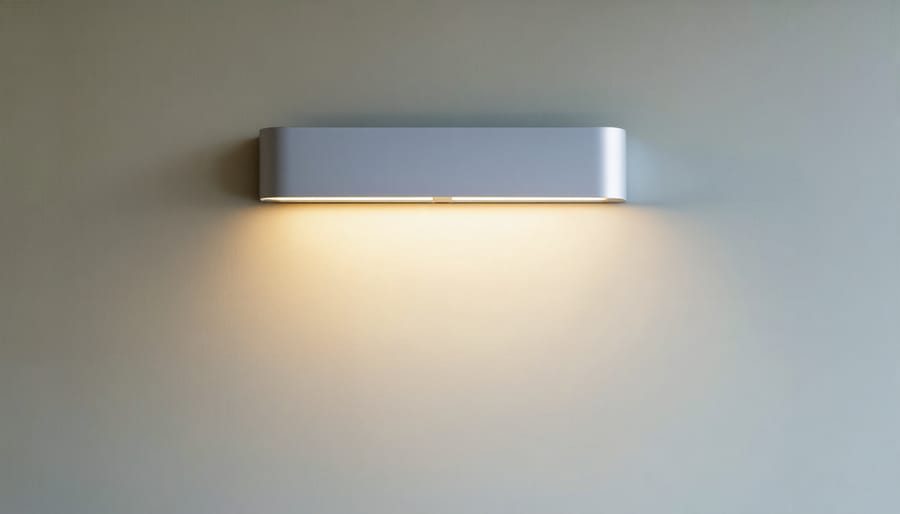
Architectural lighting requires more planning but delivers dramatic results. Wash exterior walls with wall-mounted fixtures or graze textured surfaces with closely positioned lights. Water features become focal points with submersible low-voltage lights, while pergolas and outdoor structures gain dimension with downlighting from above.
Community feedback consistently highlights the value of testing placement before permanent installation. Use temporary stakes to position lights and evaluate the effect after dark. This approach, combined with understanding luxurious home features, helps avoid common mistakes like over-lighting or poor fixture placement.
Start small with a single zone, master the techniques, then expand. Most successful outdoor lighting projects evolve over time rather than being completed in one weekend.

Low voltage outdoor lighting offers an accessible entry point into landscape illumination that doesn’t require professional electrical expertise or expensive permanent installations. The safety benefits, energy efficiency, and straightforward setup make it an ideal first project for homeowners exploring outdoor improvements. You don’t need to transform your entire property overnight. Start with a small zone like your front walkway or patio area to build confidence and understand how the system works in practice.
Before purchasing equipment, consider exploring tool rental options in your area. Many specialty tools for outdoor lighting projects, such as voltage testers, wire strippers, and landscape augers for post installation, are available through rental platforms at a fraction of the purchase cost. This approach lets you access quality tools without the storage commitment.
Take advantage of community-driven reviews when selecting fixtures and transformers. Real users share valuable insights about durability, brightness levels, and installation challenges that manufacturer specifications don’t always reveal. These firsthand experiences help you avoid common pitfalls and choose products that perform well in real-world conditions. Local DIY communities and online forums also provide troubleshooting support when questions arise during your installation, ensuring you have guidance throughout the entire process.
Related Posts
Post a Comment