
Orient your home’s main living areas and largest windows toward the sun’s path (north-facing in the Southern Hemisphere) to capture free warmth during winter months while minimizing exposure on hotter sides of the building. This single decision can reduce your heating and cooling costs by up to 40% without any mechanical systems.
Maximize thermal mass by incorporating concrete floors, brick walls, or stone features in sun-exposed areas—these materials absorb heat during the day and release it slowly at night, naturally regulating indoor temperatures. Pair this with adequate insulation in walls, ceilings, and floors to trap the thermal energy where you want it.
Design strategic cross-ventilation by positioning windows and openable sections on opposite sides of rooms, allowing hot air to escape naturally while drawing in cooler breezes. This free cooling method, combined with appropriate shading from eaves, pergolas, or deciduous trees, can eliminate the need for air conditioning in many climates.
Seal every gap, crack, and junction point in your building envelope to prevent air leakage, which accounts for up to 25% of heating and cooling loss in conventional homes. Focus particularly on window frames, door thresholds, electrical outlets, and roof-wall connections where air movement typically occurs.
These principles form the foundation of passive building design—an approach that works with climate and natural resources rather than against them. Unlike conventional sustainable construction practices that often rely on expensive technology, passive design achieves comfort and efficiency through thoughtful planning and proven building science, making it accessible whether you’re constructing a new home or renovating an existing one.
What is Passive Building Design?
Passive building design is an approach to construction that prioritizes natural elements over mechanical systems to maintain comfortable indoor temperatures year-round. Rather than relying heavily on air conditioning units, heaters, or ventilation fans, passive design harnesses free energy from the sun, natural airflow, and strategic shading to regulate your home’s climate.
Think of it as working with nature instead of against it. A passively designed building uses its orientation, layout, windows, insulation, and thermal mass to naturally heat, cool, and ventilate spaces. For example, positioning large windows on the north-facing side of your home (in the southern hemisphere) captures winter sunlight for warmth, while deep eaves or awnings prevent harsh summer sun from overheating rooms.
The key difference between passive and active systems is simple: active systems require ongoing energy consumption and mechanical equipment to function. Your air conditioner, ceiling fans, and heating system are all active solutions. Passive design, however, builds climate control directly into the structure itself. Once implemented during construction or renovation, these features work continuously without electricity or maintenance costs.
This doesn’t mean passive design eliminates all mechanical systems entirely. Most homes combine both approaches, but passive design dramatically reduces how often you need to switch on heating or cooling. The result is lower energy bills, reduced environmental impact, and greater comfort.
The beauty of passive design is that many principles can be applied whether you’re building from scratch, planning a major renovation, or making smaller improvements to an existing home. Understanding these fundamentals helps you make informed decisions about materials, layouts, and features that align with sustainable building practices while delivering practical, long-term benefits.

Core Principles That Make Passive Design Work
Building Orientation and Solar Access
Building orientation is one of the simplest yet most effective passive design strategies, and it costs nothing extra when planning new construction. The basic principle is straightforward: position your building to maximize winter sun and minimize summer heat.
In cooler climates, orient the longest wall to face true south (or north in the Southern Hemisphere) to capture maximum sunlight during winter months. This free solar heat can reduce heating bills by up to 25%. Place living areas on the sun-facing side and less-used spaces like garages or storage on the shaded side as thermal buffers.
For hot climates, the approach flips. Minimize east and west-facing windows where harsh morning and afternoon sun creates unwanted heat gain. Instead, use shading devices like eaves, pergolas, or deciduous trees that provide summer shade but allow winter sun through.
A handy tip from experienced builders: use a sun path diagram or free smartphone apps to track how sunlight moves across your site throughout the year before finalizing your design. This simple step prevents costly mistakes and ensures your building works with nature, not against it.
Insulation and Airtightness
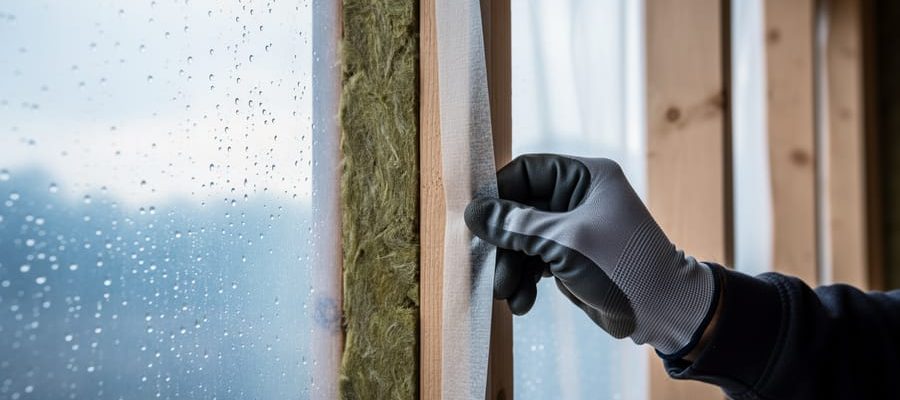
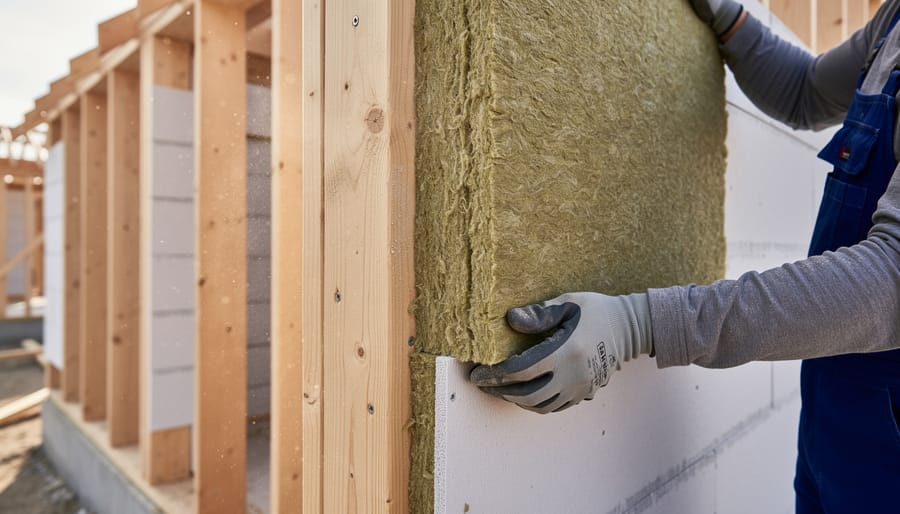
Proper insulation and airtightness form the backbone of passive building design, working together to maintain comfortable indoor temperatures year-round while dramatically reducing energy costs. Think of insulation as your home’s thermal blanket—it slows heat transfer through walls, roofs, and floors. Modern green insulation options include materials like sheep’s wool, recycled denim, and cellulose, which you can install with basic tools available for hire.
Airtightness prevents unwanted drafts and moisture infiltration by sealing gaps around windows, doors, and building joints. Essential tools include caulking guns for applying sealants, thermal imaging cameras for detecting air leaks, and blower door testing equipment to measure overall building performance. Tradespeople often recommend achieving an air changes per hour rating of 0.6 or less for optimal passive performance. When combined effectively, quality insulation rated at R4.0 or higher and thorough air sealing can reduce heating and cooling needs by up to 90 percent compared to conventional construction, making this investment worthwhile for any sustainable building project.
Thermal Mass and Temperature Regulation
Thermal mass works like a battery for heat in your home. Dense materials such as concrete, brick, stone, and tile absorb warmth during the day when temperatures rise, then slowly release that stored heat as things cool down at night. This natural cycle helps keep indoor temperatures steadier without relying on heating or cooling systems.
Think of it this way: a thick concrete floor soaks up sunshine streaming through windows during winter days, then radiates that warmth back into your living space throughout the evening. In summer, the same mass absorbs excess heat from your home, keeping rooms cooler during hot afternoons.
The effectiveness depends on material thickness and placement. A 100mm concrete slab provides decent thermal mass, while 200mm offers even better performance. Position these materials where they’ll receive direct sunlight in winter or stay shaded in summer for best results.
Many DIYers and tradespeople successfully incorporate thermal mass into renovations by exposing existing concrete floors, adding brick feature walls, or installing tile in strategic locations. The beauty lies in its simplicity—once installed, thermal mass works continuously without maintenance or running costs.
Natural Ventilation Strategies
Natural ventilation harnesses airflow to keep your home fresh without relying on energy-hungry fans or air conditioning. The simplest approach is cross-ventilation, where you position windows on opposite walls to create a breeze pathway through your space. When outdoor air enters one side and exits the other, it carries away stale air and heat naturally.
The stack effect takes advantage of warm air rising. By placing lower windows or vents near the ground and higher openings near the ceiling or roof, you create an automatic updraft. Cool air enters below while warm air escapes above, circulating fresh air throughout your home without mechanical systems.
Strategic window placement makes all the difference. Consider prevailing wind directions in your area and position openable windows to capture those breezes. Casement windows that swing outward can catch side winds, while hopper or awning windows work well in wet weather since they shield rain while staying open.
Community feedback from DIY builders shows that even small adjustments, like adding transom windows above doors or installing operable skylights, significantly improve airflow. The key is creating multiple pathways for air to move through your home naturally, reducing cooling costs while maintaining comfort year-round.
Real-World Benefits: Why This Matters for Your Project
Passive building design delivers measurable improvements that affect your wallet, comfort, and home value from day one. Let’s break down what these benefits look like in practical terms.
The most immediate impact shows up in your energy bills. Homeowners who’ve implemented passive design principles report heating and cooling cost reductions of 70-90% compared to conventional homes. For an average Australian household spending $2,000 annually on heating and cooling, that translates to $1,400-1,800 back in your pocket every year. Over a 30-year mortgage, you’re looking at potential savings exceeding $50,000.
Comfort improvements go beyond the numbers on your thermostat. Passive homes maintain consistent temperatures throughout, eliminating those cold spots near windows in winter or stuffy rooms in summer. One tradie we spoke with mentioned how his clients consistently comment on the “feel” of their renovated spaces, even before understanding the technical reasons behind it. Better air quality from controlled ventilation systems means fewer allergens and pollutants, particularly beneficial for families with asthma or allergies.
Environmental impact matters to many DIYers and homeowners today. A passive design home typically reduces carbon emissions by 80% compared to standard construction. That’s equivalent to taking a car off the road permanently. Combining passive principles with building-integrated solar solutions can push your home toward net-zero energy consumption.
Property value receives a significant boost too. Australian real estate data shows energy-efficient homes command 5-10% premiums over comparable standard properties. As building codes tighten and energy costs rise, this gap will likely widen, making your investment increasingly valuable.
The beauty of passive design lies in its scalability. Whether you’re planning a complete new build or tackling a weekend insulation upgrade, each improvement delivers proportional benefits. Start small, measure results, and expand as your budget allows.
Passive Design Techniques You Can Implement Today
For New Construction Projects
Getting passive building design right starts at the very beginning of your project. Your first major decision is site selection—choose a location that maximizes natural sunlight exposure, typically with southern orientation in the northern hemisphere. This simple choice dramatically reduces your future heating needs.
Window placement deserves careful planning. Work with your architect to position larger windows on sun-facing walls while minimizing openings on colder sides. This strategy, called solar gain optimization, captures free heat during winter months. Consider triple-glazed windows for superior insulation, though they come at a higher initial cost.
Material selection forms the backbone of passive design. Prioritize high-performance insulation materials like rigid foam boards or mineral wool. Thermal mass materials such as concrete or brick help regulate indoor temperatures by storing heat during the day and releasing it at night.
Finding an architect experienced in passive design principles is essential. They’ll help you navigate complex decisions about building envelope design, air tightness, and thermal bridging—areas where small mistakes create big problems.
For tools and equipment, you’ll need thermal imaging cameras for identifying air leaks, blower door testing equipment to measure airtightness, and moisture meters to prevent future problems. Many specialized tools are available through equipment hire services, making passive construction more accessible without major capital investment. Community reviews from other builders can guide you toward the most reliable equipment options.
For Renovations and Retrofits
Transforming an existing home into a more passive building doesn’t require starting from scratch. Several practical modifications can significantly improve your home’s energy efficiency and comfort.
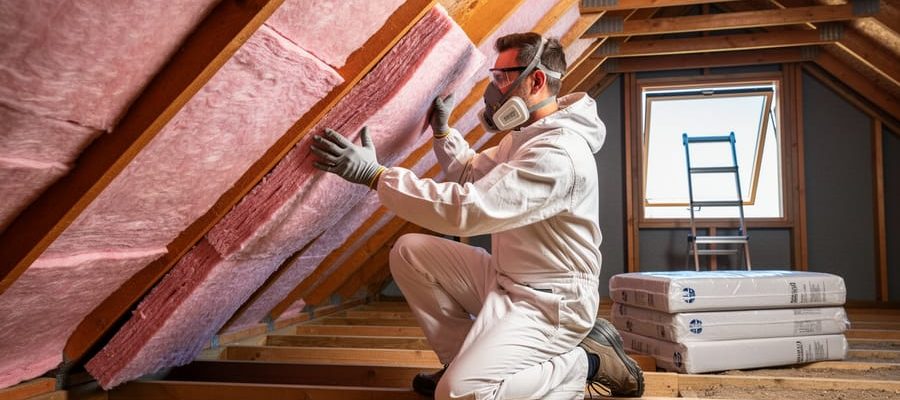
Upgrading insulation is the foundation of any retrofit project. Focus on your attic first, as heat rises and poor roof insulation causes major energy loss. Wall cavity insulation comes next, though this often requires professional assessment to determine the best approach for your home’s construction type. Many DIY enthusiasts can tackle attic insulation with rented blowers for loose-fill materials, but wall insulation typically needs professional installation.
Window replacement offers substantial benefits. Look for double or triple-glazed units with low-emissivity coatings. While measuring and ordering can be DIY-friendly, professional installation ensures proper sealing and performance.
Adding external shading devices like awnings, pergolas, or deciduous trees reduces summer heat gain without blocking winter sun. These projects range from simple DIY installations to more complex carpentry work.
Improving natural ventilation might involve installing adjustable vents, strategically placed windows, or whirlybirds on your roof. Consider whether your skills match the task; roof work and structural modifications warrant professional help for safety and building compliance.
Start with an energy audit to identify your home’s biggest weaknesses, then prioritize projects based on impact and budget.
Low-Cost Quick Wins
You don’t need a complete home overhaul to benefit from passive design principles. Start with these accessible improvements that deliver real results without breaking the bank.
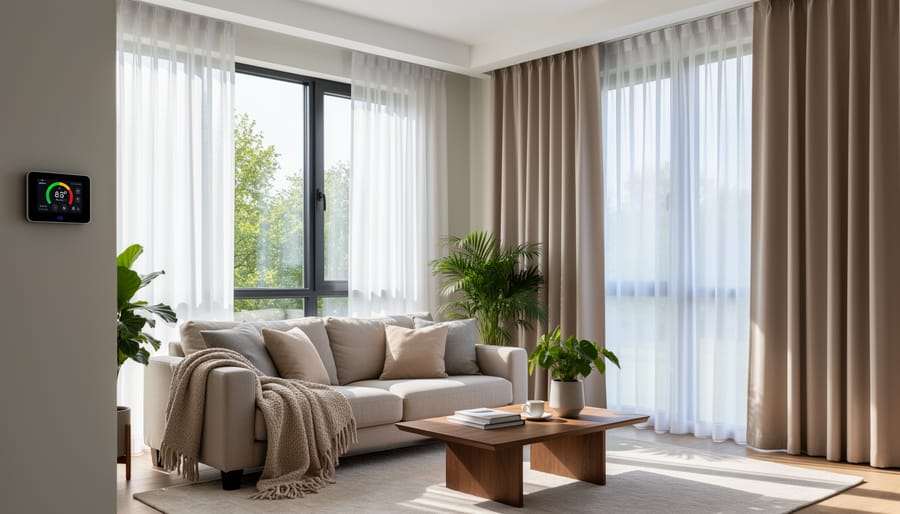
Window treatments make an immediate difference. Thermal curtains or cellular shades trap air in their honeycomb structure, creating an insulating barrier that keeps heat out in summer and warmth in during winter. Install them on your largest or sun-facing windows first for maximum impact. Many DIYers report noticeable temperature changes within days.
Weatherstripping is perhaps the quickest win. Check around doors and windows for gaps by holding a lit candle near the edges on a windy day—flickering flames reveal air leaks. Apply adhesive-backed foam tape or V-strip weatherstripping to seal these gaps. This simple afternoon project can reduce heating and cooling costs by up to 15 percent according to community feedback.
Strategic landscaping provides natural climate control. Plant deciduous trees on your home’s south and west sides—they’ll shade your walls in summer but allow warming sunlight through bare branches in winter. Even container-planted shrubs near windows offer shade benefits for renters or those on tight budgets.
Finally, consider reflective surfaces. Applying reflective window film or painting your roof with heat-reflective coating bounces solar radiation away from your home, keeping interiors cooler without active cooling systems.
Tools and Materials for Passive Building Projects
Implementing passive building design doesn’t require an entirely new toolkit, but certain specialized equipment makes the job significantly easier and ensures better results. For DIYers and professionals alike, understanding which tools are essential versus nice-to-have helps manage project budgets effectively.
Start with quality basics: laser levels ensure accurate alignment for window installations and thermal breaks, while thermal imaging cameras (available through most hire services) identify air leaks and thermal bridges before you seal walls. These cameras have become game-changers for passive projects, showing exactly where heat escapes.
For insulation work with sustainable insulation materials, you’ll need proper cutting tools, safety gear including respirators, and insulation blowers for ceiling cavities. Many hire centers now stock these specifically for energy-efficient renovations.
Air-sealing requires caulking guns, expanding foam applicators, and blower door testing equipment. While purchasing a blower door system isn’t practical for most DIYers, hiring one for pre and post-construction testing validates your work and identifies problem areas.
Window installation demands precision tools: quality drill sets, shims, weatherproofing tape, and sealants designed for passive standards. A moisture meter protects against future issues by ensuring frames are installation-ready.
For mechanical ventilation systems, basic electrical tools suffice for most installations, though complex heat recovery ventilator setups might warrant professional help.
Many tradespeople and homeowners find that hiring green building tools rather than purchasing makes financial sense, especially for one-off projects. Look for hire centers offering package deals for passive building projects, which typically bundle thermal cameras, air-sealing equipment, and testing devices at reduced rates. Community tool libraries are also emerging as cost-effective alternatives, with members sharing experiences and equipment recommendations.
Common Mistakes and How to Avoid Them
Even with the best intentions, passive building design can fall short if common mistakes aren’t avoided. Here’s what real-world experience and community feedback reveal about the most frequent pitfalls.
Inadequate insulation continuity ranks as the top issue. Many DIYers and even some professionals create thermal bridges by allowing gaps in insulation at wall-to-roof junctions or around window frames. These breaks can reduce overall energy efficiency by 20-30%. Always ensure insulation wraps continuously around the building envelope, paying special attention to corners and penetrations.
Incorrect window placement and sizing causes another frequent problem. While maximizing south-facing glazing seems logical, too much glass without proper shading creates overheating in summer. The rule of thumb is keeping south-facing windows between 7-12% of floor area in temperate climates, but always verify calculations for your specific location and microclimate.
Poor ventilation planning undermines many passive designs. Simply making a building airtight without adequate ventilation strategy leads to moisture problems, poor air quality, and potential mold growth. This represents a genuine safety concern. If you’re unsure about ventilation requirements or humidity control, consult with a building scientist or certified passive house consultant before proceeding.
Ignoring thermal mass principles is another setback. Adding heavy materials like concrete floors without corresponding solar gain access wastes their potential. Conversely, excessive thermal mass in predominantly cloudy climates provides little benefit.
Finally, skipping blower door testing means you’ll never know if your airtightness measures actually work. Professional testing equipment is readily available through tool hire services and provides invaluable data for identifying and fixing air leakage issues before they become expensive problems.
Passive building design offers a practical pathway to creating comfortable, energy-efficient homes while reducing your environmental footprint and long-term costs. By working with natural elements like sunlight, airflow, and thermal mass, you can significantly decrease your reliance on mechanical heating and cooling systems. The beauty of passive design is that it doesn’t require an all-or-nothing approach. Whether you’re planning a major renovation or simply looking to make incremental improvements, every step counts.
Start small by assessing your home’s orientation, improving insulation in key areas, or adding window treatments that regulate heat gain and loss. Many passive design improvements are achievable DIY projects when you have access to the right equipment. For larger undertakings like installing thermal mass features or upgrading ventilation systems, tool rental services can make professional-grade equipment accessible without the investment of purchasing.
We’d love to hear about your passive design journey. What changes have you made to improve your home’s sustainability? What challenges have you encountered? Share your experiences and questions with our community, and don’t hesitate to explore our equipment options to support your next eco-friendly building project. Together, we’re building a more sustainable future, one home at a time.
Related Posts
Post a Comment