Verify local safety regulations and pool fencing codes before purchasing materials—most jurisdictions require specific fence heights (typically 1.2-1.8 meters), self-closing gates, and minimum gap specifications to prevent child access. Contact your council’s building department to obtain the exact requirements for your area, as non-compliant fences may result in fines or mandatory reconstruction.
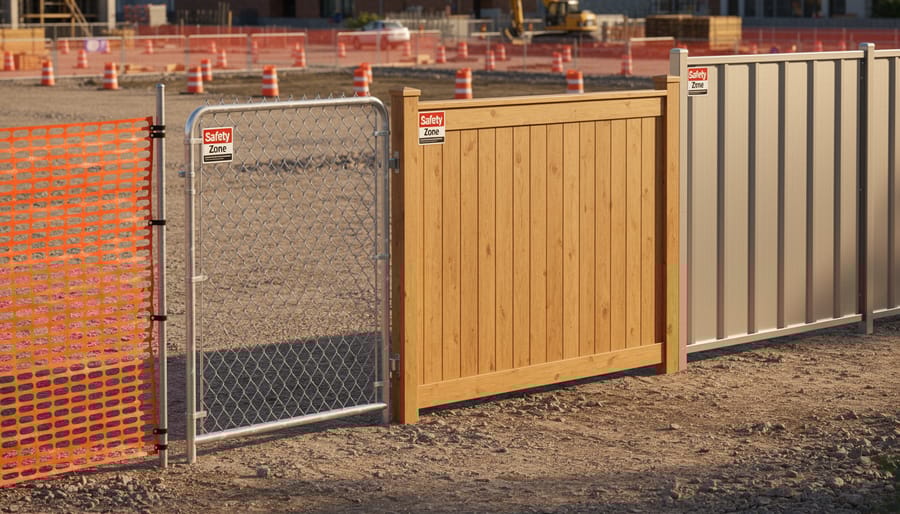
Choose materials based on your specific safety need: aluminum and steel offer superior strength for pool barriers and meet most Australian Standards, while chain-link provides cost-effective visibility for pet containment, and timber picket fencing works well for child play areas when gaps are kept under 100mm. Each material requires different installation techniques and post-setting methods.
Measure your perimeter accurately and mark post locations at maximum 2.4-meter intervals, using string lines and a spirit level to ensure gates align properly with pathways. Factor in corner bracing and gate swing clearance during planning—inadequate spacing causes structural weakness and functionality issues.
Rent professional-grade equipment rather than purchasing for one-time projects: a post hole digger or auger speeds installation significantly, while a concrete mixer ensures proper post setting. Quality tools produce straighter, more durable results than manual methods, particularly in hard or rocky soil conditions.
Install posts in concrete footings at minimum 600mm depth, or deeper in sandy soil, allowing 24-48 hours for curing before attaching fence panels. This foundation work determines your fence’s long-term stability and resistance to wind loads, ground movement, and constant use—rushing this stage compromises the entire structure’s safety function.
Understanding Safety Fence Requirements and Regulations

Common Safety Standards You Need to Know
When building a safety fence, understanding key regulations ensures your project protects people while meeting legal requirements. Let’s break down the essential standards you need to follow.
Gap spacing is critical for preventing entrapment. Most building codes require vertical slat spacing of 4 inches or less—this measurement prevents small children from squeezing through or getting their heads stuck. To check compliance, use a simple 4-inch sphere (like a baseball) as a test gauge. If it can pass through any opening, adjust your spacing accordingly.
Pool fence height requirements typically mandate a minimum of 4 feet, though many jurisdictions require 5 feet for residential installations. Check your local building codes, as these measurements can vary by region. The height is measured from the ground on the side facing away from the pool, so account for any grade changes during planning.
Self-closing and self-latching gates are non-negotiable for pool enclosures. These mechanisms must close and latch automatically from any open position. The latch release should be positioned at least 54 inches from the bottom of the gate to prevent young children from reaching it. Many homeowners report that magnetic latches offer reliable operation compared to spring-loaded options, though both types meet code when properly installed.
Additional standards include ensuring no footholds or climbable elements within 45 inches of the top rail, and maintaining smooth surfaces without protrusions. Always consult your local building department before starting construction—they’ll provide specific requirements for your area and clarify permit needs.
Checking Your Local Building Codes
Before you dig the first post hole or purchase materials, you’ll need to confirm your fence complies with local regulations. Start by contacting your council’s building department—most now have online resources where you can download fence requirements specific to your area. Pay special attention to pool fence regulations, which are typically the strictest and governed by Australian Standard AS1926.
Next, determine whether you need a building permit. While some low-height boundary fences may be exempt, safety fences around pools, spas, or elevated areas almost always require permits. Submit your application with detailed plans showing fence height, materials, gate specifications, and distance from property lines.
Understanding inspection processes is crucial for project success. Most councils require inspections at key stages—typically after post installation and upon completion. Schedule these in advance and don’t proceed to the next stage until you’ve received approval.
Pro tip from our community: Document everything with photos throughout construction. Many DIYers report this helps tremendously during inspections and provides valuable records for future property sales. Also, check with your insurance provider, as proper permits may affect your coverage.
Choosing the Right Materials for Safety Fence Construction
Wood Safety Fencing
Wood remains a popular choice for safety fencing due to its natural appearance, versatility, and relatively straightforward installation. Cedar and redwood are the top recommendations for outdoor safety applications because they contain natural oils that resist rot, decay, and insect damage. Pressure-treated pine offers a budget-friendly alternative, though it requires chemical treatment to achieve similar durability.
The main benefits of wood fencing include easy customization to meet specific height and spacing requirements, good structural integrity when properly installed, and the ability to repair individual sections without replacing the entire fence. Wood also provides excellent privacy and wind resistance, making it suitable for pool barriers and pet enclosures.
However, wood does have drawbacks. It requires regular maintenance including staining or sealing every 2-3 years to prevent weathering and warping. Without proper treatment, wood can splinter, creating safety hazards for children and pets. Additionally, wood posts need concrete footings for stability and must be set below the frost line in colder climates.
When selecting treated lumber, verify it’s rated for ground contact if posts will be buried. Check local regulations, as some areas restrict certain chemical treatments near water features. According to user feedback, investing in quality kiln-dried lumber reduces warping and extends fence lifespan significantly.
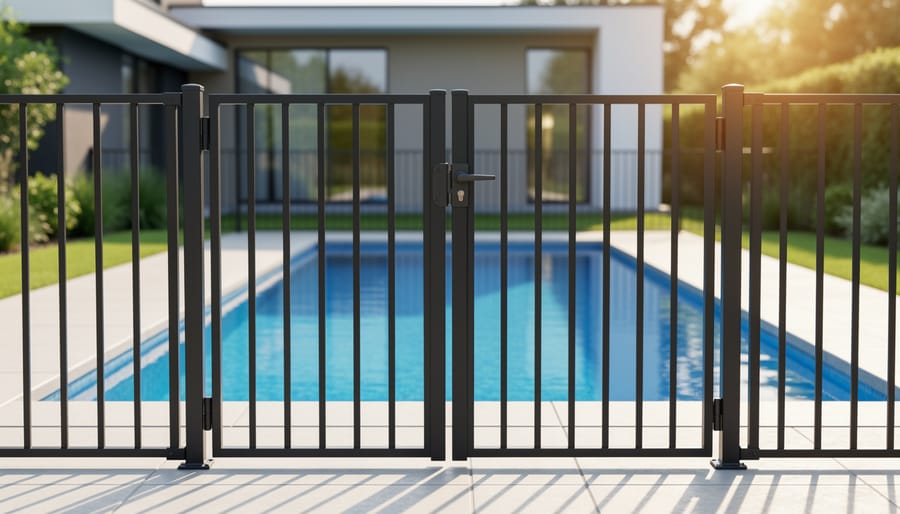
Metal and Chain-Link Options
Metal fencing provides excellent durability and security for safety applications, particularly around pools, machinery, or high-traffic areas. When choosing between materials, consider your specific requirements and local conditions.
Aluminum fencing works well for pool barriers and residential safety applications. It resists corrosion, requires minimal maintenance, and remains lightweight for easier installation. While more expensive upfront, aluminum won’t rust in coastal or humid environments. Steel fencing offers superior strength for commercial sites or areas requiring maximum security, though it needs powder coating or galvanizing to prevent rust.
Chain-link fencing remains a popular, cost-effective safety solution. For residential safety fences, specify 11-gauge or heavier wire with a minimum 2-inch diamond mesh pattern—smaller openings prevent children from climbing. The framework should use galvanized steel posts set in concrete at intervals no greater than 3 meters. Top rails add rigidity and professional finish.
When exploring metal framing options for your safety fence, ensure all materials meet Australian Standards AS 1926.1 for pool barriers if applicable. Community feedback consistently highlights the importance of selecting vinyl-coated chain-link for areas where children play, as it prevents scrapes and offers color options that blend with your landscape. Professional installers recommend hot-dipped galvanized finish over electro-galvanized for longer-lasting protection against weathering.
Vinyl and Composite Materials
Vinyl and composite materials have become increasingly popular for safety fencing, offering several advantages over traditional options. These modern alternatives consist of PVC (polyvinyl chloride) or composite blends that combine wood fibers with plastic polymers.
From a safety perspective, vinyl fencing eliminates splinter risks entirely, making it ideal for areas where children and pets play. The smooth surface also prevents clothing snags and reduces injury potential. Most quality vinyl products resist cracking and warping, maintaining structural integrity over time without developing sharp edges or weak points.
Maintenance requirements are minimal compared to wood or metal. Vinyl fencing doesn’t require painting, staining, or rust treatment. A simple wash with soap and water keeps it looking fresh for years. This low maintenance translates to long-term safety, as there’s less chance of deterioration creating hazards.
Cost considerations vary significantly. Initial installation typically runs 20-40% higher than wood but lower than wrought iron. However, factor in virtually zero maintenance costs and a 20-30 year lifespan with minimal upkeep. Many homeowners find the long-term value compelling despite higher upfront investment. Community reviews consistently praise the durability and ease of cleaning, particularly for pool safety applications.
Essential Tools and Equipment You’ll Need
Must-Have Tools for the Job
Building a safety fence requires the right equipment to ensure structural integrity and compliance with safety standards. Here are the essential tools you’ll need:
Post hole diggers are your starting point—manual clamshell diggers work for smaller projects, while power augers tackle multiple posts efficiently in harder soil. A quality spirit level (both 2-foot and 4-foot lengths) ensures your posts stand perfectly vertical, which is critical for fence stability and gate function.
Measuring tools are non-negotiable: a 100-foot tape measure for overall layout, a string line for alignment, and a marking spray for ground reference points. These prevent costly errors before you dig.
For setting posts, a concrete mixer—whether rented or manual—creates consistent mixes that anchor posts securely. Mix ratios matter for safety fences, so follow manufacturer guidelines closely.
Power tools speed up construction significantly. A circular saw or mitre saw cuts rails precisely, while a cordless drill with various bits handles brackets and hardware. An impact driver makes quick work of lag screws and heavy-duty fasteners.
Don’t overlook safety gear: work gloves, safety glasses, steel-toed boots, and ear protection are essential. Many community members recommend renting specialized equipment rather than purchasing for one-time projects—it’s cost-effective and ensures you’re using well-maintained professional-grade tools.
When to Hire Instead of Buy
For safety fence construction, hiring specialized equipment often makes better financial sense than purchasing. A post hole auger, essential for digging uniform holes quickly, costs between $200-$600 to buy but only $50-$100 per day to rent. If you’re building a single fence, that’s significant savings. Similarly, concrete mixers retail for $300-$800, yet rent for around $40-$80 daily. For weekend projects, hiring covers your needs without the storage headaches.
Post drivers present another clear case for rental. These pneumatic or manual tools ensure posts sit level and secure, costing $150-$400 to purchase versus $30-$60 to rent. Unless you’re a professional fencer or planning multiple projects, buying doesn’t pencil out.
Calculate your break-even point: if buying costs five times the rental rate, you’d need to use that tool five separate times to justify ownership. For most homeowners tackling one safety fence installation, rental delivers the performance you need without depleting your budget.
Community feedback consistently shows DIYers appreciate rental options for specialty tools, especially when building compliance-critical projects like pool barriers where precision matters. Check your local hire shop for package deals combining augers, mixers, and levels at discounted rates.
Step-by-Step Safety Fence Construction Process
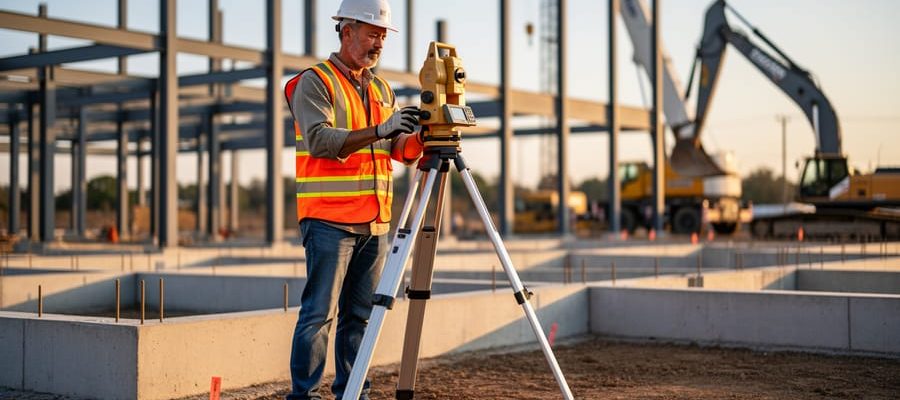
Planning and Marking Your Fence Line
Proper planning prevents costly mistakes and ensures your safety fence meets its purpose. Start by surveying your property lines to avoid encroaching on neighboring land. Check your local council or homeowner’s association for setback requirements, which dictate how far the fence must be from property boundaries.
Before digging a single post hole, contact your utility locating service to mark underground cables, gas lines, water pipes, and telecommunications infrastructure. This free service typically requires 2-3 business days’ notice and could save you from serious injury or expensive damage.
Mark your fence line using stakes and string, ensuring corners are square by using the 3-4-5 triangle method: measure 3 feet along one side, 4 feet along the adjacent side, and adjust until the diagonal equals 5 feet. Space post locations according to your fence design, typically 6-8 feet apart for standard safety fencing.
Use a line level or laser level to maintain consistent height across uneven terrain. Many DIY enthusiasts recommend double-checking measurements before purchasing materials. Community reviews suggest marking post locations with spray paint for visibility during construction, especially when working with a team. Taking extra time during planning ensures your safety fence is both structurally sound and compliant with regulations.
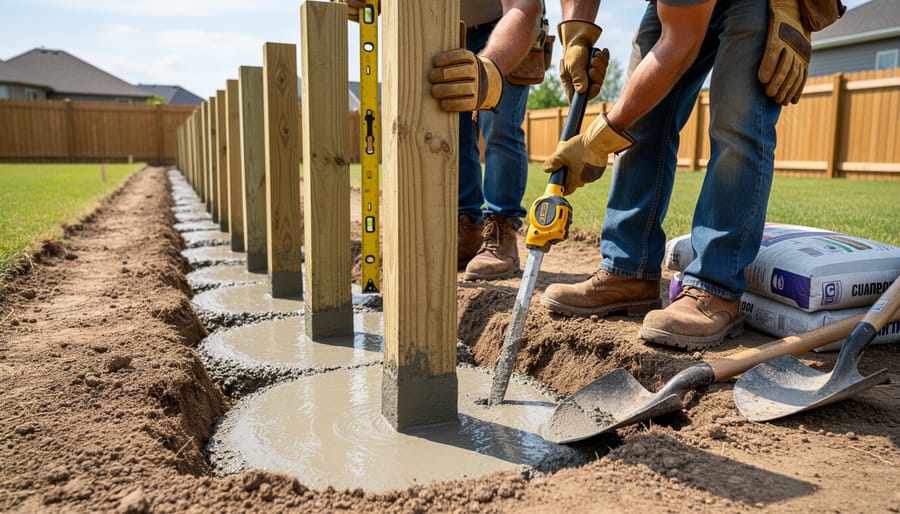
Setting Posts for Maximum Stability
Getting your fence posts properly installed is the foundation of a safe, long-lasting barrier. The general rule is that posts should be buried to a depth equal to one-third of their total height. For a standard 1.8-metre safety fence, this means digging holes at least 600mm deep. In areas with soft soil or high wind exposure, consider going deeper for added security.
Post spacing depends on your fence type and local regulations, but 2.4 metres centre-to-centre is standard for most residential safety fences. Closer spacing provides greater structural stability, particularly important for pool fencing where regulations may require maximum gaps.
When mixing concrete for setting posts, proper concrete mixing ratios are essential. A standard mix uses one part cement, two parts sand, and three parts aggregate, with enough water to achieve a thick, workable consistency. Many DIYers find pre-mixed concrete bags simpler and more reliable.
Before pouring concrete, ensure each post is perfectly plumb using a spirit level on two adjacent sides. A laser level makes this job easier across multiple posts. Create a string line between corner posts to maintain alignment throughout your fence run. Temporary bracing with timber stakes will hold posts in position while concrete sets.
Pack concrete firmly around each post, eliminating air pockets that could compromise strength. Slope the concrete surface away from the post to prevent water pooling. Allow at least 24 hours for concrete to cure before attaching rails or panels.
Community feedback consistently highlights the importance of patience during this stage. Rushing the setting process is a common mistake that leads to leaning posts and compromised safety over time.
Installing Rails and Panels Correctly
With your posts secured, you’re ready to install the horizontal rails that form your fence’s framework. Start by marking consistent spacing on each post—typically, rails sit at the top, middle, and bottom positions, though this varies based on your fence height and design specifications. A standard 6-foot safety fence usually requires three rails spaced approximately 24 inches apart.
Secure the bottom rail first, positioning it 4-6 inches above ground level to prevent moisture damage and rot. Use a spirit level to ensure each rail sits perfectly horizontal before fastening. For timber rails, pre-drill holes to prevent splitting, then drive in galvanized screws or bolts. Metal rails typically require brackets that bolt directly to the posts.
Here’s a practical tip from experienced DIYers: work with a helper to hold rails level while you fasten one end, then check level again before securing the opposite end. This two-person approach prevents sagging and maintains consistency across long fence runs.
When attaching fence panels, start from one corner and work systematically along your fence line. Position each panel flush against the rails, checking vertical alignment with your level before fastening. Use appropriate fasteners for your material—stainless steel screws for timber panels resist corrosion, while specialized clips work best for vinyl or composite materials.
Maintain consistent spacing between panels (typically 1/8 inch) to allow for natural expansion and contraction with temperature changes. Verify level positioning after every third panel to catch any drift before it compounds into noticeable misalignment. Many community reviewers suggest marking a chalk line along the fence run as a visual guide for maintaining uniform height throughout your installation.
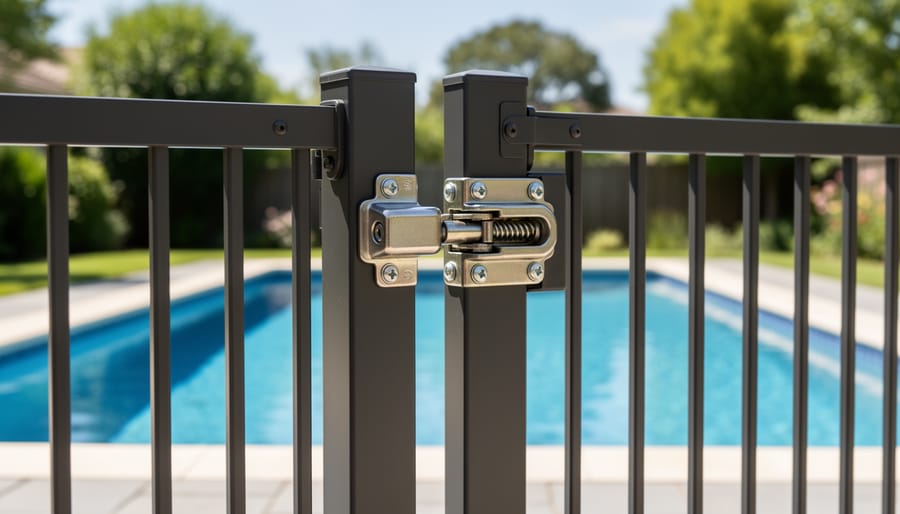
Safety Gate Installation and Hardware
Proper gate installation is the cornerstone of safety fence functionality, and getting it right the first time prevents accidents and future adjustments. Start by positioning hinges on the latch-free side of your gate frame, ensuring they’re spaced at least one-third down from the top and one-third up from the bottom for optimal weight distribution.
Self-closing hinges are essential for safety fences, particularly around pools or areas where children play. These spring-loaded mechanisms automatically return the gate to its closed position, eliminating the risk of someone forgetting to close it. When installing, adjust the tension screw gradually—too tight creates excessive force that could pinch fingers, while too loose won’t close reliably. Test the closing action multiple times at different angles to ensure consistency.
Gate swing direction matters significantly for safety. Gates should always swing away from the protected area (like a pool) and never inward where someone could accidentally push through. This outward swing also prevents children from using climbing structures inside the enclosed area to manipulate the gate.
Latch placement requires careful attention to local regulations. Most safety codes mandate latches be installed at least 54 inches from ground level, placing them out of reach for young children. Self-latching mechanisms are typically required and should engage automatically when the gate closes. Popular options include magnetic latches and gravity latches, both providing reliable performance without maintenance.
Before finalizing installation, perform multiple open-close cycles while checking for smooth operation, proper alignment, and secure latching. Community reviews consistently highlight that taking extra time during gate installation prevents the majority of safety fence failures.
Final Checks and Adjustments
Before considering your safety fence complete, conduct a thorough inspection to ensure it meets all safety standards. Start by walking the entire perimeter and checking that posts remain firmly anchored with no wobbling. Test every gate mechanism multiple times, confirming latches engage properly and self-closing hinges work smoothly without sticking. Gates should swing freely and latch securely at the correct height, typically 1.5 meters from ground level to prevent young children from reaching.
Run your hands along all surfaces to identify sharp edges, splinters, or protruding fasteners that could cause injury. Any screws or bolts should sit flush or be capped with protective covers. Inspect the spacing between pickets or mesh openings, ensuring gaps don’t exceed 100mm to prevent head entrapment or climbing footholds. Check the bottom clearance as well, keeping it under 100mm to stop small children or pets from squeezing underneath.
Pay special attention to potential climbing hazards. Remove any horizontal rails on the outside face that could act as ladder rungs, and ensure decorative elements don’t create footholds. Finally, verify your fence height meets local regulations for your specific application, whether pool barrier, child safety, or pet containment.
Safety Considerations During Construction
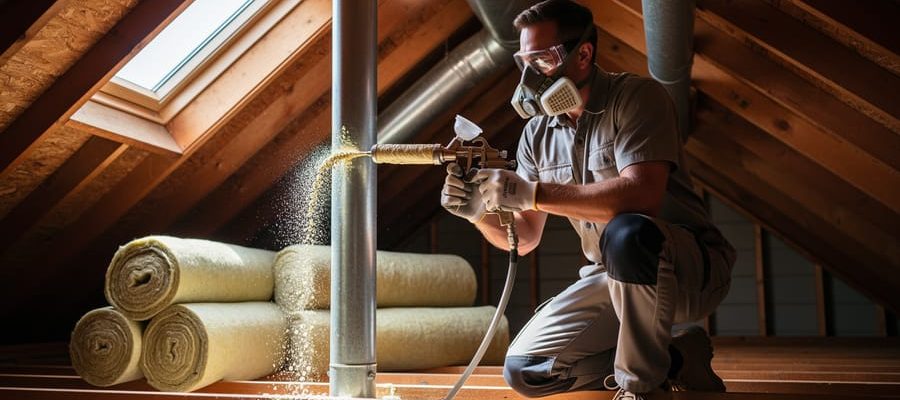
Personal Protective Equipment
Before you begin building your safety fence, proper protective equipment is essential to prevent injuries. Always wear heavy-duty work gloves to protect your hands from splinters, sharp metal edges, and blisters when handling fence materials and tools. Safety glasses or goggles are non-negotiable, especially when cutting materials or driving fasteners, as debris and dust can cause serious eye injuries.
Steel-toed boots provide crucial protection for your feet from dropped posts, tools, or equipment. They also offer better ankle support when working on uneven ground or carrying heavy materials. If you’ll be using power tools like post hole augers, circular saws, or impact drivers, hearing protection is vital. Prolonged exposure to loud tool noise can cause permanent hearing damage, so invest in quality ear plugs or earmuffs.
Consider wearing long sleeves and pants to protect against cuts and sun exposure during outdoor work. Many experienced builders in our community reviews also recommend knee pads if your project involves ground-level work. Remember, proper safety gear isn’t optional—it’s your first line of defense against common construction injuries that could derail your project.
Safe Tool Operation and Site Management
Safe tool operation begins with a thorough inspection before each use. Check power tools for frayed cords, damaged housings, or loose components, and never operate equipment that appears compromised. When using post hole diggers, concrete mixers, or pneumatic nail guns, always wear appropriate personal protective equipment including safety glasses, work gloves, and steel-toed boots.
Managing cords and air hoses prevents tripping hazards and equipment damage. Route them away from walkways and secure them with cable ties or clips. Use ground fault circuit interrupters (GFCIs) when working outdoors with electric tools to protect against electrical shock. Keep cords elevated and dry, especially when mixing or pouring concrete.
Secure your work area by establishing a clear perimeter around the construction site. Alert household members and neighbors about ongoing work, particularly when operating loud machinery or digging. Mark underground utilities before breaking ground and keep children and pets at a safe distance from tools and materials.
When mixing and handling concrete, wear protective gloves and long sleeves to prevent chemical burns from prolonged contact. Mix only what you can use within the working time, typically 20-30 minutes. Clean tools immediately after use, as dried concrete can damage equipment and create sharp edges. Always follow manufacturer instructions for proper mixing ratios and curing times to ensure fence posts set correctly and meet safety standards.
Common Mistakes That Compromise Safety Fence Integrity
Structural Errors to Avoid
Even well-intentioned fence projects can fail due to common structural errors that compromise safety and longevity. One of the most critical mistakes is installing posts at insufficient depth. Posts should be buried at least one-third of their total height, with a minimum of 600mm for standard residential fences and 900mm for taller safety barriers. Shallow posts can shift or topple, creating dangerous gaps.
Inadequate concrete footings are another frequent problem. Skimping on concrete or allowing it to cure improperly weakens the foundation. Always use rapid-set concrete rated for structural applications and follow manufacturer curing times.
Poor post spacing compromises fence integrity. Safety fences require posts every 2.4 to 3 meters maximum, depending on panel material and local regulations. Wider spacing creates weak points where panels can bow or break.
Finally, neglecting corner bracing is a serious oversight. Corners experience the most stress and require diagonal bracing or concrete collars to maintain structural integrity. Without proper corner reinforcement, the entire fence line can gradually lean or collapse, defeating its safety purpose entirely.
Safety Feature Oversights
Even well-constructed fences can fail their safety mission if critical details are overlooked. One of the most common mistakes involves gate latches. Gates must self-close and self-latch from any open position, with latches positioned at least 54 inches from ground level to prevent young children from reaching them. Many DIYers install standard residential latches that don’t meet these requirements, creating a serious hazard.
Horizontal rails present another frequent oversight. While they may look attractive, horizontal or ladder-like designs give children easy footholds to climb over. Pool safety regulations typically require vertical pickets or mesh designs that are difficult to scale. If your design includes horizontal elements, ensure they face away from the pool or hazard area, never toward it.
Gap sizing is equally critical but often misjudged. Spacing between vertical pickets should never exceed 4 inches to prevent a child’s head from becoming trapped. This applies to gaps under the fence too, where uneven ground can create dangerous spaces. Community feedback consistently highlights these spacing errors as the most dangerous post-construction discovery.
Before finalizing your design, double-check all measurements against local codes. What seems secure during construction might fail inspection or, worse, fail to protect your family when it matters most.
Maintenance Tips to Keep Your Safety Fence Secure
Regular Inspection Checklist
Regular inspections keep your safety fence functioning properly and help you catch problems before they become hazardous. Schedule a thorough check every three months, or more frequently in harsh weather conditions.
Start by examining each post for stability. Push firmly against posts at various heights—there should be no wobbling or movement. Check the concrete footings for cracks or signs of settling. Any loose posts compromise the entire fence structure and need immediate attention.
Next, inspect all fasteners and connections. Tighten any loose screws, bolts, or brackets using the appropriate tools. Look for rust or corrosion on metal fasteners, which weakens their hold over time. Replace corroded hardware promptly to maintain structural integrity.
Test gate operation by opening and closing several times. Gates should swing smoothly without dragging, and latches must engage securely each time. Self-closing mechanisms should function consistently, and locks should operate without sticking. These features are critical for child and pet safety.
Examine fence materials for degradation. On wood fences, look for rot, splintering, or insect damage. Check vinyl for cracks or brittleness. Inspect mesh or chain-link for tears, rust, or separation from the frame. Address any material issues immediately to prevent gaps that could compromise safety.
Seasonal Maintenance Tasks
Regular maintenance keeps your safety fence functioning properly and extends its lifespan. In spring, inspect all posts, panels, and fasteners for winter damage. Clean debris from the fence line using a soft brush and mild detergent mixed with water. Check for loose screws or bolts and tighten them with a socket wrench or screwdriver. This is also the ideal time to apply a fresh coat of weather-resistant sealant or paint to wooden fences.
During summer, trim vegetation growing near the fence that could compromise its structure or visibility. Inspect hinges and latches on gates, applying lubricant as needed. Fall requires clearing leaves and organic matter that trap moisture against fence materials. For metal fences, check for rust spots and treat them immediately with rust converter and protective coating.
Before winter arrives, reinforce any weak points and ensure drainage around posts is adequate to prevent frost heaving. Many community members report that quarterly inspections help catch small issues before they become safety hazards. Document your maintenance schedule and keep records of repairs, which proves valuable if modifications are needed later or for insurance purposes.
Building a safety fence is an investment in protecting what matters most—your family, pets, and peace of mind. Throughout this guide, we’ve emphasized that proper construction isn’t just about following steps; it’s about meeting regulations, choosing quality materials, and refusing to cut corners when safety is on the line.
Before you begin your project, always verify local permit requirements and safety codes. These regulations exist for good reason, and non-compliance can result in fines, insurance issues, or worse—a fence that fails to protect. If any part of the process feels beyond your skill level, don’t hesitate to consult a professional. Sometimes the smartest DIY decision is knowing when to ask for help.
We’d love to hear about your safety fence construction experiences. What challenges did you face? Which tools made the biggest difference? Your feedback helps our community learn from real-world projects and make better-informed decisions. Share your story in the comments below, and let’s build a safer environment together—one fence at a time.
Related Posts
Post a Comment