Utilities in construction form the essential lifeline of any building project, delivering water, electricity, gas, and sewage systems that transform empty land into functional space. Whether you’re breaking ground on a commercial development or planning a residential addition, understanding site utilities installation separates successful projects from costly delays and code violations.
Site utilities encompass all underground and above-ground infrastructure connecting your construction site to municipal services or creating standalone systems. This includes water mains and service lines, electrical conduits and transformers, natural gas pipelines, telecommunications cables, storm drainage systems, and sanitary sewer connections. Each utility requires specific installation techniques, safety protocols, and coordination with local authorities before the first shovel breaks ground.
The installation process demands careful planning that begins months before construction. You’ll need to contact utility companies for site surveys, obtain permits from municipal offices, arrange for professional locating services to mark existing lines, and schedule inspections at critical installation phases. Mistakes during this phase can result in service disruptions, property damage, or dangerous situations affecting entire neighborhoods.
Understanding the scope of utilities work helps you budget accurately, hire qualified contractors, and recognize when specialized equipment becomes necessary. From trenching machines for laying pipe to directional boring tools that minimize surface disruption, each utility type requires specific installation methods. This guide walks you through the complete process, from initial planning and permitting through final inspection and connection, ensuring your project meets code requirements while staying on schedule and within budget.
Understanding Site Utilities: The Lifelines of Your Construction Project
Temporary vs. Permanent Utilities
Construction projects require two distinct types of utilities: temporary and permanent. Understanding the difference helps you plan properly and avoid costly delays.
Temporary utilities are essential services installed specifically for the construction phase. These include temporary power poles, portable generators, construction trailers with electricity, temporary water hookups from hydrants or tanks, and portable toilets. You’ll need these from day one to power tools, provide lighting, and support your crew’s basic needs. Most contractors arrange temporary power through the local utility company, which installs a meter and service for the duration of construction. Expect this process to take 1-2 weeks and cost between $500-2,000 depending on your location.
Permanent utilities are the final installations that remain after construction completes. These include underground electrical service, municipal water and sewer connections, natural gas lines, and telecommunications infrastructure. The transition typically happens during the final construction phases once walls are closed and systems are ready for inspection.
Plan the switchover carefully. Coordinate with utility companies at least 30 days before you need permanent service activated. During the overlap period, you’ll maintain temporary utilities until permanent connections pass inspection and become fully operational. Professional installers handle permanent utility work since it requires licensing, permits, and utility company coordination. Many DIYers successfully manage temporary utilities but wisely leave permanent installations to certified professionals to ensure code compliance and safety.
Above-Ground vs. Underground Systems
Choosing between above-ground and underground utility systems depends on several practical factors including climate, budget, local codes, and project permanence.
Underground systems offer significant advantages for permanent installations. They’re protected from weather damage, equipment strikes, and vandalism. They keep job sites cleaner and safer by eliminating trip hazards. Underground lines also maintain better aesthetic appeal for finished properties. However, they require extensive excavation work, specialized trenching equipment, and careful planning to avoid future access issues. Installation costs run higher initially, and repairs mean digging up lines when problems occur. Underground works best for permanent structures, residential developments, and areas with extreme weather conditions.
Above-ground systems shine in temporary construction situations and where frequent modifications are needed. They’re faster to install, easier to inspect, and simpler to repair or relocate. You’ll spend less upfront on installation since trenching isn’t required. These systems work particularly well for construction trailers, temporary power distribution, and phased building projects. The downsides include vulnerability to weather damage, higher maintenance needs, and potential safety hazards from exposed lines.
Consider hybrid approaches too. Many commercial sites use underground mains with above-ground distribution for flexibility. Temporary construction power often runs overhead while permanent utilities go underground before final grading. Always check local building codes since some jurisdictions mandate underground installation for specific utilities like gas lines or residential electrical services.
Essential Tools and Equipment for Site Utilities Installation
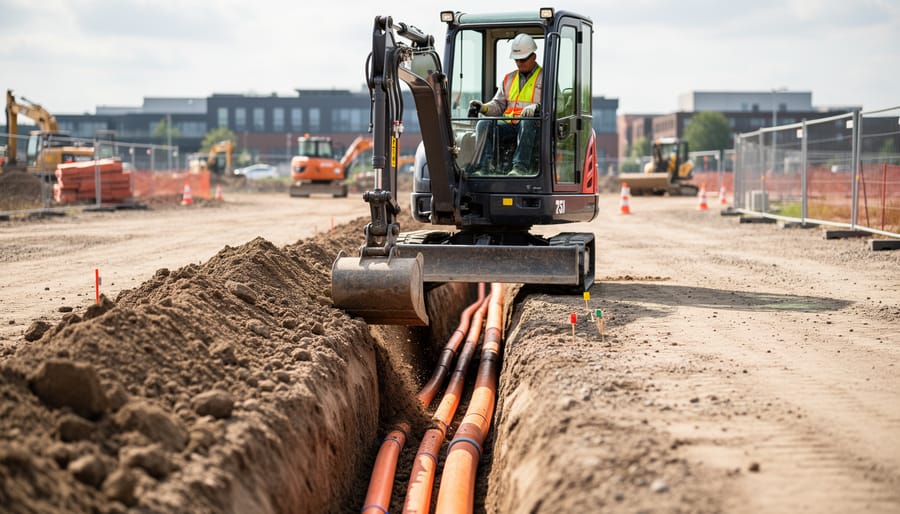
Excavation and Trenching Equipment
Selecting the right excavation equipment can make or break your utilities installation project. The key is matching your equipment to the specific depth, soil conditions, and access constraints you’re facing.
Mini excavators (typically 1-3 tons) are the workhorse for residential utility projects. They’re compact enough to fit through standard gates and deliver impressive digging power for water lines, electrical conduits, and sewer connections. For trenches up to 10 feet deep, a mini excavator offers precision control and minimizes lawn damage. Most rental centers offer models with varying bucket widths, so choose narrower buckets (12-16 inches) for utility-specific trenches to reduce backfill work.
Trenchers excel at creating long, uniform trenches for electrical and communication lines. Walk-behind trenchers handle depths up to 36 inches and are perfect for irrigation or shallow cable runs. Ride-on trenchers tackle deeper projects but require more operational experience. Consider soil conditions: rocky ground may require a chain trencher, while sandy soil works better with wheel trenchers.
Backhoes combine digging power with versatility, making them ideal for larger properties where you need both excavation and material handling capabilities. They’re particularly useful when you’re installing multiple utility types simultaneously.
Don’t underestimate hand tools. For final depth adjustments near existing utilities or in tight spaces, quality trenching shovels, mattocks, and post hole diggers give you the control machinery can’t provide. Always hand-dig within 24 inches of marked utility lines to prevent accidental damage.
Before renting, check user reviews on specific models. Community feedback often reveals issues like difficult controls or maintenance problems that aren’t obvious in equipment specifications.
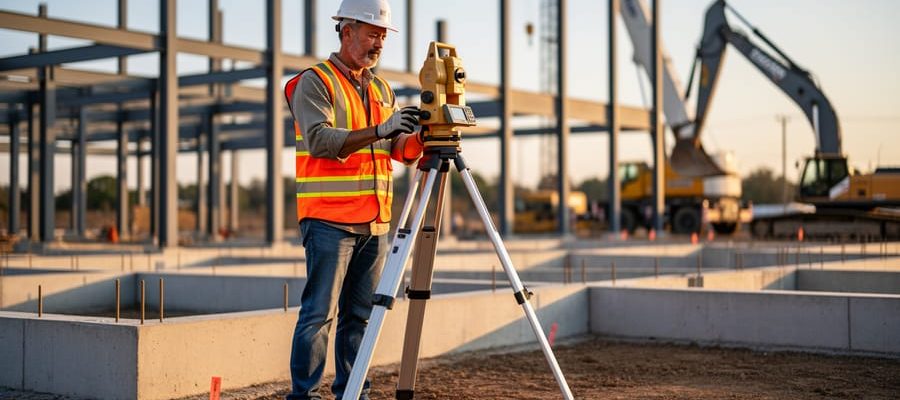
Detection and Surveying Tools
Before you dig, you need to know what’s below. Detection and surveying tools are your safety net against costly mistakes and dangerous utility strikes.
Start with utility locators, also called cable locators or pipe finders. These handheld devices detect electromagnetic signals from buried pipes and cables, helping you mark their exact positions before breaking ground. Many rental centers offer both basic models for shallow residential work and advanced units that penetrate several feet deep.
Ground-penetrating radar (GPR) takes detection further by creating underground images without any digging. While pricier to rent, GPR identifies non-metallic utilities like PVC pipes and fiber optic lines that standard locators might miss. Professional contractors favor GPR for complex sites with multiple utility layers.
For proper installation, you’ll need precision measuring tools. Laser levels ensure your trenches maintain correct slope for drainage, typically a quarter-inch drop per foot for sewer lines. Digital inclinometers measure grade angles accurately, while measuring wheels quickly calculate trench lengths for material estimates.
Don’t forget traditional tools: a 100-foot tape measure, marking flags, and spray paint for clearly indicating utility locations. Community feedback consistently emphasizes that investing time in thorough detection prevents expensive repairs and keeps everyone safe on site.
Installation and Finishing Tools
Professional utility installations require specialized tools that ensure secure connections and long-lasting performance. Pipe cutters are essential starting points, with ratcheting models handling PVC and copper cleanly while maintaining proper pipe ends for fitting connections. For larger diameter pipes, reciprocating saws with metal-cutting blades provide versatility across different materials.
Fusion machines become necessary when working with polyethylene pipes for gas or water lines, creating seamless joints stronger than the pipe itself. These machines heat pipe ends to precise temperatures before pressing them together. Many rental centers now stock beginner-friendly models with automatic temperature controls, making this once-professional-only technique accessible to confident DIYers.
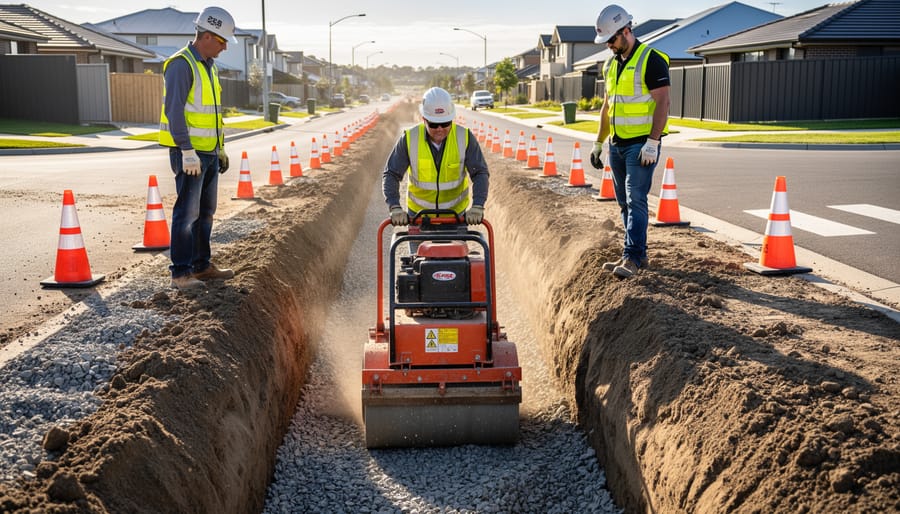
Compaction equipment prevents future settling around buried utilities. Plate compactors work well in confined trenches, while jumping jack tampers reach tight spots around pipe runs. Proper compaction in 6-inch layers prevents ground subsidence that could stress connections.
Finishing tools complete installations professionally. Torpedo levels ensure proper slope for drainage lines, while infrared thermometers verify fusion temperatures. Digital calipers confirm pipe dimensions before cutting, preventing costly mistakes. Community reviews consistently emphasize that investing time in proper finishing prevents callbacks and ensures code compliance.
Step-by-Step Site Utilities Installation Process
Pre-Installation Planning and Permits
Before breaking ground, thorough preparation saves time, money, and headaches down the track. Start with a comprehensive site survey to identify existing utilities, soil conditions, and potential obstacles. Many councils offer online property reports showing registered services, but always verify with physical inspections and professional locating services.
Obtaining permits is non-negotiable for utility installations. Contact your local council early to understand requirements, as proper planning and permits typically take 4-8 weeks to process. You’ll need detailed site plans, engineering specifications, and proof of qualified contractors for most applications.
Coordinate with utility companies at least two months ahead of your planned start date. Each provider (water, electricity, gas, telecommunications) has different connection processes and timeframes. Schedule a combined services meeting if possible to streamline approvals.
Common permitting delays include incomplete applications, missing engineering certifications, and inadequate easement documentation. Avoid these by creating a checklist of required documents and submitting everything simultaneously. Keep copies of all correspondence and follow up weekly on application progress.
Pro tip from our community: Establish relationships with your local council’s planning department early. They can flag potential issues before formal submission, saving costly resubmissions.
Locating Existing Utilities and Marking
Before breaking ground on any project, always contact your local 811 service at least two to three business days in advance. This free nationwide “call before you dig” hotline connects you with utility companies who will send professionals to mark underground lines on your property. This simple step prevents potentially fatal accidents and costly damage to gas, electric, water, sewer, and communication lines.
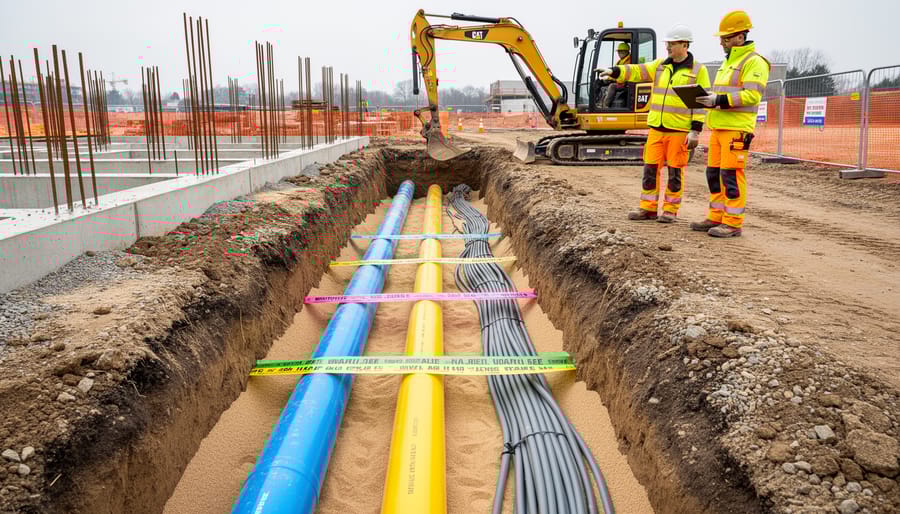
When utility locators visit your site, they’ll use color-coded flags and spray paint to identify what’s buried beneath. Understanding these colors is essential: red marks electric power lines, yellow indicates gas and oil, orange marks telecommunication lines, blue identifies water, green shows sewer systems, and purple indicates reclaimed water. White paint or flags mark your proposed excavation area, which you should clearly outline beforehand.
Keep detailed photos of all markings and note the date they were applied, as markings typically remain valid for only 14 to 30 days depending on your location. Many community members recommend creating a simple site map documenting all marked utilities, which proves invaluable if weather fades the markings. Remember that 811 only locates public utilities up to your property line, so private lines like irrigation systems, propane tanks, or electrical service to outbuildings remain your responsibility to identify and mark safely.
Excavation and Trenching Best Practices
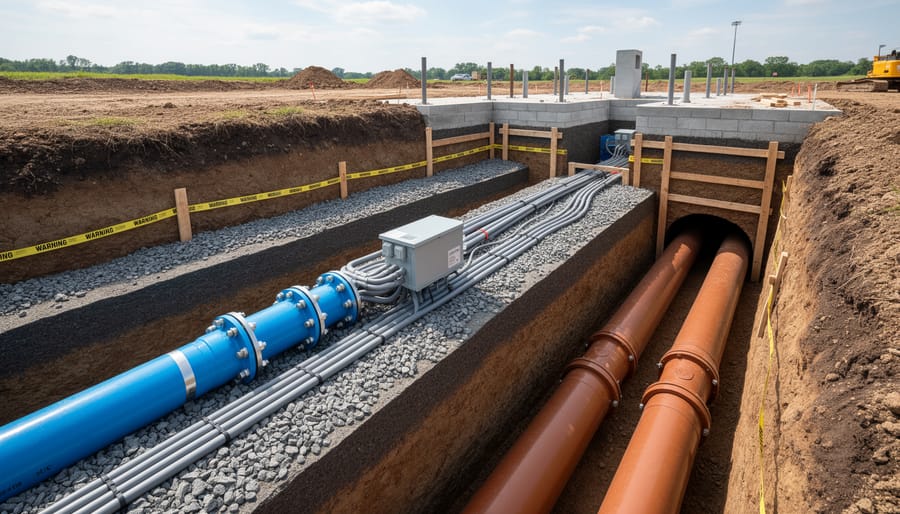
Before breaking ground, understanding utility depth requirements is essential for safety and compliance. Water lines typically sit 600-900mm deep, while sewer lines need 750-1200mm depending on local codes. Electrical conduits require minimum 450mm coverage in residential areas, though deeper is safer. Gas lines generally go 300-600mm deep, but always verify exact requirements with your local authority before digging.
When excavating for drainage utilities, maintaining proper slope is crucial. Sewer and stormwater lines need a minimum 1-2% gradient (about 10-20mm drop per meter) to ensure gravity does the work. Too flat and you’ll have drainage problems; too steep causes excessive flow velocity and potential damage.
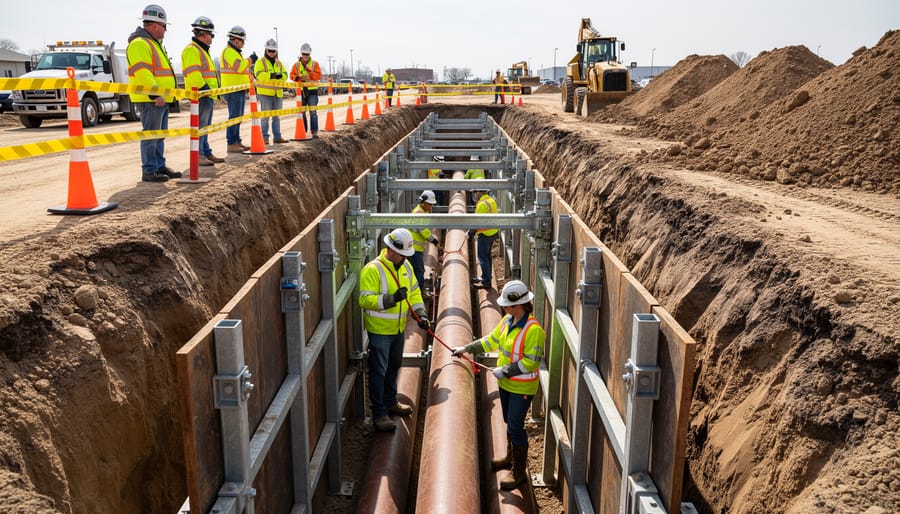
Trench safety cannot be overlooked. Any trench deeper than 1.2 meters requires protective systems like shoring, shielding, or benching. Even shallow trenches can collapse unexpectedly, particularly in sandy or wet soils. Never enter an unsupported trench, and keep excavated soil at least 600mm back from trench edges to prevent cave-ins.
Proper excavation and soil preparation means managing excavated material thoughtfully. Separate topsoil from subsoil for proper backfilling later. Keep excavated material organized and protected from rain, which can turn manageable dirt into problematic mud. Community members frequently recommend using trench boxes for added protection, especially when working solo or in questionable soil conditions.
Installing Water and Sewer Lines
Installing water and sewer lines requires careful planning and execution to ensure reliable service and prevent costly failures. Start by selecting appropriate pipe materials based on your project requirements. PVC remains the most popular choice for drainage applications due to its durability and cost-effectiveness, while PEX or copper typically serve water supply lines. Each material requires specific joining techniques, so consult manufacturer guidelines before beginning.
When installing DWV plumbing systems, maintaining proper slope is critical for drainage. Sewer lines need a minimum fall of 1:60 (approximately 16mm per metre) to ensure waste flows correctly without settling. Use a spirit level or laser level to verify gradients throughout installation.
Proper joining techniques prevent leaks that can cause extensive damage. For PVC, apply primer and cement evenly, then hold joints firmly for 30 seconds. Pressure test water lines at 150% of working pressure for at least two hours before backfilling. For drainage systems, perform a visual inspection and water test to confirm proper flow.
Always mark utility locations clearly and photograph installations before covering trenches. This documentation proves invaluable for future maintenance or renovations.
Safety Considerations That Could Save Your Life
Trench Safety and Cave-In Prevention
Trench work ranks among the most dangerous construction activities, with cave-ins causing numerous fatalities each year. Any trench deeper than 5 feet requires a protective system—either shoring (supports that prevent collapse), shielding (trench boxes that protect workers inside), or sloping the walls at a safe angle based on soil type.
Before entering any trench, verify proper shoring or shielding is installed according to manufacturer specifications. Trenches need safe entry and exit points, like ladders or ramps, positioned every 25 feet so workers can evacuate quickly. Never work in a trench without these protections, regardless of how stable the soil appears.
Atmospheric hazards present another serious risk. Excavations can accumulate toxic gases, displace oxygen, or contain explosive vapors, especially near utility lines or in areas with organic soil decomposition. Test the atmosphere before entry using a gas detector, and ensure adequate ventilation throughout the work period.
Inspect trenches daily before starting work and after rain, vibrations, or any event that could affect stability. Keep excavated soil and materials at least 2 feet from trench edges to prevent surcharge loads. According to community feedback from experienced contractors, the extra time spent on proper trench safety measures consistently proves worthwhile compared to the devastating consequences of shortcuts.
Electrical and Gas Line Safety Protocols
Working near electrical and gas lines demands extreme caution and adherence to strict safety protocols. Before any excavation or installation begins, always contact your local utility locating service (dial 811 in the United States) at least two to three business days in advance. This free service marks underground utility locations, preventing accidental strikes that could cause injuries, service disruptions, or explosions.
When working near marked utilities, maintain minimum clearance distances. For electrical lines, stay at least 18 inches away from marked locations during hand digging, and never use mechanical equipment within 24 inches. Gas lines require similar respect, with most codes mandating 24-inch buffer zones. Always hand dig within these proximity zones using non-conductive tools.
If you accidentally damage a utility line, immediately stop work and evacuate the area. For gas line strikes, avoid creating sparks, don’t operate electrical switches, and call your gas company’s emergency line and 911 from a safe distance. With electrical line damage, assume all lines are live, keep everyone away, and contact the utility company immediately.
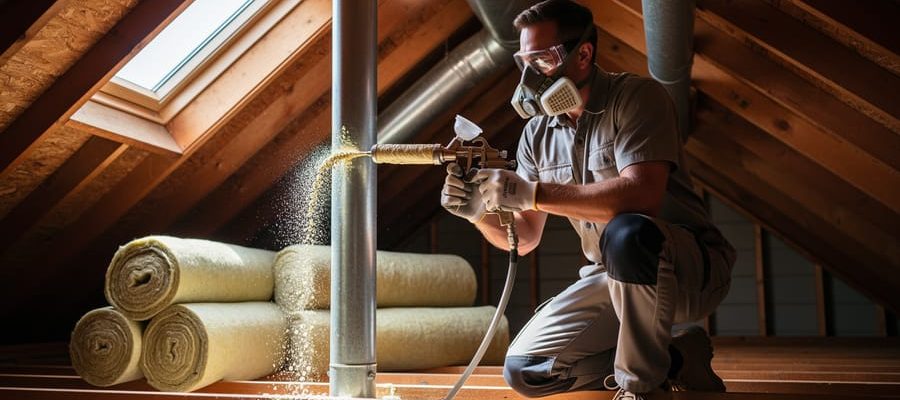
Proper personal protective equipment is non-negotiable. Wear insulated gloves, safety glasses, and steel-toed boots. For gas work, have gas detection equipment on-site. Never work alone when dealing with these high-risk utilities, and ensure someone knows your work plan and expected completion time.
Common Mistakes That Cost Time and Money
Improper Depth and Slope Issues
Getting utility depth and slope wrong creates serious downstream problems—literally. Improper depth leaves pipes vulnerable to freeze damage and surface traffic, while incorrect slope causes sewage backups, standing water in drainage lines, and premature system failure.
For depth, measure from the finished grade (not current ground level) to the top of your pipe using a story pole or laser level. Most regions require water lines at least 18-36 inches deep depending on your frost line, while sewer lines typically need 12-24 inches of cover. Always verify local code requirements before digging.
Slope is equally critical. Sewer and drainage lines need a consistent fall of 1/4 inch per foot (2% grade) to ensure proper flow. Use a string line with a line level or a digital slope gauge attached to a straight board. Check slope every 10 feet during installation.
If you discover errors during inspection, address them immediately. Shallow sections require additional excavation and reinstallation. Incorrect slope means re-bedding pipes with proper gravel support and adjusting trench bottoms. Some contractors report that fixing slope issues discovered after backfilling can cost three times the original installation price. Community feedback consistently emphasizes that taking extra time for accurate initial measurement prevents expensive callbacks and system failures.
Poor Backfilling and Compaction
Poor backfilling creates serious problems that may not appear immediately but can cost you significantly down the road. When trenches aren’t properly filled and compacted after utility installation, you risk soil settlement that leads to sinkholes, cracked driveways, and damaged underground lines.
Proper compaction requires adding backfill material in layers no more than 6-8 inches thick, compacting each layer to at least 95% of maximum density using a plate compactor or jumping jack tamper. Simply pushing loose dirt back into a trench won’t provide adequate support. Many DIYers make the mistake of skipping this step or assuming that rain and time will naturally compact the soil.
Material selection matters too. Avoid using organic material, large rocks, or frozen soil as backfill. Clean granular fill or excavated native soil works best when properly compacted. For critical areas like under driveways or foundations, consider using flowable fill or controlled low-strength material for uniform support without mechanical compaction. Community feedback consistently shows that taking time for proper backfilling prevents costly repairs and maintains site integrity for years.
Coordination Failures Between Trades
Poor coordination between trades remains one of the biggest challenges in utility installation. When electricians, plumbers, and HVAC technicians work independently without clear communication, conflicts arise. Pipes might occupy spaces needed for electrical conduit, or ductwork may interfere with planned plumbing runs.
The solution starts with comprehensive pre-installation meetings. Before work begins, gather all trades to review plans together and identify potential conflicts. Create a detailed schedule that sequences work logically—typically rough plumbing first, followed by electrical and HVAC installations. This prevents the common scenario where one trade must redo work because another needed that same space.
Documentation proves essential throughout the process. Maintain a shared project log where each trade records their progress, notes deviations from plans, and flags upcoming needs. Many crews now use smartphone apps for real-time updates, though a simple shared notebook works equally well for smaller projects.
Establish clear communication channels and designate a coordination lead who tracks all utility installations. This person ensures that when the electrician needs to cross a plumbing chase, the plumber knows about it beforehand. Regular daily check-ins, even brief five-minute standup meetings, prevent most conflicts before they become costly problems requiring rework.
Working with Utility Companies and Inspectors
Building strong relationships with utility companies and inspectors from day one can save you significant time, money, and frustration. Start by contacting utility providers early in your planning phase, often 4-6 weeks before you need connections. Each utility company has specific requirements for applications, documentation, and site preparation.
When you first reach out, ask for their connection guidelines in writing. These documents outline exactly what they expect, including trench depths, setback distances, and any required permits. Most utility companies assign a representative to your project, so establish clear communication channels and get their direct contact information. Don’t rely solely on general customer service numbers when issues arise.
Schedule utility locates well in advance of any digging. This free service marks existing underground lines and is legally required in most areas. Take photos of the marked locations and keep locate tickets on file, as they typically expire after 14-28 days.
For inspections, preparation is everything. Review your local building codes thoroughly and create a checklist based on inspector requirements. Common issues that cause failures include incorrect depths, improper materials, missing access points, and inadequate documentation. Before calling for an electrical rough-in inspection or other utility inspections, walk through your installation with your checklist in hand.
Professional tip: Keep a project binder with all permits, approved plans, material specifications, and correspondence with utility companies. Inspectors appreciate organized documentation, and it demonstrates your commitment to doing things properly. Many experienced contractors also photograph each installation stage before covering trenches or closing walls, providing visual proof of compliance if questions arise later.
Cost Factors and Budgeting for Site Utilities
Understanding what drives utilities installation costs helps you plan realistically and avoid budget surprises. The major expense categories break down into materials, equipment, labor, and those often-overlooked hidden costs that can derail your project finances.
Material costs vary significantly based on your utility type and local requirements. Water and sewer lines typically run $50-$200 per linear foot for materials alone, depending on pipe diameter and material (PVC versus copper or cast iron). Electrical conduit and wiring range from $0.50-$5 per foot, while natural gas lines cost $4-$12 per linear foot. Always purchase 10-15% extra materials to account for waste, mistakes, and future repairs.
Equipment rental rates represent another substantial cost. Trenching machines rent for $150-$400 daily, while excavators cost $200-$600 per day depending on size. Boring equipment for horizontal directional drilling runs $300-$800 daily. Pro tip from experienced contractors: rent equipment mid-week when possible, as weekend rates often carry premiums.
Labor considerations depend heavily on your location and whether you’re hiring licensed professionals. Electricians charge $50-$100 hourly, plumbers $45-$200 hourly, and general excavation crews $40-$75 per hour per worker. Most utility installations require licensed professionals for final connections, even if you handle preliminary work yourself.
Hidden expenses frequently catch people off-guard. Permit fees range from $50-$500 per utility type. Inspection fees add another $100-$300 per inspection stage. Rock or difficult soil conditions can double excavation costs. Utility locating services typically cost $100-$300 but prevent expensive damage to existing lines. Connection fees charged by utility companies often run $500-$3,000 per service, varying by municipality and distance from existing infrastructure.
Always maintain a 20% contingency buffer in your budget for unexpected complications or requirement changes discovered during installation.
Successfully installing utilities on your construction site comes down to three essential elements: thorough planning, unwavering attention to safety, and having access to the right equipment. As we’ve covered throughout this guide, understanding what utilities you need, mapping out their locations before breaking ground, and following proper installation sequences will save you time, money, and potential headaches down the road.
Remember that every site is unique, and what works perfectly for one project might need adjustment for another. Always verify local codes and regulations, call before you dig to locate existing utilities, and don’t hesitate to consult with professionals when you’re uncertain about any aspect of the installation process.
Whether you’re a seasoned contractor or tackling your first major site development project, the right tools make all the difference. From trenchers and pipe layers to specialized testing equipment, investing in quality rentals ensures the job gets done safely and efficiently.
We’d love to hear about your experiences with site utilities installation. What challenges did you face? What tools proved most valuable? Share your stories, tips, and questions in our community section below. Your insights help fellow builders learn and improve their own projects.
Related Posts
Post a Comment