
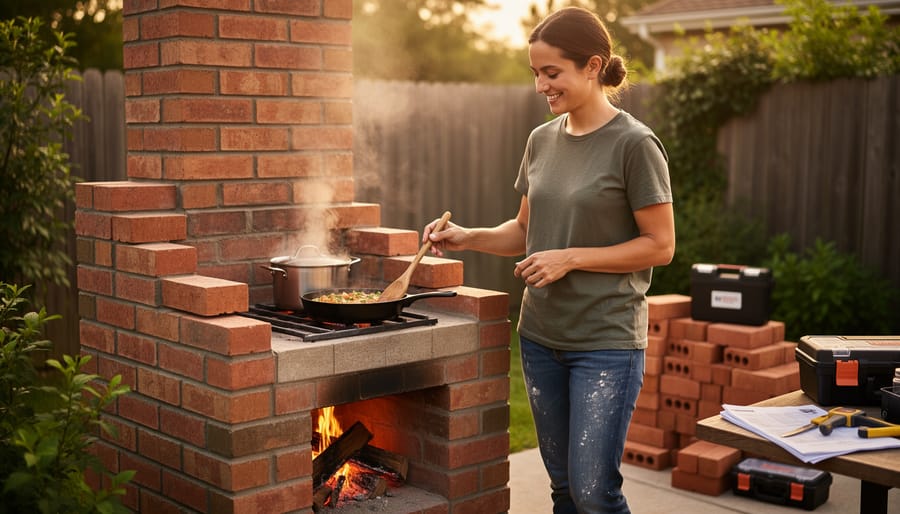
Gather 50-75 standard bricks, fire-resistant mortar, and basic masonry tools to construct a functional outdoor cooking stove in a single weekend. Position your stove on level, non-flammable ground away from structures and overhead branches, ensuring proper clearance meets local fire safety codes. Stack bricks in a U-shaped configuration with a 12-16 inch cooking chamber height, leaving strategic gaps at the base for airflow and ash removal while creating a flat top surface to support cooking grates or pots.
Choose between mortared permanent designs that withstand weather and heavy use, or dry-stack temporary versions you can disassemble and relocate as needed. The dry-stack method requires no special skills and allows you to test different configurations before committing to a permanent structure. Calculate your fuel chamber depth based on typical cooking sessions—8-10 inches accommodates standard firewood while maintaining efficient heat distribution to the cooking surface above.
Test your completed stove with a small fire before full-scale cooking to identify airflow issues and heat distribution patterns. Community feedback consistently highlights the importance of building a removable ash tray or cleanout access, preventing maintenance headaches that plague first-time builders. Add a simple chimney extension using additional bricks if smoke control becomes problematic, directing exhaust away from cooking and seating areas. This straightforward approach transforms basic materials into a reliable outdoor cooking station that enhances any backyard gathering while requiring minimal investment or construction experience.
Why a Brick Stove Beats Other Homemade Outdoor Cookers
When you’re planning an outdoor cooking setup, you’ve got plenty of DIY options beyond a brick stove. Metal drum stoves, cinder block arrangements, and repurposed barbecue grills all have their followers. So what makes a simple brick stove stand out from the crowd?
The biggest advantage is heat retention. Bricks absorb and hold heat far longer than metal drums or thin cinder blocks. This means steadier cooking temperatures and the ability to keep food warm long after you’ve stopped adding fuel. Community feedback from DIY builders consistently highlights this feature as a game-changer for slow-cooking projects.
Longevity is another winning point. Metal drums rust and deteriorate within a few seasons, especially in coastal or humid climates. Cinder blocks can crack under thermal stress. Quality bricks, however, are fired to withstand extreme temperatures and last for decades with minimal maintenance. One community member reported their brick stove functioning perfectly after fifteen years of regular use.
The construction process itself requires remarkably few specialized tools. Unlike welding a metal drum stove or building a blockwork offset smoker, you can assemble a basic brick stove with just a trowel, level, and mixing container for mortar. This accessibility makes it ideal for beginners who haven’t accumulated extensive tool collections yet.
Finally, there’s the aesthetic factor. A well-built brick stove adds rustic charm to any outdoor space. It looks intentional and crafted rather than improvised. Metal drums and cinder blocks scream temporary solution, while a brick structure becomes a permanent landscape feature that actually enhances property appeal.
For straightforward outdoor cooking without ongoing replacement costs or specialized equipment, brick simply delivers the best value.
What You’ll Need: Materials and Tools Checklist
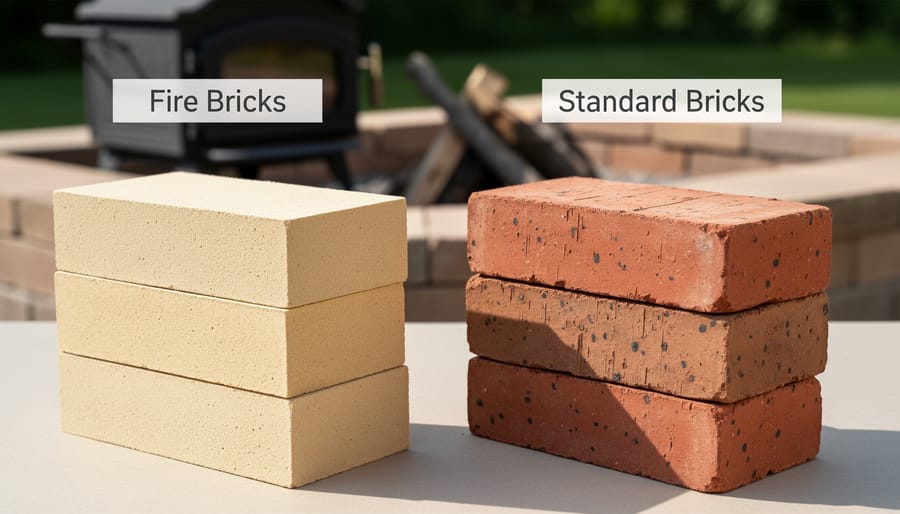
Understanding Fire Bricks vs. Regular Bricks
Not all bricks are created equal, especially when it comes to fire. Understanding the difference between fire bricks (also called refractory bricks) and regular bricks is essential for building a safe, long-lasting outdoor stove.
Fire bricks are specially designed to withstand extreme temperatures, often exceeding 1000°C. They’re made from ceramic materials with low thermal conductivity, meaning they absorb heat rather than transferring it. This makes them perfect for lining the firebox where flames directly contact the bricks. Regular bricks, while affordable and widely available, can crack, crumble, or even explode when exposed to intense heat repeatedly.
For your outdoor brick stove, use fire bricks to line the entire cooking chamber and firebox floor where direct flame contact occurs. Regular bricks work fine for the outer structure, base, and chimney areas that don’t experience extreme heat.
Many DIY builders in our community recommend using at least one layer of fire bricks in high-heat zones, with some suggesting a two-brick-thick firebox for added insulation and durability. While fire bricks cost more upfront, they prevent dangerous structural failures and extend your stove’s lifespan significantly. Think of it as an investment in safety rather than an optional upgrade.
Optional Upgrades Worth Considering
Once you’ve mastered the basics, several upgrades can enhance your brick stove’s functionality. A simple chimney pipe (usually 4-6 inches diameter) dramatically improves draft and reduces smoke when cooking, especially if your stove sits in a sheltered area. Many builders add a metal ash cleanout door at the base, making maintenance much easier than scooping out debris by hand. A concrete or flagstone work surface alongside your stove creates valuable prep space and protects surrounding ground from heat damage. Consider a removable cooking grate or adjustable grill rack for more versatility than a fixed surface. These additions make most sense if you’ll use your stove regularly rather than occasionally. Community feedback shows that chimney pipes offer the best value for frequent users, while cleanout doors pay off during fall and winter when ash accumulates faster.
Choosing the Right Location for Your Brick Stove
Before you lay a single brick, choosing the right spot for your outdoor stove will determine both its safety and how much you’ll actually use it. This crucial first step requires consideration of several practical factors.
Start by ensuring adequate clearance from buildings, fences, and overhanging trees. A minimum distance of three metres from any structure is recommended, though local regulations may require more. This protects against fire hazards and prevents smoke damage to your home. Check with your local council about specific setback requirements and whether you need a permit for outdoor cooking structures.
Observe wind patterns in your yard throughout the day. Position your stove where prevailing winds will carry smoke away from your house and seating areas. However, avoid completely exposed locations where strong gusts might interfere with cooking or scatter embers. A partially sheltered spot offers the best balance.
Think about how the stove fits into your overall outdoor hangout space. Place it close enough to your gathering area for easy interaction with guests, but not so close that heat and smoke become uncomfortable. Consider access to your kitchen for food prep and cleaning.
Ground stability is essential. Choose level, well-draining soil that won’t shift or settle. Avoid low spots where water pools after rain. The base should be compacted and stable before construction begins.
For the foundation, excavate approximately 100-150mm deep and fill with compacted gravel or crusher dust. This creates drainage and prevents ground moisture from deteriorating your bricks. Top this with a concrete slab or additional layers of fire bricks for a solid, level building surface. Many builders recommend a concrete pad at least 50mm thick for long-term durability.
Step-by-Step Construction Process
Laying the Foundation Base
A solid foundation is crucial for your brick stove’s stability and longevity. Without proper leveling, your stove may crack, shift, or become unsafe during use.
Start by selecting your location and clearing the ground of grass, debris, and loose soil. You’ll need a flat area roughly 90cm x 90cm. For the foundation itself, you have two main options: concrete pavers or a poured concrete pad. Pavers offer a simpler solution, requiring minimal preparation. Simply lay them on compacted gravel or sand, ensuring they’re tightly fitted together. A poured pad provides superior stability but requires more effort and drying time.
Regardless of your choice, checking for level is essential. Use a spirit level in multiple directions across your base. Even small deviations can cause structural problems later. If you find high spots, remove material beneath. For low areas, add sand or gravel and compact thoroughly.
Many DIYers in our community recommend adding a layer of fire-resistant insulation beneath the base to protect your foundation from heat damage. This simple step can significantly extend your stove’s lifespan and prevent cracking from thermal expansion.
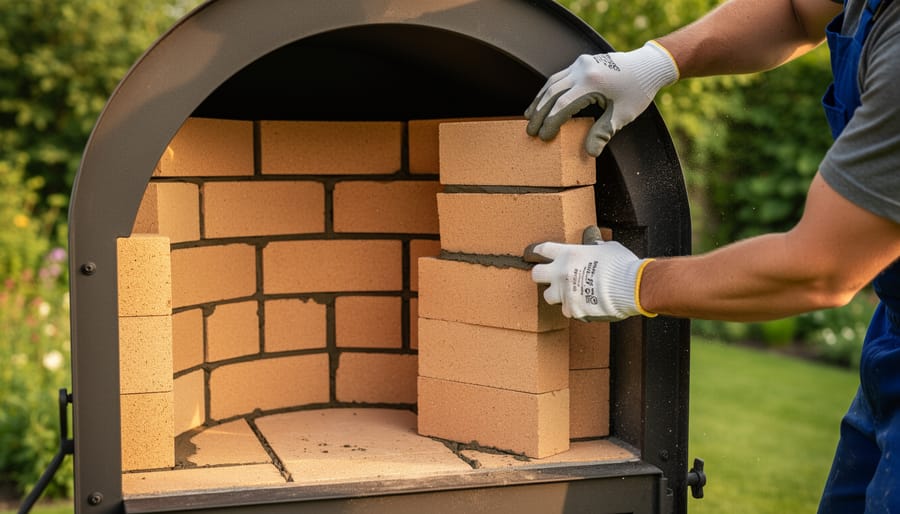
Building the Fire Chamber
The fire chamber is the heart of your outdoor brick stove, where heat generation and control happen. Start by laying your first course of fire bricks directly on your foundation. Fire bricks are essential here because they withstand extreme temperatures without cracking, unlike regular bricks. Leave approximately half an inch of space between your fire bricks rather than using mortar for the interior chamber. This dry-stack method allows for thermal expansion and makes future repairs much simpler.
Build your chamber walls to a comfortable working height, typically three to four courses (about 9-12 inches tall). This creates enough space for a good fire while keeping your cooking surface at a manageable level. Many community builders recommend testing the height with a pot before finalizing, ensuring you won’t strain your back during cooking sessions.
As you stack each course, stagger the joints like traditional brickwork to maintain structural integrity. Create an opening at the front for fuel loading, usually spanning three bricks wide. Some experienced DIYers suggest leaving small gaps at the base of the back wall to improve airflow and create a draft, which helps your fire burn more efficiently.
For the cooking platform, lay a course of fire bricks flat across the top of your chamber walls. These should slightly overhang the chamber to provide stable support for pots and pans. Test stability by applying gentle pressure to each brick, ensuring everything sits firmly without wobbling. The dry-stack method means you can adjust positioning until everything feels solid and level.
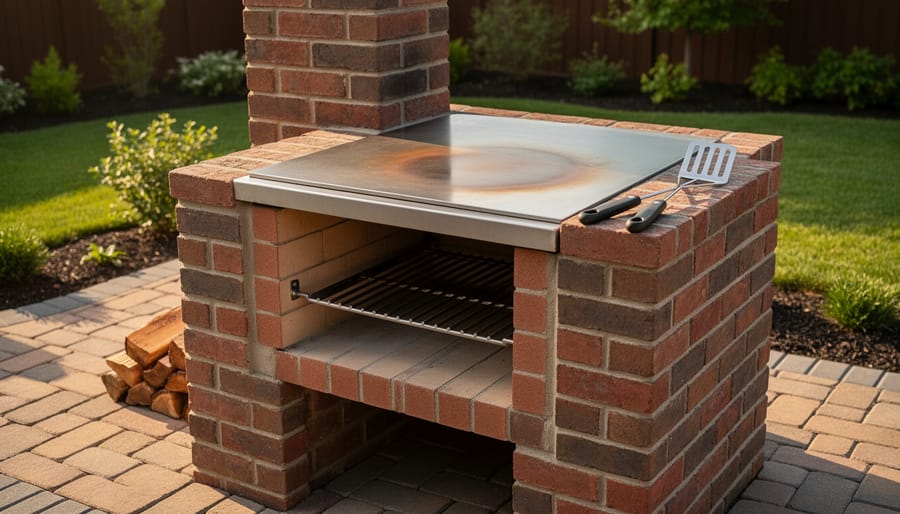
Adding the Cooking Surface and Walls
Once your base structure is solid and stable, you’re ready to add the cooking surface. Metal cooking grates salvaged from old barbecues work perfectly and are often available secondhand. Simply lay the grate across the top of your brick walls, ensuring it sits level and has at least 2 inches of brick support on each side. For a more permanent flat cooking surface, use a piece of steel plate or cast iron griddle, which provides excellent heat distribution for pans and pots.
Building surrounding walls serves two important purposes: protecting your flame from wind and reflecting heat back toward your cooking surface. Construct these walls 8 to 12 inches high using the same mortar-and-brick technique from your base. Leave a gap at the front for fuel access and ventilation. Many DIY builders in our community recommend creating an L-shape or U-shape configuration rather than a complete enclosure, allowing you to tend the fire comfortably while maintaining heat efficiency.
Consider adding a simple work surface adjacent to your stove using flat paving stones or concrete blocks. This gives you a convenient spot for food prep, utensils, and plates. Position this workspace upwind from smoke for comfort during cooking sessions.
Safety reminder: ensure all additions maintain proper clearance from flammable materials. Keep a bucket of sand or water nearby during use, and never leave your stove unattended while lit. Test your setup with a small fire before attempting full-scale cooking to identify any design adjustments needed.
Mortar or No Mortar: Making the Right Choice
When building your outdoor brick stove, you’ll face a key decision: should you use mortar or simply stack the bricks dry? Each method has distinct advantages worth considering.
Dry-stacking means placing bricks without any binding material. This approach offers excellent flexibility—you can disassemble and reconfigure your stove layout easily, making it perfect for renters or those who like experimenting with different designs. It’s also beginner-friendly since there’s no mixing or waiting for mortar to cure. Many DIY community members report success with dry-stacked stoves for occasional weekend cooking.
However, dry-stacking has limitations. The structure lacks permanence and stability, making it unsuitable for windy locations or frequent use. Temperature fluctuations from freeze-thaw cycles can shift bricks over time, requiring regular adjustments.
Mortared construction creates a permanent, sturdy structure that withstands weather and heavy use. It’s the better choice for year-round cooking in harsh climates. The downside? It requires more skill, additional materials like fire-rated mortar, and careful planning since mistakes are harder to correct.
For beginners in mild climates with occasional cooking needs, dry-stacking works well. If you’re in areas with extreme weather or want a permanent cooking station, invest time in learning proper mortaring techniques for a durable result.
Safety Essentials You Can’t Skip
Building your outdoor brick stove safely is just as important as making it functional. Before you start, understand that experienced DIY community members consistently emphasize three non-negotiable safety rules.
First, location matters tremendously. Position your stove at least 10 feet away from any structure, overhanging trees, or combustible materials. Community feedback shows that many first-time builders underestimate how far sparks and heat can travel, especially on windy days.
Second, never use bricks containing asbestos or those previously exposed to hazardous chemicals. Standard clay bricks work perfectly fine for simple designs. Avoid painted or treated bricks, as they release toxic fumes when heated. If you’re unsure about your materials, experienced users recommend consulting with suppliers or checking online community forums where others share their material testing results.
During construction, wear heavy-duty work gloves to protect against sharp edges and skin abrasions. Safety glasses prevent brick dust from irritating your eyes, particularly when cutting or shaping bricks.
When using your completed stove, keep a fire extinguisher or water source within easy reach. One community member shared how a nearby garden hose saved their patio furniture when unexpected wind shift sent embers flying.
Proper ventilation is critical. Build your stove in open areas where smoke can disperse naturally. Poor airflow not only creates breathing hazards but also reduces cooking efficiency.
In emergencies, smother flames with sand or baking soda rather than water, which can crack hot bricks and cause dangerous steam explosions. This tip comes directly from seasoned outdoor cooking enthusiasts who learned through close calls.
First Fire: Testing and Breaking In Your Stove
Your new brick stove needs proper curing to prevent cracking and ensure longevity. Start with a small kindling fire on day one, burning for just 30-45 minutes. This allows moisture trapped in the mortar and bricks to escape gradually. Over the next three to four fires, incrementally increase both fire size and duration.
During initial burns, expect to see some steam or light smoke coming from mortar joints—this is normal as residual moisture evaporates. You may also notice a slight sulfur smell from the mortar curing. Allow the stove to cool completely between each break-in fire, ideally waiting 24 hours.
Common issues during testing include excessive smoke, which typically indicates poor airflow. Ensure your fuel grate isn’t blocked and consider adjusting your fire layout to improve draft. If you experience uneven heating, this often relates to fire placement—position your fuel centrally for better heat distribution.
Many DIYers in our community report that their stoves perform best after five or six uses once everything has fully cured. Take notes during each fire about what works and what doesn’t. This break-in period is your opportunity to learn your stove’s personality before cooking that first meal. Remember, patience during curing prevents expensive repairs later.
Maintenance Tips to Make Your Stove Last Decades
With proper care, your brick stove can serve you for twenty years or more. Community members report their stoves lasting decades when following these straightforward maintenance practices.
After each use, allow the stove to cool completely before removing ash buildup with a brush or small shovel. Accumulated ash restricts airflow and reduces heating efficiency. Many users recommend keeping a dedicated metal bucket nearby for ash disposal.
Inspect mortar joints twice yearly, particularly before and after winter. Look for cracking or crumbling, which indicates moisture damage. Repoint any deteriorating joints promptly using heat-resistant mortar to prevent structural issues. One experienced builder notes that addressing small cracks immediately saves major repairs later.
For weatherproofing, consider covering your stove with a tarp or purpose-built cover during extended periods of non-use. This protects mortar from freeze-thaw cycles that cause deterioration. Some users apply waterproof masonry sealant to exterior surfaces, though this requires reapplication every few years.
Before winter, clean your stove thoroughly and ensure all joints are sound. In spring, inspect for winter damage before your first fire.
If you notice loose bricks, significant mortar loss, or structural shifting, repairs are needed immediately. These issues compromise both safety and performance, requiring attention before further use.
Real User Builds: What Worked and What Didn’t
We reached out to DIYers who’ve tackled outdoor brick stove projects, and their experiences reveal valuable lessons. Sarah from Newcastle saved over $150 by sourcing second-hand firebricks from a demolition yard, though she warns to check each brick carefully for cracks. Her biggest mistake? Starting without a level base, which meant rebuilding the first three rows.
James in Brisbane shared his clever modification: adding a removable steel plate on top transformed his basic cooking surface into something resembling a wood fired pizza oven, perfect for flatbreads and quick pizzas. He recommends investing in a quality spirit level and masonry trowel rather than hiring them, as both proved essential throughout construction.
Common pitfalls mentioned across multiple builders include underestimating mortar quantities (always buy 20 percent extra), placing the stove too close to fences or structures (minimum two metres clearance), and skipping the curing process. Michelle from Adelaide emphasizes this final point: she cracked several bricks by lighting a full fire immediately instead of gradually increasing heat over three days.
The consensus on cost? Most builders spent between $80-200 depending on brick choice and existing tool ownership. Nearly everyone agreed that taking an extra weekend to plan properly saved headaches later. Community tip: join local DIY groups online where members often share leftover materials or loan specialized tools.
Building your own outdoor brick stove is an achievable weekend project that doesn’t require advanced masonry skills. With basic tools, careful planning, and attention to safety, you can create a functional cooking space that will serve you for years to come. The satisfaction of preparing meals on a stove you built yourself makes the effort worthwhile.
If you don’t own all the necessary equipment, remember that tool rental services offer everything from spirit levels to mixing equipment at affordable daily rates, making this project accessible without significant upfront investment.
We’d love to hear about your brick stove build. Share photos of your finished project, any modifications you made to the design, or challenges you overcame during construction. Your experience helps fellow DIY enthusiasts learn from real-world builds and fosters a community of makers who support each other. Whether you’re a first-time builder or an experienced tradesperson, your insights contribute valuable knowledge that benefits everyone tackling similar projects.
Related Posts
Post a Comment