
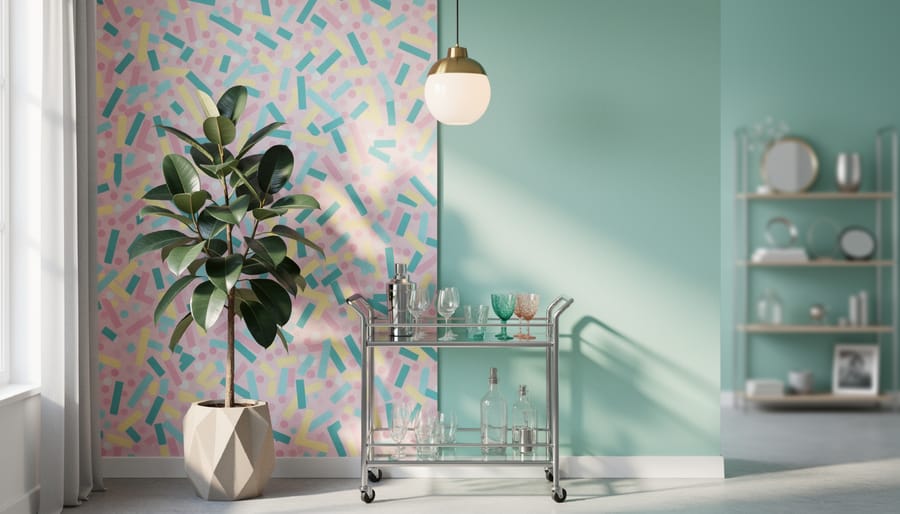
Layer geometric patterns through removable wallpaper or peel-and-stick tiles in kitchens and bathrooms to capture quintessential 80s style without permanent commitment. Choose bold Memphis Design motifs—squiggles, triangles, and color blocks in pink, teal, and yellow—that can transform a space in an afternoon with just a utility knife, smoothing tool, and level from your local hire shop.
Swap outdated light fixtures for statement pieces featuring brass finishes, frosted glass globes, or track lighting systems that defined the decade. These electrical updates typically require only a screwdriver and wire stripper, making them perfect weekend projects for confident DIYers practicing safe updating interiors without renovation.
Introduce oversized potted plants like rubber trees or fiddle-leaf figs in ceramic planters with geometric patterns to recreate the era’s jungle-inspired aesthetic. Pair these with mirrored or lacquered accessories—think acrylic photo frames, neon signs, and chrome bar carts sourced from thrift stores or online marketplaces.
Paint accent walls in signature 80s hues like dusty rose, seafoam green, or mauve using quality rollers and painter’s tape to achieve clean lines. These color pops work especially well behind shelving units or in alcoves, giving you maximum visual impact with minimal paint coverage and easy future reversal if you change direction.
Why ’80s Design Is Making a Comeback
The ’80s are back, and this time around, homeowners are embracing the decade’s bold aesthetic with a modern twist. What was once considered excessive has become refreshingly authentic in our current design landscape, offering a welcome departure from years of minimalist grey and beige interiors.
At the heart of 1980s design lies an unapologetic maximalist approach. Think saturated jewel tones like emerald green, sapphire blue, and rich coral alongside geometric patterns that demand attention. Memphis Design Group’s influence brought us squiggly lines, asymmetrical shapes, and color blocking that defined the era’s playful spirit. These elements are finding new life in contemporary spaces, particularly among DIY enthusiasts looking to inject personality into their homes without committing to full renovations.
The resurgence isn’t about recreating a time capsule. Today’s interpretation focuses on selective incorporation of ’80s elements into existing spaces. You might add a geometric accent wall using painter’s tape and bold paint colors, swap out light fixtures for statement pieces with brass finishes, or introduce Memphis-inspired accessories as conversation starters. The beauty of this trend lies in its accessibility for renters and homeowners alike, since most updates require minimal tools and can be reversed or modified easily.
Community feedback shows that people are drawn to the era’s optimistic energy and willingness to take design risks. In uncertain times, the ’80s aesthetic offers both nostalgia and permission to have fun with your living space.
Small-Scale Color Updates That Pack a Punch
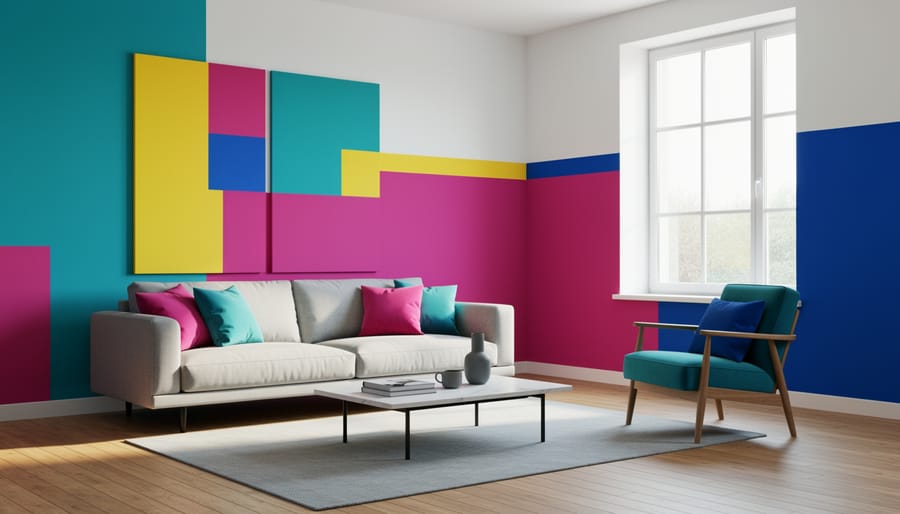
Accent Walls and Color Blocking
Accent walls and geometric color blocking deliver instant 80s impact without permanent commitment—perfect for renters or anyone testing the retro waters. These bold design moves transform spaces using paint alone, making them budget-friendly and reversible.
Start by selecting your color palette. Classic 80s combinations include mauve with dusty rose, teal paired with coral, or peach alongside mint green. Purchase sample pots first to test how colors look in your lighting throughout the day.
For a single accent wall, you’ll need painter’s tape, drop cloths, paint rollers, angled brushes for edges, and a paint tray. Choose one wall as your focal point—typically the wall behind your bed or sofa. Prep the surface by cleaning it and filling any holes. Apply painter’s tape along ceiling edges, baseboards, and adjacent walls. Use your angled brush to cut in around edges first, then roll paint in a W-pattern for even coverage. Two coats usually suffice.
Geometric color blocking requires additional planning. Sketch your design on paper, then measure and map it onto your wall using a level and pencil. Popular 80s patterns include diagonal stripes, offset rectangles, or chevron designs. Apply painter’s tape to define each section, pressing edges firmly to prevent bleeding. Paint one color at a time, allowing each to dry completely before taping over it for the next section. Remove tape while paint is slightly tacky for crisp lines.
Community feedback suggests starting with smaller walls or single geometric shapes before attempting complex patterns. Remember to ventilate your space and allow 24 hours drying time between coats.
Painted Furniture and Fixtures
Transform your existing pieces into 80s showstoppers with the right paint choices and techniques. High-gloss lacquer paint delivers that authentic decade-defining shine, while chalk paint offers easier application for beginners tackling painting furniture projects. Opt for classic 80s hues like turquoise, coral pink, sunshine yellow, or Memphis-inspired color blocking with contrasting geometric patterns.
Before painting, proper preparation ensures lasting results. Clean surfaces thoroughly with sugar soap to remove grease and grime, then lightly sand with 120-grit sandpaper to create texture for paint adhesion. Wipe away dust with a damp cloth and allow complete drying. Apply primer designed for your furniture material, whether laminate, wood, or metal. This step prevents chipping and improves color vibrancy.
When working indoors, ventilation is essential. Open windows and doors, or set up fans to circulate fresh air, especially when using spray paints or oil-based products. Wear appropriate safety equipment including dust masks during sanding, protective gloves, and safety glasses. Lay down drop cloths to protect floors and surrounding surfaces.
Apply paint in thin, even coats rather than one thick layer, allowing proper drying time between applications as specified by manufacturers. Most furniture projects require two to three coats for full coverage. Finish with clear polyurethane sealant for durability, particularly on high-use surfaces like tabletops and cabinet doors. Community members recommend testing techniques on small inconspicuous areas first to perfect your approach.
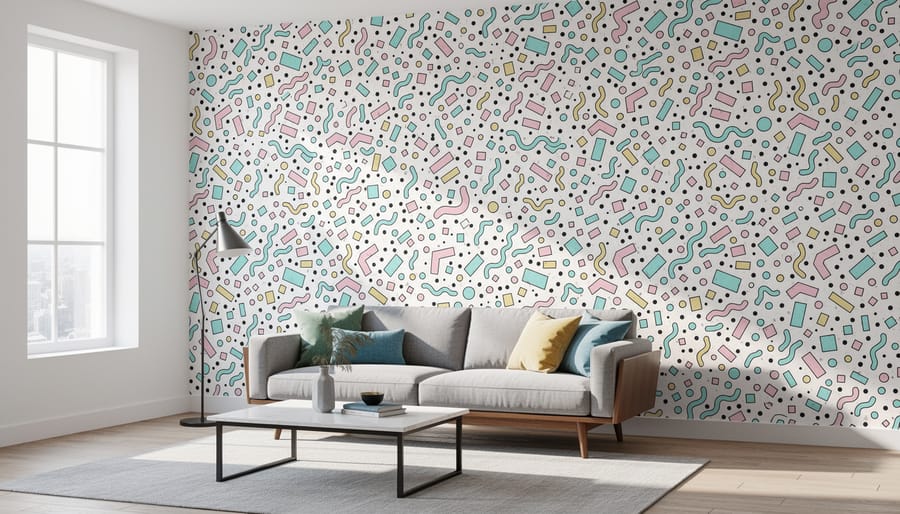
Pattern Play: Wallpaper and Removable Options
Peel-and-Stick Wallpaper Installation
Before starting your 80s wallpaper project, gather these essential tools: a smoothing tool or squeegee, measuring tape, level, utility knife with fresh blades, pencil, and a clean cloth. You’ll also want a step ladder for hard-to-reach areas and a friend to help with longer strips.
Begin by measuring your wall height and width carefully. Add 2-3 inches to each measurement for trimming allowance. Most peel-and-stick wallpaper comes in standard roll widths, so calculate how many strips you’ll need by dividing your wall width by the roll width. Always order 10-15% extra to account for pattern matching and mistakes.
Wall preparation is crucial for success. Clean the surface thoroughly with a damp cloth to remove dust, grease, and debris. Let it dry completely. The beauty of removable wallpaper is it works on most smooth surfaces without damaging them, making it perfect for renters.
Start at the top corner of your wall. Peel back about 12 inches of backing paper and align the strip using your level. Smooth from the center outward as you gradually peel and stick, working downward. This technique pushes air bubbles toward the edges. If bubbles appear, gently lift the paper and reapply, smoothing as you go.
For corners and outlets, overlap slightly and trim excess with your utility knife. When it’s time to remove the wallpaper, simply pull slowly at a 45-degree angle. The adhesive should release cleanly without leaving residue or damaging paint underneath.
Feature Wall Strategies
Creating an 80s-inspired feature wall requires strategic planning to capture the decade’s boldness without overwhelming your space. Start by choosing the wall that naturally draws attention when you enter the room, typically the one behind your bed, sofa, or the first wall visible through the doorway.
When working with geometric patterns or Memphis-style designs, limit your accent to one wall only. This approach prevents sensory overload and gives the eye a place to rest. Consider the room’s existing colours and furniture before committing. Your feature wall should complement, not clash with, your current setup.
For renters or those testing the waters, removable wallpaper offers a low-commitment option that requires minimal tools—just a smoothing tool, measuring tape, and craft knife. Community feedback consistently highlights that smaller patterns work better in compact spaces, while larger, bolder designs suit spacious rooms.
Balance is crucial. If you’re introducing a vibrant geometric feature wall, keep surrounding walls neutral in soft pastels or white. This creates visual breathing room and lets your 80s statement shine without competing elements fighting for attention.
Lighting Upgrades That Channel the Decade
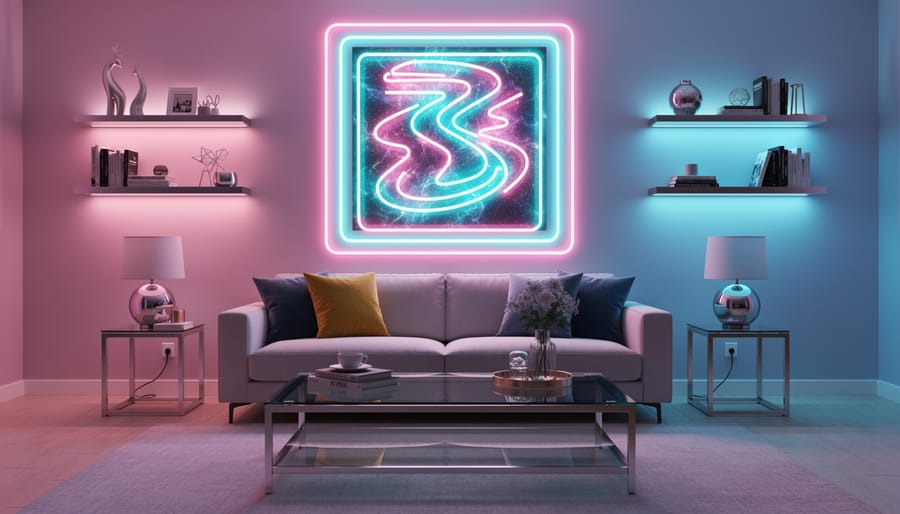
LED Neon Signs and Strip Lighting
Modern LED neon alternatives offer the iconic 80s glow without the fragility, heat, or electrical hazards of traditional glass neon. These flexible strips come in various colors—think hot pink, electric blue, and vivid purple—and typically plug directly into standard outlets, making them renter-friendly and fully reversible.
Before installation, plan your design and measure the space. Most LED neon signs arrive with mounting clips or adhesive backing. For heavier signs, use wall anchors appropriate to your wall type. Community reviews consistently recommend testing plug-in locations first to avoid visible cord runs across walls.
When mounting strips, clean surfaces thoroughly with rubbing alcohol for better adhesion. Secure the strip every 12-18 inches using the provided clips, ensuring the power cord reaches an outlet without stretching. Many DIYers hide cords behind furniture or use cord covers painted to match walls.
Safety considerations are straightforward but essential. Always check that your LED system is UL-listed and inspect cords for damage before plugging in. Avoid routing cords under carpets or through doorways where they could fray. Use surge protectors for multiple signs, and never exceed the recommended total wattage. LED options run cool to the touch, making them safer than vintage alternatives while delivering that authentic 80s aesthetic.
Statement Light Fixture Swaps
Swapping out dated light fixtures for 80s-inspired designs instantly transforms a room’s aesthetic. Popular choices include geometric pendant lights, Memphis-style fixtures with bold colors and asymmetrical shapes, or chrome and glass chandeliers that capture that quintessential decade glamour.
Before starting any fixture replacement, safety comes first. Always turn off the power at the circuit breaker, not just the light switch, and use a voltage tester to confirm electricity is off. For basic replacements, you’ll need a screwdriver set, wire strippers, wire nuts, electrical tape, and a sturdy ladder. A headlamp or flashlight helps when working in dark ceiling boxes.
Most straightforward fixture swaps are manageable DIY projects. If your new fixture weighs about the same as the old one and connects to an existing electrical box, it’s typically a simple wire-to-wire replacement following color-coded connections: black to black (hot), white to white (neutral), and green or bare copper to ground.
However, call a licensed electrician if you’re installing a significantly heavier fixture requiring additional ceiling support, dealing with outdated wiring without proper grounding, adding dimmer switches, or feeling uncertain about any electrical work. Community reviews consistently emphasize that electrical safety isn’t worth the risk of incorrect DIY installation.
Accessorizing With ’80s Flair
Bringing ’80s style into your space doesn’t require permanent changes or a major budget. The right accessories instantly transport any room to the era of bold choices and unapologetic personality.
Start with mirrors, which were everywhere in ’80s homes. Look for geometric shapes like hexagons or sunburst designs at charity shops and car boot sales. Grouping smaller mirrors together creates an eye-catching gallery wall without drilling multiple holes. Lean oversized mirrors against walls for a temporary installation that renters can easily remove. Many community members report finding quality vintage mirrors for under £20 at second-hand stores.
Textiles offer another quick transformation. Hunt for geometric-print cushions, bold striped throws, or anything featuring Memphis design patterns. These items frequently appear at thrift stores and online marketplaces. Don’t overlook making your own cushion covers from vintage fabric remnants, a simple weekend project requiring basic sewing skills or fabric glue for no-sew options.
Plants were statement pieces in ’80s interiors, particularly large specimens in brass or ceramic planters. Fiddle leaf figs, rubber plants, and spider plants capture the era perfectly. Display them in oversized floor planters or group smaller potted plants on plant stands. Macramé hangers, easily found at craft fairs or made using online tutorials, add authentic period detail.
Collectibles complete the look. Scour charity shops for coloured glass vases, chrome accessories, abstract sculptures, and neon-accented picture frames. User feedback consistently highlights car boot sales as goldmines for authentic ’80s decorative items at bargain prices. Display collections on floating shelves or glass-fronted cabinets to create focal points without permanent wall alterations.
Remember, layering these accessories gradually prevents overwhelming your space whilst letting you test what works before committing further.
Texture and Material Touches
The distinct materials of the 1980s offer some of the easiest and most impactful small updates you can tackle as a DIY project. These textural elements instantly communicate the decade’s aesthetic without requiring major construction work.
Start with chrome fixtures in bathrooms and kitchens. Swapping out dated cabinet pulls, faucet handles, or towel bars for shiny chrome alternatives takes minimal time and usually requires just a screwdriver or adjustable wrench. Most hardware stores sell affordable chrome replacements that install using existing mounting holes, making this a truly reversible update for renters.
Glass blocks provide architectural interest without permanent walls. Consider a small glass block panel as a privacy screen in bathrooms or as a decorative room divider. Prefabricated glass block kits come with detailed instructions and typically need only basic construction adhesive and spacers for installation. Always wear safety goggles and work gloves when handling glass blocks to prevent injury.
Lacquered surfaces bring that signature 80s shine to furniture pieces. You can achieve this look by refinishing existing tables, cabinets, or shelving units with high-gloss lacquer paint. Proper ventilation is essential when working with lacquer products. A quality paint sprayer creates the smoothest finish, though many tool hire shops offer these by the day for cost-effective rentals.
Brass accents work beautifully alongside chrome for that authentic mixed-metal 80s vibe. Replace light switch plates, door handles, or picture frames with brass options. Remember that unlacquered brass will develop patina over time, which adds character but requires periodic polishing if you prefer the bright finish.
Tools You’ll Need for These Updates
Most 80s interior updates require only basic tools you likely already own. For painting geometric wall designs or applying removable wallpaper, gather a tape measure, spirit level, painter’s tape, paint rollers, and brushes. A stepladder ensures safe access to higher areas.
If you’re installing picture rails, floating shelves, or swapping light fixtures, you’ll need a cordless drill, screwdriver set, stud finder, and appropriate fixings for your wall type. Always check your wall material before drilling, especially in rental properties.
For larger projects like refinishing furniture or creating custom mirror frames, consider tool rental options rather than purchasing expensive equipment you’ll rarely use. Sanders, jigsaws, and tile cutters are perfect candidates for hiring.
Safety equipment is non-negotiable: dust masks, safety glasses, and work gloves protect you during any project. Keep a first aid kit nearby and ensure proper ventilation when using paints or adhesives.
Community members consistently recommend investing in quality measuring tools and levels while hiring specialty equipment. This balanced approach keeps costs manageable while ensuring professional results for your 80s-inspired transformation.
Bringing 80s interior design into your home doesn’t require a complete renovation or professional contractor. Start small with just one project that excites you, whether that’s adding geometric wall art, swapping out light fixtures with rental tools, or introducing bold accent colors through textiles. The beauty of these updates is their flexibility – you can test the look without permanent commitment, making them ideal for renters and homeowners alike.
Remember, even minor changes like repositioning furniture to create conversation pits or adding a few neon accessories can transform your space’s entire vibe. The key is choosing elements that genuinely resonate with your personal style rather than recreating an exact 80s replica.
We’d love to see your retro-inspired transformations! Share photos of your 80s interior updates in our community gallery and let us know which projects worked best for you. Your experiences and reviews help fellow DIYers tackle their own vintage makeovers with confidence. What will your first 80s-style project be?
Related Posts

Post a Comment