**Understand that R-value measures insulation’s resistance to heat flow—the higher the number, the better the thermal performance.** Every R-1 increase in your home’s insulation can reduce heating and cooling costs by 3-5%, while strategically upgrading from R-19 to R-38 in your attic typically delivers a 50-90% return on investment when you increase property value before selling.
**Focus your insulation budget on attics first, where 25-30% of heat loss occurs.** Charts show R-38 to R-49 as the optimal range for Australian climates, balancing material costs against energy savings—a $1,500 attic insulation project typically adds $2,000-3,000 to resale value while cutting annual energy bills by $200-400.
**Match R-values to your climate zone rather than blindly maximizing insulation thickness.** Zone 1 (tropical) properties need R-1.5 to R-3.5 for walls, while Zone 7 (alpine) requires R-4 to R-6, and installing beyond recommended levels delivers diminishing returns that rarely justify the additional expense.
**Use R-value efficiency charts to identify gaps where small investments yield outsized returns.** Upgrading an uninsulated wall cavity from R-0 to R-2.5 provides dramatically better cost-per-degree improvement than increasing an already-insulated ceiling from R-4 to R-6, making strategic upgrades more valuable than blanket improvements across your entire property.
What R-Value Actually Means for Your Home
Breaking Down the Numbers
Understanding R-values doesn’t require an engineering degree—it’s simply a measurement of how well insulation resists heat flow. The higher the number, the better the insulation performs. Let’s break down the most common R-values you’ll encounter when planning your home insulation project.
**R-13 to R-15** is the baseline for wall insulation in most climates. If you’re insulating between 2×4 wall studs, this is your standard range. It’s adequate for moderate climates but may leave you paying higher heating and cooling bills in extreme temperatures.
**R-19 to R-21** fits nicely into 2×6 walls and offers noticeably better performance. Many homeowners upgrading their insulation target this range for exterior walls, as it provides a solid balance between cost and energy savings.
**R-30 to R-38** is where attic insulation typically starts. Since heat rises, your attic needs more protection than your walls. This range works well for most regions and represents a sweet spot for return on investment.
**R-49 to R-60** represents premium attic insulation, recommended for colder climates or homeowners seeking maximum efficiency. While the upfront cost is higher, the long-term energy savings—and increased property value—often justify the investment.
Floor insulation over unheated spaces typically requires **R-25 to R-30**, preventing heat loss through your home’s foundation. Each application area has optimal R-value targets based on your climate zone and existing structure.
Climate Zones and Recommended R-Values
Your home’s location plays a crucial role in determining the right R-value for maximum efficiency and property value enhancement. The U.S. Department of Energy divides the country into climate zones, each requiring different insulation levels to achieve optimal performance and energy savings.
**Climate Zone Reference Chart:**
– **Zone 1 (Southern Florida, Hawaii):** Attic R-30 to R-49, Walls R-13 to R-15
– **Zone 2 (Southern states, coastal areas):** Attic R-30 to R-60, Walls R-13 to R-15
– **Zone 3 (Southern to mid-Atlantic states):** Attic R-30 to R-60, Walls R-13 to R-21
– **Zone 4 (Mid-Atlantic, lower Midwest):** Attic R-38 to R-60, Walls R-13 to R-21
– **Zone 5 (Northern states, mountain regions):** Attic R-49 to R-60, Walls R-13 to R-21
– **Zones 6-8 (Northern border states, Alaska):** Attic R-49 to R-60, Walls R-21 to R-25
Understanding your climate zone helps you avoid over-insulating (wasting money) or under-insulating (missing energy savings). For example, a homeowner in Minneapolis needs significantly higher R-values than someone in Miami to achieve comparable comfort and efficiency.
When planning your insulation upgrade, check your local building codes—they often mandate minimum R-values based on these zones. Meeting or exceeding these standards not only improves comfort but also increases your home’s marketability and appraisal value, making it a smart investment for DIYers and property investors alike.

The R-Value Efficiency Chart: Your Roadmap to Better Insulation
Where Each R-Value Works Best
Different areas of your home lose heat at varying rates, which is why a one-size-fits-all approach to insulation simply doesn’t work. Understanding where to invest in higher R-values helps you maximize energy savings and property value without overspending on unnecessary insulation.
**Attics and Roofs: R-38 to R-60**
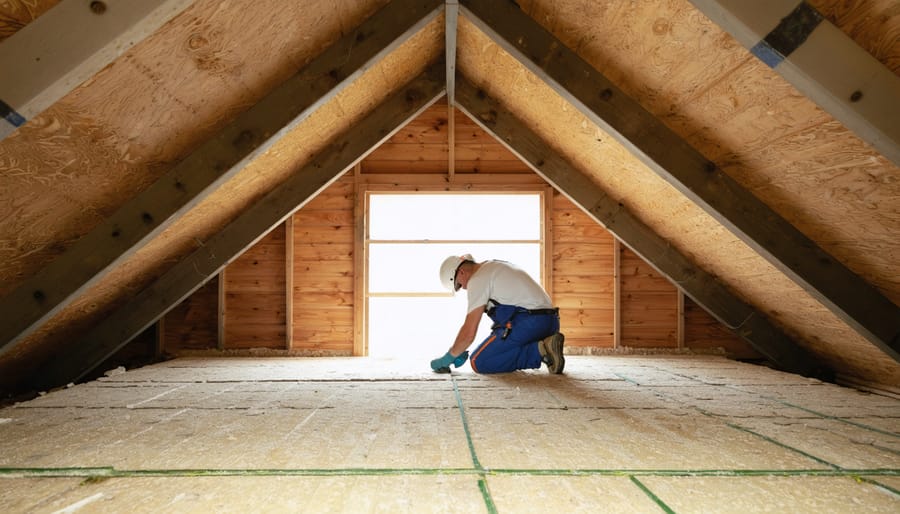
Your attic requires the highest R-value because heat naturally rises, making this the primary escape route for warmth in winter. In most climates, aim for R-38 minimum, though colder regions benefit from R-49 to R-60. The return on investment here is substantial—properly insulated attics can reduce heating costs by up to 30%. The spacious access also makes attic insulation one of the easiest DIY projects for homeowners.
**Exterior Walls: R-13 to R-23**
Wall insulation provides the second-best return on your investment. New construction typically accommodates R-21 to R-23, while retrofitting existing walls usually achieves R-13 to R-15. The thinner profile requirements mean you’re working within stud cavity limitations, but even moderate improvements create noticeable comfort differences and energy savings.
**Floors Above Unheated Spaces: R-25 to R-30**
Floors over garages, crawl spaces, or basements need solid insulation to prevent cold floors and heat loss. R-25 works well in moderate climates, while R-30 suits colder regions. This often-overlooked area can account for 10-15% of heat loss in homes.
**Basements and Crawl Spaces: R-10 to R-15**
Below-grade spaces require lower R-values since ground temperature remains relatively stable year-round. Focus on R-10 for interior basement walls or R-15 for exterior applications. This prevents moisture issues while maintaining thermal efficiency.
Match these recommendations to your climate zone using Department of Energy guidelines for optimal results and maximum property value enhancement.
Cost vs. Performance Sweet Spots
Finding the right balance between upfront costs and long-term savings is crucial when planning insulation upgrades. Based on real-world data and community feedback from homeowners who’ve tackled these projects, certain R-value improvements consistently deliver better returns than others.
**The Clear Winners**
Attic insulation upgrades typically offer the highest return on investment. Moving from R-19 to R-38 in your attic costs roughly $1.50-$2.50 per square foot but can reduce heating and cooling costs by 20-30%. Most homeowners report recouping this investment within 3-5 years through energy savings alone, while seeing immediate comfort improvements.
Wall insulation presents a different picture. Upgrading from R-11 to R-19 in existing walls requires more invasive work, costing $3-$5 per square foot. However, the energy savings are less dramatic—typically 10-15% reduction in utility bills. The payback period extends to 7-10 years, though regional climates significantly affect these numbers.
**Regional Considerations Matter**
Your climate zone dramatically impacts which upgrades make financial sense. Northern homeowners see faster returns on higher R-values (R-49 to R-60 in attics), while southern climates often find diminishing returns beyond R-38. Community reviews consistently show that matching your R-value investment to your specific heating and cooling degree days is essential.
**The Practical Threshold**
Most DIYers and professionals agree: focus on bringing all areas up to minimum recommended levels before pushing any single area to maximum R-values. An uninsulated basement upgraded to R-13 delivers better overall returns than boosting an already R-38 attic to R-60.
How R-Value Improvements Directly Increase Property Value

Energy Efficiency Ratings and Buyer Appeal
When you’re planning to sell your home or simply want to understand its market position, energy efficiency ratings have become a crucial factor that buyers scrutinize. Higher R-values directly translate to better scores on energy performance certificates, which can significantly impact buyer appeal and final sale prices.
In today’s competitive property market, homes with improved insulation—particularly those achieving R-values of R-30 or higher in attics and R-13 to R-21 in walls—consistently receive higher energy efficiency ratings. These ratings appear on certificates that potential buyers review alongside other property details, making them as important as square footage or location in many markets.
Real estate data shows that properties with superior energy ratings sell faster and command premium prices, often 3-7% above comparable homes with standard insulation. Buyers appreciate the transparent information these certificates provide, as they indicate lower ongoing heating and cooling costs—a concrete, quantifiable benefit that justifies higher asking prices.
For DIY enthusiasts considering insulation upgrades, understanding this connection is essential. A thermal imaging camera can help you identify current weak points in your insulation, allowing you to target improvements where they’ll have the greatest impact on your energy rating. Many homeowners report that upgrading from R-19 to R-38 attic insulation improved their energy certificate by an entire grade level.
The investment in proper insulation materials and installation pays dividends not just in monthly utility savings, but in demonstrable market value when it’s time to sell.
Real ROI Numbers from Insulation Upgrades
Real homeowners report seeing significant returns when upgrading their insulation. According to recent industry data, attic insulation upgrades from R-19 to R-38 typically pay for themselves within 3-7 years through reduced energy bills. In colder climates, homeowners save an average of $400-600 annually, while those in moderate zones see returns around $200-350 per year.
The resale impact is equally impressive. A comprehensive insulation upgrade can increase home value by 2-6%, with appraisers taking note of energy efficiency improvements. For a $300,000 home, that translates to $6,000-18,000 in added value. Many real estate agents report that properly insulated homes sell 5-10% faster than comparable properties without upgrades.
Wall cavity insulation shows particularly strong returns, with payback periods of 4-8 years. Basement and crawl space insulation typically recovers costs within 5-10 years while preventing moisture issues that could cost thousands to remediate later.
One community member shared their experience: “Upgrading from R-13 to R-30 in our 1970s home cost $2,800 but cut our heating bill by 35%. That’s $480 back in our pocket every year.”
Beyond energy savings, better insulation reduces property ownership costs by minimizing HVAC wear and tear. Systems running less frequently last 3-5 years longer, saving thousands in replacement costs. These tangible benefits make insulation one of the smartest home improvement investments you can make.
Tools and Equipment You’ll Need for Insulation Projects
Essential Safety Gear
Working with insulation materials requires proper protection to ensure your safety and health. Before starting any insulation project, gather these essential items to create a safe working environment.
**Respiratory Protection**: Always wear a quality dust mask or respirator when handling fiberglass, mineral wool, or spray foam insulation. Fine particles can irritate your lungs and cause breathing difficulties. Look for masks rated N95 or higher for adequate filtration.
**Eye and Skin Protection**: Safety goggles shield your eyes from airborne fibers and irritants. Wear long sleeves, pants, and work gloves—disposable nitrile gloves work well under heavier work gloves for added protection. Fiberglass particles can cause significant skin irritation and itching.
**Ventilation Equipment**: Ensure proper airflow in your workspace using fans or opening windows. This is especially critical when working with spray foam or other chemical-based insulation products that release fumes during installation.
**Protective Clothing**: Consider wearing disposable coveralls that you can discard after the job. This prevents insulation fibers from contaminating your regular clothes and spreading throughout your home.
Many DIY enthusiasts in our community emphasize that investing in proper safety gear upfront prevents uncomfortable situations and potential health issues down the line.

Installation Tools Worth Renting vs. Buying
When installing insulation to improve your home’s R-value efficiency, you’ll need specialized equipment that may not justify a purchase for a one-time project. For most homeowners tackling insulation upgrades, tool rental options offer a cost-effective solution without the burden of long-term storage or maintenance.
Essential tools like insulation blowers, which distribute loose-fill insulation evenly in attics and walls, typically cost $2,000-$5,000 to purchase but only $75-$150 per day to rent. Similarly, thermal imaging cameras—invaluable for identifying heat loss and verifying R-value improvements—rent for around $50-$100 daily versus $500+ to buy.
Renting specialized equipment also ensures you’re using well-maintained, current-model tools without worrying about repairs or updates. For DIY enthusiasts completing a single insulation project, this approach can save hundreds of dollars while still delivering professional-quality results.
Consider renting: insulation blowers, staplers for batt installation, safety gear including respirators, and measuring tools. Reserve purchases for basic items like utility knives, tape measures, and safety glasses that you’ll use repeatedly for various home projects.
DIY vs. Professional Installation: Making the Right Choice
Understanding when to DIY and when to call in professionals can significantly impact both your project’s success and your wallet. Let’s break down the key factors to help you make an informed decision.
**When DIY Makes Sense**
Simple attic insulation projects with accessible joists are ideal for DIY enthusiasts. If you’re adding blown-in insulation to an unfinished attic or installing batt insulation between exposed joists, these tasks typically fall within the average homeowner’s skill set. The R-value charts we’ve discussed earlier will guide you in selecting the right materials, and rental equipment makes professional-grade tools accessible without the professional price tag.
Projects in uncomplicated spaces—like straightforward attic upgrades or insulating an unfinished basement ceiling—generally require minimal specialized knowledge. You’ll need proper safety equipment (respirators, protective clothing, and goggles), but the techniques are manageable with careful preparation and attention to manufacturer guidelines.
**When to Call the Professionals**
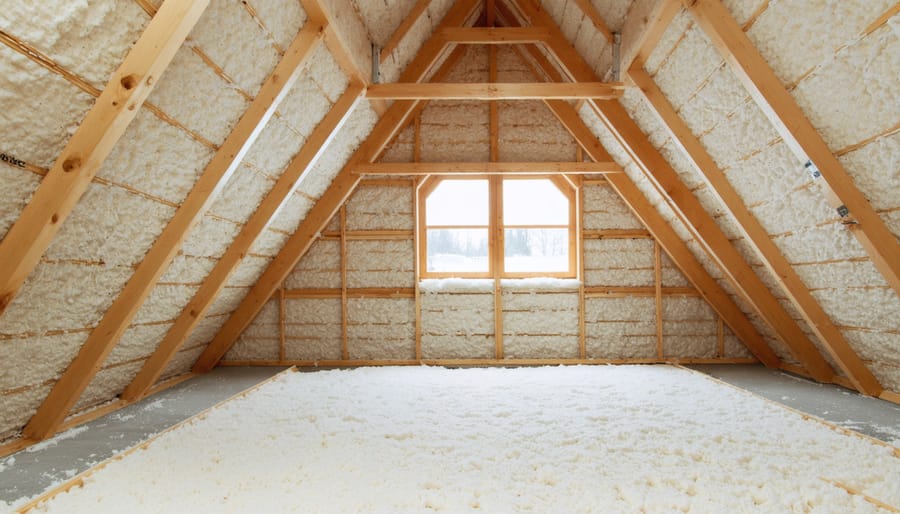
Closed-wall cavity insulation demands specialized equipment like thermal imaging cameras and injection systems that require training to operate effectively. Similarly, spray foam insulation involves chemical mixing and application expertise that’s difficult to replicate without experience—improper application can create moisture problems or fail to achieve target R-values.
Projects involving electrical work, complex ventilation systems, or structural modifications should always involve licensed professionals. The same applies to homes with existing moisture issues, as improper insulation can exacerbate problems and reduce your property’s value rather than enhance it.
**The Hybrid Approach**
Consider splitting larger projects: handle straightforward sections yourself while hiring professionals for technical challenges. This approach maximizes cost savings while ensuring quality results where it matters most. Many homeowners successfully insulate accessible areas DIY-style, then bring in experts for cathedral ceilings or spray foam applications.
Common Mistakes That Reduce R-Value Efficiency
Even the best insulation with impressive R-values won’t perform as expected if installation mistakes compromise its effectiveness. Understanding these common pitfalls can save you money and ensure your investment delivers the promised thermal performance.
**Compression: The Silent Efficiency Killer**
Compressing insulation is one of the most frequent errors that dramatically reduces R-value. When you squeeze fiberglass batts or rolls to fit into tight spaces, you’re eliminating the air pockets that provide insulating power. For example, compressing R-19 insulation into a space designed for R-13 might only give you R-14 effectiveness. Always match insulation thickness to your wall or ceiling cavity depth, and never force oversized materials into smaller spaces.
**Gaps and Voids: Where Heat Escapes**
Small gaps around electrical boxes, pipes, or between insulation pieces create thermal bridges that allow heat to bypass your insulation entirely. Even a 5% gap in coverage can reduce overall insulation effectiveness by 25% or more. Take time to cut insulation precisely and seal all edges. Use expandable foam or caulk to fill spaces around obstacles—these details make a significant difference in real-world performance.
**Moisture: Insulation’s Worst Enemy**
Water infiltration destroys insulation performance and can reduce R-values by 50% or more. Moisture causes fiberglass to mat down, cellulose to compact, and creates conditions for mold growth. Always install proper vapor barriers on the warm side of insulation and ensure adequate ventilation in attics and crawl spaces. Check for roof leaks or plumbing issues before insulating—fixing these problems first prevents costly do-overs.
**Improper Facing Installation**
Kraft-faced or foil-faced insulation must be installed with the facing toward the heated space. Backward installation eliminates the vapor barrier’s effectiveness and can trap moisture within wall cavities. Community feedback from DIYers consistently highlights this as an easy mistake to make when working in cramped conditions, so double-check orientation before securing materials in place.
Maximizing Your Investment: Beyond Just R-Value
While R-value charts provide essential guidance for insulation performance, achieving true energy efficiency and property value enhancement requires looking at the bigger picture. Think of your home as a complete system where multiple components work together—insulation alone won’t deliver maximum returns if other critical elements are overlooked.
**Air Sealing: The Hidden Performance Factor**
Even the highest R-value insulation loses effectiveness when air leaks around windows, doors, and wall penetrations. Before adding insulation, seal gaps and cracks using caulk guns and spray foam equipment. Many homeowners report that air sealing alone can reduce heating costs by 15-20%, and combining it with proper insulation amplifies these savings significantly.
**Moisture Management Matters**
Vapor barriers protect your insulation investment from moisture damage that degrades R-value over time. Install vapor barriers on the warm side of insulation—typically the interior wall in cold climates. Without proper moisture control, even premium insulation can lose up to 50% of its effectiveness within a few years.
**Ventilation Balances the Equation**
Proper ventilation prevents moisture buildup in attics and crawl spaces while maintaining insulation performance. Ridge vents, soffit vents, and adequate airflow ensure your insulation works as designed. This balance is crucial—too much ventilation wastes energy, while too little invites mold and structural damage.
**The Investment Payoff**
This holistic approach doesn’t just lower energy bills; it directly impacts appraisal values. Home inspectors and buyers recognize comprehensive insulation strategies, often translating to 3-5% higher property valuations. Reviews from DIY enthusiasts consistently highlight that combining these elements delivers faster payback periods than insulation upgrades alone, typically recovering costs within 3-5 years through energy savings and increased home value.
Understanding the relationship between R-value efficiency and property value gives you a powerful tool for making informed home improvement decisions. As we’ve explored throughout this guide, proper insulation isn’t just about comfort—it’s a strategic investment that enhances your property’s marketability, reduces energy costs, and delivers measurable returns.
The key takeaway is simple: higher R-values in the right locations create compounding benefits. You’ll see lower utility bills, improved comfort year-round, and increased appeal to potential buyers who increasingly prioritize energy efficiency. The efficiency charts we’ve discussed serve as your roadmap, helping you identify where your property stands and what improvements will deliver the best return on investment.
**Your next steps are straightforward:**
First, conduct a thorough assessment of your property’s current insulation levels. Check your attic, walls, and crawl spaces against the recommended R-values for your climate zone. Many DIY enthusiasts find this initial inspection reveals surprising gaps that are relatively simple to address.
Second, prioritize your improvements based on the biggest efficiency gains. Attics typically offer the highest return, followed by walls and basements. Use the charts as your reference point for target R-values.
Finally, gather the right tools and materials for your project. Whether you’re tackling a weekend DIY project or planning a larger renovation, having proper equipment ensures professional-quality results. Remember, the community feedback from fellow homeowners who’ve completed similar projects can provide invaluable insights and help you avoid common pitfalls.
Start with one area, measure your results, and build momentum toward a more efficient, valuable property.
Related Posts

Post a Comment