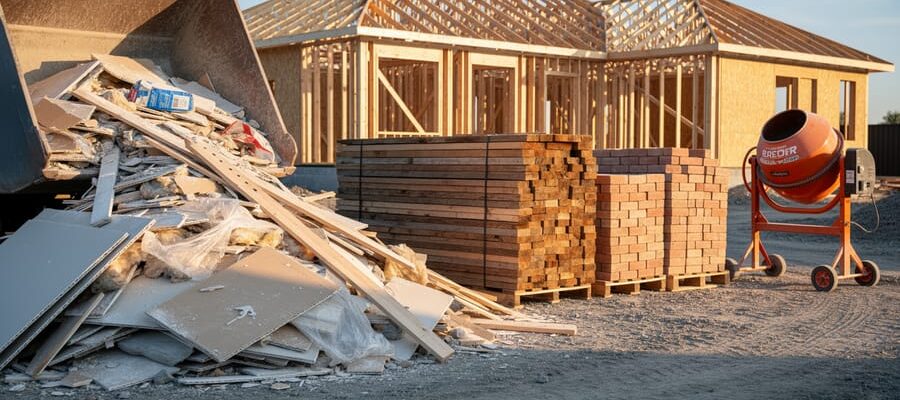

Green building isn’t just an environmental buzzword—it’s a practical construction approach that reduces waste, cuts energy costs, and creates healthier spaces, all while using equipment and techniques already available at your local tool hire center. Whether you’re a contractor tackling a commercial retrofit or a homeowner planning a sustainable renovation, implementing green building practices starts with understanding three core principles: material efficiency, energy performance, and indoor environmental quality.
Material efficiency means selecting sustainable resources and minimizing construction waste. Choose locally sourced lumber, recycled steel framing, and low-VOC adhesives. Rent concrete mixers and cutting equipment sized precisely for your project to avoid overordering materials. Energy performance focuses on insulation, air sealing, and efficient HVAC systems—tasks requiring thermal imaging cameras, insulation blowers, and air compressors that most contractors hire rather than purchase.
Indoor environmental quality addresses ventilation, natural lighting, and non-toxic finishes. Proper ventilation equipment, dehumidifiers, and air quality monitors ensure your green building delivers on its health promises.
The beauty of green building lies in its scalability. A single sustainable choice—installing energy-efficient windows, adding solar panels with rented scaffolding and lifts, or improving insulation with hired equipment—creates measurable impact. Community feedback from contractors and DIYers consistently shows that green projects often cost less than anticipated when you leverage tool hire services instead of buying specialized equipment. This guide translates green building theory into actionable steps, connecting sustainable construction principles with the practical equipment and techniques that make them achievable for any project scale.
What Green Building Initiatives Actually Mean for Your Projects

The Three Pillars: Energy, Materials, and Habitat
Green building for biodiversity doesn’t have to be complicated. Think of it as three practical categories that work together to support local wildlife while reducing your environmental footprint.
First, there’s Energy. This means choosing systems that minimize carbon emissions and reduce light pollution that disrupts wildlife. Solar panels, efficient LED lighting with motion sensors, and proper window placement all fit here. Renewable energy integration doesn’t just cut power bills—it reduces the environmental impact that affects habitat quality in your area.
Second, Materials matter enormously. Selecting sustainable building materials means choosing products with lower embodied energy, recycled content, or rapidly renewable sources. Bamboo flooring, reclaimed timber, and low-VOC paints create healthier spaces for both humans and visiting wildlife. Many DIYers are surprised to learn that material choices affect everything from local water quality to bird nesting success.
Third, Habitat integration is where green building directly supports biodiversity. This includes installing bat boxes during roofing work, creating green roofs or walls, preserving native vegetation during construction, and designing water features that support local species. The good news? Most habitat features can be incorporated during standard construction phases with minimal additional cost.
These three pillars work together. Energy-efficient buildings need less ongoing maintenance, sustainable materials reduce environmental stress, and habitat features bring nature back into urban spaces.
Why Urban Wildlife Needs Your Building Projects
Cities are facing a hidden crisis that affects us all. As urban areas expand, we’re losing the green corridors and natural spaces that wildlife depends on. Studies show that many bird, insect, and small mammal populations have declined by over 40% in developed areas over the past few decades. This biodiversity loss isn’t just bad for wildlife—it impacts air quality, pollination of urban gardens, and the overall health of our neighborhoods.
Here’s where your building project comes in. Construction sites and new buildings can actually become stepping stones for wildlife moving through urban environments. Think of them as links in a chain, connecting parks, gardens, and green spaces that might otherwise be isolated. When you incorporate features like green roofs, native plantings, or even simple nesting boxes during your build, you’re creating habitat corridors that allow species to thrive despite urbanization.
The good news? Many of these biodiversity-friendly features are easier to implement than you might think, especially during the construction phase. From choosing the right materials to adjusting your site layout, small decisions during your project can make a significant difference for urban wildlife while still meeting your building goals.
Essential Tools and Equipment for Biodiversity-Friendly Construction
Site Preparation Equipment That Protects Native Species
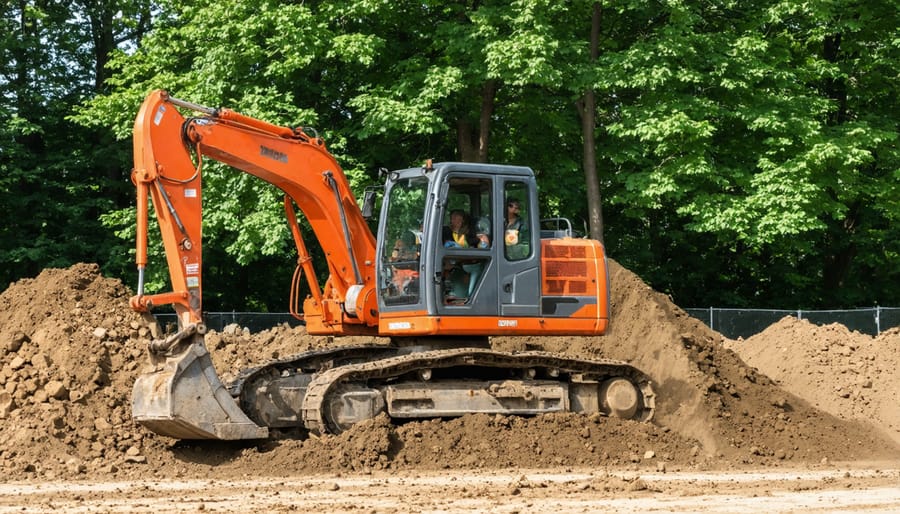
Before breaking ground on any green building project, protecting the existing ecosystem starts with the right site preparation equipment. Modern excavators equipped with GPS precision controls allow operators to work within centimeters of protected zones, avoiding unnecessary soil disturbance that can harm underground habitats and root systems. These systems use digital mapping technology to create virtual boundaries around trees, native plants, and sensitive areas—think of it as an invisible fence that helps you dig exactly where you need to, and nowhere you shouldn’t.
Root pruning equipment deserves special attention when working near established vegetation. Rather than tearing through roots with standard digging tools, specialized root pruners make clean cuts that trees can heal from more effectively. This equipment typically includes vibrating blades or hydraulic cutting bars that slice through roots rather than ripping them. Community feedback from contractors shows that taking this extra step significantly improves tree survival rates on construction sites, with one local landscaper reporting 85% tree health retention compared to 40% with conventional methods.
Soil testing tools round out your site preparation toolkit. Portable pH meters, compaction testers, and soil augers help you understand what you’re working with before you start moving earth. These handheld devices reveal soil composition, drainage patterns, and contamination levels—information that guides where you can safely excavate and where you need to implement protective measures. Testing first means you’ll avoid accidentally spreading invasive species or disturbing beneficial soil organisms that support native plants. Many tool hire centers now offer complete site assessment kits that include everything needed for a thorough pre-construction evaluation.
Green Roof and Living Wall Installation Tools
Installing green roofs and living walls requires specialized equipment beyond standard gardening tools. Like solar panel installation, these projects demand proper planning and the right gear to ensure long-term success.
Start with waterproofing essentials. You’ll need a roof membrane applicator or hot-air welder to seal protective layers, preventing water damage to the structure below. Root barrier sheets are crucial too, stopping plant roots from penetrating waterproofing membranes. A basic moisture meter helps verify your waterproofing is working correctly after installation.
Drainage and irrigation systems form the backbone of any living wall or green roof. Consider hiring a trenching spade for creating drainage channels, along with specialized drip irrigation kits designed for vertical or sloped applications. Automatic timers and moisture sensors take the guesswork out of watering schedules, particularly important during establishment phases.
For the growing medium installation, rent a wheelbarrow or small conveyor system for rooftop projects, as hauling bags of lightweight substrate up ladders is exhausting and unsafe. A soil spreader ensures even distribution across large areas.
Planting equipment includes module trays for pre-grown systems, landscape fabric cutters, and sturdy work platforms or scaffolding for living walls. Safety gear is non-negotiable: harnesses, non-slip boots, and edge protection systems for roof work.
Community feedback consistently highlights the importance of proper irrigation setup. One user noted that investing time in a quality drip system saved countless hours of manual watering and prevented plant loss during hot spells.
Sustainable Material Handling and Waste Reduction Tools
Managing construction waste effectively starts with having the right equipment on hand. Modern waste sorting systems and material handling tools make it easier than ever to reduce your project’s environmental footprint while keeping job sites organized and efficient.
Mobile waste sorting stations are game-changers for green building projects. These multi-bin systems allow you to separate recyclables like metal, wood, cardboard, and plastics on-site, preventing valuable materials from ending up in landfills. Many tool hire centers now offer these sorting stations with clear labeling, making it simple for your entire crew to participate in waste reduction efforts.
For processing natural materials, consider hiring wood chippers and garden shredders. These machines convert site vegetation and timber offcuts into mulch that can be reused for landscaping or composted, keeping organic matter out of waste streams. Community reviews consistently highlight how these tools save disposal costs while supporting circular economy practices.
Compactors reduce waste volume by up to 80 percent, minimizing the number of skip bins needed and reducing transportation emissions. When paired with proper sorting practices and green insulation options, these tools create a comprehensive approach to sustainable construction.
Remember to plan your waste management strategy before starting work. Conduct a site audit to identify what materials you’ll generate, then hire appropriate sorting and processing equipment accordingly. Many DIYers report that proper planning actually speeds up projects by reducing clutter and simplifying cleanup. Always wear appropriate safety gear when operating processing equipment, including gloves, safety glasses, and hearing protection for chippers and compactors.
Step-by-Step: Integrating Biodiversity Into Your Next Build or Renovation
Pre-Construction: Survey and Planning
Before breaking ground, take time to understand what’s already thriving on your site. Start by walking the property during different times of day to observe wildlife activity, existing vegetation, and water flow patterns. Document everything with photos and notes, paying special attention to native plants, mature trees, and areas where animals gather.
Consider hiring or borrowing survey equipment like GPS devices and measuring tools to map significant natural features accurately. Many DIYers find that basic ecological surveys can be done independently, though consulting with a local naturalist or environmental group adds valuable insight. Community members recommend timing your survey across seasons if possible, as spring might reveal nesting birds while autumn shows migration patterns.
Identify preservation zones by marking areas with high biodiversity value, such as wildflower meadows, hedgerows, or wetland sections. These become your no-build or minimal-impact zones. Plan construction access routes that avoid disturbing these sensitive areas.
Create a simple site map showing where existing features are located and where construction activities will occur. This becomes your reference throughout the project, helping contractors understand which areas are off-limits. Remember, preserving even small pockets of habitat, like leaving a fallen log or maintaining a cluster of native shrubs, contributes significantly to supporting local wildlife during and after construction.
During Construction: Protection and Minimal Disruption
Once construction begins, protecting the site’s existing biodiversity requires careful planning and the right equipment. Here are practical techniques that contractors and DIY builders can implement immediately.
Start by establishing physical barriers around sensitive areas like trees, hedges, and water features. Use temporary fencing at least 1.5 meters high to prevent accidental damage from machinery or material storage. For root protection zones, calculate the area by measuring 12 times the tree’s trunk diameter and mark it clearly with high-visibility tape.
Noise pollution significantly impacts wildlife, particularly during breeding seasons. Schedule high-decibel activities like drilling, cutting, and excavation between 8am and 6pm on weekdays only. When hiring generators or compressors, opt for models with built-in sound dampening features. One community member shared that using acoustic barriers reduced complaints from nesting birds in adjacent gardens by over 70 percent during their extension project.
Light pollution disrupts nocturnal species and insect populations. If working after dark becomes necessary, use directional LED work lights pointed downward rather than floodlights. Motion-activated lighting minimizes unnecessary illumination hours.
Timing matters enormously. Research local wildlife breeding seasons before starting work. In most UK regions, avoid major earthworks and vegetation clearance between March and August when birds nest. Amphibians breed from February to June, so delay any pond or wetland work until autumn.
Keep construction materials contained using covered skips and sealed storage containers to prevent animals becoming trapped. Conduct daily site checks for any wildlife that may have entered overnight, and maintain clear exit routes along fence lines.
Post-Construction: Creating New Habitats
Once your building work is complete, the real opportunity begins—transforming your site into a thriving habitat for local wildlife. This phase focuses on creating purposeful homes and resources that support urban biodiversity for years to come.
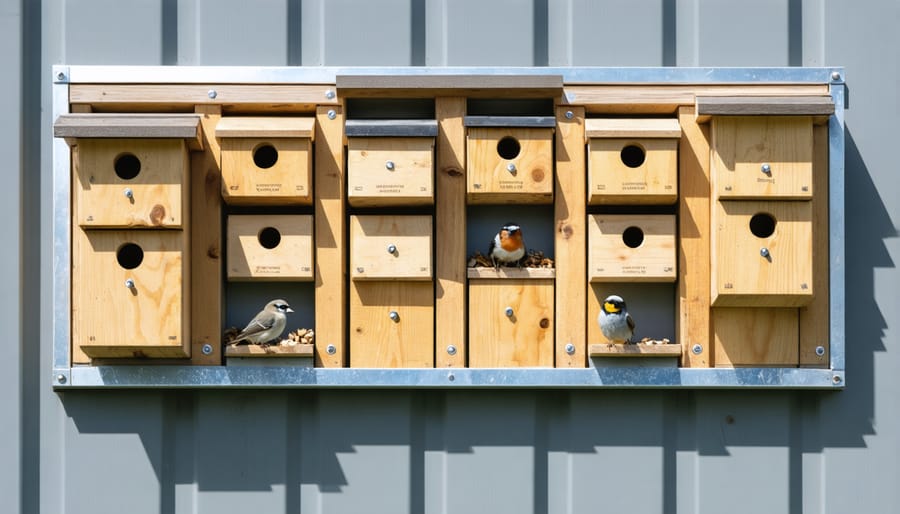
Start by installing bird boxes at various heights to accommodate different species. Position them facing northeast to avoid harsh afternoon sun and prevailing winds. You’ll need a cordless drill for mounting, available from most tool hire centers. Community feedback suggests installing boxes between 2-5 meters high, with multiple boxes spaced at least 10 meters apart to prevent territorial disputes.
Bat boxes require southern or western exposure for warmth. Mount them at least 4 meters high on buildings or mature trees using ladder equipment. One contractor shared that installing three boxes in different orientations increased occupancy rates significantly within two seasons.
Ground-level insect hotels provide crucial habitats for solitary bees and beneficial insects. Build simple structures using untreated timber, drilled logs, hollow bamboo canes, and corrugated cardboard. A basic miter saw and hand drill are sufficient for construction. Fill gaps with natural materials like pine cones and bark.
Native plantings form the foundation of any wildlife garden. Hire a mini digger or rotavator for larger areas to prepare soil efficiently. Select region-appropriate species that provide year-round food sources and shelter. Local gardeners recommend grouping plants in clusters rather than single specimens for maximum impact.
Finally, incorporate water features using small pond liners or shallow dishes. Even compact water sources support numerous species. Ensure gentle slopes or stones allow safe access and exit points for visiting wildlife.
Real-World Success Stories From the Tool Hire Community
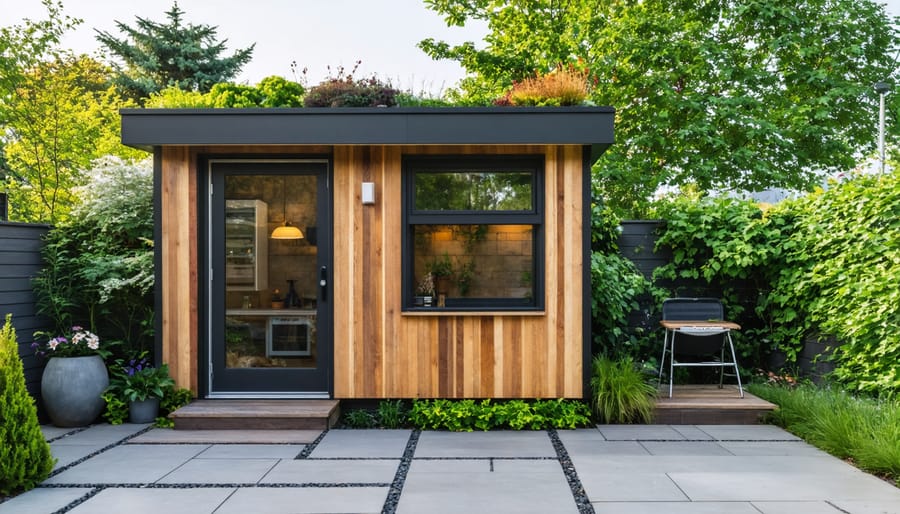
Urban Garden Office With Pollinator-Friendly Green Roof
When Brisbane homeowner Sarah Chen decided to build a garden office in her 20-square-meter backyard, she committed to making it a pollinator haven. What started as a practical workspace became an award-winning example of how small-scale construction can support urban biodiversity.
Sarah worked with local ecologist Marcus Webb to design a 40-square-meter green roof featuring exclusively native Queensland plants. The plant selection included Scaevola calendulacea, Myoporum parvifolium, and several native grass species chosen for their shallow root systems and drought tolerance. The build required specialized equipment including a concrete mixer for the lightweight growing medium and a mini excavator for foundation work, both hired locally to reduce the project’s carbon footprint.
Within twelve months, the results exceeded expectations. Monthly biodiversity surveys documented 23 native bee species, 15 butterfly varieties, and 8 bird species regularly visiting the roof. Native blue-banded bees, previously absent from the neighborhood, established a small colony in purpose-built bee hotels integrated into the office walls.
The project cost approximately 8,200 dollars above standard construction, but delivered measurable environmental returns. The green roof reduced internal temperatures by 4-6 degrees Celsius, eliminating cooling needs entirely and complementing other energy-efficient building practices Sarah implemented.
Community feedback has been overwhelmingly positive, with three neighboring properties now planning similar installations. Sarah’s detailed build diary, shared through local DIY forums, emphasizes proper waterproofing membrane installation and irrigation system setup as critical success factors. She recommends consulting biodiversity specialists early in the design phase to maximize ecological outcomes while maintaining structural integrity.
Commercial Renovation That Tripled Local Bird Species
When commercial electrician James Murphy took on the warehouse conversion project in Manchester’s industrial quarter, biodiversity wasn’t initially part of the brief. However, after attending a council workshop on green building practices, he saw an opportunity to transform the tired 1970s structure into something that would benefit local wildlife while meeting modern commercial standards.
The project began with a comprehensive audit of the building’s exterior surfaces. James hired scaffolding towers and boom lifts to access the full height of the structure, allowing his team to identify prime locations for nesting boxes, bat roosts, and green wall installations. The survey revealed that the building’s south-facing brick wall received excellent sunlight, making it ideal for vertical planting systems.
Using rented masonry drills and fixing equipment, the team installed modular green wall panels with integrated irrigation systems. These living walls featured native plant species specifically chosen to attract insects and provide year-round food sources for birds. The installation required careful planning around the building’s existing drainage, which James modified using hired pipe threading tools and inspection cameras.
The roof conversion proved most impactful. James’s team created a biodiverse roof garden using lightweight growing media, accessible via newly installed safety access equipment. They incorporated shallow water features using recycled materials and planted native wildflowers in clusters.
Within eighteen months, local ornithologists documented species count rising from six to eighteen different birds regularly using the site. The project demonstrated that commercial renovations can successfully integrate biodiversity features without excessive cost, particularly when strategic equipment hire keeps overheads manageable.
Safety Considerations When Working With Wildlife-Friendly Features
When incorporating wildlife-friendly features into your building project, safety must remain your top priority. Whether you’re installing a green roof, creating habitat walls, or working with natural materials, following proper protocols protects both you and the existing wildlife you’re trying to support.
Before starting any work, conduct a thorough site assessment to identify active wildlife habitats. Birds may be nesting in eaves, bats roosting in cavities, or beneficial insects colonizing wall spaces. In many regions, disturbing protected species carries legal consequences. Schedule work outside breeding seasons when possible, typically avoiding spring and early summer. If you discover active nests or colonies, consult with local wildlife authorities before proceeding.
When handling natural materials like logs, rocks, or reclaimed wood for habitat features, wear heavy-duty gloves to protect against splinters, sharp edges, and potential wildlife encounters. Store materials off the ground and inspect them carefully before use, as they may harbor spiders, snakes, or stinging insects. A community member shared their experience: “I always tap logs firmly and wait a few minutes before moving them. You’d be surprised what crawls out when given the chance to relocate peacefully.”
Green roof installations present unique height-related hazards. Use proper fall protection equipment, ensure scaffolding meets safety standards, and never work alone at height. The added weight of soil, plants, and water requires professional structural assessment before installation. Most green roofs add 10-50 kilograms per square meter, which existing structures may not support without reinforcement.
Personal protective equipment remains essential throughout any green building project. Safety glasses prevent debris from entering eyes when drilling bat boxes or bird houses. Dust masks are necessary when working with soil or disturbing areas with accumulated droppings, which can harbor harmful bacteria. Steel-toed boots provide protection when moving heavy materials or working on uneven terrain.
Finally, maintain clear communication with your team about wildlife encounters. Establish protocols for safely pausing work if animals appear, and keep emergency contacts for local wildlife rehabilitation services readily available.
Green building projects that support urban biodiversity aren’t reserved for large-scale developments or expert contractors. Whether you’re a weekend DIYer tackling your first green roof or a professional tradesperson implementing comprehensive habitat features, these initiatives are within reach for builders at every skill level. The key factor that makes these projects accessible is the availability of specialized equipment for hire, eliminating the need for costly equipment purchases that might otherwise be prohibitive.
From compact excavators for creating wildlife ponds to drilling equipment for installing bat boxes, rental options mean you can access the right tool for each specific task without long-term investment. Many of our community members have successfully completed biodiversity-friendly projects by strategically hiring equipment as needed, allowing them to focus their budget on quality materials and thoughtful design.
We want to hear from you. Have you incorporated green building elements into your recent projects? Perhaps you’ve installed a living wall, created pollinator-friendly landscaping, or used sustainable construction methods that minimize environmental impact. Share your experiences, photos, and outcomes with our community. Your real-world insights help others understand what works in practice, not just in theory.
Equally valuable are your honest reviews of the tools and equipment you’ve used. Did a particular aerator make your green roof installation easier? Was the concrete mixer you hired efficient for your permeable paving project? Your feedback guides others in making informed decisions and helps everyone build better, greener structures. Together, we’re creating a knowledge base that makes sustainable construction genuinely achievable for all.
Related Posts

Post a Comment