
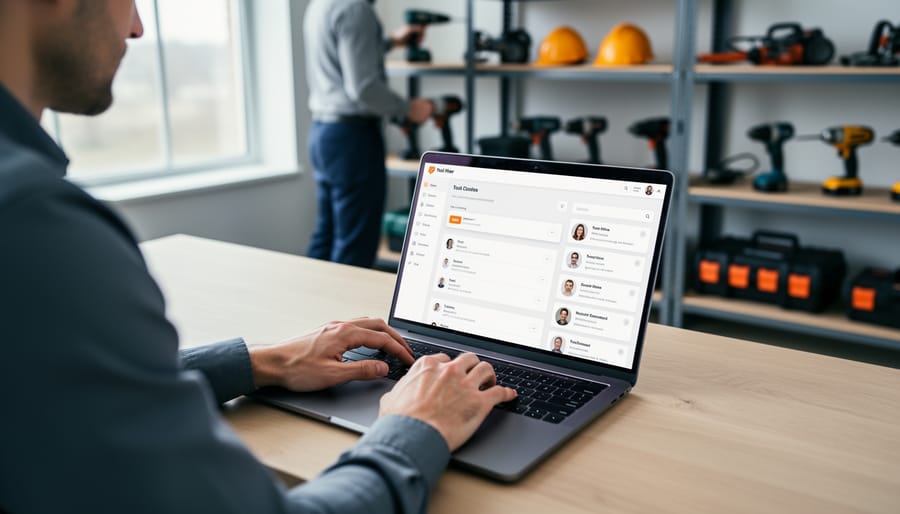
Navigate to the Admin Dashboard and locate the User Management section to begin creating new accounts for your Tool Hire platform. Access the “Add New User” button, where you’ll enter essential information including email address, username, and contact details—this establishes the foundation for each account while ensuring proper system access and communication channels.
Assign appropriate permission levels based on the user’s role, distinguishing between administrators who manage platform operations, staff members who process rentals and handle customer service, and standard users who browse and book equipment. Each permission tier controls what features and data that person can view or modify, protecting sensitive business information while enabling efficient workflow.
Complete the account setup by generating a secure temporary password or triggering an automated welcome email that allows users to set their own credentials. Verify all entered information before saving, as incorrect email addresses or permission settings can create access issues and security vulnerabilities down the line.
Document each new account creation in your user registry, noting the creation date, assigned permissions, and the administrator who established the account. This administrative record maintains accountability, simplifies future audits, and helps track platform growth as your Tool Hire community expands with contractors, equipment owners, and team members who contribute reviews and feedback.
Before You Start: Understanding User Account Types
Before creating new user accounts in your platform management system, it’s essential to understand the different account types available and their specific purposes. Each account type comes with distinct permissions and capabilities designed to support various roles within your tool hire operation.
Administrator accounts provide full system access and control. These users can modify platform settings, manage all other accounts, configure pricing structures, and access sensitive business data. Create administrator accounts sparingly, reserving them for business owners, managers, or IT personnel who need comprehensive oversight. Think of administrators as having the master keys to your entire operation.
Standard user accounts are designed for front-line staff who handle daily operations. These team members can process bookings, manage customer inquiries, update inventory status, and generate basic reports. They cannot, however, alter system-wide settings or access financial records beyond their immediate tasks. Most of your staff will fall into this category.
Vendor accounts are specifically for suppliers and partner businesses who provide tools or services to your inventory. These accounts allow vendors to update product information, track their equipment usage, and receive notifications about maintenance needs. This account type streamlines collaboration with external partners while maintaining security boundaries.
Customer accounts enable your clients to browse inventory, make bookings, leave reviews, and track their rental history. While customers typically self-register, staff may occasionally need to create accounts on their behalf for phone orders or walk-in customers without internet access.
Understanding these distinctions ensures you assign appropriate access levels, maintain platform security, and create an efficient workflow for everyone involved in your tool hire business.

Accessing the User Account Creation Area
Required Permissions to Create Accounts
Before you can create new user accounts in the Tool Hire system, you’ll need to ensure you have the appropriate administrative permissions. Only users with Administrator or User Manager roles can add new accounts to the platform.
To verify your current access level, log into your account and navigate to the main dashboard. Look for the “User Management” or “Account Administration” option in your left-hand menu. If you can’t see these options, you likely don’t have the required permissions and will need to contact your organization’s primary administrator.
Administrator roles typically have full system access, including the ability to create, modify, and delete user accounts across all permission levels. User Manager roles may have slightly restricted capabilities, often limited to creating standard user accounts rather than other administrative users.
If you’re unsure about your permission level, check your profile settings where your assigned role should be clearly displayed. For organizations new to the platform, the initial account holder automatically receives full Administrator privileges. They can then grant appropriate permissions to other team members as needed.
Remember that proper permission management is essential for maintaining system security and ensuring that only authorized personnel can make changes to user accounts.

Step-by-Step: Creating a New User Account
Essential Information Required
When creating a new user account in the Tool Hire system, you’ll need to gather several pieces of essential information to ensure proper account setup and system security. Understanding these requirements upfront will streamline the process and help avoid delays.
The username serves as the primary identifier for each account. Choose a unique username that follows your organization’s naming conventions, typically between 3-20 characters. Many administrators prefer using a combination of first initial and last name, or employee ID numbers for consistency across the platform.
An active email address is mandatory for account creation. This email becomes the primary communication channel for password resets, system notifications, and important updates about tool availability or rental reminders. Ensure the email address is accessible to the user and belongs to your organization’s domain if you’re managing internal accounts.
Password requirements follow industry-standard security protocols. New passwords must contain at least 8 characters, including one uppercase letter, one lowercase letter, one number, and one special character. When creating accounts for others, you’ll typically set a temporary password that users must change upon first login.
Contact details including a phone number are necessary for urgent communications, such as late return reminders or tool recall notifications. Some systems also require a physical address, particularly if the account will be used for delivery services or invoicing purposes.
Finally, you’ll need to specify the account type and permission level during creation, determining what features and functions the user can access within the platform.

Setting Initial Permissions and Roles
When creating a new user account, assigning the correct permissions and roles from the start ensures smooth operations and maintains system security. The role you select determines what features and areas of the platform the user can access, so it’s essential to match the role with their responsibilities.
Start by selecting from the predefined role options in the account creation form. Most Tool Hire platforms offer several standard roles:
Customer accounts are the most basic level, allowing users to browse tools, make bookings, submit reviews, and manage their rental history. These accounts have no administrative access and are designed for DIY enthusiasts, homeowners, and tradespeople renting equipment.
Staff or Store Manager accounts provide elevated permissions for day-to-day operations. These users can process bookings, manage inventory, handle customer inquiries, and process returns. They typically cannot modify platform payment settings or create other user accounts.
Administrator accounts have full access to all platform features, including user management, system configuration, financial reporting, and security settings. Limit these roles to trusted personnel only.
Some platforms also offer Tool Owner accounts for users who list their own equipment for hire, combining customer privileges with inventory management capabilities specific to their listings.
When assigning roles, follow the principle of least privilege: grant only the permissions necessary for the user to perform their job. You can always upgrade permissions later if their responsibilities expand. Review the permissions summary before finalizing account creation to confirm the role alignment matches your requirements.
Optional Profile Fields and Settings
Beyond the essential fields required to create a user account, the Tool Hire platform offers several optional profile settings that enhance the user experience and streamline communication. These additional fields help personalize accounts and ensure users receive relevant information about their rentals and community activity.
The profile picture field allows users to upload a photo, which appears alongside their reviews and community contributions. This visual element builds trust within the community-driven reviews system and helps create a more personable rental experience. Recommended image dimensions are 400×400 pixels in JPG or PNG format.
Company information fields are particularly valuable for professional tradespeople who want to represent their business on the platform. These fields include company name, business registration number, and trade licenses. Completing these details can help professionals access specialized equipment and potentially qualify for business account benefits.
Location details extend beyond the basic address requirement. Users can specify their preferred rental locations, set a default pickup branch, and indicate their service radius for delivery options. This information helps the system suggest nearby tool availability and reduces search time for frequently used rental locations.
Notification preferences give users control over how they receive updates about their bookings, tool availability alerts, and community activity. Options include email notifications, SMS alerts for urgent updates, and in-app notifications. Users can customize which events trigger notifications, such as booking confirmations, return reminders, promotional offers, and responses to their reviews. Setting these preferences during account creation ensures users stay informed without experiencing notification overload.
Common Mistakes to Avoid When Creating Accounts
Even experienced administrators can stumble when setting up new user accounts. Being aware of common pitfalls will help you maintain a secure, organized system and save time correcting errors later.
One frequent mistake is assigning incorrect permission levels. It’s tempting to grant higher access than necessary, especially when you’re in a hurry, but this creates security vulnerabilities. A staff member who only needs to process rentals shouldn’t have access to financial reports or user management features. Always follow the principle of least privilege: give users only the permissions they need to perform their specific job functions. Before finalizing any account, double-check the role assignment against the person’s actual responsibilities.
Weak passwords remain a persistent problem across all platforms. While it might seem easier to set simple passwords like “Password123” or “ToolHire2024,” these put your entire system at risk. Require passwords that combine uppercase and lowercase letters, numbers, and special characters. Better yet, implement a minimum length of at least 12 characters and use password strength indicators during account creation. Remember, the strongest passwords are those that are difficult to guess but memorable for the user.
Duplicate email addresses cause confusion and technical errors. Before creating a new account, search your existing user database to verify the email hasn’t already been registered. Some platforms automatically prevent duplicates, but manual checking adds an extra layer of protection. This is particularly important when team members move between departments or change roles within your organization.
Incomplete profile information is another oversight. Missing phone numbers, incorrect location assignments, or blank emergency contact fields might not seem critical during setup, but they create problems later when you need to reach someone urgently or generate accurate reports. Take the extra minute to fill in all required fields completely.
What Happens After Account Creation
Once you’ve successfully created a new user account, the system automatically initiates several important processes to help the user get started. Understanding these steps ensures you can support new users effectively and troubleshoot any issues they might encounter during their initial experience.
Immediately after account creation, the system sends a welcome email to the address provided during registration. This email serves multiple purposes: it confirms the account has been created, provides the username for reference, and includes a verification link that the user must click within 24 hours. This verification step is essential for security purposes and confirms the email address is valid and accessible to the account holder.
The verification link directs users to a confirmation page where they’ll see a success message and be prompted to complete their first login. During this initial login, new users enter their chosen username and password. The system may require them to complete additional security steps, such as setting up security questions or enabling two-factor authentication, depending on your platform’s security settings and the account type assigned.
After successfully logging in for the first time, users typically land on a guided onboarding screen. This introduction highlights key platform features, explains how to browse available tools, and introduces the community review system that helps users make informed rental decisions. Professional tradespeople and DIY enthusiasts alike benefit from this orientation, which can be customized based on account type.
If a user doesn’t receive the welcome email or verification link, common troubleshooting steps include checking spam folders, verifying the correct email address was entered during account creation, and using the resend verification option available in the user management dashboard.
You’ve now completed the process of creating user accounts in your Tool Hire system. By following these steps carefully, you’ll ensure each new user has the appropriate access level and permissions from the start, reducing security risks and streamlining your platform operations.
Remember, effective user account management doesn’t end with creation. Regularly review account activity, update permissions as roles change, and promptly deactivate accounts when users leave your organization. This ongoing maintenance protects your system and customer data while ensuring smooth operations across your tool rental platform.
As you continue managing your system, consider implementing user management best practices that include regular permission audits and clear documentation of who has access to what features. Strong password policies and two-factor authentication add additional security layers worth exploring.
For further guidance on securing your platform and fine-tuning user permissions, refer to sections 8.2 (Security Settings) and 8.3 (Permission Management) of this documentation. These resources will help you maintain a secure, efficient system that serves both your team and your customers effectively.
Related Posts

Post a Comment