Break down every construction project into three financial components: material costs with exact quantities, labor hours at realistic rates, and equipment rental periods that match your actual work schedule. Construction estimating transforms guesswork into predictable cash flow when you match payments to project milestones rather than arbitrary dates.
Start by listing every material from foundation to finish, then add 10-15% for waste and mistakes—a bathroom remodel requiring 50 square feet of tile actually needs 57 square feet ordered. Price each item using current supplier quotes, not outdated online estimates, since material costs fluctuate weekly in volatile markets.
Calculate labor by task completion time, not project duration. Hanging drywall takes 6-8 hours per room for experienced workers, 12-15 hours for DIYers learning as they go. Multiply realistic hours by your actual hourly cost, whether that’s your own time value or subcontractor rates with insurance and taxes included.
Structure payment schedules around verification points where you can see completed work before releasing funds. Request 30% upfront for materials, 40% at rough-in completion, 20% when finish work passes inspection, and hold final 10% for thirty days after project completion—this protects against defects and gives leverage for punch-list items.
Track equipment rental costs separately since these create time pressure that materials don’t. A concrete mixer rented for three days costs the same whether you use it two hours or twenty, so front-load equipment-dependent tasks and return rentals promptly to avoid bleeding profit through extended rental fees.
Understanding Construction Estimating Basics

The Three Types of Construction Estimates
Understanding the different types of construction estimates helps you choose the right approach for your project stage and needs. Let’s break down the three main types you’ll encounter.
A rough estimate (sometimes called a ballpark estimate) gives you a quick, high-level cost range based on square footage or similar past projects. Use this when you’re just exploring ideas or deciding whether a project fits your budget. For example, estimating a kitchen remodel at $150-200 per square foot gives you an initial reality check without detailed measurements.
A detailed estimate digs deeper, breaking down specific materials, labor hours, and equipment costs for each task. This is what you need before starting work, as it accounts for actual quantities and current prices. You’ll list everything from the exact number of tiles needed to how many days you’ll need that concrete mixer rental.
A bid estimate is the most precise, created by contractors competing for your job. It includes detailed line items, payment schedules, and binding prices. Contractors prepare these after site visits and careful calculations, committing to the quoted costs. This becomes your contractual agreement and the foundation for tracking cash flow throughout the project.
Each estimate type serves a different purpose in your planning journey, becoming more detailed as you move closer to breaking ground.
Why Cash Flow Matters More Than You Think
Cash flow is the lifeblood of any construction project, yet it’s often the most underestimated aspect of project planning. When your cash flow estimate is off, the consequences ripple through every phase of your build.
Poor cash flow estimation directly causes project delays. When you haven’t accurately predicted when money will be available, you can’t pay suppliers on time. This means materials arrive late, workers stand idle, and your timeline extends. A bathroom renovation that should take two weeks can stretch to four simply because the tiles didn’t arrive when needed.
Tool and equipment rental becomes particularly problematic with cash flow miscalculations. If you’ve reserved a concrete mixer or scaffolding but can’t pay for materials on schedule, you’re paying rental fees for equipment sitting unused. These unnecessary rental costs eat into your budget while adding no value to the project. Even worse, you might need to return equipment before the work is complete, then rent it again later at a higher total cost.
Contractor disputes frequently stem from payment timing issues. When subcontractors aren’t paid according to the agreed schedule because funds haven’t arrived as estimated, trust breaks down quickly. Tradespeople may walk off the job, refuse to return, or demand payment upfront for future work, creating a cascade of complications that could have been avoided with accurate cash flow planning from the start.
Real-World Estimating Example: Small Home Renovation

Breaking Down the Material Costs
Here’s what you’ll actually spend on a typical bathroom renovation, broken down by category:
Fixtures ($800-$3,500): This includes your toilet ($200-$800), vanity with sink ($400-$1,500), and bathtub or shower unit ($200-$1,200). Mid-range options usually hit the sweet spot for durability and budget.
Tiles and Flooring ($600-$2,000): Floor tiles run $15-$45 per square metre, while wall tiles for wet areas cost $20-$60 per square metre. Don’t forget adhesive, grout, and waterproofing membrane—budget an extra $200-$400 for these essentials.
Plumbing Supplies ($300-$800): Pipes, fittings, taps, showerheads, and drainage components add up quickly. Quality brass fittings last longer than cheaper alternatives.
Paint and Finishing ($150-$400): Moisture-resistant paint for bathrooms, primer, sealants, and trim materials round out your shopping list.
Contingency Buffer (10-15%): Always calculate contingencies for unexpected discoveries like water damage or code compliance upgrades. On a $10,000 project, that’s $1,000-$1,500 set aside for surprises—and trust us, there are always surprises.
Total Material Costs: $2,850-$7,700 depending on your quality choices and bathroom size.
Labor and Equipment Hire Estimates
Labor costs represent one of your largest expenses in any construction project. For this bathroom renovation, let’s break down the numbers clearly so you can plan your cash flow accordingly.
A licensed plumber typically charges between $80-120 per hour depending on your location. For our bathroom project, estimate 16 hours of work across three visits: rough-in plumbing (8 hours), fixture installation (6 hours), and final connections (2 hours). At $100/hour, that’s $1,600 total. Many plumbers require a deposit upfront, usually 30-50% of the quoted price.
Electrician costs run similarly, averaging $75-100 per hour. Budget 12 hours for outlet relocation, lighting installation, and exhaust fan wiring. At $85/hour, expect $1,020 in electrical labor.
Equipment rental adds up quickly but remains more cost-effective than purchasing. A wet tile saw rents for approximately $50-70 per day or $200-250 weekly. Since tiling takes 3-4 days, the daily rate makes sense here. A cement mixer costs about $40 daily if you’re mixing mortar batches. Small rotary hammers for demolition run $30-50 daily.
Pro tip from our community: Always build in a 10-15% buffer for labor overruns. Unexpected complications like corroded pipes or outdated electrical panels frequently extend project timelines and increase costs.
Creating a Payment Schedule
A well-structured payment schedule protects both contractors and clients while ensuring steady cash flow throughout your project. Here’s a proven milestone-based approach that balances financial risk:
Start with a deposit of 10-15% upon contract signing. This covers initial material purchases and tool rentals you’ll need to begin work. For a $15,000 bathroom renovation, that’s $1,500-$2,250 upfront.
Schedule your second payment at rough-in completion, typically 25-35% of the total. This milestone covers framing, plumbing, electrical, and major demolition work. Using our bathroom example, you’d receive $3,750-$5,250 when inspections pass.
The third payment comes at finish work completion, another 25-35%. This covers tiling, fixture installation, painting, and trim work. That’s an additional $3,750-$5,250 as the space becomes recognizable.
Reserve the final payment of 20-25% for project completion and final walkthrough. This gives clients leverage to ensure quality while protecting your cash flow. In our example, that’s $3,000-$3,750 upon satisfactory completion.
Remember to specify in your contract when payments are due—immediately upon milestone completion or within 5-7 days. Clear payment terms prevent disputes and keep your project moving forward smoothly.
Real-World Estimating Example: Deck Construction Project
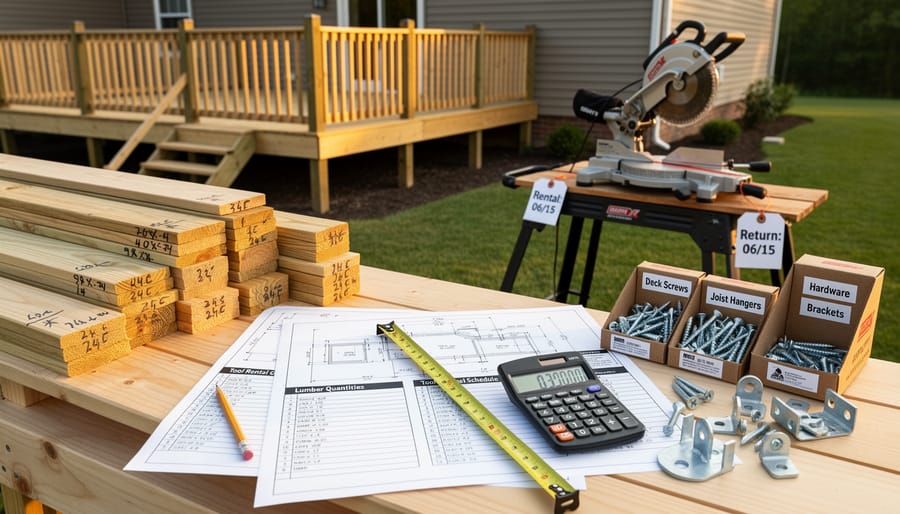
Estimating Lumber and Hardware
Let’s break down lumber estimation using a practical 12×16-foot deck example. Start by calculating your decking boards: multiply the deck length (16 feet) by width (12 feet) to get 192 square feet. Add a 15% waste factor for cuts and mistakes, bringing your total to 221 square feet. If using standard 5.5-inch wide boards, divide 221 by the board coverage rate (typically 0.46 square feet per linear foot) to determine board quantities needed.
For structural components, calculate posts first. Spacing posts every 6-8 feet requires six posts for this deck size. Joists spaced 16 inches on-center need fourteen 12-foot joists, plus three rim joists. Don’t forget your ledger board attached to the house.
Hardware adds up quickly but matters for budget accuracy. Plan for approximately 5 pounds of deck screws per 100 square feet, meaning 10-12 pounds for this project. Include joist hangers (one per joist end), post anchors, and lag bolts for ledger attachment.
Current market factors significantly impact costs. Lumber prices fluctuate seasonally and regionally, so check local suppliers within two weeks of purchasing. Consider treated lumber for ground contact areas and composite options for low-maintenance alternatives. Always round quantities up to account for damaged materials and measurement errors—experienced builders typically add 10-15% beyond calculated needs.
Tool Rental Timeline and Costs
Timing your equipment rentals correctly can significantly impact your project budget. Rather than renting all tools for the entire project duration, create a detailed timeline that shows exactly when each piece of equipment is needed.
Start by breaking your project into phases. For a fence installation, you might need a post-hole digger for days 1-2, a power auger during the initial setup, and a circular saw intermittently throughout weeks 2-3. By mapping these needs against your project schedule, you avoid paying for equipment sitting idle on-site.
Calculate rental costs using daily versus weekly rates. Most rental shops offer discounts for longer periods, but only if you’ll actually use the equipment. A concrete mixer rented for three days at $45 per day costs $135, while a weekly rate might be $120, but only makes sense if your concrete work spans that timeframe.
Document these rental windows in your estimate with specific start and end dates. Include buffer time for unexpected delays, typically adding 10-20 percent to your rental duration. This prevents costly last-minute extensions while keeping your cash flow predictable. Community feedback consistently shows that phased equipment rental reduces overall costs by 15-30 percent compared to renting everything upfront.
Phase-Based Payment Structure
Breaking payments into project phases protects both you and your contractor while keeping cash flow manageable. Here’s a practical example for a home renovation showing how to structure payments with protective hold-backs.
Consider a $50,000 home addition project divided into three main phases:
Foundation Phase (30% – $15,000): Release $13,500 upon completion of the foundation and approval of inspection. Hold back $1,500 (10% of phase total) until final project completion. This ensures the foundation work meets code before you commit further funds.
Framing Phase (40% – $20,000): Once the structure is framed, roof installed, and exterior closed in, release $18,000. Again, retain $2,000 as hold-back. At this point, you’ve paid $31,500 of the total project cost with $3,500 held back for quality assurance.
Finishing Phase (30% – $15,000): This covers electrical, plumbing, drywall, and final touches. Release $13,500 upon substantial completion. Your total hold-back now stands at $6,500.
Final Payment: Release all hold-backs ($6,500) after final inspection approval and lien waivers from all subcontractors. This 13% total hold-back percentage gives you leverage to ensure quality work throughout the project while providing the contractor reasonable cash flow to purchase materials and cover labor costs as work progresses.
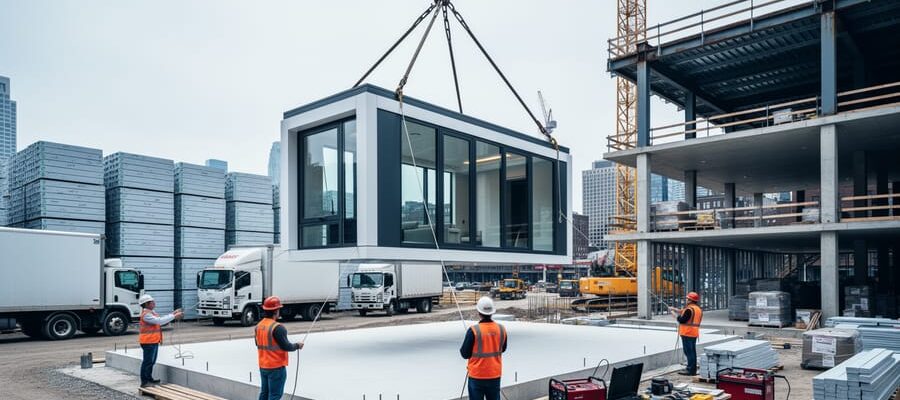
Real-World Estimating Example: Commercial Storefront Build-Out
Managing Multiple Trade Estimates
Juggling estimates from multiple specialists is where many projects get messy, but a clear system keeps everything organized. The key is treating each trade estimate as a building block in your master budget, not separate islands of information.
Start by creating a simple spreadsheet with columns for trade type, estimated cost, timeline, and deposit requirements. When your electrician quotes $4,500 with a 30% deposit and 10-day completion, that information goes directly into your master document alongside the HVAC contractor’s $6,200 estimate requiring a 50% upfront payment. This visual layout immediately shows you two things: you need $3,625 in deposits before work begins, and you’ll need to schedule these trades so they’re not competing for the same workspace.
The coordination challenge comes from dependencies between trades. Your flooring contractor can’t start until the electrician finishes running floor outlets, and your HVAC installer needs wall access before the drywall goes up. Mark these dependencies clearly in your schedule, adding buffer days between trades. Real community feedback from contractors shows that 2-3 day gaps between trades prevent costly delays when the previous specialist runs over schedule.
For payment tracking, create a second tab listing all deposits, progress payments, and final payments with their due dates. This becomes your cash flow roadmap. When three specialists all want mid-project payments in week four, you’ll see that $8,000 spike coming and can plan accordingly. Many DIYers find success using color coding for different trades, making it easy to spot scheduling conflicts or payment clusters at a glance.
Staged Payment Schedule for Larger Projects
For larger projects extending beyond a few weeks, a staged payment schedule protects both you and your contractor while maintaining healthy cash flow. Here’s how a typical three-month kitchen renovation might break down:
Month 1 (Weeks 1-4): Demolition and Rough-In – 35% Payment ($17,500 of $50,000 total)
This covers initial mobilization, demolition, structural work, and rough plumbing and electrical. Payment releases after inspector approves rough-in work. Your costs include equipment rental for debris removal, basic hand tools, and possibly a small excavator if foundation work is needed.
Month 2 (Weeks 5-8): Installation and Systems – 40% Payment ($20,000)
This phase includes drywall, cabinetry installation, countertops, and fixture placement. Payment triggers when cabinets are installed and plumbing fixtures are roughed in. Tool rental needs shift to specialty items like tile saws and pneumatic nailers.
Month 3 (Weeks 9-12): Finishing and Final Inspection – 20% Payment ($10,000)
Painting, trim work, hardware installation, and final connections happen here. Payment releases upon successful final inspection and your walkthrough approval.
Retention (5%): Final Payment ($2,500)
Hold back this amount for 30 days post-completion to address any overlooked expenses or punch-list items that emerge during normal use.
This structure ensures contractors have working capital while you maintain leverage for quality work completion.
Common Estimating Mistakes That Destroy Your Cash Flow
Underestimating Material Waste and Tool Rental Duration
One of the quickest ways to blow your construction budget is underestimating how much material you’ll actually need and how long you’ll keep rental equipment. Let’s break down the reality.
Material waste varies significantly by type. Lumber typically requires a 10-15% waste factor due to cuts and defects. Concrete needs about 5-10% extra to account for spillage and uneven subgrades. Drywall generates 15-20% waste, especially in rooms with complex angles. Tiles and pavers? Plan for 10% waste on straight layouts and up to 20% for diagonal patterns. Paint usually needs 10% more than calculated surface area suggests.
The correction strategy is simple: build these percentages directly into your initial estimate rather than hoping for perfection. If you need 100 square feet of tile, order 110-120 square feet from the start.
Tool rentals present a different challenge. That weekend project stretches into the following week because weather delays work, you discover underlying issues, or tasks simply take longer than YouTube videos suggest. Community feedback consistently shows that first-time DIYers underestimate project duration by 40-60%.
Protect your estimate by booking rental equipment for 25-50% longer than your optimistic timeline suggests. It’s cheaper to return tools early than paying rush fees or daily overages when deadlines slip. Always confirm the rental shop’s after-hours return policy and late fee structure before committing.
Forgetting Hidden Costs and Contingencies
Even the most detailed construction estimate can fall short if you overlook common expenses that aren’t immediately obvious. These hidden costs can quickly erode your profit margin or blow your budget if not accounted for upfront.
Start with permits and inspections, which vary widely by location and project type. A bathroom renovation might require plumbing and electrical permits costing $200-$800, while deck construction could need building permits ranging from $150-$600. Always check with your local council before estimating.
Disposal fees are another frequently forgotten expense. Skip bin hire typically costs $300-$600 depending on size, plus tipping fees if you’re hauling waste yourself. Factor in roughly 3-5% of your material costs for waste disposal.
When hiring equipment, don’t forget delivery and pickup charges, which can add $50-$150 per delivery depending on distance. Equipment damage waivers, while optional, provide peace of mind and typically cost 10-15% of the daily rental rate.
As a safety net, always include contingencies in your estimate. For straightforward projects, add 10% for unexpected issues. More complex renovations warrant 15-20%, while projects involving structural work or older buildings should include 20-25%. This buffer protects against material price fluctuations, unforeseen site conditions, and those inevitable surprises that emerge once work begins.
Tools and Templates for Better Cash Flow Estimates
Free Spreadsheet Template Breakdown
A quality construction estimating template should work as your financial roadmap, helping you track costs and payments from start to finish. At minimum, your template needs these core sections: labor costs (broken down by trade), materials with current pricing, equipment rentals (especially important if you’re hiring specialized tools), subcontractor fees, and a contingency buffer of 10-15% for unexpected expenses.
The payment schedule section is equally crucial. Include columns for invoice dates, payment due dates, and actual payment received. This lets you compare your projected cash flow against reality, which is essential for keeping projects financially healthy.
Customizing templates for different project types is straightforward. For small residential jobs like bathroom renovations, you might work with a single-phase payment structure. Medium projects like deck construction typically need three payment milestones: deposit, mid-project, and completion. Commercial work requires more detailed breakdowns with multiple progress payments tied to specific completion percentages.
Start with a basic template and add complexity as needed. Include spaces for permit costs, waste removal, and insurance. Most importantly, review feedback from your previous projects and adjust categories that caused confusion or missed expenses. A template that evolves with your experience becomes increasingly accurate over time.
Apps and Software Worth Considering
Whether you’re tackling your first DIY project or managing multiple jobs, the right software can transform your estimating process. For beginners, apps like HomeAdvisor’s Cost Calculator and ImproveNet offer free, basic estimating features perfect for understanding material costs and rough budgets. These tools work well for simple projects but lack detailed labor breakdowns and equipment rental calculations.
Mid-level users should consider BuildBook or Joist, which cost between $10-40 monthly. These platforms let you create professional-looking estimates with payment schedules, track material orders, and communicate with clients. The learning curve is gentle, with templates that guide you through each step. One community member noted that Joist “made invoicing actually enjoyable” and helped organize cash flow tracking.
For professional contractors, options like ProEst or PlanSwift provide comprehensive features including equipment cost tracking, subcontractor management, and integration with accounting software. While pricier at $100+ monthly, they handle complex commercial estimates with accuracy.
The main tradeoff is simplicity versus detail. Free apps get you started quickly but may oversimplify costs. Professional software requires time investment but delivers precision. Consider starting with free tools to learn estimating fundamentals, then upgrade as your projects grow more complex.
Accurate construction estimating isn’t just about getting the numbers right—it’s about protecting your cash flow and keeping your project on track. As we’ve explored through these examples, the difference between a project that runs smoothly and one that stalls due to financial surprises often comes down to how thoroughly you’ve planned your costs and payment schedules upfront. When you avoid delays through proper estimating, you protect both your timeline and your budget.
If you’re just starting out, begin with simpler projects like the bathroom renovation we discussed. Track every expense, from materials to equipment hire, and compare your estimates against actual costs. This real-world feedback becomes invaluable as you tackle more complex jobs. Remember to build in contingency buffers—most experienced estimators recommend 10-15% for residential work and more for commercial projects.
The beauty of construction estimating is that it’s a skill that improves with practice and community knowledge. We’d love to hear from you in the comments below. What estimating challenges have you faced? Do you have tips for tracking costs more effectively? Have you discovered helpful tools or techniques that make the process easier? Your experiences could help someone else avoid costly mistakes on their next project. Share your stories and let’s learn from each other.
Related Posts

Post a Comment