
Position outdoor heaters at least three feet from your dog’s shelter walls to prevent fire hazards while maintaining effective warmth distribution. Working dogs sleeping outdoors in temperatures below 7°C face serious health risks including hypothermia, joint stiffness, and weakened immune systems, making proper heating essential rather than optional.
Choose between three proven heating solutions based on your setup: radiant heat panels mounted inside insulated kennels provide consistent warmth without open flames, ceramic heat emitters offer targeted heating for larger outdoor runs, or micathermic heaters deliver rapid warmth for dogs transitioning between indoor and outdoor facilities for dogs. Each option requires different power sources and installation approaches, so match your selection to available electrical infrastructure.
Calculate your heating needs using this practical formula: multiply your kennel’s cubic metres by 25 watts for mild climates or 40 watts for frost-prone areas. A standard 2×3 metre kennel needs approximately 150-240 watts, helping you avoid underpowered systems that waste money or overpowered units that create safety risks.
Install weatherproof electrical outlets with ground fault circuit interrupters specifically rated for outdoor use, positioning them where dogs cannot reach cords or connections. This single step prevents the majority of outdoor heater accidents reported by farmers and kennel operators. Combine heating with proper insulation, raised bedding, and wind barriers to reduce running costs by up to 60% while keeping your working dogs comfortable, healthy, and performing at their best throughout winter months.
Why Outdoor Dogs Need Dedicated Heating Solutions
Temperature Risks and Health Concerns
Understanding when your dog faces real danger from cold temperatures helps you take timely action. Most healthy dogs can tolerate temperatures above 45°F without significant issues, though smaller breeds and those with short coats may feel uncomfortable. When temperatures drop between 32°F and 45°F, cold-sensitive dogs start experiencing discomfort and may need protection during extended outdoor periods.
The danger zone begins below 32°F, where hypothermia and frostbite become genuine concerns for all dogs. Hypothermia occurs when a dog’s body temperature drops below 99°F, causing shivering, lethargy, and in severe cases, organ failure. Watch for warning signs like excessive shivering, whimpering, reluctance to move, or seeking warm places desperately.
Frostbite typically affects extremities including ear tips, paws, and tails. These areas may appear pale or gray, feeling cold and brittle to touch. As tissue thaws, it becomes red and swollen, potentially leading to permanent damage if not addressed quickly.
Wind chill dramatically increases these risks, making 20°F feel like 0°F. Working dogs and outdoor breeds handle cold better than companion animals, but no dog should face prolonged exposure below 20°F without proper heating solutions and shelter. Always monitor your dog’s behavior closely during cold weather, as individual tolerance varies based on age, health, and conditioning.
Breed and Size Considerations
Not all dogs handle cold weather equally, and understanding your dog’s vulnerability is essential before investing in outdoor heating solutions. Small breeds like Chihuahuas and Yorkshire Terriers struggle in cold temperatures due to their limited body mass, which makes heat retention difficult. Short-haired breeds such as Greyhounds, Boxers, and Pit Bulls lack the natural insulation that longer coats provide, making them particularly sensitive to dropping temperatures.
Senior dogs and puppies also require extra attention. Older dogs often develop arthritis and weakened immune systems that make cold exposure more painful and potentially dangerous. Very young puppies haven’t yet developed full temperature regulation capabilities.
On the opposite end, cold-tolerant breeds like Siberian Huskies, Alaskan Malamutes, Saint Bernards, and Newfoundlands have thick double coats naturally designed for harsh climates. However, even these hardy breeds benefit from shelter and heated spaces during extreme weather conditions or extended outdoor periods.
Working dogs that spend significant time outdoors regardless of breed will appreciate supplemental heating, especially during overnight hours. Many farmers and property owners report that providing heated spaces improves their working dogs’ performance and overall health during winter months. Consider your specific dog’s characteristics when determining whether an outdoor heater is necessary for your situation.
Types of Outdoor Dog Heaters Available
Electric Heated Dog Beds and Pads
Electric heated dog beds and pads offer a targeted, energy-efficient solution for keeping outdoor dogs comfortable during cold weather. These low-wattage units typically consume between 20-40 watts, making them affordable to run continuously while providing consistent warmth directly where your dog rests.
Most quality heated pads include essential safety features designed specifically for outdoor use with dogs. Look for models with chew-resistant steel-wrapped cords, as exposed wiring poses both electrical hazards and potential injury risks. Waterproof or water-resistant covers protect the heating elements from moisture, while thermostat controls maintain safe temperatures between 102-108 degrees Fahrenheit, preventing overheating.
Installation is straightforward for most DIY enthusiasts. Simply place the pad inside your dog house on a flat surface, ensuring the cord reaches your power source without creating trip hazards. Many users recommend elevating the pad slightly off the ground using a wooden platform to prevent cold transfer from below.
Community feedback consistently highlights durability concerns. Several reviewers note that even chew-resistant cords may not withstand determined chewers, so monitoring your dog’s behavior initially is crucial. Others praise the targeted heating approach, reporting lower energy bills compared to space heaters while effectively keeping their dogs warm during winter months.
Radiant Panel Heaters
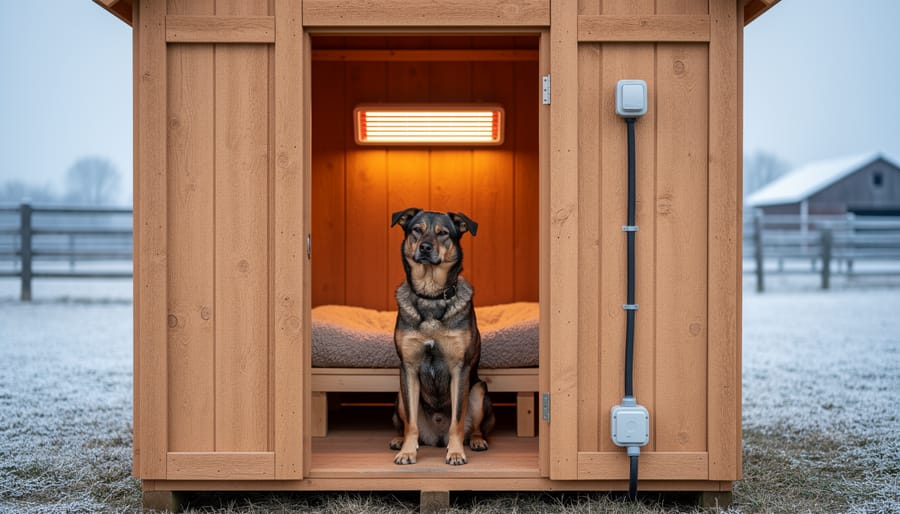
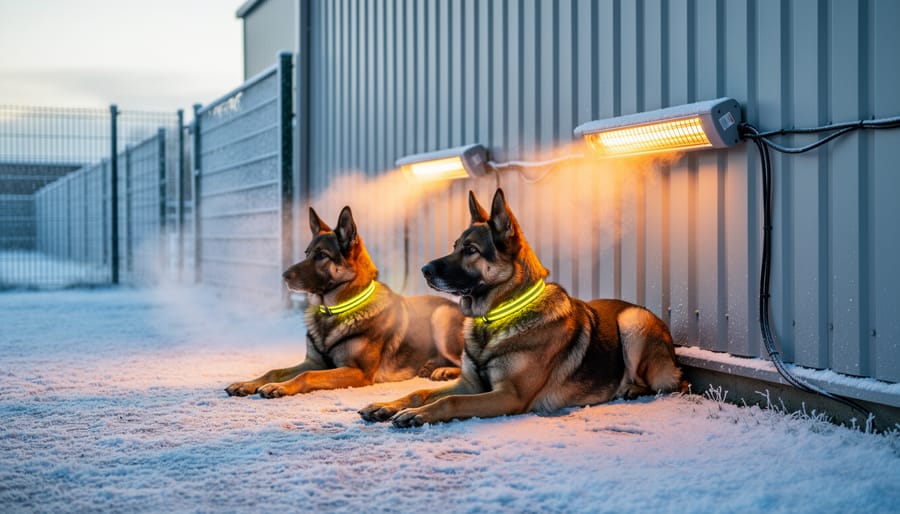
Radiant panel heaters mount to walls or ceilings in dog kennels, making them ideal for larger outdoor structures where floor space is limited. These units work by emitting infrared heat that warms solid objects and surfaces rather than just the air, similar to how the sun heats your skin on a cold day. This means your dog benefits from direct warmth even when wind or drafts are present.
Most radiant panels designed for outdoor kennels feature weatherproof housings rated for damp environments. Look for units with protective guards to prevent direct contact, as the panel surface can reach high temperatures. Installation typically requires mounting brackets and electrical connection to a dedicated circuit, which many homeowners can handle with basic DIY skills and proper safety precautions.
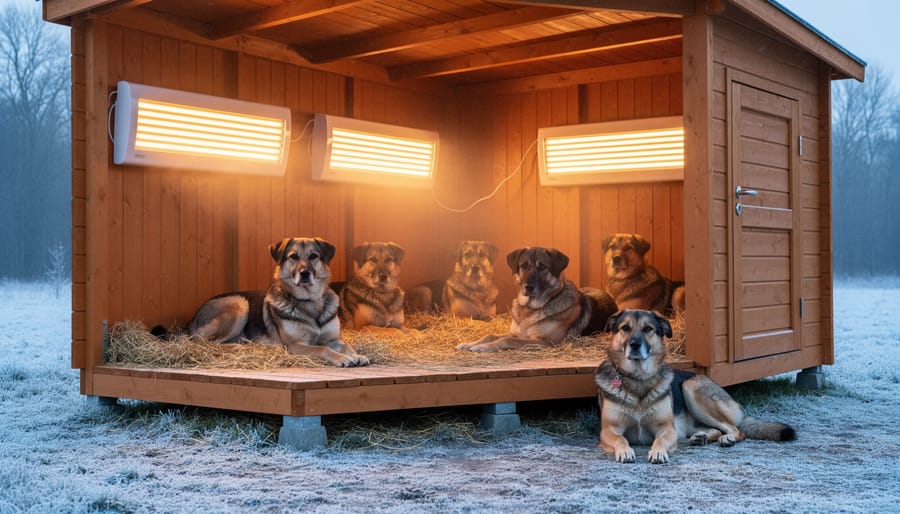
According to community feedback from kennel owners, radiant panels excel in structures with insulated walls and roofs, where the heat can reflect efficiently. Users report these heaters consume less energy than forced-air options because they don’t waste power heating the entire air volume. Position panels at least three feet above your dog’s resting area and ensure adequate clearance from bedding materials. Always include a thermostat to maintain consistent temperatures and prevent overheating.
Heat Lamps and Infrared Bulbs
Heat lamps and infrared bulbs offer targeted warmth for dog shelters and outdoor kennels, making them popular choices for overnight heating. These overhead units work by radiating heat downward, similar to how the sun warms surfaces. When selecting a heat lamp, choose ceramic bulbs rated between 100-250 watts depending on your space size. A 150-watt bulb typically heats a standard doghouse (4×6 feet) adequately in moderate cold.
Installation height matters significantly for both safety and effectiveness. Mount heat lamps 18-24 inches above your dog’s resting area to prevent burns while ensuring adequate warmth reaches them. Always use porcelain lamp fixtures rated for high temperatures, as plastic fixtures can melt and create fire hazards. Secure the fixture to ceiling joists or structural beams, never to thin plywood or plastic shelter roofs.
Community feedback consistently emphasizes using protective wire guards around bulbs. Dogs occasionally bump or paw at unfamiliar objects, and guards prevent direct contact with hot surfaces. Additionally, connect heat lamps to ground fault circuit interrupter (GFCI) outlets to protect against electrical issues in damp conditions. Consider thermostatic controls that automatically turn lamps off when temperatures rise, preventing overheating and reducing electricity costs.
Solar-Powered Heating Options
For off-grid properties, construction sites, or remote locations without reliable electricity access, solar-powered heating solutions are becoming increasingly practical for outdoor dog shelters. These systems typically combine solar panels with battery storage units to power low-wattage heating pads or radiant heat panels during cold nights.
Solar heating setups work best in areas with consistent sunlight and when paired with well-insulated dog houses that retain heat overnight. A basic system includes a 50-100 watt solar panel, a deep-cycle battery, and a low-voltage heating element designed for pet shelters.
While the upfront investment is higher than traditional electric heaters, solar options eliminate ongoing power costs and provide heating independence. Users report particular success with these systems on rural properties where extending electrical lines would be costly. Consider your location’s winter sunlight hours and your dog’s shelter insulation when evaluating whether solar heating meets your needs.
Essential Safety Features and Installation Requirements
Electrical Safety and Weatherproofing
When setting up any heating system for your dog’s outdoor space, electrical safety isn’t just important—it’s absolutely critical. Water, cold temperatures, and electricity create a dangerous combination if not properly managed, so understanding the right equipment and precautions will protect both you and your pet.
Always use heaters specifically rated for outdoor use. Indoor heaters lack the weatherproof construction necessary to withstand moisture, temperature fluctuations, and UV exposure. Look for products with an IP (Ingress Protection) rating of at least IP44, which indicates protection against water splashes from any direction. The packaging should clearly state “outdoor rated” or “suitable for outdoor use.”
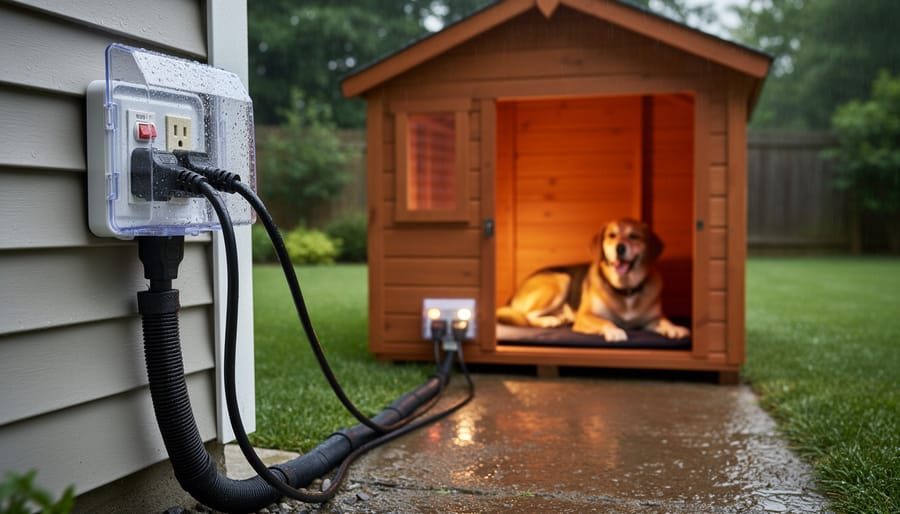
Ground Fault Circuit Interrupter (GFCI) protection is non-negotiable. A GFCI outlet instantly cuts power when it detects an electrical imbalance, which happens when water creates an unintended current path. If your outdoor outlet doesn’t have GFCI protection built in, use a portable GFCI adapter that plugs directly into the outlet. Test the GFCI monthly by pressing the test button to ensure it’s functioning properly.
Extension cords deserve special attention. Use only heavy-duty, outdoor-rated cords with a wire gauge appropriate for your heater’s wattage—typically 12-gauge for most heating applications. Keep cords elevated off the ground when possible to prevent water pooling, and never run them through doorways or windows where they could be pinched or damaged. Inspect cords regularly for fraying, cracks, or exposed wires.
Protect all connections from moisture using weatherproof junction boxes or cord covers. Even outdoor-rated plugs benefit from additional protection. Community feedback consistently emphasizes that taking these extra precautions prevents costly repairs and dangerous situations down the line.
Chew-Proof and Tip-Over Protection
Dogs naturally explore with their mouths, making exposed electrical cords a serious safety hazard around outdoor heaters. To protect your equipment and your pet, invest in heavy-duty cord protectors made from flexible PVC or metal conduit. These covers should run the entire length from the heater to your power source. Community feedback consistently highlights bitter-tasting cord sprays as an effective deterrent, though they require reapplication after rain or snow.
For wireless heater models, position them in areas your dog cannot easily reach. Wall-mounted or ceiling-mounted units eliminate ground-level temptations entirely. If ground placement is unavoidable, create a physical barrier using pet-safe fencing or wire mesh guards around the heater while maintaining proper clearance for ventilation.
Tip-over accidents pose fire risks and can injure your dog. Select heaters with wide, stable bases or mounting brackets designed for secure installation. Many modern outdoor heaters include automatic shut-off sensors that immediately cut power if the unit tilts beyond safe angles. According to user reviews, these safety features have prevented numerous potential disasters in kennels and shelters.
Additional safety measures include using Ground Fault Circuit Interrupter (GFCI) outlets, which detect electrical irregularities and shut off power instantly. These devices are essential for outdoor electrical work and can prevent electrocution from damaged cords. Check your heater’s cord daily for chew marks or wear, replacing it immediately if damage appears.
Consider heaters with protective caging or grilles that prevent direct contact with heating elements while allowing warmth distribution. Users with multiple dogs especially recommend these enclosed designs for active outdoor environments.
Setting Up an Outdoor Heated Dog Shelter: Step-by-Step
Tools and Materials You’ll Need
Before installing a dog outdoor heater, gather these essential items to ensure a safe and effective setup. You’ll need weatherproof extension cords rated for outdoor use (check the amperage matches your heater’s requirements), heavy-duty mounting brackets or hardware suitable for your installation surface, and a GFCI (Ground Fault Circuit Interrupter) outlet or adapter to prevent electrical hazards. Include insulation materials like weatherstripping or foam sealant to minimize heat loss from the shelter. A basic multimeter helps test electrical connections, while cable clips keep cords organized and off the ground. Don’t forget a screwdriver set, drill with appropriate bits for your mounting surface, and wire cutters. Safety gear including work gloves and safety glasses protects during installation. Keep your heater’s instruction manual handy, and consider a timer or thermostat for automated temperature control. Many users recommend having spare fuses and a flashlight available for troubleshooting.
Installation Process
Installing a dog outdoor heater requires careful planning to ensure both safety and effectiveness. Before beginning, always turn off power at the circuit breaker and consult your local electrical codes, as some installations may require a licensed electrician.
Start by selecting the mounting location for wall-mounted or ceiling-mounted heaters. Position the unit at least 18 inches away from any combustible materials and high enough that your dog cannot directly contact the heating element. Most radiant heaters work best mounted 5-7 feet from the ground, angled slightly downward toward your dog’s resting area. Use a stud finder to locate solid framing, then mark your mounting holes. Secure the heater bracket firmly with appropriate fasteners rated for outdoor use.
For electrical connections, outdoor heaters require weatherproof wiring and GFCI protection. Run electrical lines through rigid conduit rated for exterior exposure, ensuring all connections are sealed against moisture. Never use indoor-rated extension cords as permanent solutions. If you’re uncomfortable with electrical work, hiring a professional electrician is always the safest choice and may be required by local regulations.
When insulating your dog’s shelter, combine your heating solution with proper outdoor shelter construction principles. Seal gaps around doors and windows with weatherstripping. Install rigid foam insulation panels on walls and ceiling, leaving adequate ventilation to prevent moisture buildup and carbon monoxide accumulation if using any fuel-based heaters.
For heated bed installations, place them on elevated platforms away from cold ground surfaces. Ensure cords are protected inside chew-proof conduit or cord covers. Position beds away from water bowls and shelter entrances where they might get wet.
Test all equipment before extreme weather arrives, monitoring temperature levels with a thermometer to maintain comfortable conditions between 45-65 degrees Fahrenheit.
Testing and Temperature Monitoring
Before introducing your dog to the outdoor heated space, always test the system without your pet present for at least 24 hours. Check that all connections are secure and that the heater maintains consistent output without overheating or shutting off unexpectedly. Use a reliable outdoor thermometer placed at your dog’s typical resting height to monitor actual conditions, since temperatures can vary significantly between ground level and human height.
The ideal temperature range for most dogs in outdoor shelters is between 45-65°F. Temperatures below 45°F may require additional insulation or bedding, while readings above 65°F suggest your heater is too powerful or positioned too close. Place thermometers in multiple locations within the shelter to identify cold spots or areas of excessive heat. Digital thermometers with remote monitoring capabilities are particularly useful, allowing you to check conditions from indoors without disturbing your dog.
Check temperature readings at different times throughout the day and night, as outdoor conditions change. Community feedback from other dog owners suggests keeping a log during the first week helps identify patterns and necessary adjustments. Always verify that safety features like tip-over switches and overheat protection are functioning properly during your initial testing period.
Running Costs and Energy Efficiency Tips
Understanding the running costs of outdoor dog heaters helps you budget effectively while keeping your four-legged friends comfortable through winter. The electricity consumption varies significantly depending on the heater type and size you choose.
Infrared heaters typically use between 500-1500 watts per hour, costing approximately £0.15-£0.45 per hour based on current UK electricity rates. If you run a 1000-watt heater for 8 hours nightly during a three-month winter period, expect monthly costs around £35-£40. Ceramic heaters consume similar amounts, while heated pads draw considerably less power at 50-150 watts, potentially saving you £20-£30 monthly.
To minimize energy consumption without compromising your dog’s wellbeing, consider these practical strategies. First, properly insulate your dog’s shelter using foam boards or reflective insulation to trap heat more effectively. This simple improvement can reduce heating time by up to 40 percent. Position heaters strategically in smaller, enclosed spaces rather than open areas where heat disperses quickly.
Install a thermostat-controlled timer to prevent unnecessary heating during milder temperatures or when your dog is active elsewhere. Many owners report cutting costs by 30 percent using programmable timers that align with weather patterns and their pet’s routine.
Regular maintenance also impacts efficiency. Clean infrared panels monthly to maintain optimal heat output, and check electrical connections for corrosion that increases energy draw. Replace worn weatherstripping around kennel doors to prevent drafts.
Consider zone heating by only warming the sleeping area rather than the entire outdoor space. Combine heating with thermal bedding and windbreaks for maximum efficiency. Some users suggest sharing equipment between multiple kennels using portable units, though always prioritize safety over cost savings. Monitor your electricity meter during the first week to establish actual usage patterns and adjust accordingly.
What Real Users Say: Community Reviews and Experiences
We reached out to property owners and tradespeople who’ve used outdoor dog heaters to understand what really works in Australian conditions. The feedback reveals valuable insights for anyone considering this investment.
Sarah, a kennel operator from rural Victoria, shares her experience: “We installed radiant panel heaters in our working dog shelters three years ago. The biggest mistake we made initially was mounting them too low. Dogs need clearance, and we learned to position them at least 90cm high after one curious pup got too close.” She emphasizes checking units daily during cold snaps and keeping backup heating available.
James, a farmer in New South Wales, warns against undersizing: “I cheaped out on a small heater for my livestock guardian dogs. It couldn’t handle overnight temps below 5 degrees. Invest in proper wattage from the start, around 1500-2000 watts for most kennels.”
Multiple users highlighted the importance of weatherproof electrical connections. Lisa from Queensland notes: “Even though we don’t get extreme cold, morning dampness caused our first heater to short out. Now everything runs through a weatherproof box with RCD protection.”
Common praise goes to ceramic heat emitters for reliability and radiant panels for energy efficiency. Users consistently recommend pairing outdoor heaters with other comfort measures like a DIY dog feeding station and proper insulation.
The key takeaway from community feedback: proper installation, adequate sizing, and regular maintenance make the difference between effective heating and wasted money.
Keeping your outdoor working dogs warm during cold weather isn’t just about comfort – it’s a fundamental aspect of responsible pet ownership. Whether you’re managing a construction site, farm operation, or property with security dogs, providing adequate heating helps maintain your dog’s health, energy levels, and ability to perform their duties effectively. Dogs exposed to prolonged cold without proper warming options face risks ranging from decreased immune function to serious conditions like hypothermia and frostbite.
Remember that installing any heating solution is only the first step. Regular safety checks are essential to prevent hazards and ensure your system continues working properly. Make it part of your routine to inspect electrical connections, test thermostats, clear any debris from vents, and verify that protective barriers remain secure. Check for chewed wires, damaged cords, or any signs of overheating at least weekly during active use.
By combining the right heating equipment with proper installation, weatherproofing, and ongoing maintenance, you’re investing in your dog’s wellbeing and work performance. The community feedback from fellow dog owners and professionals shows that taking these precautions seriously pays off in healthier, happier working dogs who can comfortably handle their outdoor responsibilities year-round.
Related Posts

Post a Comment