
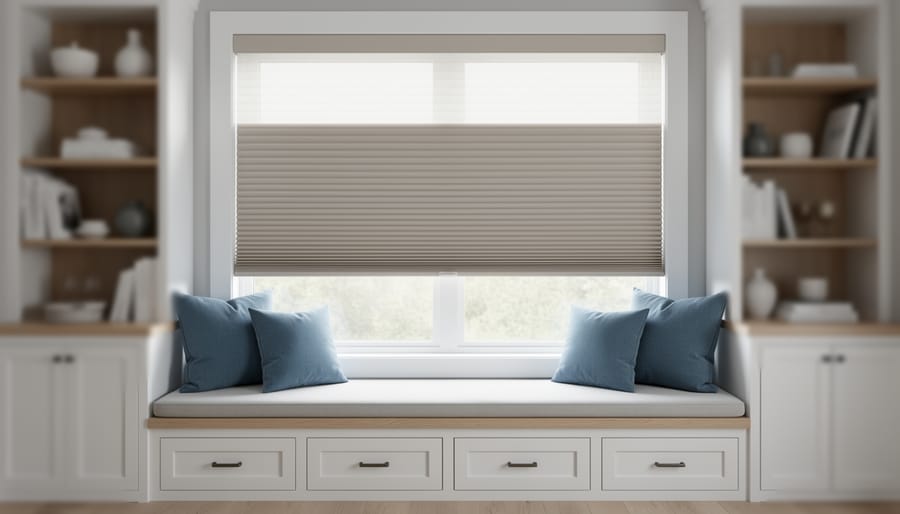
Choose Roman shades or café curtains that mount above the window frame, allowing your seat cushion to remain unobstructed while maintaining full functionality. These treatments sit high enough to clear the seating area yet provide privacy and light control when needed. Install inside-mount cellular shades that stack compactly at the top of the window, taking up minimal space and leaving your window seat completely accessible for reading, relaxing, or storage access.
Consider roller blinds with a top-down, bottom-up mechanism that lets you adjust coverage from either direction—pull down from the top for privacy while keeping lower windows clear for seating comfort. This solution works particularly well for modern home design where clean lines matter. You’ll need a cordless drill, level, measuring tape, and appropriate mounting hardware for most installations, with some treatments requiring a hacksaw for custom width adjustments.
Measure your window recess depth before purchasing any treatment, ensuring at least 2-3 inches of clearance between the mounted blind and your seat cushion when fully recessed. Mark mounting bracket positions with a pencil, checking alignment with your level twice before drilling pilot holes. Test the treatment’s operation before final installation to confirm it doesn’t interfere with seat access or built-in storage compartments common in window seat designs.
Why Window Seats Demand Different Treatment Options
Window seats present distinct installation challenges that standard window treatments simply aren’t designed to handle. Unlike flush wall-mounted windows, these built-in benches extend into the room, creating obstacles for conventional curtains, blinds, and shades.
The most immediate concern is accessibility. Your window treatment needs to operate smoothly without requiring you to climb onto the seat each time you want to adjust it. This rules out many bottom-up shade systems and standard curtain configurations where access points sit at window sill level, now blocked by the seating platform.
Clearance becomes critical when the seat protrudes several inches from the wall. Traditional inside-mount blinds won’t accommodate the seat’s depth, while outside-mount options must extend far enough to clear both the window frame and the bench itself. This affects your measurements significantly and may require custom brackets or extended mounting hardware that you won’t find in standard installation kits.
Comfort matters too. Anyone sitting on your window seat shouldn’t feel trapped behind heavy drapes or constantly bump their head on dangling cords and mechanisms. Treatments that hang too low or project too far inward create awkward, unusable spaces rather than the cosy reading nooks most homeowners envision.
Light control requirements also differ from standard windows. Window seats often serve as prime relaxation spots where lighting design considerations become essential. You’ll need treatments offering flexible light management, from full blackout for afternoon naps to filtered natural light for reading, all while maintaining easy operation from a seated or standing position.
The seat cushions themselves introduce another variable. Thick cushions reduce the available clearance even further, and fabric treatments that touch upholstery create cleaning headaches and potential damage from friction and moisture transfer.
Top Window Treatment Types That Actually Work for Window Seats
Roman Shades: The Space-Saving Winner
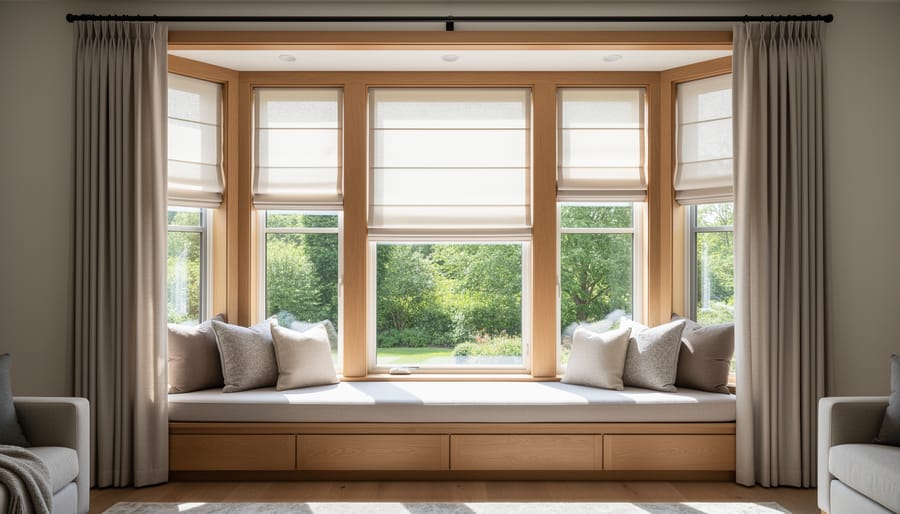
Roman shades are the go-to choice for window seats because they stack neatly at the top of the window when raised, leaving your seating area completely unobstructed. Unlike traditional curtains that require floor clearance, these shades mount inside or outside the window frame and eliminate the fabric pooling issue that makes window seats impractical.
When choosing Roman shades, fabric selection matters both aesthetically and functionally. Light-filtering linen or cotton blends work beautifully for reading nooks, while blackout fabrics suit bedrooms with window seat arrangements. Consider the fold style too: flat-fold Romans create a modern, streamlined look, while hobbled styles add texture and depth.
Installation is straightforward for most DIYers. Inside-mount shades require accurate measurements of your window’s width, height, and depth. You’ll need a drill, level, measuring tape, and pencil for proper bracket placement. Outside-mount installations offer more flexibility if your window frame lacks sufficient depth or has obstructions.
Cost-wise, DIY installation of ready-made Roman shades runs between 40 to 150 dollars per window, depending on size and fabric quality. Custom shades increase costs to 150 to 400 dollars per window. Professional installation typically adds 75 to 150 dollars per window but guarantees precise mounting, which is particularly valuable for multiple windows or challenging installations. Many homeowners find the investment worthwhile to avoid measurement errors that could render expensive custom shades unusable.
Café Curtains: Keep Privacy Without Blocking Your Seat
Café curtains offer an elegant solution for window seats by covering only the lower portion of your window—typically the bottom half or two-thirds. This style maintains natural light and views while providing privacy exactly where your seat is positioned.
For installation, you’ll need a tension rod or mounted curtain rod positioned at mid-window height, usually 36-48 inches from the floor depending on your seat dimensions. Most homeowners can complete this project with basic tools: a drill, level, pencil, and appropriate wall anchors for your wall type. The rod should sit just above where you’d naturally sit to ensure comfortable headroom.
Choose medium-weight fabrics like cotton, linen, or cotton-blend materials that hang well without looking too formal. Lightweight sheers work in spaces needing minimal privacy, while heavier fabrics suit street-facing windows. Measure your window width and add 1.5 times that measurement for proper fullness.
This option works best when you want flexible light control, have attractive window frames to showcase, or need a budget-friendly solution. Café curtains particularly shine in kitchens converted to reading nooks, breakfast nook window seats, and cottage-style spaces. They’re less suitable for bedrooms requiring complete darkness or modern minimalist designs where the vintage aesthetic might clash.
Cellular Shades for Energy Efficiency
Cellular shades, also known as honeycomb shades, are excellent for window seats because their unique construction creates air pockets that provide superior insulation. This double-layer design helps regulate temperature, keeping your window seat comfortable year-round while reducing energy costs by up to 40% according to user reviews in our community.
When mounting cellular shades above a window seat, you have two primary options: inside mount or outside mount. Inside mounting sits within the window frame, preserving your seat’s full width and creating a clean look. Outside mounting covers the entire frame, maximizing light blockage and insulation. Measure carefully before purchasing—inside mounts require precise measurements with minimal margin for error.
Child safety is critical for window seat installations. Cordless cellular shades eliminate strangulation hazards, making them the safest choice for homes with children or pets. Many models feature top-down, bottom-up functionality, allowing you to lower the shade from the top while maintaining privacy below—perfect for window seat reading nooks.
For installation, you’ll need a drill, level, measuring tape, and appropriate mounting brackets. Most cellular shades come with detailed instructions and can be installed in under an hour. If drilling into brick or concrete window frames, consider renting a hammer drill to ensure clean, secure mounting holes without damaging your walls.
Shutters: The Permanent Solution
Interior shutters offer a permanent, high-end solution for window seats that combines functionality with timeless style. Unlike temporary treatments, shutters become part of your home’s architecture and won’t interfere with your seating area when properly installed.
Popular material options include basswood for its lightweight properties and resistance to warping, paulownia for budget-conscious projects, and PVC for high-moisture environments like bathrooms. Each material requires different handling considerations during installation. The key advantage over roller shutters is the ability to control light direction through adjustable louvres while maintaining access to your window seat.
Custom measurement is critical for window seat installations. You’ll need to account for any trim work and ensure adequate clearance between the shutters and seat cushions. Most installations require inside mounting to maximize the seating space below.
Essential tools include a cordless drill, level, measuring tape, and a miter saw for trimming mounting frames. A stud finder helps locate secure anchor points, particularly important given shutters’ weight. Installation typically takes 2-3 hours per window for experienced DIYers.
Cost ranges from 250 to 800 dollars per window depending on materials and customization requirements, making shutters a significant investment that adds property value.
When NOT to Use Full-Length Curtains
Full-length curtain panels typically create frustration on window seats rather than solving design challenges. These floor-length treatments bunch awkwardly when you sit down, trap dirt and moisture from shoes, and prevent comfortable access to the seating area. Traditional panels also block natural light unnecessarily, defeating one of the window seat’s primary benefits. If you’re debating between curtains or blinds for this space, skip full-length options entirely when the seat functions as daily seating rather than occasional storage. High-traffic window seats in kids’ rooms, breakfast nooks, or reading areas need treatments that end above the cushion level to maintain both functionality and cleanliness.
Critical Measurements You Need Before Buying Anything
Getting your measurements right is the difference between a window treatment that looks professionally installed and one that’s clearly DIY-gone-wrong. For window seats, you’re dealing with more complexity than standard windows, so let’s walk through exactly what you need to measure and why.
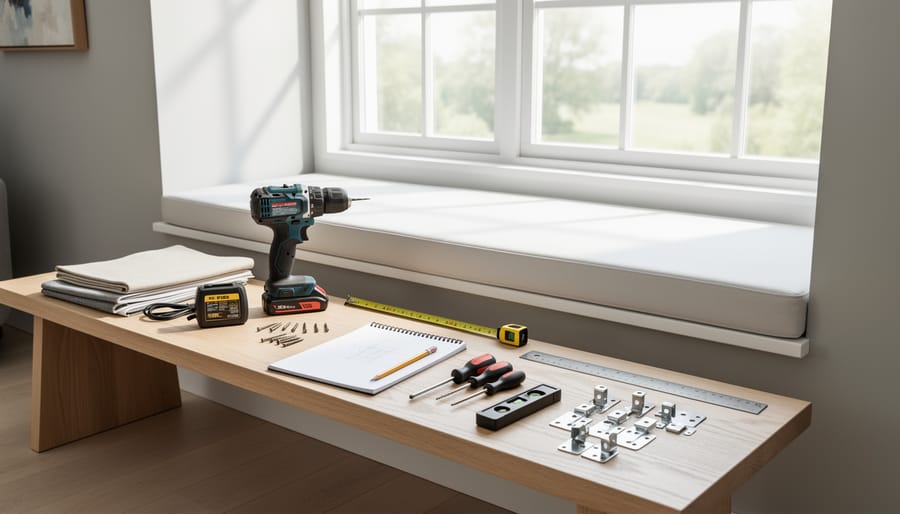
Start by gathering your tools: a metal measuring tape (cloth ones can stretch and give inaccurate readings), a notepad, and a stepladder if needed. Always measure in three places across the width and height of your window, as frames are rarely perfectly square. Use the largest measurement to ensure complete coverage.
Here’s where window seats get tricky. You need four critical measurements:
First, measure your window width from outside edge to outside edge of the frame. Second, measure the height from the top of the frame to where you want the treatment to end. Third, and this is crucial for window seats, measure the distance from the window to the front edge of your seat. This tells you how much clearance you need for treatments that project into the room. Finally, measure the seat depth including any cushions at their compressed height when someone’s sitting down.
The biggest mistake people make is forgetting to account for cushion loft. Your cushions might be 4 inches thick when sitting on the seat, but compress to 2 inches under weight. Measure both, because treatments like Roman shades need to clear the compressed height, while bypassing shutters need to account for the full loft when open.
For recessed installations, measure the depth of your window recess. If it’s less than 3 inches deep and you have a window seat, you’ll likely need outside-mount treatments to avoid the hardware interfering with your seating area.
Write everything down with labels. Community feedback shows that taking photos with measurements marked digitally helps avoid confusion when ordering. Trust the numbers, not your eye, because our brains are terrible at estimating dimensions accurately.

Installation Tools and Hardware You’ll Actually Need
Having the right tools makes window seat treatment installation straightforward, while the wrong ones turn a weekend project into a frustrating ordeal. Here’s what you’ll actually need based on your chosen treatment.
For curtains and drapes, you’ll need a quality cordless drill with adjustable torque settings (essential for avoiding stripped screws in architraves), a stud finder for secure mounting, a spirit level (minimum 600mm for accuracy), measuring tape, pencil, and a step ladder. If installing ceiling-mounted tracks, add a masonry drill bit set for concrete ceilings or a hole saw for timber access.
Roman blinds and roller blinds require similar basics but add a hacksaw or pipe cutter if you’re trimming aluminium headrails to size. Many DIYers discover mid-project that their multi-tool isn’t precise enough for this job. Consider hiring a mitre saw if you’re installing multiple treatments, as clean cuts prevent operational issues down the track.
Shutters demand more specialized equipment. You’ll need a jigsaw for custom panel cuts, combination square for precise angles, chisel set for hinge recesses, and clamps to hold panels during fitting. These installations justify tool hire rather than purchase, particularly the jigsaw and quality clamps.
Where to source equipment? Most standard tools are available from local hardware stores, but specialized items like professional-grade mitre saws, laser levels for long spans, or pneumatic staplers for upholstery work are ideal hire candidates. Tool libraries and community workshops often stock these items at fraction-of-purchase rates.
Safety gear matters too. Safety glasses, dust masks for drilling overhead, and work gloves should be non-negotiable additions to your kit, regardless of treatment type.
DIY Installation: What You Can Handle vs. When to Call Help
Installing window treatments above a window seat presents unique challenges that vary significantly based on which option you choose. Here’s an honest breakdown to help you decide whether to tackle it yourself or bring in professional help.
For simple roller blinds or Roman shades, most DIY enthusiasts can manage installation independently. You’ll need basic tools like a drill, level, measuring tape, and stud finder. Expect to spend 1-2 hours per window. The trickiest part is working above the seat safely – use a sturdy stepladder positioned to the side rather than standing on the cushioned surface, which offers unstable footing. One community member shared that they nearly fell when their foot sank unexpectedly into plush cushioning.
Installing curtain rods requires moderate skill, particularly ensuring proper weight distribution for heavy fabrics. Budget 2-3 hours for measuring, bracket installation, and hanging. Working overhead can strain your arms and neck, so take breaks. User reviews consistently mention underestimating how challenging it is to drill straight holes while reaching upward.
Bay window treatments demand professional expertise. The angled measurements, custom brackets, and specialized hardware make this a job for experienced installers. Professional installation typically costs between £150-400 but eliminates measurement errors and ensures proper structural support.
Cost-wise, DIY saves 40-60% on installation fees. However, mistakes can prove expensive – incorrect measurements or damaged walls offset initial savings. Consider professional help if you’re uncomfortable using power tools, lack proper ladder access, or are installing treatments worth over £500.
Safety first: always turn off power if drilling near light switches, wear safety glasses, and never overreach. If you feel uncertain at any point, calling a professional isn’t admitting defeat – it’s smart decision-making that protects both you and your investment.
Real User Solutions: What Actually Worked
We reached out to homeowners who’ve successfully solved their window seat treatment challenges, and their real-world experiences offer valuable insights.
Sarah from Manchester discovered that mounting Roman blinds directly to the window frame rather than above it was game-changing. “I thought I needed fancy hardware, but standard brackets positioned inside the recess meant the blinds sat flush and didn’t interfere with sitting on the seat,” she explains. Her tip: measure the recess depth carefully before purchasing to ensure clearance when the blind is raised.
Professional installer James recommends cafe curtains for budget-conscious homeowners. “Mount a tension rod or slim curtain pole halfway up the window. You get privacy without blocking natural light, and there’s zero impact on headroom when you’re using the seat. Total cost under thirty quid, and no power tools needed.”
The most common pitfall? Not accounting for cushion height. Multiple users reported buying blinds that worked perfectly until they added seat cushions, which then prevented the blinds from lowering completely. Measure from your cushioned seating position, not the bare bench.
DIYer Michelle shared a creative workaround for bay window seats: “I used three separate roller blinds instead of one large one. Each window section operates independently, so I can adjust for sun position while still accessing the seat from any angle.”
For those tackling awkward installations, several community members emphasized the value of having an extra pair of hands and quality measuring tools, particularly when working with recessed windows where precision matters.
Choosing the right window treatment for your window seat ultimately comes down to balancing aesthetics, functionality, and your skill level. Consider how you use the space—will you need frequent access to the window, or is the seat primarily decorative? Factor in the clearance required, light control preferences, and whether you’re comfortable with DIY installation or need professional help.
The good news is that most window seat treatments are achievable DIY projects with the right tools. From mounting Roman shades above the frame to installing inside-mount cellular blinds, having access to quality equipment makes installation smoother and more precise. If you don’t own specialized tools like cordless drills, levels, or stud finders, consider rental options to keep your project budget-friendly without compromising on results.
We’d love to hear about your window seat transformation. What treatment did you choose, and what challenges did you overcome during installation? Share your experiences and photos in the comments below—your insights could help fellow DIYers tackle similar projects with confidence.
Related Posts

Post a Comment