
Select pavers based on your climate and foot traffic patterns—concrete pavers handle freeze-thaw cycles in colder regions, while natural stone withstands intense sun without fading in warmer areas. For driveways expecting vehicle weight, choose interlocking concrete pavers with minimum 80mm thickness, whereas patios and walkways perform well with 50mm options.
Match material durability to your project timeline and budget constraints. Porcelain pavers resist staining and require virtually no maintenance over 25+ years but cost $80-150 per square metre installed. Concrete pavers deliver solid performance at $50-80 per square metre, while natural sandstone and limestone sit between $90-120 per square metre with moderate upkeep requirements.
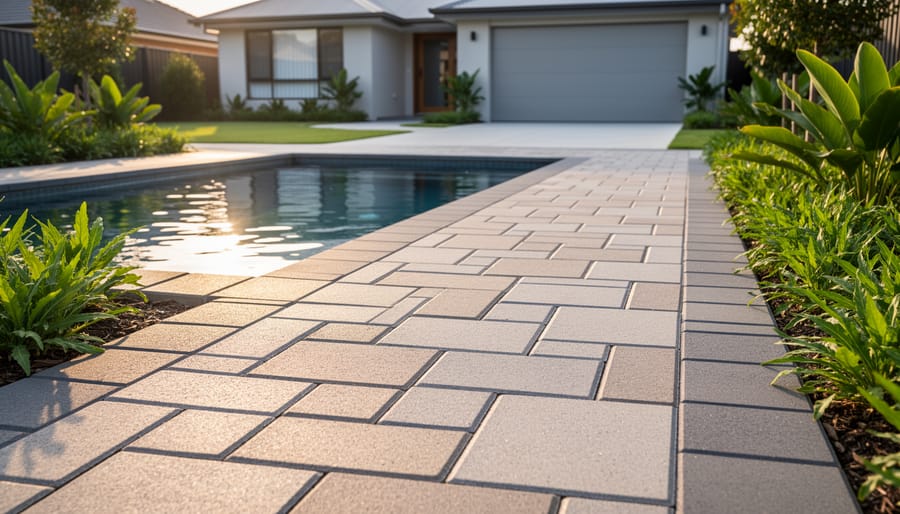
Test slip resistance before finalizing selections, especially around pools and water features. Look for R11-rated pavers (wet barefoot safe) or sandblasted finishes that provide texture without sacrificing aesthetics. Smooth surfaces like polished granite appear stunning but become hazardous when wet.
Consider installation complexity when comparing options. Concrete and clay pavers suit DIY projects with basic leveling tools and plate compactors available for hire, saving $40-60 per square metre in labor costs. Large-format porcelain and irregular natural stone require professional cutting equipment and expertise to avoid costly mistakes.
Your outdoor paver choice fundamentally shapes your property’s functionality and curb appeal, making it one of the most impactful landscape design elements. Understanding material properties, realistic cost expectations, and installation requirements helps you select pavers that perform beautifully for decades while matching your skill level and budget.
What Makes a Paver ‘Best’ for Your Outdoor Project
Matching Pavers to Your Skill Level
Choosing pavers that match your capabilities saves time, money, and frustration. Concrete pavers are the most DIY-friendly option, requiring only basic tools like a rubber mallet, level, hand tamper, and plate compactor. Most homeowners can handle straightforward rectangular patterns with minimal experience. You’ll need a wet saw for cuts, which is readily available at tool rental centers.
Brick pavers sit at an intermediate skill level. While installation follows similar principles to concrete, achieving professional-looking results demands more attention to joint spacing and pattern precision. The cutting process is more forgiving than natural stone, making mistakes less costly.
Natural stone pavers like flagstone or slate present the biggest challenge. Irregular shapes require skilled cutting and fitting, plus specialized diamond blades. The weight alone makes handling difficult, and achieving level surfaces on uneven stone takes experience. Professional installation typically makes financial sense here unless you’re comfortable with masonry work.
Permeable pavers fall into the advanced DIY category. Beyond standard installation, they require proper base preparation and understanding of drainage principles. Getting the subsurface layers correct matters more than the pavers themselves.
Community feedback consistently shows that homeowners who rent professional-grade equipment and start with simple patterns achieve far better results than those rushing into complex projects with inadequate tools.
Climate and Weather Considerations
Your local climate plays a crucial role in determining which pavers will perform best and last longest. Understanding these environmental factors helps you choose materials that won’t crack, fade, or deteriorate prematurely.
Freeze-thaw cycles pose the biggest threat in cold regions. When water seeps into porous pavers and freezes, it expands and can cause cracking or spalling. Look for pavers with low water absorption rates (under 5%) if you live where temperatures regularly drop below freezing. Concrete and dense natural stone options typically handle these conditions better than highly porous materials.
Heat resistance matters in warmer climates. Some pavers absorb and retain heat, making surfaces uncomfortably hot for bare feet. Lighter-colored materials reflect more sunlight and stay cooler, while certain manufactured pavers include heat-reflective technology.
Moisture and humidity affect different materials uniquely. Areas with heavy rainfall need pavers that resist algae growth and maintain slip resistance when wet. Proper drainage becomes essential—poor water management causes more paver failures than the material choice itself.
Regional considerations include salt exposure in coastal areas, which can degrade certain paver types, and intense UV radiation in sunny climates that may fade colored pavers over time. Check community reviews from users in similar climate zones to learn how specific paver types perform in real-world conditions matching yours.
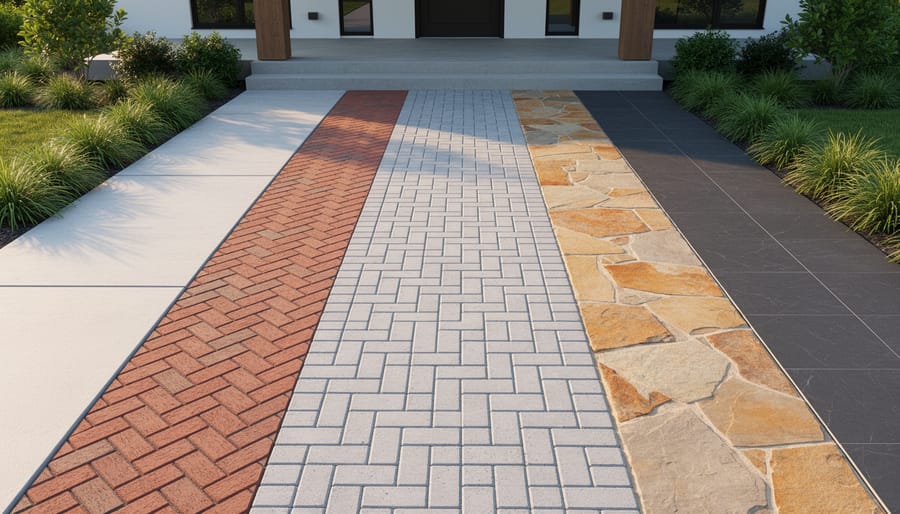
Top Paver Materials: The Complete Breakdown
Concrete Pavers: The Versatile Workhorse
Concrete pavers remain the go-to choice for many outdoor projects, offering an unbeatable combination of affordability, durability, and design flexibility. These manufactured units come in three main types, each serving different needs and budgets.
Standard concrete pavers are the most common option, available in rectangular, square, and interlocking shapes. They typically last 25-50 years when properly installed and maintained. Modern manufacturing techniques have transformed these workhorses beyond basic gray slabs into an impressive array of colors and textures that mimic natural stone, brick, or even wood grain.
Permeable pavers address drainage concerns by allowing water to filter through joints or the paver body itself. These are particularly valuable for eco-conscious projects or areas with strict stormwater management requirements. The trade-off is slightly higher cost and more specialized installation needs.
Stamped or textured concrete pavers offer enhanced visual appeal with surface patterns that replicate premium materials at a fraction of the cost. Expect to pay between $3-15 per square foot depending on complexity and finish quality.
Installation requires proper base preparation, which is where having the right equipment makes all the difference. A plate compactor ensures your base is solid, while a wet saw handles cuts cleanly and efficiently.
Community members consistently praise concrete pavers for DIY-friendliness. As one homeowner shared, “I tackled my 200-square-foot patio over a weekend with rented equipment. The interlocking design was forgiving for a first-timer, and three years later it still looks great.”
Best applications include patios, walkways, driveways, and pool decks. The versatility means you can start small and expand later while matching existing pavers perfectly.
Natural Stone Pavers: Timeless Beauty with a Price
Natural stone pavers bring unmatched authenticity to outdoor spaces, transforming ordinary patios into one of those luxurious home features that truly stand out. The most popular options include flagstone, slate, granite, and limestone, each offering unique characteristics and price points.
Flagstone delivers that organic, irregular look perfect for creating natural-looking pathways and terraces. Slate provides excellent slip resistance and maintains its colour beautifully, making it ideal for pool surrounds. Granite offers exceptional durability and handles freeze-thaw cycles better than most alternatives, whilst limestone creates a softer, Mediterranean aesthetic that many homeowners love.
The authenticity benefits are clear: no two natural stone pavers look exactly alike, colours develop character over time, and the material literally lasts generations when properly installed. However, the maintenance realities deserve honest discussion. Stone requires periodic sealing to prevent staining, especially limestone and flagstone which are more porous. Moss can accumulate in shaded areas, and certain stones may develop efflorescence (white salt deposits) during the first year.
Installation challenges set natural stone apart from manufactured alternatives. Irregular thicknesses mean you’ll spend considerable time on base preparation and leveling. A plate compactor and masonry saw become essential tools, and many DIYers find hiring these tools more practical than purchasing for a single project. The weight factor shouldn’t be underestimated either; granite pavers can exceed 35 kilograms each.
Cost considerations range from around 40 dollars per square metre for basic flagstone to over 150 dollars for premium granite. The investment makes sense when permanence matters, your design embraces natural variation, and you’re committed to long-term property enhancement rather than quick cosmetic updates.
Brick Pavers: Classic Appeal That Lasts
Clay brick pavers have been beautifying outdoor spaces for centuries, and there’s good reason they remain a top choice today. These traditional pavers offer exceptional durability, often lasting 50-100 years when properly installed, making them one of the longest-lasting paving options available.
What sets brick pavers apart is their timeless aesthetic appeal and natural color variations. Made from fired clay, they develop character over time rather than looking worn. The classic red, brown, and terracotta tones blend seamlessly with most architectural styles, from historic homes to contemporary landscapes.
Design flexibility is another major advantage. Standard brick pavers come in multiple sizes, with running bond, herringbone, and basket weave patterns being community favorites according to user reviews. Many DIYers appreciate that bricks can be laid in sand-set installations for patios and walkways, though driveways typically require a more robust concrete base.
Installation does demand attention to proper base preparation. You’ll need to excavate 7-9 inches deep, create a compacted gravel base, add bedding sand, and use edge restraints to prevent shifting. A plate compactor is essential for achieving professional results, and renting one for a weekend project typically costs less than purchasing.
The main considerations are cost, running slightly higher than concrete pavers, and potential for efflorescence (white mineral deposits) in the first year. However, their proven track record and low maintenance requirements make brick pavers a sound long-term investment. Community feedback consistently highlights their ability to maintain structural integrity even in freeze-thaw climates when installed correctly.
Porcelain Pavers: The Modern Game-Changer
Porcelain pavers represent one of the most significant innovations in outdoor hardscaping over the past decade. Manufactured using high-pressure compression and extreme heat, these engineered pavers deliver exceptional performance that’s catching the attention of both DIY homeowners and professional landscapers.
The standout advantage of porcelain pavers is their impressive stain resistance. Unlike natural stone that requires regular sealing, porcelain’s non-porous surface repels oil, wine, and other common patio spills with minimal effort. A simple rinse or quick wipe-down typically handles most messes, making them ideal for outdoor kitchens and entertaining spaces. Users consistently praise this low-maintenance quality in community reviews, especially those with young families or frequent guests.
These pavers also excel in durability. They resist fading from UV exposure, won’t crack from freeze-thaw cycles, and maintain their appearance for decades with virtually no upkeep. Many manufacturers offer contemporary designs that mimic natural wood, marble, or concrete at a fraction of the weight, which simplifies installation logistics.
However, there are trade-offs to consider. Porcelain pavers typically cost more upfront than concrete alternatives, often ranging from $8 to $25 per square foot depending on design complexity. Installation requires specialized techniques and tools since the material can chip if handled roughly. Most professionals recommend using pedestal systems or specific adhesives rather than traditional sand-set methods.
The specialized installation needs mean DIYers should carefully research proper techniques before tackling larger projects, though smaller applications like walkways can be manageable with patience and the right equipment.
Rubber and Composite Pavers: Specialty Solutions
When traditional pavers don’t quite fit the bill, rubber and composite materials offer innovative alternatives worth considering for specialized applications.
Rubber pavers, typically made from recycled tires, excel in play areas, gym spaces, and rooftop installations where safety and cushioning matter most. They provide excellent shock absorption, reducing injury risk from falls—a priority for families with young children. These pavers remain cooler underfoot than concrete in summer heat and offer superior slip resistance when wet. Installation is straightforward since rubber pavers are lightweight and don’t require heavy equipment or complicated base preparation. However, they can fade over time with UV exposure, may develop odors in extreme heat, and generally cost more upfront than basic concrete options.
Composite pavers blend recycled plastics with other materials, creating eco-friendly alternatives that appeal to environmentally conscious homeowners. They resist moisture, won’t rot or splinter, and require minimal maintenance—no sealing or regular treatments needed. Composites work well for rooftop decks and balconies where weight is a concern, as they’re significantly lighter than stone or concrete.
The honest drawbacks? Both materials lack the timeless aesthetic appeal of natural stone and may not add the same resale value to your property. They’re also less durable under heavy point loads—think riding mowers or vehicles—making them poor choices for driveways. Community feedback suggests these specialty pavers shine in niche applications but shouldn’t replace traditional materials for general landscaping projects where longevity and classic appearance matter most.
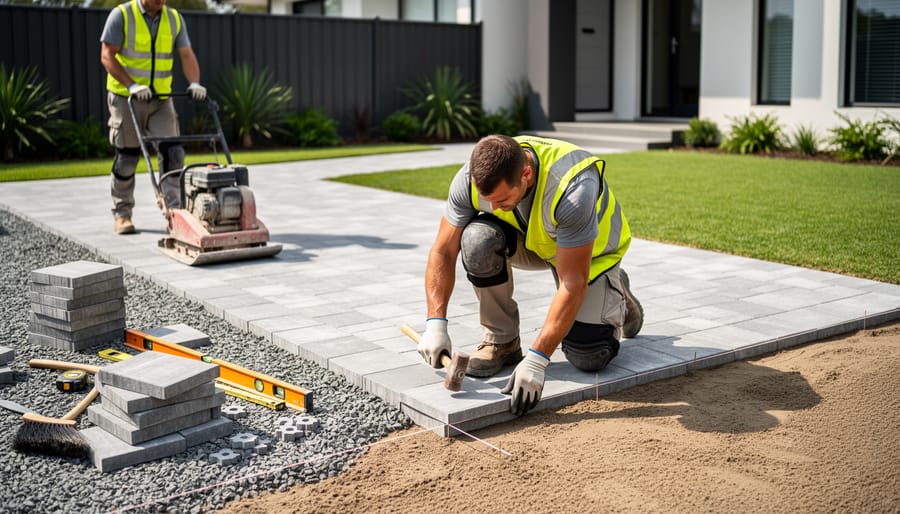
Essential Tools and Equipment for Paver Installation
Getting your paver installation right starts with having the right tools and equipment on hand. Let’s break down what you genuinely need versus what makes more sense to hire.
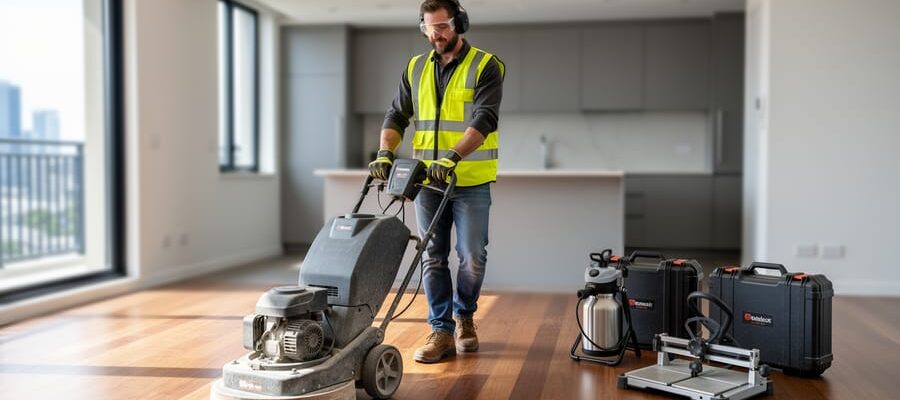
For base preparation, you’ll need a plate compactor to create a stable foundation. These run around $80-120 per day to hire and are absolutely essential for preventing future settling. Purchase a good quality rake, shovel, and wheelbarrow if you don’t already own them. A spirit level and string line are inexpensive must-haves for maintaining proper grades and alignment.
When it comes to cutting pavers, a wet saw or angle grinder with a diamond blade is non-negotiable for professional-looking edges and curves. Wet saws typically hire for $60-90 daily and dramatically reduce dust while delivering cleaner cuts. For smaller jobs, an angle grinder with a masonry blade works adequately and costs about $30-40 to hire.
Safety equipment isn’t optional. Invest in quality safety glasses, hearing protection, dust masks or respirators, and heavy-duty work gloves. Steel-capped boots protect your feet from dropped pavers, which can cause serious injury. These items are worth purchasing outright since they’re reusable across multiple projects.
Finishing tools include rubber mallets for tapping pavers into place, a push broom for spreading jointing sand, and knee pads to save your joints during the installation process. A landscape fabric cutter or heavy-duty scissors helps with weed barrier installation.
One community member shared that hiring a laser level for $40 per day saved hours of re-leveling work, particularly on larger patios. Another noted that investing in a quality tape measure and carpenter’s pencil prevented costly cutting mistakes.
Budget roughly $200-300 for tool hire on a weekend DIY project, or purchase essential hand tools for around $150 if you’ll tackle future landscaping work.
Real-World Project Scenarios: Which Paver Wins
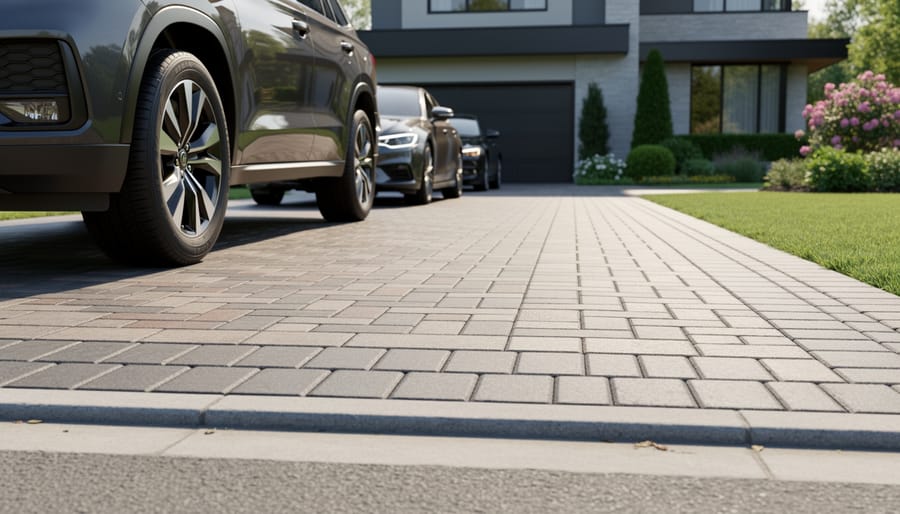
High-Traffic Driveways
Driveways endure substantial weight and repetitive stress, so material selection is critical. Concrete pavers remain the top choice for vehicular traffic, with interlocking designs rated for 8,000 PSI compressive strength—more than adequate for standard vehicles and light commercial use. Their thickness matters: opt for pavers at least 80mm (3 inches) thick for residential driveways.
Clay brick pavers also perform exceptionally well under vehicle loads, offering natural skid resistance when wet. Community feedback consistently highlights their longevity, with many homeowners reporting 30+ years of use without significant deterioration.
Proper base preparation cannot be overlooked. A compacted aggregate base of 150-200mm depth distributes weight effectively and prevents settling. Many DIYers underestimate this step—investing in quality compaction equipment during installation prevents costly repairs later.
Maintenance is straightforward: periodic joint sand replenishment and occasional power washing keep pavers functional. Sealed pavers resist oil stains better, though sealing requires reapplication every 2-3 years. For budget-conscious projects, unsealed concrete pavers with darker colors effectively mask minor staining while maintaining structural integrity.
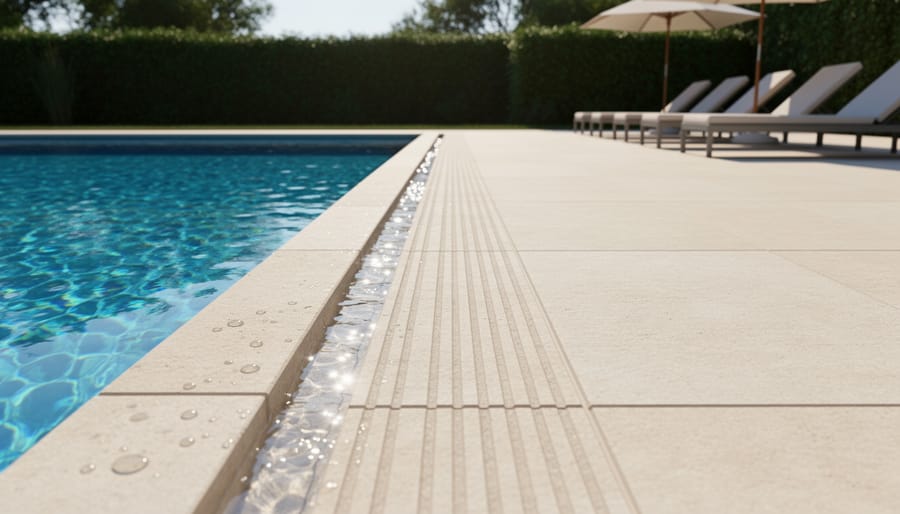
Poolside and Water Features
Pool areas demand pavers with specific performance characteristics that go beyond aesthetics. Slip resistance becomes critical when surfaces are wet, so look for textured or sandblasted finishes rather than polished options. Travertine and textured concrete pavers naturally offer excellent grip, while some porcelain tiles now feature specialized anti-slip coatings rated for wet environments.
Chlorine resistance matters for longevity—pool chemicals can degrade certain materials over time. Porcelain and natural stone like bluestone handle chemical exposure well, whereas some concrete pavers may require periodic sealing to maintain their integrity.
Heat reflection is often overlooked but essential for barefoot comfort. Light-colored pavers reflect rather than absorb heat, staying cooler underfoot during summer months. Travertine remains a top choice for its natural cooling properties, while dark granite or slate can become uncomfortably hot. Community feedback consistently highlights this factor as a make-or-break decision for pool deck satisfaction.
Entertaining Patios and Outdoor Kitchens
For outdoor entertaining spaces and kitchen areas, choosing pavers that resist food and drink stains while remaining easy to clean is essential. Porcelain pavers excel here, offering exceptional stain resistance and requiring only simple soap and water for maintenance. Natural stone like granite provides durability and heat resistance near grills, though it requires periodic sealing to prevent staining from oils and acidic foods. Concrete pavers with sealed surfaces offer a budget-friendly option that handles spills well when properly maintained. Consider textured finishes for slip resistance around pools and wet areas, but avoid overly porous surfaces that trap grease and grime. Community feedback consistently highlights that smooth-finish porcelain and sealed concrete perform best for high-traffic entertaining zones where appearance matters.
Garden Pathways and Walkways
For garden paths, gravel stabilizers paired with permeable pavers offer excellent value while maintaining natural aesthetics. Concrete pavers in simple designs cost $1-3 per square foot and withstand moderate foot traffic beautifully. Many DIYers report success using reclaimed brick or flagstone for character without premium pricing. Consider 12×12-inch concrete pavers for easier installation—you’ll need fewer cuts and less specialized equipment. Community feedback highlights that stepping stone paths using irregular flagstone create charming walkways for under $200 in materials for typical garden routes, making them ideal budget-friendly choices that enhance landscaping without dominating project costs.
Cost Comparison: What You’ll Actually Spend
Understanding the true cost of outdoor pavers goes beyond the sticker price. Let’s break down what you’ll actually spend so you can budget realistically.
Material costs vary significantly by paver type. Concrete pavers run $3-$15 per square foot, making them the most budget-friendly option. Natural stone ranges from $15-$30 per square foot, while premium materials like bluestone or travertine can reach $40 per square foot. Porcelain pavers typically cost $12-$25 per square foot. Remember, these prices don’t include base materials, which add roughly $2-$5 per square foot for gravel and sand.
Installation costs depend heavily on your approach. DIY installation saves substantially but requires tool hire. A plate compactor rental costs around $60-$80 per day, while a wet saw runs $50-$70 daily. Professional installation typically adds $8-$15 per square foot to your total, but ensures proper base preparation and drainage. According to community feedback from DIYers, projects under 200 square feet are manageable for homeowners with basic skills.
Long-term maintenance expenses differ by material. Concrete pavers need sealing every 3-5 years at approximately $1-$2 per square foot. Natural stone requires similar sealing but handles weathering better, potentially reducing replacement costs. Porcelain pavers require minimal maintenance, saving money over time.
For lifetime value analysis, consider a 100-square-foot patio. Budget concrete pavers cost $800 in materials plus $300 for DIY tool rental, while professional installation totals $2,300. Premium natural stone DIY costs $2,500, or $4,500 professionally installed.
Budget optimization tips: Order 10 percent extra material to account for cuts and future repairs. Consider funding your outdoor project strategically if tackling larger areas. Mix premium pavers as borders with budget options for field areas to reduce costs without sacrificing curb appeal.
Common Mistakes That Cost DIYers (And How to Avoid Them)
Community feedback reveals that most paver installation failures stem from five preventable mistakes. Understanding these pitfalls before you start can save significant time, money, and frustration.
The most critical error is inadequate base preparation. DIYers frequently underestimate the importance of proper excavation depth and compaction. Your base should typically extend 6-8 inches below the finished paver surface, with multiple layers of compacted gravel. Skipping this step or rushing through compaction leads to settling, uneven surfaces, and premature failure. Many homeowners report having to completely redo projects within two years due to insufficient base work.
Improper drainage planning ranks second among costly mistakes. Water needs somewhere to go, or it will undermine your installation. Always slope your paver surface away from structures at a minimum 2% grade, and consider where runoff will flow. Some DIYers discover too late that standing water accelerates weed growth, staining, and base erosion.
Edge restraints are another commonly skipped element. Without proper edging, pavers gradually spread and shift, creating uneven surfaces and gaps. Professional-grade plastic or aluminum edge restraints maintain pattern integrity for decades.
Incorrect spacing and joint sand application also plague amateur installations. Pavers need consistent gaps for proper interlock and drainage. Polymeric sand helps stabilize joints, but it must be applied to completely dry pavers and properly activated with water.
Finally, rushing through any phase compromises results. Paver installation requires patience and attention to detail at every stage.
For safety, always call utility companies before excavating, wear appropriate protective equipment, and use proper lifting techniques when handling heavy materials. Consider consulting professionals for complex grading issues, large-scale projects, or situations involving structural concerns. Some aspects of hardscaping genuinely require expert intervention.
Choosing the best outdoor pavers isn’t about following trends or selecting the most expensive option. It’s about matching materials to your specific project requirements, climate conditions, budget, and skill level. A beautiful natural stone patio means nothing if it doesn’t suit your local freeze-thaw cycles or exceeds your installation capabilities.
Start with proper planning. Assess your site conditions, calculate materials accurately, and secure the right equipment before breaking ground. Whether you’re working with concrete, natural stone, porcelain, or clay pavers, success depends more on thorough preparation and correct installation than the material itself.
Remember that the best paver for your project is the one that delivers long-term performance while aligning with your maintenance expectations and aesthetic vision. A DIY-friendly permeable paver system might outperform premium natural stone if you lack professional installation experience.
We’d love to hear about your paver projects. What materials worked best for your situation? What challenges did you encounter during installation? Share your experiences in the comments below to help fellow homeowners and DIY enthusiasts make informed decisions. Your real-world insights create the community-driven guidance that helps everyone build better outdoor spaces.
Related Posts
Post a Comment