
Transform your cramped quarters into functional, comfortable living by installing wall-mounted fold-down furniture that disappears when not in use—a Murphy bed or drop-leaf desk can reclaim up to 25 square feet instantly. Maximize vertical storage by mounting floor-to-ceiling shelving units and utilizing the often-wasted space above doorways and in corners with custom-cut shelves you can create using a circular saw and level. Install sliding barn doors or pocket doors to eliminate the swing radius that traditional doors demand, freeing up precious floor space for furniture placement. Apply the 60-30-10 color rule with light, neutral tones to create visual expansion, then deploy multi-functional furniture pieces like storage ottomans and extendable dining tables that serve double duty.
Maximizing small spaces requires strategic planning before purchasing a single tool or material. Measure your space thoroughly and sketch a scaled floor plan to identify dead zones and traffic flow issues. This preparation prevents costly mistakes and ensures every modification serves a purpose, whether you’re tackling the project yourself or consulting with a tradesperson for the heavy lifting.
Why Compact Living Fails (And How to Fix It)
The Planning Problem Most People Skip
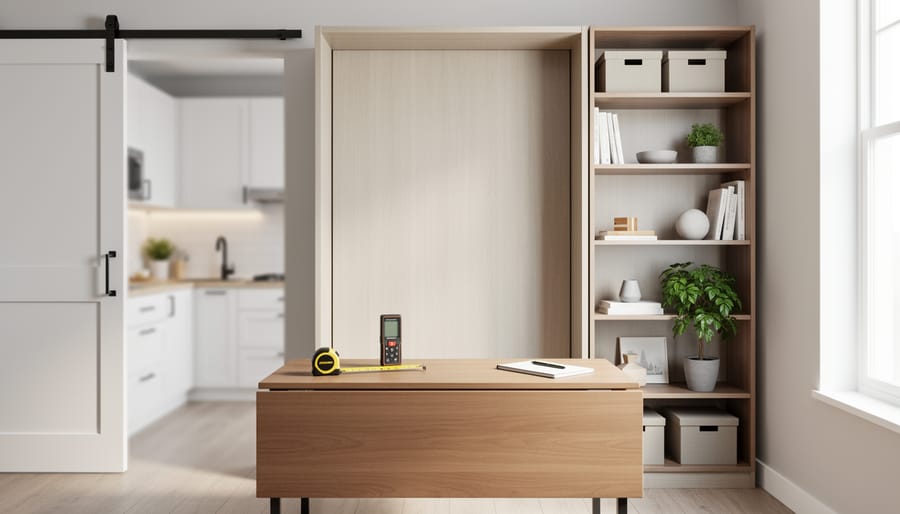
Before you buy a single piece of furniture or knock down any walls, the most crucial step is proper measurement and planning. This is where most compact living projects go wrong—people skip the groundwork and end up with furniture that doesn’t fit or storage solutions that waste valuable space.
Start with accurate measurements of your entire room, including ceiling height, door swing clearances, and window positions. A quality laser measure makes this job significantly easier and faster than traditional tape measures, giving you precise dimensions in seconds. Many hire shops stock these devices, perfect for a one-off planning session without the investment.
Once you have measurements, create a scale floor plan. You don’t need fancy software—graph paper works perfectly. Mark fixed elements like radiators, electrical outlets, and architectural features. This visual reference helps you spot opportunities you’d otherwise miss, like unused vertical space or awkward corners that could house custom storage.
Professional tradespeople recommend photographing each wall and using these images alongside your floor plan. This combination gives you both the technical dimensions and the real-world context needed to make smart decisions about what will actually work in your space.
Tool Selection That Makes or Breaks Your Project
When working in compact living spaces, the wrong tools can literally stop you in your tracks. That bulky drill you bought on sale? It won’t fit between your wardrobe and wall. Here’s why hiring specialized equipment makes financial and practical sense for space optimization projects.
Multi-purpose tools are essential when storage is limited. A quality oscillating multi-tool handles cutting, sanding, and scraping without requiring three separate devices cluttering your space. Compact circular saws with depth adjustment features let you work in tight corners where full-sized models simply can’t reach. Hiring these tools means you get professional-grade equipment that actually fits your project constraints.
Consider the reality: buying cheap alternatives often means sacrificing the precision needed for built-in storage or custom shelving. Poor-quality tools produce uneven cuts, leading to gaps in fitted furniture that waste precious inches. Professional-grade equipment available through hire services delivers accuracy the first time.
Community feedback consistently shows that cordless, lightweight versions of standard tools perform better in cramped conditions. Angle drills, offset screwdrivers, and compact sanders designed specifically for tight spaces complete jobs that would otherwise require dismantling existing fixtures. You pay only for the days you need them, avoiding the storage issues that defeat the purpose of optimizing space in the first place.
Vertical Space Solutions That Actually Add Storage
Wall-Mounted Storage You Can Install This Weekend
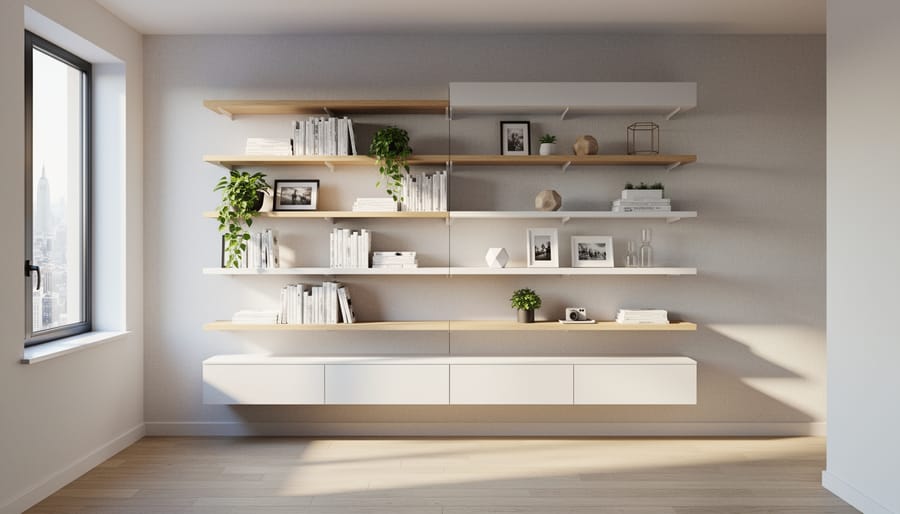
Installing wall-mounted storage transforms wasted vertical space into functional storage without sacrificing precious floor area. Before you begin, gather the essential tools: a quality drill (cordless models offer better maneuverability in tight spaces), a reliable stud finder, a spirit level, measuring tape, and appropriate wall anchors for your wall type.
Start by mapping your wall studs using the stud finder, marking their locations with painter’s tape. This step is critical for secure installation, as mounting directly into studs provides maximum weight capacity. For floating shelves, position your brackets at least two studs apart for stability. Hold each bracket against the wall, check it with your level, and mark drilling points with a pencil.
When drilling into plasterboard, use a 6mm drill bit for standard wall plugs. For heavier loads, toggle bolts or metal cavity anchors provide superior holding power. Always drill pilot holes slightly smaller than your screws to prevent splitting in wooden studs. Community feedback consistently highlights the importance of using the correct drill bit type for your wall material—masonry bits for brick, wood bits for studs, and specialized bits for tiles.
Wall track systems offer incredible flexibility for compact spaces, allowing you to adjust shelf heights as your needs change. These modular solutions work brilliantly for vertical plant storage, book displays, or kitchen organization. Install the vertical tracks first, ensuring they’re perfectly plumb before attaching horizontal brackets.
Safety reminder: always wear protective eyewear when drilling overhead, and double-check for hidden electrical wiring or plumbing before making any holes.
Ceiling Storage Without Damaging Your Space
Overhead storage transforms wasted ceiling space into valuable storage real estate, but proper installation is essential for both safety and longevity. Before starting any ceiling storage project, locate your ceiling joists using a stud finder – these structural supports are the only safe anchor points for heavy loads. Standard ceiling drywall alone cannot support storage weight and will eventually fail.
For overhead racks, consider your load requirements carefully. Most residential ceiling joists can safely support 50-80 pounds when properly anchored, but this varies based on joist spacing and condition. Always check your specific ceiling’s capacity or consult a structural engineer for heavy items. Use lag bolts or through-bolts anchored directly into joists, never rely on hollow wall anchors for overhead storage.
Pulley systems offer flexible storage for seasonal items like bicycles or kayaks. These systems work by hoisting items to the ceiling when not in use, keeping floor space clear. Look for pulley kits rated for at least twice your intended load weight to maintain a safety margin. Install pulleys with heavy-duty eye bolts screwed at least 2.5 inches into solid joists.
Hanging storage rails mounted perpendicular to joists distribute weight across multiple anchor points, making them ideal for lighter items like camping gear or holiday decorations. Space hangers 16-24 inches apart for optimal weight distribution.
Essential safety equipment includes a sturdy ladder, safety glasses, and a drill with appropriate bits. Test all installations with weighted loads before adding your actual items, and conduct regular inspections every six months to check for loose fasteners or stress signs.
Multi-Functional Furniture You Can Build or Modify
Fold-Down Desks and Tables That Disappear
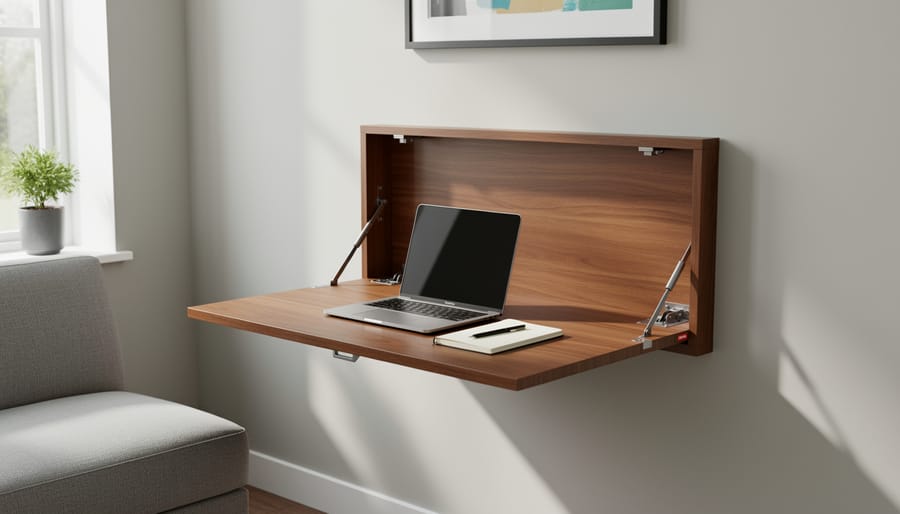
Fold-down desks and tables offer ingenious small home office solutions that literally disappear when not in use. These hinged work surfaces mount directly to walls and fold flat, reclaiming valuable floor space in compact living areas.
To build a basic fold-down desk, you’ll need a sturdy piece of plywood or laminated timber for the desktop surface, piano hinges or heavy-duty drop-down hinges, wall brackets, and appropriate fixings. Essential tools include a circular saw or handsaw for cutting your desktop to size, a power drill for creating pilot holes, and an orbital sander to smooth all edges and surfaces for a professional finish.
Start by determining your ideal desk height, typically 72-76cm from the floor. Cut your desktop material to size, ensuring it’s no deeper than 60cm to prevent the folded desk from protruding too far from the wall. Sand all surfaces thoroughly to prevent splinters and create a smooth working area.
Mount a cleat or support rail to the wall studs using a stud finder and appropriate wall anchors. Attach the piano hinge to both the wall cleat and the underside of your desktop. Add folding leg brackets or chain supports to hold the desk level when deployed. These supports fold away neatly when you’re finished working.
Most tool hire centres stock the circular saws, drills, and sanders needed for this project, making it accessible even if you don’t own these tools.
Storage Beds and Hidden Compartments
Under-bed storage represents one of the most underutilized spaces in compact homes. A standard double bed wastes approximately 6-8 cubic feet of potential storage space beneath it. Let’s explore practical solutions that maximize this area without requiring advanced carpentry skills.
For retrofitting existing beds, simple rolling storage boxes offer the quickest solution. Measure your bed’s clearance height first—most beds provide 8-12 inches of space. Purchase or build shallow storage containers on casters (small wheels that make furniture mobile). For smooth operation across carpet or hardwood, opt for heavy-duty swivel casters rated for at least 50 pounds per wheel.
Building a platform bed with integrated drawers requires more commitment but dramatically increases storage capacity. You’ll need basic power tools: a circular saw or miter saw for cutting plywood or MDF boards, a drill with screwdriver bits, and a jigsaw for drawer openings. The frame typically consists of 2×4 lumber for structural support, with 3/4-inch plywood for the platform top. Install full-extension drawer slides rated for your expected load—25-pound slides work for linens, while 100-pound slides handle heavier items.
Material costs run approximately 150-250 pounds depending on bed size and finish quality. Pine offers affordability, while birch plywood provides better durability for high-traffic use.
Safety consideration: Always wear dust masks when cutting MDF, as it produces fine particles that irritate airways. Secure all moving parts properly to prevent collapse, especially with platform beds supporting significant weight. Test drawer functionality before adding bedding to ensure smooth operation and proper weight distribution.
Room Division Without Permanent Walls
Tension-Based Room Dividers and Curtain Systems
Tension-based dividers offer an ideal solution for compact spaces because they require zero wall damage and minimal tools. Pressure-mounted systems work by creating friction between floor and ceiling, while ceiling-track curtains provide smooth operation with simple installation.
For pressure-mounted dividers, you’ll need just a measuring tape, level, and possibly a rubber mallet. Start by measuring your ceiling height precisely—most systems adjust between 7 to 10 feet. Clean both contact surfaces thoroughly to maximize grip. Position the bottom plate, extend the pole until it’s slightly longer than your ceiling height, then twist or pump the tension mechanism according to manufacturer instructions. Test stability by applying gentle sideways pressure before hanging fabric panels.
Ceiling-track curtains demand slightly more effort but deliver professional results. Mark your track position using a level and pencil, ensuring it’s perfectly straight. For plasterboard ceilings, locate joists with a stud finder or use appropriate anchors rated for your curtain’s weight. Most tracks snap together without tools, though you’ll need a drill for mounting brackets.
Both systems allow instant reconfiguration—slide curtains open for entertaining, close for privacy, or remove dividers entirely when moving. The flexibility means your space adapts to your changing needs without permanent commitment.
Bookshelf and Screen Partitions
Bookshelves and screen partitions serve double duty in compact spaces by defining distinct zones while providing essential storage. Open-back bookcases work particularly well as room dividers because they maintain sight lines and natural light flow, preventing smaller areas from feeling claustrophobic. Position these units perpendicular to walls to separate sleeping areas from living spaces, or use them to create dedicated home office nooks.
Safety is paramount when using furniture as dividers. Freestanding units must be properly anchored to prevent tipping hazards. Use L-brackets to secure the top of your bookshelf to the nearest wall, or invest in anti-tip straps designed for this purpose. For units that can’t reach a wall, consider creating a T-shape configuration by positioning two bookcases perpendicular to each other, which significantly improves stability.
When assembling flat-pack dividers, a cordless drill speeds up the process considerably and ensures screws are tightened to the proper torque. A spirit level is essential for ensuring your partition stands perfectly vertical, preventing items from sliding off shelves over time.
For enhanced functionality, choose units with adjustable shelving that adapts to your storage needs. Mix open shelves with closed cabinet sections to balance display space with concealed storage, keeping your compact space looking organized and intentional.
Smart Storage in Dead Spaces
Corner Solutions That Maximize Every Inch
Corners are often the most underutilized areas in compact homes, yet they offer tremendous storage potential. Corner shelving units can transform dead space into functional storage, while rotating carousel systems make accessing items in deep corner cabinets effortless.
For custom-fit solutions, you’ll need precision tools to work with your space’s unique dimensions. A compound mitre saw ensures accurate angle cuts for corner shelving that fits perfectly against two walls. When working with tighter spaces or circular designs, a jigsaw provides the maneuverability to create curved cuts for rotating units.
Installing corner shelves often requires secure mounting into wall studs. A cordless drill with appropriate bits makes installation straightforward, while a stud finder ensures you’re drilling into solid support. For floating corner shelves, you’ll need a spirit level to maintain proper alignment across two wall planes.
Community feedback consistently highlights lazy Susan mechanisms as game-changers for corner cabinets, particularly in kitchens and bathrooms. These rotating platforms double your accessible storage compared to static shelving. Many DIYers recommend measuring your corner space carefully before purchasing or building, as even a centimeter can make the difference between a perfect fit and an unusable installation.
Under-Stair and Sloped Ceiling Storage
Awkward angles don’t have to mean wasted space. Under-stair areas and sloped ceilings present unique storage opportunities when you approach them with the right measuring techniques and tools.
Start by creating a cardboard template of your space. Hold large pieces against the slope or staircase profile and trace the exact angle. This method prevents costly material waste from incorrect cuts. Transfer these measurements to your storage materials using a sliding bevel gauge, which captures precise angles that standard measuring tools miss.
For cutting custom-fit shelving and storage units, a circular saw with an adjustable base plate handles angled cuts accurately. When working with tighter spaces, a jigsaw offers better maneuverability around corners and curves. Always measure twice and cut once—this old adage proves especially true with angled work.
Consider modular drawer systems that pull out from under stairs, maximizing every inch of depth. For sloped ceilings, built-in units that follow the roofline create seamless storage while maintaining headroom where you need it.
Community feedback consistently highlights the importance of test-fitting pieces before final installation. Dry-fit everything first, making minor adjustments with a hand plane or sander to achieve that professional, gap-free finish.
Essential Tools for Compact Living Projects
The Core Tool Kit for Space Optimization
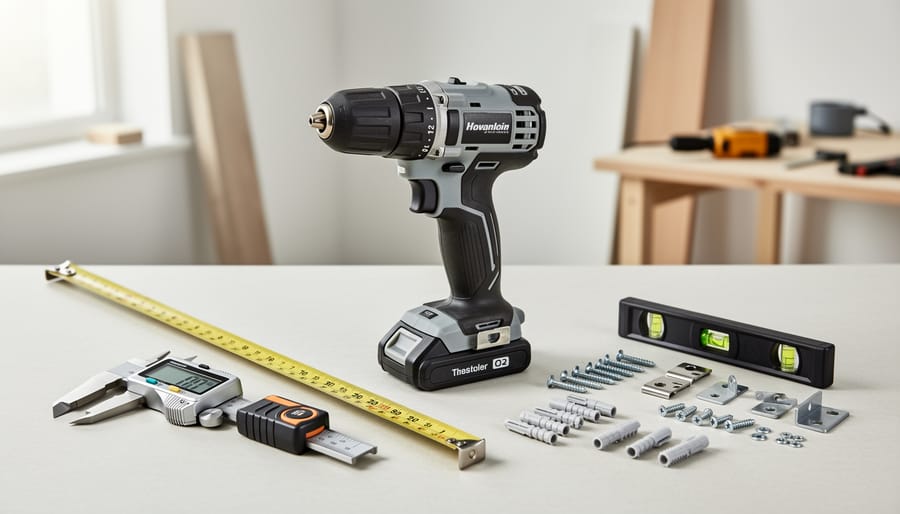
Every compact living project starts with the right equipment. A cordless drill remains your most versatile investment—look for 18V models with adjustable torque settings for everything from installing floating shelves to assembling modular furniture. Pair this with a compact circular saw or jigsaw for custom cuts when building storage solutions.
Accurate measuring tools prevent costly mistakes in tight spaces. A laser measure eliminates the awkwardness of traditional tape measures in cramped areas, while a digital level ensures your wall-mounted units sit perfectly straight. Don’t overlook quality fastening tools—a brad nailer speeds up trim work around built-ins, and a stud finder is essential for secure mounting in limited wall space.
Here’s the practical reality: purchasing specialized tools for a one-time project rarely makes financial sense. If you’re tackling a single weekend renovation, hiring equipment costs a fraction of buying. Community reviews consistently show that hiring power tools for projects under two weeks saves 60-70% compared to purchasing. Save your budget for permanent space-saving furniture instead. For ongoing projects or multiple rooms, ownership becomes more economical after calculating hire costs versus purchase price.
Specialty Tools Worth Hiring for Specific Projects
When tackling compact living space projects, certain professional-grade tools can transform your results without requiring permanent storage space. A track saw delivers perfectly straight cuts for custom shelving and room dividers, essential for maximizing vertical storage. Unlike traditional circular saws, track saws include guided rails that ensure precision even in tight corners where table saws won’t fit.
Biscuit joiners create strong, invisible joints for built-in furniture and cabinetry, giving your compact space solutions a professional finish. These tools cut crescent-shaped slots that align wooden pieces seamlessly, perfect for constructing fold-down desks or Murphy beds.
Pneumatic nailers speed up installation work significantly. A brad nailer handles trim work and lightweight assemblies, while a framing nailer tackles heavier structural projects like building loft platforms.
The cost-benefit analysis favors hiring for most DIYers. A quality track saw costs upwards of 400 pounds, yet rental runs just 25-40 pounds daily. For a weekend shelving project, you’ll spend under 80 pounds hiring versus purchasing equipment that demands precious storage space afterward.
Community feedback consistently shows that hiring these specialty tools for specific projects delivers professional results without the financial commitment or storage burden of ownership, perfectly aligning with compact living principles.
Transforming your compact living space doesn’t require a complete renovation or a massive budget. As we’ve explored throughout this guide, success comes down to three key elements: thoughtful planning, choosing the right tools for each project, and applying creative problem-solving to your unique space. The beauty of compact living solutions is that they’re highly achievable with a DIY approach, especially when you have access to the proper equipment through tool hire services.
Start small if you’re feeling overwhelmed. Pick one project that addresses your biggest pain point, whether that’s vertical storage in your kitchen, a fold-down desk for your home office, or custom shelving for an awkward corner. Each completed project builds your confidence and skills while immediately improving your daily living experience.
Remember that the compact living community is vast and supportive. Share your projects, ask questions, and learn from others who’ve tackled similar challenges. User reviews and community feedback offer invaluable insights into which tools work best for specific applications and which techniques deliver the most impact. Your compact space has potential you haven’t discovered yet, and with the right approach, you’ll create a home that feels twice its size while perfectly reflecting your needs and style.
Related Posts

Post a Comment