
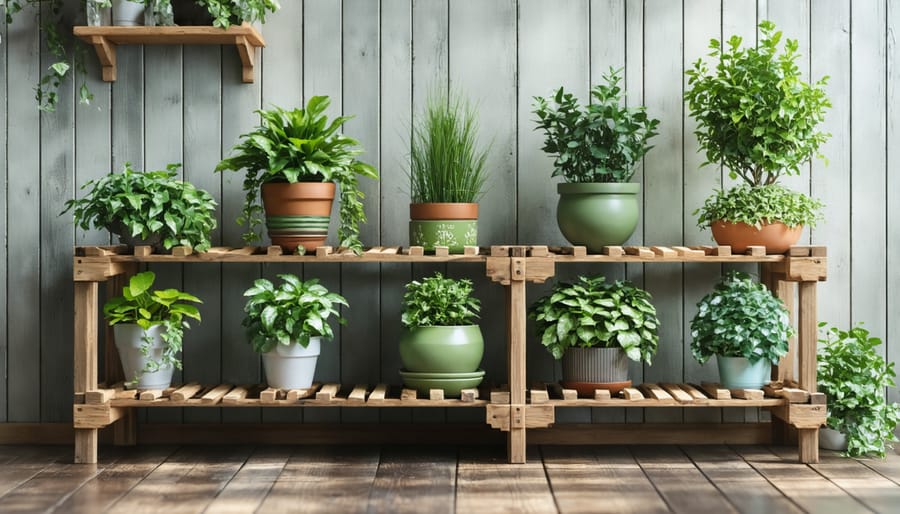
Transform rugged 4×4 lumber posts into stunning home accent pieces that update your home decor while minimizing waste and maximizing creative potential. Reclaimed timbers bring character through weathered patinas and authentic distressing, while fresh lumber offers clean lines and modern possibilities. From elegant porch posts to industrial-style coffee tables, 4×4 wood crafts combine structural integrity with design versatility.
Master these projects using basic power tools – a miter saw, drill, and orbital sander transform simple posts into professional-quality pieces. Beginners can start with tea light holders or rustic planters, while experienced crafters tackle floating shelves and architectural elements. Every piece showcases wood’s natural beauty while providing practical solutions for home organization and décor.
Whether salvaging old deck posts or purchasing new pressure-treated lumber, 4×4 projects offer sustainable ways to create lasting, functional art. The substantial dimensions provide stability for furniture while allowing intricate decorative cuts and joints that elevate simple designs into conversation pieces.
Essential Tools for 4×4 Wood Upcycling
Basic Tools Every DIYer Needs
Before diving into your 4×4 project, gathering the right tools for furniture making is essential for success. Start with a quality circular saw or miter saw for clean, precise cuts. A power drill with various bits is crucial for joinery and assembly, while a good orbital sander will ensure smooth surfaces.
You’ll need measuring and marking tools, including a tape measure, speed square, and carpenter’s pencil for accurate layouts. A sturdy workbench or sawhorses provides a stable work surface, and clamps are invaluable for holding pieces together during assembly.
For more detailed work, consider adding a chisel set and wood rasp to your toolkit. Don’t forget safety equipment – protective eyewear, ear protection, and a dust mask are non-negotiable. A level and rubber mallet will help ensure your projects are properly aligned and assembled.
Keep your tools organized in a toolbox or dedicated storage area, and always maintain them properly. Remember, quality tools are an investment that will serve you well across multiple projects.

Safety Equipment and Precautions
When working with 4×4 lumber, safety should always be your top priority. Start by wearing appropriate personal protective equipment (PPE), including safety glasses to protect your eyes from wood chips and dust, ear protection when using power tools, and a dust mask or respirator to prevent inhaling sawdust. Steel-toed boots are recommended to protect your feet from falling lumber.
Keep your workspace clean and well-organized to prevent tripping hazards. Always use sharp, well-maintained tools, as dull blades can cause kickback and accidents. When cutting 4×4 posts, ensure they are properly secured with clamps or a sturdy workbench. Never try to hold the lumber with your hands while cutting.
If using power tools, read and follow all manufacturer safety guidelines. Ensure proper ventilation when working indoors, especially when applying finishes or creating dust. Keep a first aid kit and fire extinguisher nearby, and make sure you have adequate lighting in your work area.
For larger projects, consider working with a partner who can help stabilize materials and provide assistance if needed. Never work with power tools when tired or under the influence of alcohol or medications that may affect judgment.
Simple 4×4 Projects for Beginners
Rustic Plant Stands
Transform your 4×4 posts into charming outdoor plant stands that elevate your garden’s aesthetic. Start by cutting your 4×4 into three pieces: one 24-inch piece for the base and two 12-inch pieces for the legs. Sand all pieces thoroughly to prevent splinters and create a smooth finish.
Create notches in the legs using a circular saw set to half the width of your 4×4 (approximately 1.75 inches). These notches should be cut 2 inches from the top of each leg piece. Next, position the legs perpendicular to each other, fitting the notches together to form an X-shape.
Secure the X-base to the center of your 24-inch vertical post using 3-inch deck screws, pre-drilling to prevent splitting. For extra stability, add metal L-brackets at the connection points. Apply exterior wood sealer or paint to protect your stand from weather damage.
For a multi-tiered look, create several stands at different heights. Place them in groups around your patio or garden to showcase potted plants, herbs, or decorative items. Remember to position the stands on level ground and check periodically for stability.
Modern Candle Holders
Transform a simple 4×4 post into elegant candle holders that add warmth and character to any room. Start by cutting your 4×4 into three different lengths: 8 inches, 6 inches, and 4 inches for visual variety. Sand each piece thoroughly, progressing from 80-grit to 220-grit sandpaper for a smooth finish.
Using a 1½-inch Forstner bit, drill holes approximately 1 inch deep into the top center of each block. For added stability, drill a slightly smaller pilot hole first. Remember to keep your drill perfectly vertical for even candle placement.
To prevent splitting, drill slowly and clear wood chips frequently. After drilling, sand the inside edges of the holes to ensure your candles fit snugly. For a rustic look, use a propane torch to carefully char the wood, then brush it with a wire brush to highlight the grain pattern.
Finish your candle holders with two coats of clear polyurethane for protection and sheen. For extra stability, attach non-slip rubber pads to the bottom of each holder. Always use appropriate-sized candles and never leave them unattended when lit.
These versatile holders work beautifully as standalone pieces or grouped together as a centerpiece. Consider creating sets in different heights for a more dynamic display.
Farmhouse-Style Door Stops
Transform a 4×4 post into charming farmhouse-style door stops that blend functionality with rustic appeal. Begin by cutting your 4×4 into 6-inch sections at a 45-degree angle, creating a wedge shape that’s perfect for holding doors. Sand all surfaces thoroughly, starting with 80-grit sandpaper and working your way up to 220-grit for a smooth finish.
For added stability, attach a non-slip rubber pad to the bottom using construction adhesive. To achieve that classic farmhouse look, you can either whitewash the wood with a 1:1 mixture of white paint and water or stain it in a weathered gray tone. For extra character, consider distressing the edges with a hammer or chain before applying your finish.
Optional decorative elements include adding black metal corners, stenciling house numbers, or attaching rustic rope handles. Apply two coats of clear polyurethane to protect your door stops from moisture and wear, especially if you plan to use them in high-traffic areas or on exterior doors.
This project typically takes about two hours to complete, not including drying time, and yields multiple door stops from a single 4×4 post. Remember to wear appropriate safety gear, including eye protection and a dust mask, when cutting and sanding.
Advanced 4×4 Upcycling Projects
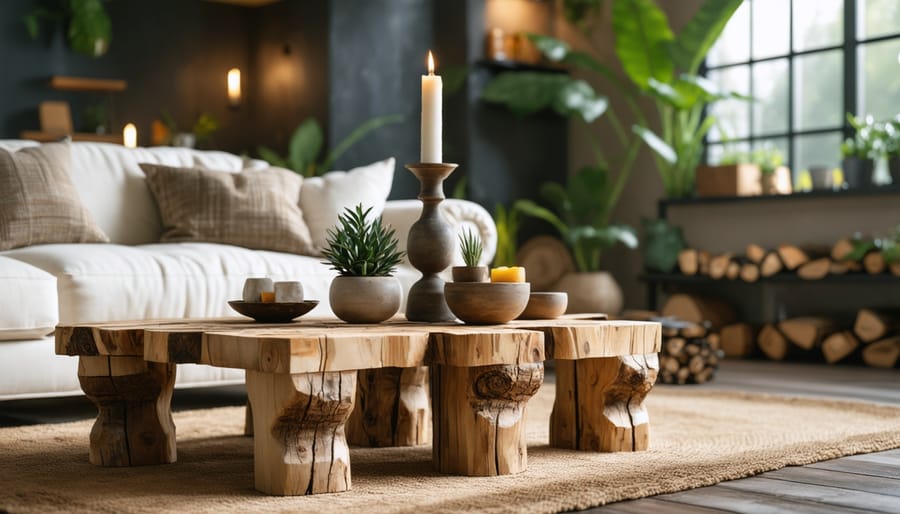
Statement Coffee Table
Transform your 4×4 posts into a stunning statement piece when you create a unique coffee table that combines modern design with rustic charm. This project requires four 4×4 posts cut to 16 inches for legs, two 4x4s at 48 inches for the long sides, and two at 24 inches for the short sides.
Start by sanding all pieces thoroughly with 80-grit sandpaper, progressing to 120-grit for a smoother finish. Create corner joints by cutting 45-degree angles on the long and short side pieces using a miter saw. For added stability, drill pocket holes at each corner joint.
Assemble the frame by connecting the mitered corners with exterior wood glue and 2½-inch pocket hole screws. Attach the legs using 4-inch timber screws, pre-drilling to prevent splitting. Ensure each leg is perfectly square using a carpenter’s level.
For the tabletop, arrange three 4×4 posts side by side, cut to 48 inches. Join them using wood glue and 3-inch deck screws from underneath. Sand the top surface until completely smooth, working up to 220-grit sandpaper.
Secure the tabletop to the frame using angle brackets, ensuring they’re recessed to remain hidden. Apply your chosen finish – we recommend an oil-based polyurethane for durability. Add rubber feet to the legs to protect your flooring.
Remember to wear appropriate safety gear throughout the project, including safety glasses and a dust mask when sanding. Allow 24 hours for the finish to cure completely before using your new coffee table.
Geometric Wall Art
Transform your 4×4 lumber into stunning geometric wall art with this modern, eye-catching project. Start by cutting your 4×4 posts into pieces of equal length – 12-inch segments work well for most wall spaces. Sand each piece thoroughly, paying special attention to the cut ends.
Create your design by arranging the pieces in a geometric pattern. Popular options include diamonds, hexagons, or abstract arrangements. For beginners, try a simple diamond pattern using five pieces. Mark 45-degree angles on each end of your segments to ensure tight-fitting joints.
Before assembly, consider your color scheme. You can leave the wood natural, stain it in varying shades, or paint it with bold colors. For a rustic look, try whitewashing some pieces while leaving others with their natural wood tone. Apply your chosen finish before final assembly for easier coverage.
To mount your creation, attach a sturdy plywood backing cut to size. Use wood glue and finish nails to secure each 4×4 piece to the backing. Ensure the nails are countersunk and fill the holes with wood putty that matches your finish.
For hanging, attach a heavy-duty sawtooth hanger or D-rings to the back of the plywood. Given the weight of 4×4 pieces, make sure to mount the finished piece into wall studs using appropriate hardware.
Safety tip: Always wear eye protection and a dust mask when cutting and sanding. Work in a well-ventilated area when applying finishes, and allow proper drying time between coats.
Finishing Techniques
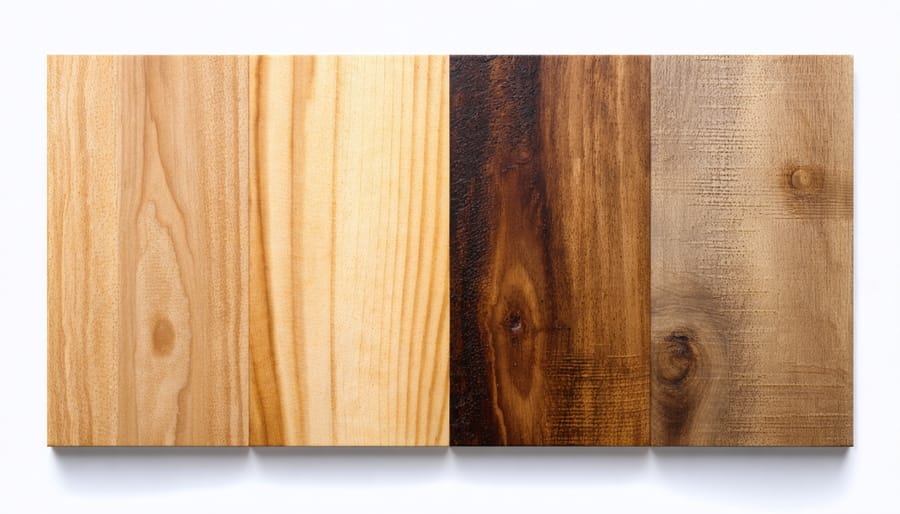
Natural Wood Finishes
Natural finishes allow the inherent beauty of your 4×4 wood projects to shine through while providing essential protection against the elements. For indoor projects, penetrating oils like linseed, tung, or Danish oil offer excellent protection while enhancing the wood’s natural grain patterns. These oils soak deep into the wood fibers, creating a durable finish that’s easy to maintain and repair.
For outdoor projects, consider using marine-grade spar varnish or exterior-grade penetrating oil sealer. These products contain UV inhibitors that protect against sun damage while remaining water-resistant. Apply multiple thin coats, sanding lightly between each layer, for the best results.
Clear water-based polyurethane provides another excellent option, especially for frequently used items like tables or benches. It dries quickly, has minimal odor, and creates a tough protective layer while maintaining wood’s natural appearance. For a more rustic look, try a clear beeswax finish, which offers moderate protection while creating a soft, natural sheen.
Before applying any finish, always test it on a scrap piece of the same wood type. Sand your project thoroughly, progressing through grits from coarse to fine, and remove all dust before application. Remember that some woods, like cedar and redwood, contain natural oils that may affect how finishes adhere, so follow manufacturer recommendations for your specific wood type.
Paint and Stain Techniques
The right finish can transform your 4×4 wood project from rustic to refined. For a natural look, consider using a clear penetrating sealer that protects while highlighting the wood’s natural grain. If you’re working with pressure-treated lumber, allow it to dry completely (usually 3-6 months) before applying any finish.
For a weathered appearance, mix one part vinegar with one part steel wool and let it sit overnight. Apply this solution to create an aged gray patina that’s perfect for farmhouse-style projects. To achieve rich, deep colors, use oil-based stains that penetrate deeply into the wood fibers. Apply with a foam brush or clean cloth, working in the direction of the grain.
Paint offers unlimited color options and excellent protection. For outdoor projects, choose exterior-grade paint and apply at least two coats after a quality primer. Consider using milk paint for an authentic vintage look – it’s non-toxic and creates a unique, slightly distressed appearance as it ages.
For added durability, especially on outdoor pieces, finish with a water-resistant sealer. Multiple thin coats provide better protection than one thick layer. If you’re creating indoor decorative pieces, try color washing or dry brushing techniques to add depth and character while maintaining the visible wood grain.
Always test your chosen finish on a scrap piece first, and work in a well-ventilated area while wearing appropriate safety gear.
Working with 4×4 lumber opens up a world of creative possibilities for both novice and experienced woodworkers. From simple garden planters to elaborate outdoor furniture, these projects offer a perfect blend of functionality and artistic expression. Remember to always prioritize safety, use appropriate tools, and take time to properly plan your projects. Whether you’re upcycling old lumber or working with new materials, the satisfaction of creating something beautiful and lasting with your own hands is unmatched. Start with smaller projects to build confidence, and don’t be afraid to experiment with different finishing techniques as your skills grow. The woodworking community is always ready to share tips and experiences, so connect with fellow crafters for inspiration and support. Now it’s your turn to grab some 4x4s and bring your creative vision to life!
Related Posts

Post a Comment