
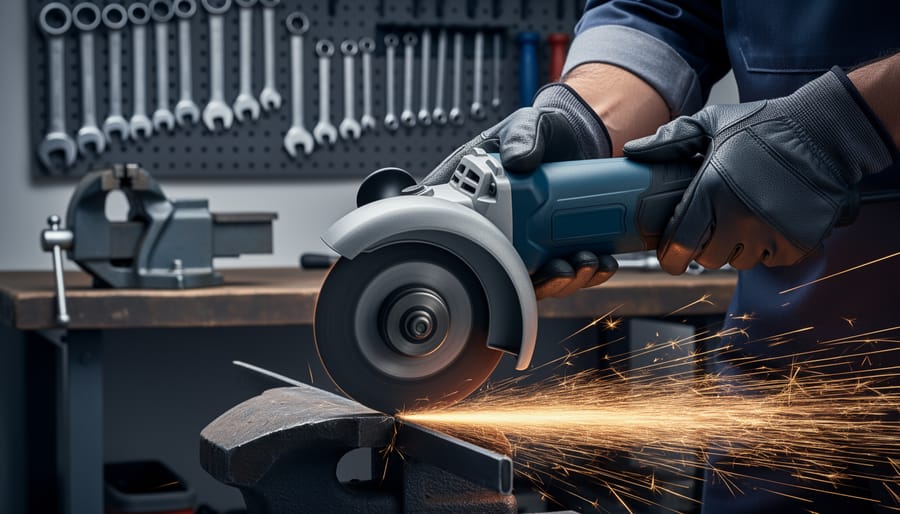
Position your abrasive wheel guard to cover at least 180 degrees of the wheel’s circumference, with the closed side facing you during operation. This single adjustment prevents up to 80% of grinding-related injuries by blocking sparks, debris, and wheel fragments from striking your face and body.
Check that your guard matches your specific wheel type and diameter before each use. Angle grinders, bench grinders, and cut-off saws each require different guard configurations, and using an incompatible guard offers zero protection regardless of how securely it’s attached.
Never operate an abrasive wheel without its guard, even for “quick jobs.” Wheels can explode at speeds exceeding 10,000 RPM, sending razor-sharp fragments in all directions. Legal regulations across most regions mandate guards for all abrasive operations, making their use both a safety requirement and a compliance necessity.
Adjust your guard position based on your cutting or grinding angle, rotating it so the protective barrier stays between you and the wheel. Most guards feature tool-free adjustment mechanisms, allowing repositioning in seconds without compromising security.
Inspect guards for cracks, missing components, or loose mounting hardware before starting work. A damaged guard provides false confidence while offering minimal protection. Replace compromised guards immediately rather than attempting repairs, as structural integrity cannot be reliably restored once compromised.
Understanding these fundamentals transforms abrasive wheel guards from inconvenient accessories into essential safety equipment. Whether you’re a weekend DIYer or seasoned tradesperson, proper guard usage separates professional operation from preventable accidents.
What Safety Guards Actually Do (And Why They’re Required by Law)
The Three Types of Protection Your Guard Provides
Your abrasive wheel guard serves three critical protective functions that work together to keep you safe during operation.
First and foremost, the guard contains wheel disintegration. When an abrasive wheel fails—whether from excessive speed, defects, or improper mounting—it doesn’t just crack. It can explode with tremendous force, sending fragments flying at speeds exceeding 200 miles per hour. The guard acts as a barrier, catching these high-velocity pieces and directing them away from your body. Think of it like a shield that channels the blast zone to a safe direction.
Second, the guard deflects everyday flying debris that’s part of normal operation. Every time you grind metal or cut concrete, you’re creating a shower of sparks, dust, and small particles. Without proper deflection, these materials fly directly toward your face, hands, and body. The guard’s curved design redirects this debris downward or to the sides, keeping your work area safer and visibility clearer. Users in our community frequently report that proper guard positioning dramatically reduces cleanup time and material waste.
Third, guards prevent accidental contact with the spinning wheel. A momentary lapse in concentration or an unexpected slip can bring your hand dangerously close to a wheel rotating thousands of times per minute. The physical barrier of the guard creates a buffer zone between you and the wheel’s exposed surface. This is especially critical during startup and shutdown when you might reach to adjust your workpiece, forgetting the wheel is still coasting.
Understanding Different Guard Types for Different Wheels
Angle Grinder Guards: Adjustable Protection
Angle grinder guards are specifically designed to rotate and adjust, giving you flexibility for different cutting and grinding tasks while maintaining essential protection. These guards typically allow a maximum exposure angle of 180 degrees (half the wheel), though many safety experts recommend keeping exposure closer to 90-135 degrees whenever possible for optimal protection.
The guard should always position itself between you and the wheel, acting as a barrier against sparks, debris, and potential wheel breakage. Before starting work, loosen the adjustment mechanism (usually a quick-release lever or threaded clamp), rotate the guard to your desired position, and firmly retighten it. Never operate the grinder with a loose guard.
For horizontal cutting, position the guard to deflect sparks downward and away from your body. When grinding vertically, adjust it to shield your face and upper body. Many users in our community emphasize the importance of repositioning the guard multiple times during a single project as your working angle changes.
A crucial safety note: if your guard has cracked, bent, or lost its adjustment tension, replace it immediately. According to user feedback, worn guards that slip during operation create serious hazards. Always verify the guard remains secure throughout your task, and readjust if you notice any movement.
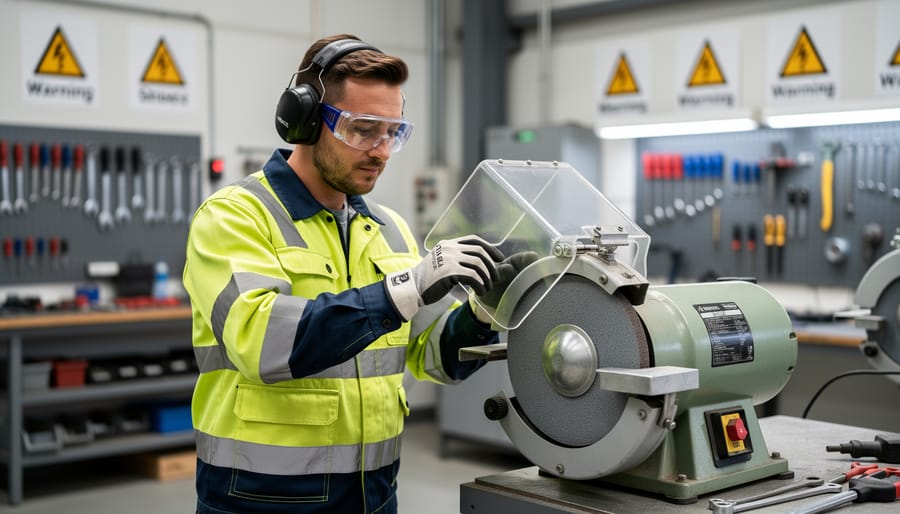
Bench Grinder Guards: Fixed Safety Systems
Bench grinders require three critical fixed safety components that work together to protect you during operation. Understanding these guards and their proper setup is essential for safe grinding work.
The peripheral guard is the large curved shield that covers the grinding wheel, protecting you from wheel fragments if breakage occurs. This guard should cover at least 180 degrees of the wheel’s circumference and remain firmly secured before each use. Most bench grinders have adjustable peripheral guards that can be repositioned as wheels wear down.
The tongue guard, sometimes called an adjustable spark guard, sits between the two grinding wheels in a double-ended grinder. This smaller guard prevents sparks and debris from traveling between wheels and protects against accidental contact with the unused wheel.
Work rests provide crucial support for your workpiece and prevent it from being grabbed by the wheel. Here’s the critical measurement you need to remember: maintain a maximum gap of 3mm (roughly one-eighth inch) between the work rest and the grinding wheel. As wheels wear down during use, this gap increases, so check and readjust your work rests regularly.
Many users in the trades community report checking these gaps weekly or whenever switching between projects. This simple habit prevents workpieces from diving into the gap, which can cause wheel damage, workpiece ejection, or hand injuries. Always adjust guards with the grinder unplugged and wheels completely stopped.
Setting Up Your Safety Guard the Right Way
Before You Start: Pre-Work Guard Inspection Checklist
Before you fire up any angle grinder or bench grinder, taking a few minutes to inspect the safety guard can prevent serious injuries. Think of it like checking your car’s brakes before a long drive – it’s non-negotiable.
Start with a visual inspection of the guard itself. Look for any cracks, chips, or breaks in the metal or composite material. Even hairline cracks can fail under the stress of a spinning wheel. Run your fingers along the edges to feel for damage you might not easily see. If you spot any damage, don’t use the tool until the guard is replaced.
Check that the guard is securely mounted to the grinder. Give it a gentle shake – it shouldn’t move or wobble. Tighten any loose bolts or adjustment mechanisms. The guard must be positioned between you and the wheel, covering at least 180 degrees (half the wheel’s circumference). For bench grinders, the maximum gap between the wheel and the work rest should be 3mm or less, and the gap between the wheel and the adjustable tongue guard should not exceed 6mm.
Verify the guard’s positioning is correct for your specific task. It should deflect sparks and debris away from your body and face. Rotate the guard if necessary to ensure maximum protection for your working position.
Making regular safety inspections part of your routine protects you and extends your tool’s lifespan. Never skip this step, whether you own the equipment or you’re using a rental.
Positioning Your Guard for Maximum Protection
Proper guard positioning is your first line of defense when working with abrasive wheels. Think of the guard as a shield that should always sit between you and the wheel, deflecting sparks and debris away from your body and face.
Start by positioning the guard so the closed side faces you. The open side of the guard should point away from your body, directing sparks downward and to the side. Never position the guard so sparks fly toward yourself or anyone nearby. As one experienced contractor shared in our community reviews, “I always take five seconds to adjust my guard before starting work—it’s saved me from burns more times than I can count.”
For grinding tasks, adjust the guard to sit approximately 180 degrees from where the wheel contacts your workpiece. This maximizes protection while giving you clear visibility of your work area. The gap between the guard and your workpiece should remain as small as possible without touching—typically no more than 6mm.
When switching to cutting operations, reposition the guard so it covers the exposed portion of the wheel not engaged with the material. Cutting generates more aggressive sparks that travel further, so double-check your positioning before starting.
Remember to readjust the guard whenever you change wheels or switch between tasks. Guards can shift during wheel changes, and what worked for grinding may not provide adequate protection for cutting. Take a moment to verify the guard position every time you pick up your grinder—it’s a habit that becomes second nature with practice.
The Most Common Guard Mistakes (That Put You at Risk)
Why Removing Your Guard Is Never Worth It
We’ve all heard the excuses: “I can see the cut line better without it,” “The guard keeps getting in the way,” or “I’m only making one quick cut.” The reality is that no convenience or time-saving justification makes guard removal acceptable. Statistics show that most abrasive wheel injuries occur when guards are missing or improperly positioned, and these incidents can prevent tool-related injuries that change lives permanently.
If visibility is your concern, try repositioning the guard to its maximum allowable opening rather than removing it entirely. Proper lighting—whether a work lamp or headlamp—dramatically improves cut line visibility without compromising protection. For access issues, consider whether you’re using the right tool for the job. A smaller angle grinder or alternative cutting method might be the safer solution.
Remember that guards are engineered specifically for the wheel size and tool type you’re using. They’re tested to contain fragments traveling at speeds exceeding 200 miles per hour. Your reflexes, no matter how quick, simply cannot compete with that velocity. The few seconds you think you’re saving aren’t worth the permanent consequences of wheel failure.
Using the Wrong Guard for Your Wheel Type
Not all abrasive wheels work with every safety guard, and using the wrong combination can lead to serious injury. Each wheel type, whether it’s a cutting disc, grinding wheel, or wire brush, requires a specific guard design to protect you effectively. For example, a guard made for a thin cutting disc won’t provide adequate coverage for a thicker grinding wheel, potentially exposing you to sparks and debris.
Never modify or improvise guards to fit different wheels. Some people remove guard components or file them down to accommodate incompatible wheels, but this eliminates the protection the guard was engineered to provide. Similarly, using no guard at all because “it doesn’t fit” puts you at extreme risk of wheel breakage injuries.
To verify correct matching, always check three things before starting work. First, confirm the wheel diameter matches what the guard is rated for, clearly marked on both components. Second, ensure the wheel thickness suits the guard’s coverage area. Third, check that the wheel’s maximum RPM rating meets or exceeds your tool’s speed. When renting equipment, ask staff to demonstrate proper guard and wheel pairing for your specific project. Keep your tool’s manual handy as it lists compatible wheel types and corresponding guard requirements. Taking five minutes to verify compatibility prevents accidents that could sideline you for months.
When Guards Wear Out: Maintenance and Replacement
Red Flags: When Your Guard Needs Immediate Replacement
Your safety depends on recognizing when a guard has reached the end of its serviceable life. Stop using your angle grinder or abrasive wheel immediately if you notice any visible cracks in the guard material, even hairline fractures. These compromises in structural integrity mean the guard could shatter under stress, defeating its protective purpose entirely.
Deformation is another critical warning sign. If the guard appears bent, warped, or no longer maintains its proper curved shape, it cannot provide adequate protection from debris and wheel fragments. Similarly, inspect all mounting points before each use. Loose bolts, stripped threads, or wobbling connections indicate the guard isn’t securely attached and could shift during operation, exposing you to the spinning wheel.
Pay attention to adjustment mechanisms too. If you struggle to reposition the guard or if it won’t stay locked in your desired position, the internal components have likely worn out. A guard that slips during use is nearly as dangerous as having no guard at all.
Don’t attempt repairs on damaged guards. Replacement parts are inexpensive compared to medical bills or lost work time from injuries. Many users in our community recommend keeping a spare guard on hand, especially for frequently used tools. When in doubt, replace it.
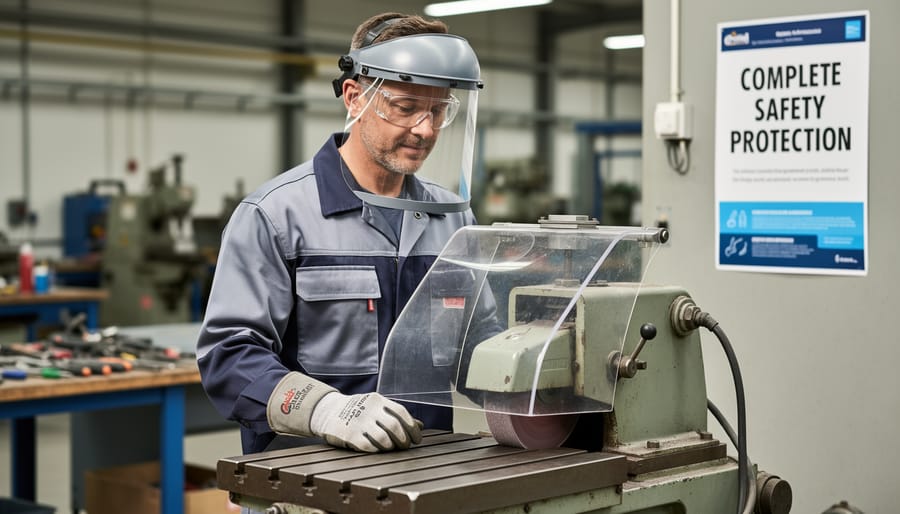
Complete Safety Checklist: Guards Plus Essential PPE
Safety guards are your primary defense, but they’re only part of the equation. A comprehensive approach combines properly positioned guards with essential PPE protection to create multiple layers of defense against potential hazards.
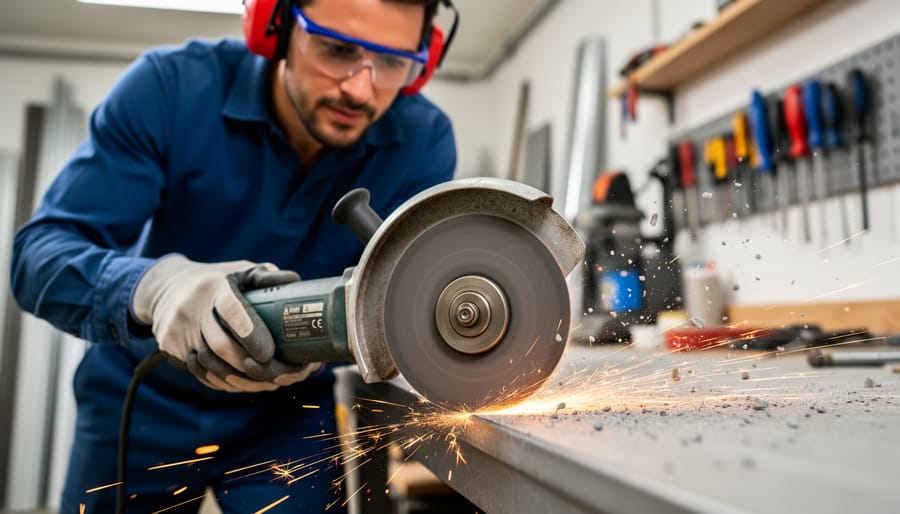
Start with eye protection. Safety glasses with side shields are the minimum requirement, but face shields provide superior coverage when dealing with larger abrasive wheels. Both should meet Australian Standards AS/NZS 1337. Remember that regular prescription glasses don’t count as safety eyewear.
Hearing protection is non-negotiable. Abrasive wheels generate noise levels that can cause permanent hearing damage over time. Foam earplugs or earmuff-style protectors rated for industrial noise are both effective options.
Your hands need protection too. Choose gloves specifically designed for grinder work, offering cut resistance without compromising grip. Avoid loose-fitting gloves that could catch in rotating parts.
Don’t forget respiratory protection when working with materials that create fine dust particles. A properly fitted P2 dust mask filters harmful particulates before they reach your lungs.
Practical tip from our community: Create a PPE station near your work area with all protective equipment clearly visible. This simple reminder system, shared by experienced users, ensures you never skip crucial safety steps in the rush to start a project. Many professionals also keep backup PPE on hand, as face shields and glasses can become scratched or damaged during heavy use, compromising their protective qualities.
Safety guards on abrasive wheels aren’t optional extras or suggestions – they’re absolutely essential, non-negotiable equipment that stands between you and serious injury. Every time you power up an angle grinder, cut-off saw, or bench grinder, that guard is your primary defense against flying debris, wheel breakage, and contact injuries that can happen in a fraction of a second.
We’ve covered the legal requirements, proper positioning, and maintenance protocols throughout this guide, but the most important takeaway is simple: commit to using guards correctly, every single time. No shortcuts, no “just this once” thinking, and no modifications that compromise protection. Your safety and the safety of those around you depend on this commitment.
If you’re hiring equipment rather than purchasing, you’re already a step ahead. Reputable tool hire centers provide properly maintained equipment with correctly fitted guards that meet current safety standards. Don’t hesitate to ask for a demonstration of proper guard positioning and adjustment before you leave – good hire centers expect these questions and welcome the opportunity to ensure you’re fully prepared. Their expertise, combined with your attention to safety protocols, creates the safest possible working environment.
Related Posts

Post a Comment