
Understand that framing forms the skeleton of any structure, defining room dimensions, supporting loads, and providing attachment points for everything from drywall to roofing materials. Whether you’re building a shed, adding a room addition, or learning the trade, mastering framing fundamentals separates successful builds from costly rebuilds. Start by familiarizing yourself with load-bearing versus non-load-bearing walls—the former supports weight from above and requires proper engineering, while the latter simply divides space. Learn to read and interpret construction plans accurately, as misreading a blueprint by even a few inches cascades into major problems during later phases of home construction projects. Invest time understanding lumber sizing conventions, where a 2×4 actually measures 1.5 inches by 3.5 inches due to planing and drying processes.
The difference between platform framing and balloon framing affects your approach—platform framing builds floor-by-floor and dominates modern construction, while balloon framing runs studs continuously from foundation to roof. Master the 16-inch and 24-inch on-center spacing standards that determine stud placement, ensuring proper support for sheathing and finish materials. Recognize that framing quality directly impacts every trade that follows, from electricians fishing wire through stud bays to plumbers running supply lines. This guide breaks down materials, essential tools, step-by-step techniques, and common mistakes that even experienced framers occasionally make, equipping you with knowledge that translates directly to square, plumb, and structurally sound frameworks.
What Structural Framing Actually Means
Structural framing is the skeleton of any building, the framework that holds everything together and determines whether a structure stands strong or fails under pressure. At its core, framing creates the support system for walls, floors, and roofs, distributing the weight of the building and everything inside it down to the foundation. Think of it as the bones beneath the skin of drywall, siding, and finishes.
The key distinction every builder must understand is the difference between load-bearing and non-load-bearing frames. Load-bearing frames carry the structural weight of the building, supporting floors above, roof systems, and transferring these forces to the foundation. Remove or compromise a load-bearing wall without proper support, and you risk catastrophic failure. Non-load-bearing frames, often called partition walls, simply divide interior spaces and support only their own weight plus any attached finishes.
Understanding this difference matters before you pick up a single tool because it determines everything from material selection to fastening requirements to permit needs. A load-bearing wall requires engineered headers over openings, specific stud spacing, and often doubled or tripled framing members. A partition wall offers more flexibility in design and modification.
Just as plumbing systems require understanding of drainage principles before installation, framing demands knowledge of load paths and structural integrity. This foundation prevents costly mistakes, ensures safety, and helps you communicate effectively with inspectors and suppliers.
Many DIYers confidently tackle non-structural projects but underestimate framing complexity. Recognizing whether your project involves load-bearing elements determines whether you need engineered plans, professional consultation, or can proceed independently with proper guidance and the right equipment from your local tool rental provider.
Essential Framing Materials You’ll Need
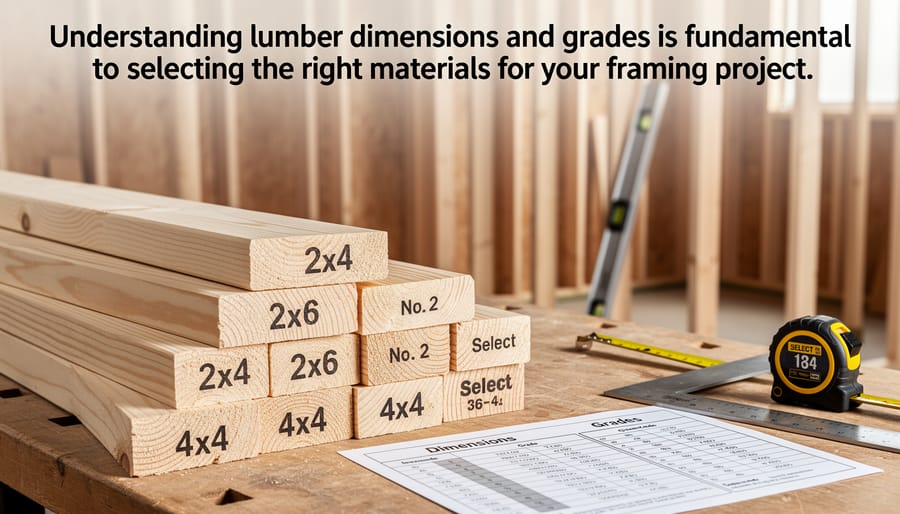
Understanding Dimensional Lumber
When you pick up a 2×4 at the lumberyard, you might be surprised to learn it doesn’t actually measure 2 inches by 4 inches. This common framing lumber actually measures 1.5 inches by 3.5 inches. The reason? The nominal size (the name we use) refers to the rough-cut dimensions before the wood is dried and planed smooth. During processing, lumber shrinks and loses about half an inch in each dimension.
Understanding these actual dimensions matters when planning your project. Here are the most common framing lumber sizes and their actual measurements:
A 2×4 measures 1.5 x 3.5 inches and works perfectly for most interior walls and light-duty framing projects. The 2×6, which actually measures 1.5 x 5.5 inches, is ideal for exterior walls where you need extra space for insulation or when building load-bearing structures. For floor joists and heavier applications, you might need 2x8s (1.5 x 7.25 inches) or 2x10s (1.5 x 9.25 inches).
Many DIYers in our community recommend using 2x6s for exterior walls in colder climates since the extra depth accommodates more insulation, improving energy efficiency. Always check your local building codes, as they often specify minimum lumber sizes for different applications.
Fasteners and Hardware That Hold It Together
Choosing the right fasteners makes the difference between a frame that lasts decades and one that fails prematurely. Understanding your options helps you build with confidence.
For most framing applications, 16d common nails (3.5 inches long) remain the standard choice. These thick-shafted nails create strong connections between studs, plates, and headers. Use 8d nails (2.5 inches) for attaching smaller dimensional lumber or toe-nailing at angles. Many professionals prefer framing screws for their superior holding power and ease of removal if adjustments are needed. Look for structural screws rated for your specific application.
Metal connectors and brackets have revolutionized modern framing by eliminating guesswork. Joist hangers support floor joists and prevent splitting that occurs with traditional toe-nailing. Hurricane ties secure roof rafters to wall plates in high-wind areas. Simpson Strong-Tie and similar manufacturers provide load ratings for each connector, so you can match the hardware to your project’s requirements.
Pro tip from the community: Never substitute fasteners or skip specified connectors to save money. Building inspectors consistently cite improper fastening as a top code violation. When in doubt, consult your local building code or ask experienced framers in online forums for their recommendations. Many builders report that investing in quality fasteners prevents callbacks and ensures structural integrity for years to come.

Engineered Wood Products Worth Knowing
Modern engineered wood products solve problems that solid lumber can’t always handle. LVL (laminated veneer lumber) beams consist of thin wood layers bonded together under heat and pressure, creating incredibly strong support members that won’t warp or twist like dimensional lumber. These beams excel in long spans where traditional lumber would sag or require multiple supports.
I-joists, named for their I-shaped cross-section, use engineered flanges with a plywood or OSB web between them. They’re lighter than solid joists, span greater distances, and maintain consistent dimensions since they don’t shrink or bow. You’ll find them in floor systems and roof framing where stability matters most.
Choose engineered products when you need to span more than 12 feet, require perfectly straight members, or want to minimize callbacks from squeaky floors or sagging beams. They cost more upfront but often save money by eliminating extra support posts and reducing labor time.
The Core Components of Frame Construction
Plates, Studs, and Their Spacing
The foundation of any wall frame consists of horizontal plates and vertical studs working together to create a stable structure. Understanding how these components fit together is essential before you pick up a hammer.
The bottom plate, also called the sole plate, sits directly on the subfloor and anchors the entire wall. At the top, you’ll find the top plate, which gets an additional layer called the double top plate once the wall is erected. This double top plate isn’t just for show—it ties multiple wall sections together and provides critical structural support for ceiling joists and roof trusses above.
Between these plates stand the wall studs, typically 2×4 or 2×6 lumber running vertically. These studs bear the weight of everything above them and provide attachment points for drywall, siding, and other finishes.
Here’s where precision matters: studs are almost always spaced 16 inches on-center, meaning you measure 16 inches from the center of one stud to the center of the next. Some builders use 24-inch spacing for non-load-bearing walls, but 16 inches remains the gold standard.
Why does this spacing matter? First, standard drywall and plywood sheets measure 4 feet wide (48 inches), which divides perfectly into 16-inch intervals. This means your sheets will always land on a stud for secure fastening. Second, this spacing provides adequate structural support without wasting materials. Third, building codes in most areas require it for load-bearing walls.
Pro tip from the community: Always mark your stud locations on the plates before cutting anything. This simple step prevents costly measurement errors during assembly.
Headers, Sills, and Openings
Openings for doors and windows require special attention because you’re removing vertical studs that normally carry structural loads. Headers solve this problem by acting as horizontal beams that redirect weight around the opening and transfer it down to jack studs on either side.
A header consists of two or more pieces of dimensional lumber (often 2×6, 2×8, or 2×10) sandwiched together with plywood spacers to match wall thickness. The required header size depends on the opening width and the load above it—wider openings and heavier loads need beefier headers. Building codes specify minimum sizes, so always check local requirements before starting.
Here’s the basic anatomy: full-height king studs frame each side of the opening. Jack studs (or trimmer studs) sit inside the king studs and support the header ends. The header rests on top of the jack studs, spanning the opening. A sill plate runs horizontally beneath window openings, supported by cripple studs that extend down to the bottom plate.
Pro tip from our community: Many DIYers skip the plywood spacer, creating headers that don’t sit flush with the wall face. This causes drywall headaches later. Take the extra time to build proper headers.
Safety reminder: inadequate headers cause sagging, cracked drywall, and potentially dangerous structural failure. When in doubt, size up or consult a structural engineer.
Joists, Rafters, and Overhead Framing
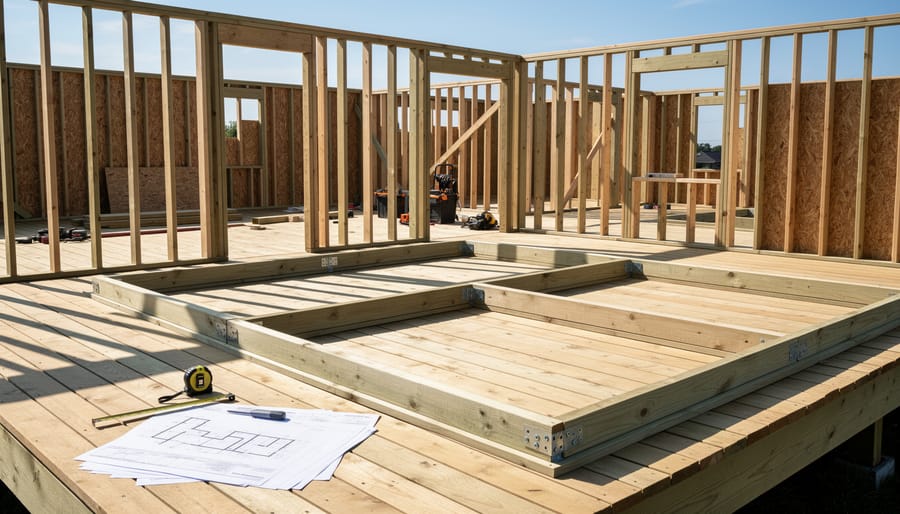
Floor joists, ceiling joists, and roof rafters form the horizontal framework that supports the loads above and transfers them down through vertical walls to the foundation. Understanding these structural components is essential for safe construction.
Floor joists span between walls or beams, typically spaced 400mm or 600mm apart depending on load requirements and local building codes. They support the subfloor and everything above it, including furniture, occupants, and fixtures. The size of joists depends on span distance and expected loads.
Ceiling joists perform double duty in most homes. They support the ceiling material below while also acting as collar ties that prevent roof rafters from spreading outward under load. They run perpendicular to rafters in typical construction.
Roof rafters create the pitched roof structure, transferring snow loads, wind forces, and the weight of roofing materials down to the exterior walls. Rafters work in pairs, meeting at a ridge beam and creating the familiar triangular profile. Many modern homes use prefabricated roof trusses instead, which combine rafters and ceiling joists into engineered units.
Proper joist and rafter installation requires accurate measuring, appropriate fastening hardware, and sometimes temporary bracing during construction. Always verify spacing requirements with local building regulations before beginning overhead framing work.
Must-Have Tools for Framing Work
Hand Tools Every Framer Needs
Quality hand tools form the backbone of any framing project. Start with a framing hammer—look for a 20-28 oz. model with a straight claw and textured grip for secure handling during repetitive strikes. Many professionals prefer the heavier weight for driving 16d nails efficiently.
A framing square (also called a carpenter’s square) is essential for checking right angles and marking cuts. Choose one made from aluminum or steel with clearly etched measurements. Speed squares, the smaller triangular versions, are equally valuable for quick angle measurements and cutting guides.
Invest in a quality 25-foot tape measure with a sturdy blade that locks firmly. The wider the blade, the better it resists bending when extended. Look for models with clear markings and a belt clip for convenience.
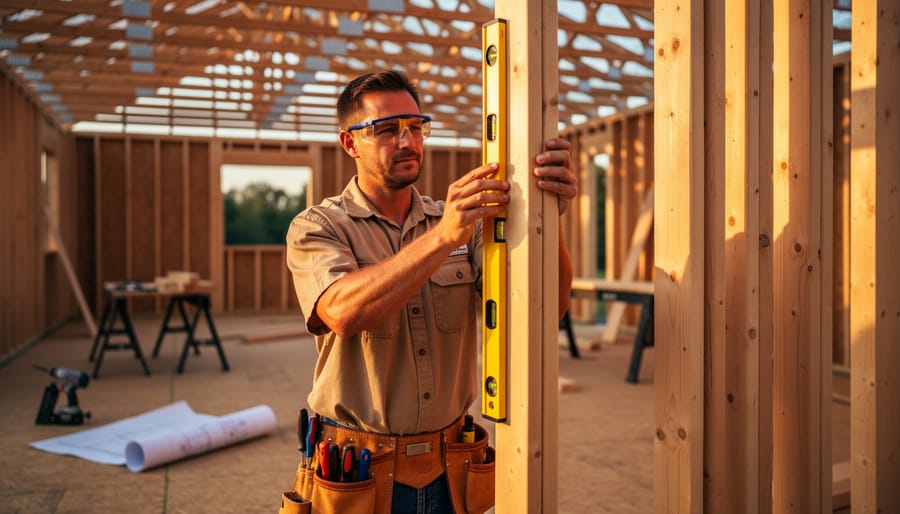
A 48-inch level ensures your walls are plumb (perfectly vertical) and level (perfectly horizontal). Magnetic versions stick to metal studs, freeing your hands. For smaller projects, a torpedo level works well in tight spaces.
Don’t overlook marking tools—carpenter pencils resist breaking and mark clearly on lumber, while chalk lines create straight reference lines across long distances. When renting or buying, community reviews consistently highlight durability and comfort as top priorities. Test the grip and weight before committing to ensure the tools feel balanced in your hands.
Power Tools That Speed Up the Job
The right power tools can cut your framing time in half, but that doesn’t mean you need to buy everything. Here’s what makes the biggest difference and when renting is the smarter choice.
A circular saw is your workhorse for cutting studs, plates, and sheathing. It’s portable and handles most cuts quickly. Look for a corded 7-1/4 inch model with at least 15 amps for consistent power through dimensional lumber. This is one tool worth owning if you tackle multiple projects.
Miter saws, also called chop saws, deliver precise angled cuts for corners and headers. A 10-inch model handles standard framing lumber. Since these are stationary and pricey, renting makes sense for one-off projects or when you need a 12-inch sliding compound version for wider materials.
Nail guns transform tedious hammer work into rapid-fire efficiency. Framing nailers drive 2-inch to 3-1/2-inch nails through multiple studs in seconds. They’re pneumatic, requiring an air compressor, or cordless battery-powered. Unless you’re framing regularly, the upfront cost of a quality nailer and compressor setup makes renting the practical option.
Impact drivers excel at driving structural screws and lag bolts, especially for ledger boards and beam connections. They’re more compact than drills and prevent wrist fatigue. These are relatively affordable and useful beyond framing, making them a solid purchase.
Consider your project scope and frequency. One weekend shed? Rent the expensive specialized tools. Building multiple structures annually? Invest in the basics and rent only the heavy-duty equipment. Many community members report saving hundreds by renting premium tools for short-term needs while owning versatile everyday essentials.
Step-by-Step Framing Process
Layout and Planning Before You Cut
Proper layout and planning can save you hours of rework and wasted materials. Start by laying your top and bottom plates side by side on a flat surface. Using a carpenter’s square and pencil, mark stud locations simultaneously on both plates—typically every 16 inches on center (meaning from the center of one stud to the center of the next). This ensures your studs align perfectly when the wall goes up.
For window and door openings, mark where you’ll need king studs (full-height studs beside openings), jack studs (shorter studs that support headers), and cripple studs (short studs above or below openings). Label each opening clearly with its dimensions and purpose. Many experienced framers recommend using different colored pencils for different components to avoid confusion during assembly.
Before making a single cut, double-check all measurements against your plans. Measure the total wall length, verify opening locations, and confirm ceiling height. A common tip from the community: take photos of your marked plates with measurements visible—this creates a helpful reference if plates get moved or marks become unclear. Remember, measure twice, cut once isn’t just a saying; it’s genuine time and money-saving advice that prevents costly mistakes.
Cutting and Assembling Wall Frames
Building wall frames flat on your subfloor (the deck) before raising them is the safest and most efficient approach. Start by measuring and cutting your studs to the correct length using a circular saw or miter saw. For standard 8-foot ceilings, studs typically measure 92 5/8 inches to account for the top and bottom plates plus drywall thickness.
Lay out your top and bottom plates side by side and mark stud locations at 16 inches on center. This spacing provides adequate support while aligning with standard 4-foot sheet goods. Use a carpenter’s square to transfer marks across both plates simultaneously, ensuring accuracy.
Position your plates on edge with the marks facing each other, then place studs between them. Nail through the plates into each stud end using two 16d nails per connection. A pneumatic framing nailer (available at most rental centers) dramatically speeds up this process compared to hand nailing.
Before raising the wall, check for square by measuring diagonally from corner to corner. Both measurements should match exactly. If they don’t, gently rack the frame until they’re equal. Pro tip from community members: tack a temporary brace across the frame to hold it square during the lift.
Once raised, brace the wall temporarily and use a 4-foot or 6-foot level to check plumb on multiple studs. Adjust as needed before securing the bottom plate to the floor and connecting adjacent walls. Remember, taking time to ensure accuracy now prevents headaches during finish work later.
Raising and Securing Frames
Once you’ve built your wall frame on the ground, the next challenge is getting it upright safely and securing it properly. This process requires careful planning and usually at least two people for walls longer than eight feet.
Start by checking that your path is clear and that the top plate won’t hit ceiling joists or other obstructions when raised. Position helpers at intervals along the wall, then lift together from the bottom, walking your hands up the studs until the wall is vertical. Slide the bottom plate into position against your chalk line on the floor or deck.
Immediately brace the wall with temporary supports before doing anything else. Use long 2x4s angled from the top plate down to the floor, securing them with clamps or nails. Place braces every eight to ten feet along the wall length. This temporary bracing prevents the wall from tipping while you work.
For permanent attachment to a concrete foundation, use a powder-actuated nail gun or pre-drill holes for anchor bolts that were set in the concrete during the pour. On wooden floors or decks, drive 16d nails at an angle through the bottom plate into the floor joists below, spacing them every sixteen inches.
Check plumb frequently using a four-foot level against the wall studs. Adjust your temporary braces until the wall stands perfectly vertical in both directions. Many community members recommend double-checking plumb before final fastening, as corrections become difficult once everything is nailed down. Only remove temporary bracing after adjacent walls are installed and the structure has adequate support.

Critical Safety Practices You Cannot Skip
Framing work involves serious hazards that demand your full attention and proper precautions. Whether you’re tackling your first project or you’re an experienced builder, these safety practices are absolutely essential and cannot be compromised.
Personal protective equipment (PPE) forms your first line of defense. Always wear safety glasses or goggles to protect against flying wood chips and sawdust. Steel-toed boots prevent crushing injuries from dropped lumber or tools. Heavy-duty work gloves protect your hands during material handling, though remove them when operating power tools to prevent catch hazards. A hard hat is mandatory on any professional job site and highly recommended for DIY projects, especially when working with overhead framing members.
Proper tool handling prevents the majority of framing accidents. Before using any power saw, check that guards are functioning correctly and blades are sharp (dull blades require excessive force and increase kickback risk). Never disable safety features to speed up work. When using nail guns, keep your free hand well away from the strike zone and never point the tool at yourself or others. Disconnect tools from power sources before making adjustments or changing blades.
Fall protection becomes critical when framing walls or working on elevated structures. Use stable, properly rated ladders and scaffolding. If working above six feet, wear appropriate fall arrest equipment and ensure anchor points can support your weight. Never lean or overreach from elevated positions.
Material handling causes numerous preventable injuries. Lift lumber with your legs, not your back, and get help with heavy or awkward pieces. Stack materials on level ground away from work areas to prevent trip hazards. Secure temporary bracing immediately after raising walls, as unsecured framing can collapse unexpectedly.
Finally, maintain a clean work site. Lumber scraps, protruding nails, and tangled extension cords create dangerous conditions. Take time throughout your day to clear debris and organize materials. According to community feedback from experienced framers, dedicating ten minutes per hour to housekeeping dramatically reduces accident rates while improving efficiency.
Common Framing Mistakes and How to Avoid Them
Even experienced builders occasionally make framing mistakes, but understanding these common errors can save you significant time and money. Based on community feedback and professional insights, here are the most frequent issues and how to prevent them.
Incorrect spacing between studs ranks as the most common mistake. Many DIYers assume 16-inch spacing means measuring from the center of one stud to the center of the next, but forget to account for the stud width itself. Always measure from the same edge of each stud and mark both edges before nailing. One community member shared that using a pre-cut spacing block between studs eliminated this problem entirely on their garage project.
Ignoring crown direction in lumber causes significant structural issues. Every piece of dimensional lumber has a natural curve or crown. When framing walls, all studs should have their crowns facing the same direction, typically toward what will be the exterior. Hold each board at eye level before installation to identify the crown. This simple step prevents wavy walls and uneven drywall surfaces.
Inadequate nailing patterns compromise structural integrity more than most realize. Each connection point has specific nailing requirements outlined in building codes. Face-nailing studs to plates requires two nails minimum, while toe-nailing needs four nails per connection. Renters of framing nailers often rush the process, missing crucial nail placements. Take time to mark nailing points with a pencil before firing.
Forgetting to account for door and window openings creates costly rework. Always frame rough openings larger than the actual door or window size. The general rule adds 2 inches to width and 2.5 inches to height for shimming and leveling. Double-check manufacturer specifications before cutting, as one incorrectly sized opening can derail an entire project timeline.
Not checking for plumb and level throughout construction leads to cascading problems. User feedback consistently emphasizes checking every few studs rather than waiting until the wall is complete. A 4-foot level works for individual studs, but rent a laser level for longer walls to maintain accuracy across the entire frame. Catching a plumb issue early takes minutes to fix; correcting it later can require complete disassembly.
Mastering construction framing isn’t about unlocking some mysterious trade secret—it’s about understanding the fundamentals and paying attention to the details. Whether you’re building a simple shed or framing an interior wall, the principles remain consistent: proper measurement, quality materials, and adherence to structural requirements.
The best approach for beginners is to start small. Tackle a garden shed or a non-load-bearing partition wall before attempting anything more complex. These smaller projects let you practice essential skills like layout, cutting, and fastening without the pressure of major structural concerns. You’ll quickly develop confidence while learning what works and what doesn’t.
Don’t feel obligated to purchase every tool immediately. Renting quality equipment makes perfect sense, especially for specialized tools like framing nailers, miter saws, or laser levels that you might only need occasionally. Quality rental tools perform better and help you determine which investments are worthwhile if you continue with larger projects.
Always reference building codes specific to your location before starting any framing work. These regulations exist for safety and structural integrity, not to create obstacles. Many communities offer workshops, online forums, or local building departments with staff willing to answer questions.
Explore tool rental options in your area and connect with others who’ve tackled similar projects. Learning from community experiences, both successes and mistakes, accelerates your skills while helping you avoid common pitfalls. With the right preparation and resources, your framing project can be both manageable and rewarding.
Related Posts

Post a Comment