
Choose elements with matching wattage and voltage specifications to your existing system—mismatched power ratings cause premature failure or inadequate heating in stainless steel water tanks. Verify the thread size and length of the element shank against your tank’s mounting boss; common sizes include 1-inch and 1.25-inch NPT threads, with lengths ranging from 9 to 14 inches depending on tank capacity.
Select 316-grade stainless steel elements over 304-grade when dealing with hard water or frequent thermal cycling—the added molybdenum content in 316 stainless provides superior corrosion resistance and extends service life by up to 40 percent. Inspect the gasket material compatibility with your water chemistry; EPDM rubber gaskets work for most residential applications, while silicone gaskets handle higher temperatures in commercial settings.
Test continuity with a multimeter before installation to confirm the element isn’t defective from the factory—a reading between 10-30 ohms indicates proper function, while infinite resistance means a broken heating coil. Calculate your required wattage by dividing tank capacity in gallons by recovery time in hours, then multiplying by 8.33 BTUs per gallon; this ensures adequate heating performance for your specific needs without oversizing the element.
What Makes Stainless Steel Elements Different
Material Compatibility Matters
When replacing a water heater element, matching materials is crucial to prevent a problem called galvanic corrosion. This occurs when two different metals come into contact in the presence of water, creating a chemical reaction that causes one metal to deteriorate rapidly. Think of it like a battery effect where one metal essentially sacrifices itself to protect the other.
If you install a copper or brass element into a stainless steel tank, the connection point becomes vulnerable to accelerated corrosion. The dissimilar metals create an electrical current through the water, leading to pitting, leaks, and premature failure. This can dramatically shorten your water heater’s lifespan, sometimes by years.
Using a stainless steel element in a stainless steel tank eliminates this risk entirely. Both components are made from the same material family, so there’s no galvanic reaction. This compatibility ensures the element threads remain sealed, prevents weakening at the connection point, and maintains heating efficiency over time.
Professional plumbers consistently recommend material matching for this reason. While a mismatched element might work initially, the hidden corrosion progresses silently until you face unexpected failure. By choosing compatible materials from the start, you’re making a smart investment that protects both your equipment and your peace of mind.
Common Element Types You’ll Encounter
When shopping for a replacement water heater element, you’ll encounter three main material types, each with specific advantages and ideal applications.
Copper elements are the most common and budget-friendly option. They heat water efficiently and work well in standard residential tanks with minimal sediment buildup. However, copper corrodes more quickly in hard water conditions and shouldn’t be used in stainless steel tanks due to galvanic corrosion—a chemical reaction between dissimilar metals that accelerates deterioration of both materials.
Brass elements offer middle-ground durability. They resist corrosion better than copper and handle moderate water quality issues effectively. Like copper, brass elements aren’t recommended for stainless steel tanks because of incompatibility issues that can lead to premature failure.
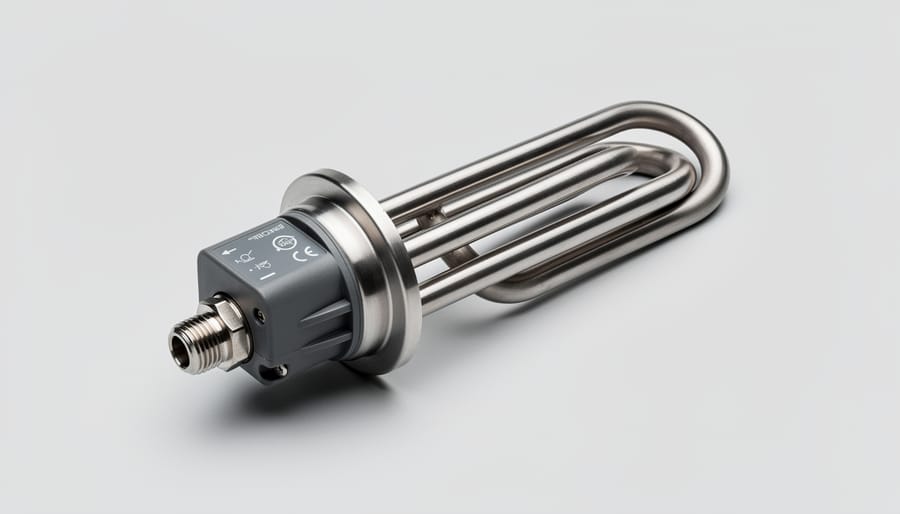
Stainless steel elements represent the premium choice, particularly for stainless steel tanks. Here’s why they’re worth the investment: stainless steel won’t cause galvanic corrosion when paired with stainless tanks, ensuring both the element and tank maintain their integrity. They handle hard water, high mineral content, and aggressive water chemistry better than other materials. While stainless elements cost more upfront, they typically last significantly longer, reducing replacement frequency and long-term costs. For anyone with a stainless steel water heater tank, matching it with a stainless steel element isn’t just recommended—it’s essential for optimal performance and longevity.
Choosing the Right Element for Your Tank
Power Rating and Tank Capacity
Choosing the right wattage for your stainless steel water heater element depends primarily on your tank’s capacity. A common rule of thumb is to allocate 1,000 watts for every 10 gallons of water. For example, a 40-gallon tank typically requires a 4,000-watt element, while an 80-gallon tank works best with a 5,500-watt element.
However, this isn’t a strict formula. Your actual needs depend on several factors including desired heating speed, incoming water temperature, and how frequently you use hot water. If you live in a colder climate where incoming water temperatures hover around 40°F, you may want a higher wattage element for faster recovery times.
To estimate heating time, use this calculation: A 4,500-watt element heating 40 gallons from 60°F to 120°F takes approximately 45-60 minutes. Lower wattage elements take proportionally longer but draw less electrical current.
Keep in mind that higher wattage doesn’t always mean better. Your electrical circuit must support the element’s power draw. A 5,500-watt element requires a 30-amp circuit, while a 4,500-watt element needs at least 25 amps. Always verify your home’s electrical capacity before upgrading to higher wattage, and consult an electrician if you’re unsure about your circuit’s capabilities.
Thread Size and Fitting Compatibility
Getting the thread size right is essential for a leak-free installation. Most water heater elements use either BSP (British Standard Pipe) or NPT (National Pipe Thread) fittings, with common sizes being 1 inch, 1¼ inch, or 2 inches in diameter.
To measure your existing fitting, use a tape measure or caliper to determine the outer diameter of the threads, then consult a thread identification chart or bring the old element to your local hardware store for verification. BSP threads have a 55-degree angle and are common in European systems, while NPT threads feature a 60-degree taper and dominate North American installations. The two types are not interchangeable.
Check your tank’s manufacturer specifications or the stamped markings on the existing element flange. If you’re uncertain, community reviews often highlight compatibility issues specific to certain tank models, helping you avoid purchasing the wrong size. Always verify thread type and diameter before ordering a replacement to prevent costly returns and installation delays.
Voltage Requirements
Before purchasing a stainless steel water heater element, check your home’s electrical system voltage. Most residential properties use 240V single-phase power, which suits standard domestic water heaters. However, some larger commercial or rural properties may have 415V three-phase systems installed.
Using an incorrect voltage element creates serious safety hazards and will damage your equipment. The voltage rating is clearly marked on both your existing element and the electrical circuit breaker panel. If you’re unsure about your system’s specifications, use a multimeter to verify the voltage, or consult a licensed electrician before making your purchase.
Elements aren’t interchangeable between voltage ratings. A 240V element connected to 415V power will overheat and fail quickly, while a 415V element on 240V simply won’t heat effectively. Always match the replacement element’s voltage exactly to your existing setup for safe, efficient operation.
Installation Steps for DIY Success
Safety First: What You Must Do Before Starting
Before touching your water heater, protecting yourself is paramount. Start by switching off the circuit breaker that powers your unit—never rely on the appliance switch alone. Verify the power is truly off using a non-contact voltage tester, an essential step covered in electrical safety testing procedures.
Next, shut off the cold water supply valve leading to your tank. Open a hot water tap somewhere in your home to release pressure and allow air into the system. Attach a garden hose to the drain valve at the tank’s base and run it to a suitable drainage point. Empty the tank completely—this prevents scalding and flooding during element removal.
Allow at least thirty minutes for the water and element to cool down, even after draining. Hot metal can cause severe burns. Keep a bucket and towels nearby for residual water that will spill when you unscrew the element. Wear safety glasses and work gloves throughout the entire process to protect against unexpected splashes or sharp edges.
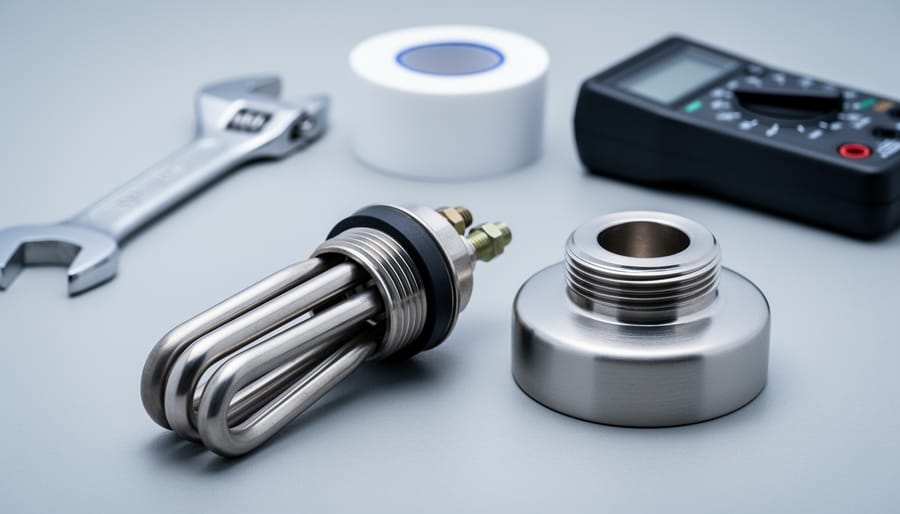
Tools and Materials You’ll Need
Before replacing your stainless steel water heater element, gather these essential items to ensure a safe, efficient installation. You’ll need an element wrench or large socket wrench (typically 1-1/2 inch) to remove the old element without damaging the tank threads. Keep a bucket and old towels nearby for draining residual water. A multimeter is crucial for testing electrical connections and confirming power is off before you begin. Thread sealant tape or pipe dope designed for potable water prevents leaks at the element connection point. Safety gloves protect your hands from sharp edges and residual heat. Having the right electrical tools and equipment like voltage testers and insulated screwdrivers ensures you can safely disconnect wiring. Wire nuts or connectors may be needed if existing ones are corroded. Finally, keep your water heater’s manual handy for voltage and wattage specifications to confirm your replacement element matches exactly.
The Installation Process
Before starting, turn off the power at your circuit breaker and shut off the water supply to your tank. Verify the power is off using a voltage tester for safety.
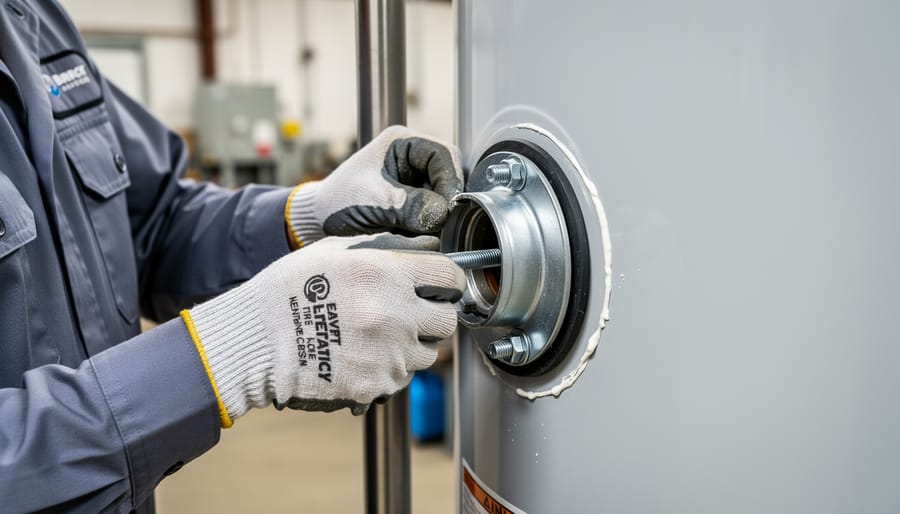
Begin by draining the tank below the element level using a garden hose connected to the drain valve. Once drained, locate your element and disconnect the electrical wires, taking a photo first to remember the correct configuration. Remove the old element by turning it counterclockwise with an element wrench, which you can rent if you don’t own one.
Clean the mounting surface thoroughly, removing any mineral deposits or old gasket material with a wire brush. This ensures a proper seal and prevents future leaks.
Position the new stainless steel element with its gasket into the tank opening. Hand-tighten first, then use your element wrench to secure it firmly, but avoid overtightening which could damage the gasket or tank threads. The gasket should compress evenly around the entire opening.
Reconnect the electrical wires according to your reference photo, ensuring tight connections on both terminals. Double-check all connections are secure before proceeding.
Refill the tank completely, checking for leaks around the element. Once confirmed leak-free and the tank is full, restore power at the breaker. Allow thirty minutes for the water to heat, then test your hot water supply.
Troubleshooting Common Problems
Element Won’t Heat or Trips Circuit
When your water heater element fails to heat or repeatedly trips the circuit breaker, systematic diagnosis will identify whether you need a replacement. First, turn off power at the breaker panel and verify it’s off using a non-contact voltage tester at the electrical panel near the element. This safety step prevents electrical shock.
To test the element with a multimeter, set it to measure resistance (ohms). Disconnect the wires from the element terminals and touch one probe to each terminal. A functioning element typically reads between 10-16 ohms for residential units, though this varies by wattage. An infinite reading means the element has an open circuit and needs replacement. A zero or very low reading indicates a short circuit.
Next, test for grounding issues by touching one probe to a terminal and the other to the element’s metal base. Any reading other than infinite suggests the element is grounded and must be replaced.
If the circuit trips immediately when power is restored, you likely have a short circuit. If the element shows correct resistance but doesn’t heat, check the thermostat and high-limit switch before concluding the element has failed.
Leaks Around the Element
Leaks around your water heater element typically stem from three common culprits. Worn gaskets are the primary offender, as the rubber or fiber washer that seals the element deteriorates over time from heat exposure and mineral buildup. Improper installation during a previous replacement can also cause leaks if the element wasn’t tightened to the correct torque specification or if the gasket wasn’t seated properly. Corrosion around the mounting flange, though less common with stainless steel elements, can occur in areas with hard water or dissimilar metal contact.
To fix a leak without replacing the entire element, first shut off power and water supply, then drain the tank below the element level. Remove the element carefully and inspect the gasket. If it appears compressed, cracked, or brittle, replace it with a new gasket sized for your element. Clean the mounting surface thoroughly to remove any mineral deposits or debris. Reinstall the element with a new gasket, tightening it firmly but not excessively. Refill the tank, check for leaks, and restore power only after confirming the repair is watertight.
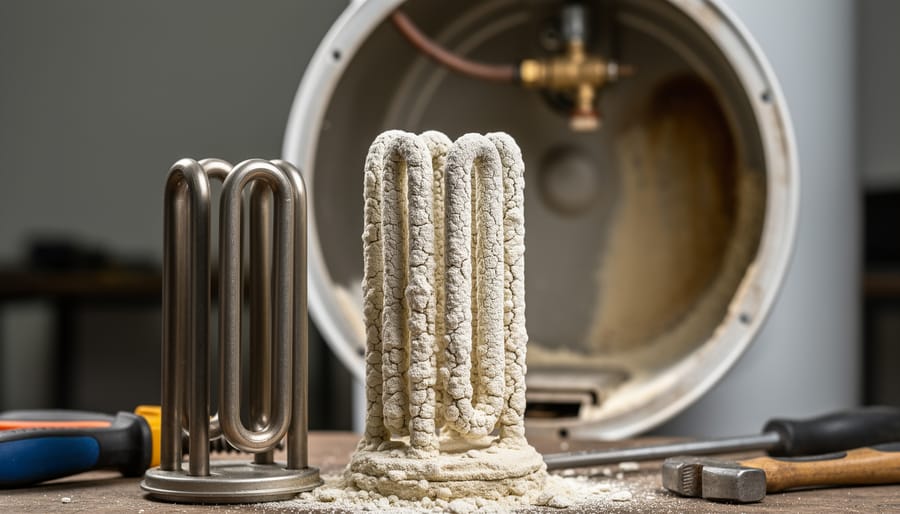
Scale Buildup and Reduced Performance
Over time, mineral deposits from hard water accumulate on stainless steel heating elements, forming a crusty layer called scale. This buildup acts as insulation, forcing the element to work harder and longer to heat water, which increases energy costs and can eventually cause element failure.
To descale an element, turn off power to the water heater and drain the tank. Remove the element and soak it in white vinegar or a commercial descaling solution for several hours to dissolve mineral deposits. Gently scrub with a soft brush to remove loosened scale, avoiding abrasive tools that could damage the stainless steel surface.
Preventive maintenance is key. Install a water softener if you have particularly hard water, or flush your tank every six months by draining several gallons to remove sediment before it hardens on the element. Regular inspection during routine maintenance allows you to catch buildup early, extending element life and maintaining efficient operation.
Maintenance Tips to Extend Element Life
Proper maintenance can significantly extend the life of your stainless steel water heater element, saving you money and preventing unexpected failures. Here’s what you need to know to keep your element running efficiently.
Start by inspecting your element every six months. Turn off the power and water supply, then visually check for mineral buildup, corrosion, or physical damage. Even stainless steel elements can accumulate limescale in hard water areas, which reduces heating efficiency and shortens lifespan.
Water quality plays a crucial role in element longevity. If you live in a hard water area, consider installing a water softener to reduce mineral deposits. Hard water contains high levels of calcium and magnesium that create scale buildup on heating elements. This insulating layer forces the element to work harder, increasing energy consumption and risk of burnout.
Drain and flush your water heater tank annually to remove sediment that settles at the bottom. This sediment can bury the element, causing overheating and premature failure. The process is straightforward: attach a garden hose to the drain valve and empty several gallons until the water runs clear.
Check your anode rod yearly if your system includes one. This sacrificial component protects against corrosion and should be replaced when more than six inches of core wire is exposed. While stainless steel resists corrosion better than other materials, maintaining proper water chemistry still matters.
Monitor your water temperature settings. Keeping temperatures above 140°F accelerates mineral buildup, while temperatures below 120°F may encourage bacterial growth. The sweet spot is typically 120-130°F for optimal efficiency and element preservation.
When to Call a Professional vs DIY
Replacing a stainless steel water heater element falls into a gray area between straightforward DIY and professional territory. If you’re comfortable working with basic hand tools and understand electrical safety fundamentals, this job is manageable with proper preparation. You’ll need to shut off power at the circuit breaker, drain the tank, and follow manufacturer instructions carefully.
However, consider calling a licensed electrician if you’re unfamiliar with electrical work or live in an area with strict wiring regulations. Many jurisdictions require licensed professionals for any electrical modifications, and DIY work could void your water heater warranty or home insurance coverage. Check your warranty documentation before proceeding.
The safety factor matters too. Water and electricity create serious hazards when mishandled. If you’re uncertain about testing circuits, identifying wire types, or properly grounding connections, professional help is worth the investment.
For those tackling the job themselves, DIY tool rentals can provide specialized equipment like element wrenches without the purchase cost. Community feedback consistently shows that confident DIYers successfully complete element replacements, while those rushing without proper knowledge face complications. When in doubt, prioritize safety and expertise over cost savings.
Selecting and installing the right stainless steel water heater element doesn’t have to be overwhelming. Remember the core considerations: match your tank’s voltage and wattage requirements, choose the appropriate element type for your water conditions, and never skip safety precautions like shutting off power at the breaker before starting work. Whether you’re tackling a straightforward replacement or addressing compatibility concerns with a stainless steel tank, taking time to verify specifications prevents costly mistakes and ensures reliable hot water for years to come.
Have you recently replaced a water heater element yourself? We’d love to hear about your experience in the comments below. What challenges did you face, and what tips would you share with fellow DIYers? If you’re still weighing your options or troubleshooting an issue, don’t hesitate to ask questions. Our community of homeowners and tradespeople is here to help you make informed decisions and tackle your project with confidence.
Related Posts

Post a Comment