
Understand the critical difference: a gas fireplace insert fits into an existing masonry or factory-built fireplace, while a zero-clearance fireplace is a standalone unit built directly against combustible walls. If you’re searching for “gas fireplace insert zero clearance,” you’re likely dealing with two separate concepts that don’t typically combine. Most homeowners discover they either need an insert for their current fireplace or they’re actually looking at zero-clearance installation requirements.
Verify your existing fireplace type before purchasing any equipment. Masonry fireplaces with traditional chimneys accept standard inserts, while factory-built fireplaces require manufacturer-specific inserts designed for that exact model. Installing the wrong type creates dangerous ventilation issues and violates building codes.
Measure your fireplace opening’s height, width, and depth at the narrowest points. Inserts must fit through the opening with adequate clearance for the surround panel, typically requiring an additional 1-2 inches on all sides. Check your chimney flue diameter against the insert’s venting requirements, as undersized flues need professional liner installation.
Confirm local permit requirements and gas line capacity with your utility provider. Most jurisdictions require licensed professionals for gas fireplace insert installation and inspection, particularly for gas connections and venting. While you can handle demolition and preparation work yourself, certified technicians must complete the final hookup to ensure safety compliance and maintain manufacturer warranties.
Understanding Zero Clearance: What It Actually Means
Zero Clearance Fireplaces vs. Fireplace Inserts
Let’s clear up the confusion between these two terms, since many homeowners mix them up when planning their fireplace projects.
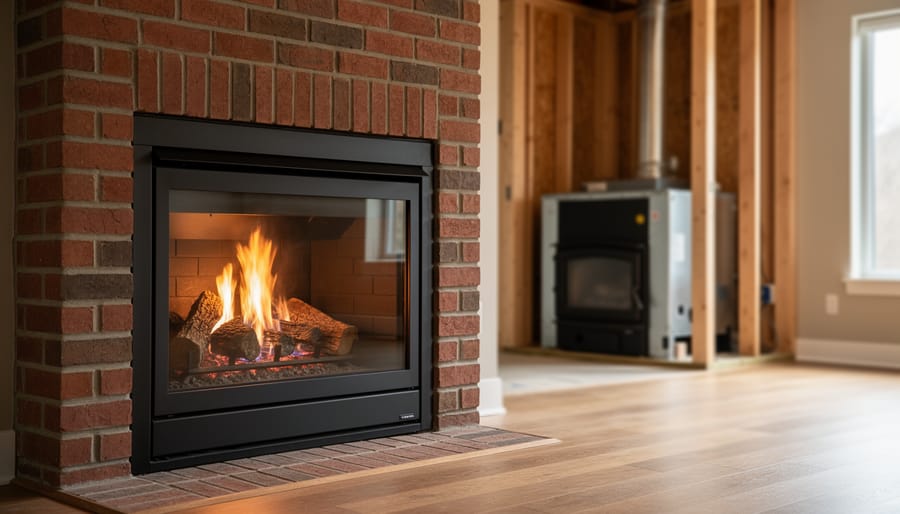
A zero clearance fireplace is a prefabricated, self-contained unit installed during home construction or major renovation. The name comes from its design: the firebox is built with special insulation that allows the metal unit to be installed directly against wood framing without requiring the traditional brick or stone clearance. Think of it as a complete fireplace system that arrives ready to install, with its own venting system and built-in safety features. These units are designed to fit into standard wall cavities, making them popular in modern homes.
A gas fireplace insert, on the other hand, is designed to retrofit an existing masonry fireplace. If you already have a wood-burning fireplace with a brick or stone chimney, an insert slides into that opening and converts it to gas operation. The insert includes its own firebox, glass front, and venting system that uses your existing chimney structure with a liner.
Here’s the key difference: you cannot install a standard gas fireplace insert into a zero clearance fireplace. They’re built for entirely different applications. Zero clearance units need zero clearance inserts specifically designed for their dimensions and venting requirements. If you have a prefab fireplace and want to upgrade, you’ll need an insert made specifically for zero clearance units, which typically costs more and offers fewer options than traditional masonry inserts. Always verify your existing fireplace type before shopping for any insert to ensure compatibility and safety compliance.
Why the Confusion Happens
The confusion typically starts when homeowners search for ways to add a gas fireplace to their existing masonry fireplace. Many assume they need a “zero clearance” product because they’re working with limited space or want to ensure safety compliance. In reality, they’re usually looking for a gas fireplace insert, which fits into an existing fireplace opening. Zero clearance fireplaces, on the other hand, are standalone units designed for new construction or rooms without existing fireplaces.
Another common scenario involves homeowners concerned about combustible materials near their fireplace. They hear the term “zero clearance” and mistakenly believe it means no clearance requirements at all. This misunderstanding can lead to unsafe installations if not corrected early in the planning process. What most people actually need to know is the specific clearance requirements for their particular insert model and how it relates to their existing fireplace structure and surrounding materials.
Clearance Requirements for Gas Fireplace Insert Installation
Measuring Your Existing Fireplace Opening
Before purchasing or renting any equipment, you’ll need accurate measurements of your existing fireplace opening. Incorrect measurements are one of the most common mistakes during insert installation, so take your time with this crucial step.
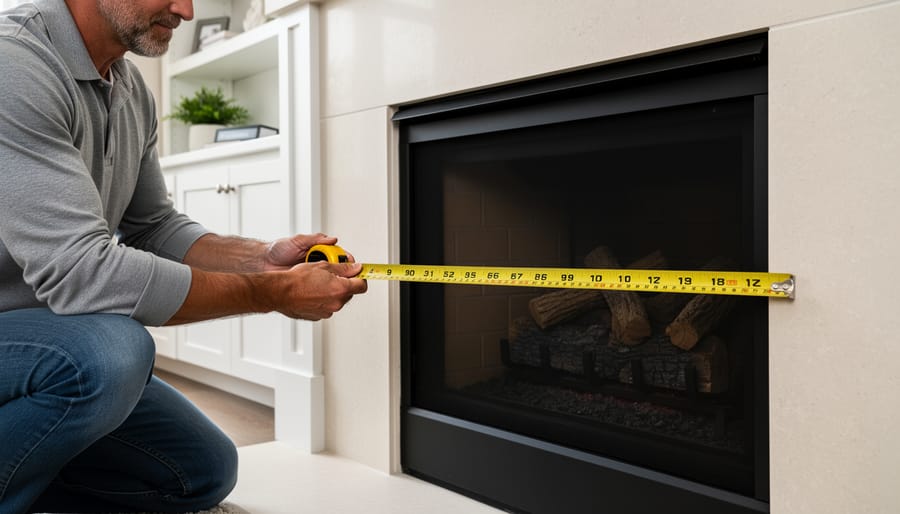
Start by gathering a steel tape measure, flashlight, notepad, and pencil. You’ll need three primary measurements: width, height, and depth.
For width, measure the inside opening at its narrowest point, usually toward the front. Measure from the left masonry or metal edge to the right edge at the bottom, middle, and top of the opening. Record the smallest measurement, as this determines the maximum insert width.
Next, measure height from the bottom of the firebox floor to the top of the opening. Again, check multiple points and use the smallest dimension.
Depth is often overlooked but critical for proper venting. Measure from the front face of the fireplace opening straight back to the rear wall of the firebox. Some inserts require specific depth minimums for safe installation and proper clearance from combustible materials.
Also measure the throat opening, the narrowest part where the firebox transitions to the chimney. This measurement ensures your insert’s venting system will fit through without modification.
Write down all measurements clearly, including any obstructions like damper handles or unusual angles. Most manufacturers provide sizing charts that compare your measurements against their insert models. When in doubt, round down rather than up. An insert that’s slightly smaller than the opening can be framed with surround panels, but an oversized unit simply won’t fit safely.
Clearance to Combustibles: What You Need to Know
Safety clearances around your gas fireplace insert aren’t just suggestions—they’re code requirements designed to prevent fires and protect your home. Here’s what you need to understand in plain language.
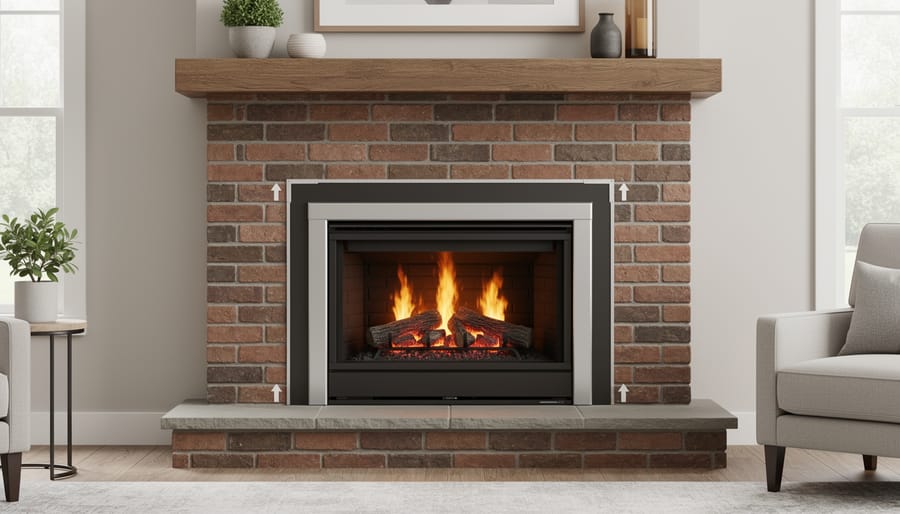
Most gas inserts require minimum clearances to combustible materials like wood framing, mantels, and trim. Standard requirements typically include at least 6 inches of clearance from the firebox opening to any combustible mantel, though this varies by manufacturer and unit BTU rating. Side walls usually need 6-12 inches of non-combustible material extending beyond the insert opening.
The term “zero clearance” can be confusing here. While zero-clearance fireplaces can sit against wood framing, gas inserts installed into existing fireplaces still need proper clearances at the facing and opening. Your existing fireplace chimney provides the required separation from wall studs, but the front matters most.
Always check your specific model’s installation manual—clearance requirements can range from 3 to 18 inches depending on heat output and design. Many manufacturers provide clearance-reduction panels or heat shields that allow closer installation to combustibles when needed.
Local building codes may be stricter than manufacturer minimums, so verify requirements with your building department before installation. Professional installers consistently report that homeowners underestimate these clearances, leading to costly modifications mid-project.
Ventilation and Chimney Clearance Considerations
Gas fireplace inserts require proper venting to safely remove combustion byproducts from your home. Most inserts use direct vent systems that draw air from outside and exhaust gases through a double-wall pipe, which typically requires installing a liner inside your existing chimney. The space needed for this liner installation varies, but you’ll generally need at least a 6-inch diameter opening, though some models require up to 8 inches.
Unlike zero clearance fireplaces that have specific clearance requirements built into their design, gas inserts installed in masonry fireplaces rely on the existing fireplace structure for heat protection. However, you still need to maintain proper clearances between the vent pipe and combustible materials, typically 1 inch for most approved systems. Your chimney must also meet minimum height requirements, usually extending at least 3 feet above the roof penetration point and 2 feet higher than any structure within 10 feet.
Before purchasing an insert, measure your chimney’s interior dimensions and check its condition. Damaged chimneys may need repair or relining before installation. Always consult local building codes and manufacturer specifications, as requirements vary by region and model. Many homeowners find hiring a certified technician worthwhile for ensuring proper venting and code compliance, though understanding these basics helps you plan your project effectively.
Tools and Equipment You’ll Need for Installation
Essential Tools for the Job
Before tackling a gas fireplace insert installation, gathering the right equipment ensures the job goes smoothly and safely. Here’s what you’ll need:
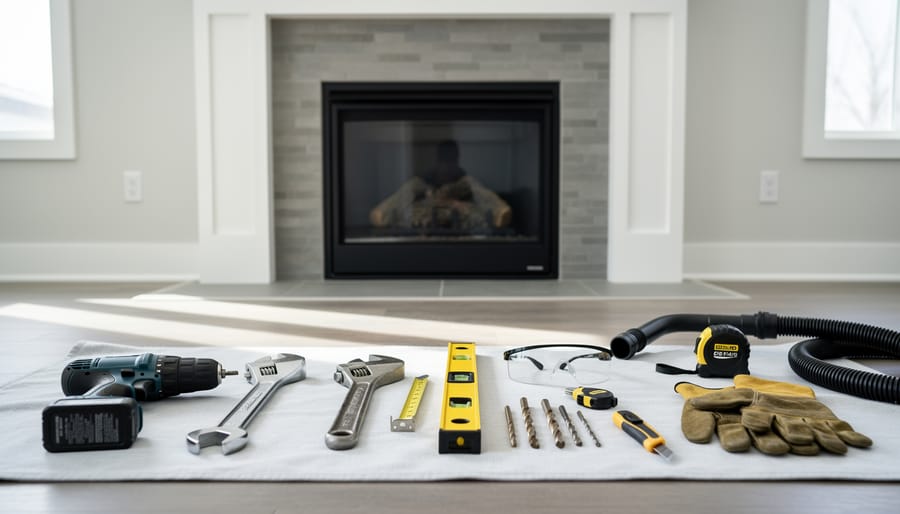
Measuring tools are essential starting points. A quality tape measure (at least 7.5 metres), level, and framing square help verify your existing fireplace dimensions and ensure proper fit. A digital calliper proves useful for measuring flange depths and clearance gaps accurately.
For the actual installation, you’ll need basic hand tools including adjustable wrenches, screwdrivers (both flathead and Phillips), pliers, wire strippers for electrical connections, and a socket set. A cordless drill with masonry bits handles anchor installation into brick or stone. Like many DIY renovation projects, having a good headlamp or work light improves visibility in tight spaces.
Safety gear is non-negotiable. Protect yourself with safety glasses, work gloves, knee pads, and a dust mask when working with existing fireplace materials. Keep a fire extinguisher rated for gas fires nearby during testing phases.
Specialised equipment worth hiring includes a pipe threader if you’re running new gas lines, a combustion analyser for testing proper venting, and potentially a masonry saw for modifications. Many hire centres stock manometers for pressure testing gas connections.
For electrical work, a multimeter and wire tester ensure safe connections. A stud finder locates framing members for secure mounting. Finally, grab a tube of high-temperature silicone sealant and appropriate gas-rated thread sealant or tape for connections.
Specialized Equipment Worth Renting
Installing a gas fireplace insert involves equipment that most homeowners won’t use again, making renting specialized tools the smarter choice. A professional-grade gas line leak detector is essential for safety testing but can cost several hundred dollars to purchase. You’ll also want access to a flexible chimney liner installation kit with fish tape and mandrel if your existing flue needs relining, which typically runs over $300 to buy outright.
Heavy-duty rotary hammers with masonry bits are necessary for securing mounting brackets to brick or stone surrounds. For precise measurements during gas line work, a digital manometer ensures proper pressure readings without the investment of owning one. A quality pipe threading machine becomes crucial if you need to modify gas supply lines, though this work often requires professional certification depending on local codes.
Consider renting inspection cameras to check chimney condition before installation. These tools let you identify blockages or damage without expensive service calls, helping you plan the project accurately while keeping costs manageable.
DIY vs. Professional Installation: Making the Right Choice
What DIYers Can Safely Handle
Confident DIYers can handle several important tasks before calling in a gas professional. Start with thorough measuring—you’ll need the exact dimensions of your existing fireplace opening, including height, width, and depth. Measure at multiple points since older fireplaces may not be perfectly square. Document the current chimney configuration and take photos from various angles for reference.
Preparation work is well within DIY territory. This includes removing the existing damper assembly if you’re converting a wood-burning fireplace, clearing debris from the firebox, and assessing the condition of the firebox walls. You can also handle the chimney liner inspection to identify any damage that might need repair before installation.
Most non-gas installation aspects are DIY-friendly too. You can install the surround and trim pieces once the insert is positioned, apply finishing touches like mantels or decorative panels, and complete any minor masonry repairs around the fireplace opening. Just remember that final positioning of the insert and all gas connections must be left to licensed professionals. These components require specialized knowledge of combustion air requirements, venting specifications, and local building codes. Your prep work will save money on professional labor hours while ensuring safety where it matters most.
When to Call in the Professionals
While some aspects of gas fireplace insert installation make great DIY projects, several critical steps require licensed professionals for both safety and legal reasons. Understanding when to call in the experts protects your home and ensures code compliance.
Gas line connections must always be handled by a licensed plumber or gas fitter. Working with natural gas or propane carries serious risks, including fire hazards and carbon monoxide exposure. In most jurisdictions, it’s illegal for unlicensed individuals to make gas connections, and doing so yourself will void manufacturer warranties and potentially your homeowner’s insurance.
Venting work typically requires professional expertise as well. While you might understand the basic concepts, proper venting involves calculations for termination height, horizontal run distances, and proper sealing to prevent exhaust leaks. A certified HVAC technician knows local building codes and manufacturer specifications that ensure safe operation.
Final inspections are mandatory in nearly all areas. Your local building department will send an inspector to verify that gas connections, venting, and clearances meet code requirements before approving the installation. This inspection protects you and future homeowners.
Consider hiring professionals as an investment in safety rather than an added expense. Their expertise prevents costly mistakes and ensures your fireplace insert operates safely for years to come.
Cost Considerations for Each Approach
Understanding the financial commitment helps you make an informed decision. For DIY installation, expect to spend $100-300 on tool rentals including a drill, level, and specialized gas line tools if you don’t own them. You’ll also need materials like flexible gas connectors ($30-60) and venting components ($150-400 depending on your setup). Most areas require permits ranging from $50-200, and a final inspection by a certified gas technician typically costs $100-150 even if you do the work yourself.
Professional installation runs $500-2,000 for labor alone, depending on complexity and local rates. This includes proper permitting, code compliance, and warranty protection. While the upfront cost is higher, professionals carry insurance against mistakes that could cost DIYers thousands to fix. A misaligned vent or improper gas connection might require wall repairs, additional parts, or complete reinstallation. Community reviews consistently show that homeowners who attempted DIY installation without prior gas line experience faced unexpected expenses averaging $400-800 to correct errors. Consider your skill level honestly, as safety and code compliance aren’t areas where cutting corners saves money long-term.
Step-by-Step Installation Overview
Preparation and Safety First
Before starting your gas fireplace insert installation, safety must be your top priority. First, locate your home’s gas shutoff valve—typically found near the gas meter or along the supply line to your fireplace—and turn it completely off. Wait at least 15 minutes to allow any residual gas to dissipate before beginning work. Next, protect your flooring by laying down drop cloths or cardboard around the entire work area, as inserts can be heavy and may scratch surfaces during removal or installation. If you’re replacing an existing insert, carefully disconnect and remove all old components, including the burner assembly, logs, and any decorative elements. Take photos during disassembly to reference later. Clear a spacious work zone extending at least three feet from the fireplace opening to safely maneuver the new insert. Ensure adequate ventilation by opening windows, and never work alone—have someone nearby in case of emergencies. Keep a fire extinguisher rated for gas fires within reach, and if you detect any gas odor at any point, immediately evacuate and call your gas company.
Installing the Chimney Liner and Venting
Installing a chimney liner is one of the most critical steps when adding a gas fireplace insert to a zero clearance fireplace. The liner provides a safe pathway for exhaust gases to vent outside while preventing heat transfer to combustible framing materials.
The process begins with measuring your existing chimney from the firebox to the cap to determine the correct liner size. Most gas inserts require a flexible stainless steel liner, typically 4 to 6 inches in diameter depending on your unit’s specifications. Before installation, inspect the chimney for obstructions, damaged components, or excessive creosote buildup that could interfere with proper venting.
The liner feeds down from the chimney top, connecting to the insert’s exhaust collar at the bottom. You’ll need to secure it with appropriate clamps and seal all connections to prevent gas leakage. At the chimney crown, a termination cap specifically designed for gas venting must be installed to prevent rain intrusion and provide proper draft.
This is where professional help becomes essential. Building codes require gas venting systems to meet strict safety standards, and improper installation can result in carbon monoxide hazards or fire risks. Additionally, most jurisdictions require permits and inspections for gas appliance installations. Unless you’re a licensed professional with gas fitting experience, hire a certified technician to handle the liner installation and gas connections.
Positioning and Securing the Insert
Once you’ve verified the insert fits your fireplace opening, it’s time to position and secure it permanently. Carefully slide the insert into place, ensuring it sits level by using a bubble level across the top edge. This step is critical because an uneven insert can affect both appearance and venting performance.
Check that the insert maintains proper clearances on all sides according to the manufacturer’s specifications, typically found in the installation manual. These clearances ensure safe operation and proper air circulation. Most zero-clearance inserts are designed to fit snugly, but you should never force them into spaces that are too small.
Secure the insert using the manufacturer-supplied mounting brackets or screws. These typically attach through pre-drilled holes in the insert frame directly into the fireplace surround or hearth. A common mistake is over-tightening fasteners, which can warp the frame and create gaps. Snug the hardware firmly but don’t force it.
Before moving forward, double-check that all venting connections remain properly aligned and sealed. Any shifting during the securing process could compromise these critical joints, leading to dangerous exhaust leaks.
Gas Line Connections and Testing
This is the one step you absolutely cannot DIY—gas line connections must be handled by a licensed professional. This isn’t just a recommendation; it’s required by code in most jurisdictions and essential for your safety.
Your licensed gas technician will connect the gas supply line to the insert, ensuring all fittings are properly sized and sealed. They’ll perform pressure testing to verify there are no leaks in the system, typically using a manometer to measure gas pressure at various points. The technician will also test each connection with a leak detection solution (soapy water or commercial product) to visually confirm no gas is escaping.
Why is professional installation critical? Gas leaks can lead to fires, explosions, or carbon monoxide poisoning. A properly licensed technician has the training, specialized tools, and insurance to handle this dangerous work safely. They’ll also ensure your installation meets local building codes, which protects you during home inspections and insurance claims. Expect this portion of the installation to take one to two hours, depending on your existing gas line setup.
Common Installation Challenges and How to Solve Them
Sizing Mismatches and Fit Issues
Even with careful measurements, you might encounter fit issues during installation. If your insert doesn’t fit as anticipated, don’t force it into place, as this can damage both the insert and your existing fireplace structure.
Start by identifying the specific clearance problem. Is the insert too wide, too tall, or protruding too far forward? Measure the gaps on all sides to determine where adjustments are needed. Sometimes the issue is actually with the surround panel rather than the insert itself. Many gas fireplace inserts come with adjustable trim kits that can be customized to cover gaps ranging from half an inch to several inches.
If the insert is slightly oversized, you may need to remove some non-structural facing material from your existing fireplace opening. However, never modify structural components without consulting a professional. For undersized inserts, decorative surrounds, mantels, or custom-cut facing panels can bridge the gap while maintaining a polished appearance.
When modifications prove too extensive or compromise safety clearances, consider exchanging the unit for a different size or exploring built-in fireplace options instead of inserts. Remember, proper fit ensures both safety and efficiency, so take the time to get it right.
Chimney and Venting Problems
Before installing a gas fireplace insert, you’ll need to assess your existing chimney and venting system. Common obstacles can complicate or even prevent installation if not addressed properly.
Offset chimneys present a significant challenge. If your chimney doesn’t run straight up from the firebox, you may need flexible venting liners or specialized adapters to connect the insert properly. Measure the offset distance and consult the insert manufacturer’s specifications for maximum allowable bends.
Damaged flues require immediate attention before any installation. Inspect for cracks, missing mortar, or deterioration using a flashlight and mirror, or consider hiring a professional chimney sweep for a thorough video inspection. A compromised flue liner can’t safely vent combustion gases and must be repaired or relined.
Inadequate draft is another common issue, especially in shorter chimneys or homes with tight weatherization. Signs include smoke backup or difficulty maintaining proper combustion. Solutions include installing a draft inducer fan or extending the chimney height. Always verify your chimney meets the minimum height requirements specified by both the insert manufacturer and local building codes before proceeding with installation.
Understanding the difference between zero clearance fireplaces and gas fireplace inserts is the crucial first step in any successful installation project. As we’ve explored, these terms aren’t interchangeable, though they’re often confused. A zero clearance fireplace is a factory-built unit designed to sit close to combustible materials, while a gas fireplace insert is specifically made to retrofit into an existing masonry or factory-built fireplace. Getting this terminology straight helps you communicate effectively with suppliers, rental centers, and inspectors.
The clearance requirements for your specific insert are non-negotiable safety standards, not suggestions. Taking accurate measurements of your existing fireplace opening, depth, and surrounding materials before you shop will save you time, money, and frustration. Remember that manufacturer specifications and local building codes work together to keep your home safe, so consult both sources during your planning phase.
While many preparation tasks fall within DIY capabilities, like gathering measurements, renting equipment, or preparing the workspace, the actual gas line connection and final installation should involve a licensed professional. This balanced approach lets you save money where appropriate while ensuring safety and code compliance where it matters most.
We’d love to hear about your fireplace insert projects. Have you tackled a similar installation? What challenges did you face with measurements or clearances? Share your experiences, photos, or questions in the comments below. Your insights help build our community’s collective knowledge and might be exactly what another homeowner needs to hear before starting their own project.
Related Posts

Post a Comment