
Transform your backyard into an engagement party venue by focusing on three essential preparation areas: ground leveling, lighting infrastructure, and shade structures.
Level uneven lawn areas using a plate compactor or sod cutter to create stable surfaces for guest seating and dance floors. Rent these tools for a weekend project that prevents twisted ankles and wobbly furniture. Remove low spots that collect water and fill divots with topsoil, compacting in layers for a professional finish that accommodates heels and dress shoes.
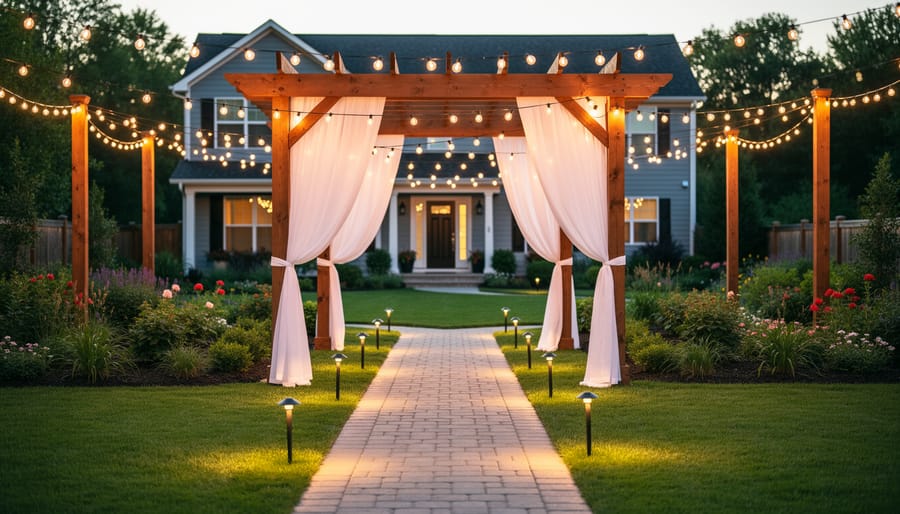
Install temporary lighting posts using a post hole digger to create anchor points for string lights and lanterns. Dig 18-24 inch holes around your party perimeter, insert 4×4 posts with concrete, and string café lights overhead. This creates ambiance while ensuring guests can navigate safely after sunset. For parties extending past dusk, position ground-level pathway lighting using a trenching shovel to run low-voltage wiring.
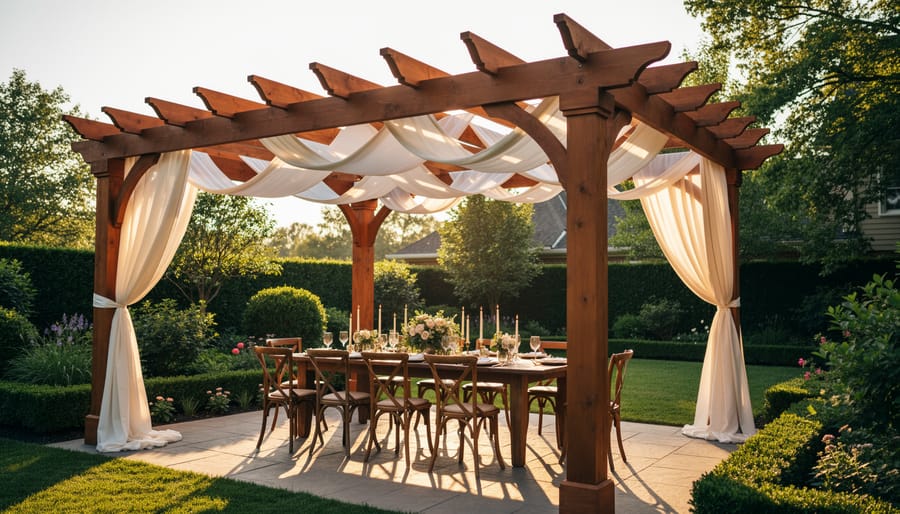
Build or assemble shade structures before your event date using basic carpentry tools. A pergola frame draped with fabric provides elegant cover during peak sun hours, while pop-up canopy reinforcements using a hammer drill and concrete anchors prevent embarrassing collapses during summer breezes. Position shaded areas over food stations and seating zones where guests congregate longest.
Prep your space 2-3 weeks before the celebration date, allowing time for grass regrowth around construction zones and testing all installations. Most tool rental centers offer weekend rates that let you tackle multiple projects efficiently while staying within budget. Focus your energy on structural improvements that photographs well and keeps guests comfortable throughout your celebration.
Preparing Your Backyard Space: Essential Groundwork
Lawn Care and Landscaping Refresh
Your backyard’s first impression starts with the lawn, so getting it guest-ready is essential. Begin by giving the entire lawn a thorough mow at least two days before the party. This timing allows any stressed grass to recover and the lawn to look its best. Set your mower to the appropriate height for your grass type—generally around 5-7 centimeters for most Australian varieties. If you don’t own a quality mower, hiring one ensures you’ll achieve that professional-looking finish without the storage commitment.
Edge along pathways, garden beds, and patios using a line trimmer or edging tool. These crisp lines create definition and show attention to detail that guests will notice. For lawns that feel compacted or patchy, consider aerating a week or two beforehand. An aerator removes small plugs of soil, allowing water, nutrients, and oxygen to reach grass roots. This process can dramatically improve lawn health and appearance, and aerators are readily available for hire by the day.
Address any obvious brown patches by top-dressing with quality soil and overseeding if time permits. Follow up with lawn care basics like proper watering in the days leading up to your party.
Beyond the lawn, trim overgrown shrubs, pull weeds from garden beds, and add fresh mulch to give landscaping a polished look. A pressure washer can quickly clean pathways and patios, removing months of accumulated grime. Most tool hire centers offer package deals that include multiple items, making it cost-effective to tackle several projects at once while ensuring your backyard looks celebration-worthy.
Cleaning and Power Washing Surfaces
Creating a spotless outdoor space is essential summer backyard preparation for your engagement party. Power washing transforms tired surfaces into fresh, welcoming areas that make the perfect backdrop for celebration photos.
Start by clearing all furniture, planters, and decorations from the areas you’ll clean. Sweep away loose debris, leaves, and cobwebs to prevent clogging your equipment. For most backyard projects, a 2000-3000 PSI (pounds per square inch) electric pressure washer provides sufficient cleaning power without risking surface damage.
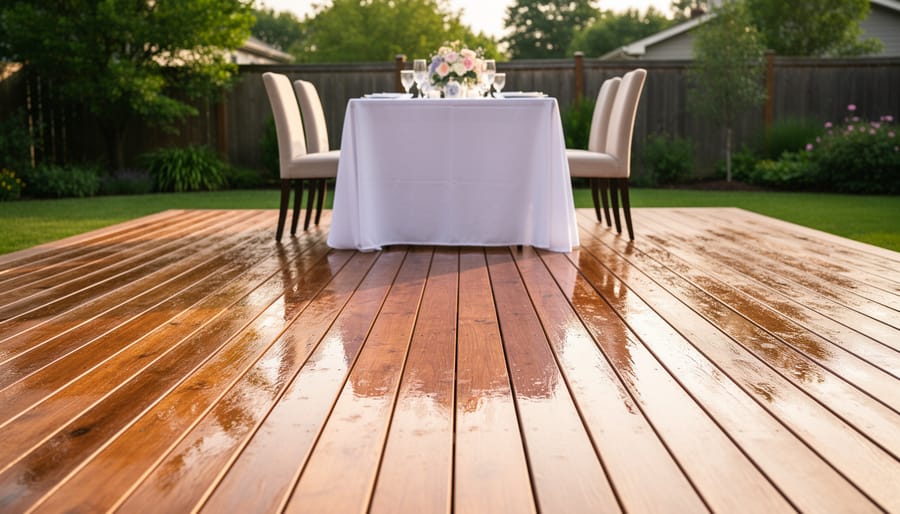
Begin with your patio or deck, working from the highest point downward to let gravity assist. Hold the nozzle 12-18 inches from the surface at a 45-degree angle, using sweeping motions to avoid streaking. For timber decks, always follow the wood grain direction to prevent splintering.
Move to pathways and walkways next, paying special attention to moss buildup and stains. Fences require a gentler approach—use a wider spray pattern and test an inconspicuous area first to ensure the pressure won’t strip paint or damage timber.
Safety tip: Always wear closed-toe shoes and safety glasses. Never point the spray at people, pets, or electrical fixtures.
Most hire centres provide pressure washers with multiple nozzle attachments and safety instructions. Allow all surfaces to dry completely (typically 24-48 hours) before repositioning furniture or adding decorations.
Repairing and Upgrading Hardscaping
Before guests arrive, walk your backyard to identify potential hazards. Cracked concrete pavement can cause trips and falls, while loose deck boards pose risks for heels catching or ankles twisting. Damaged fencing sections not only look unprofessional but may create privacy concerns during your celebration.
For concrete repairs, you’ll need a concrete patching compound, wire brush, and trowel. Clean out cracks thoroughly before applying filler, ensuring a smooth finish that blends with existing surfaces. A power washer makes quick work of cleaning driveways and patios, revealing hidden damage that needs attention.
Deck repairs require a cordless drill, replacement boards, deck screws, and wood stain to match existing finishes. Test each board by walking across it—any movement indicates loose fasteners or structural issues requiring immediate attention.
Fence repairs typically need post hole diggers for resetting wobbly posts, galvanized nails or screws, and replacement pickets. A circular saw helps cut new boards to size, while a paint sprayer efficiently refinishes large sections.
Most tool rental centres stock these items affordably, allowing you to complete professional-quality repairs without purchasing equipment you’ll rarely use afterward.
Creating Comfortable Guest Zones
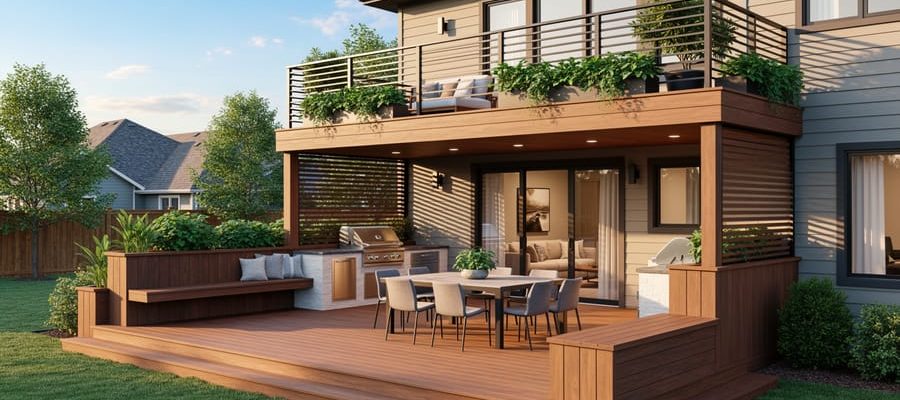
Building or Installing Shade Structures
Creating comfortable shade for your summer engagement party ensures guests stay cool and protected from harsh UV rays. Whether you’re planning a permanent structure or temporary solution, understanding your options and the tools required will help you execute this project successfully.
For permanent shade, pergolas offer an elegant architectural element that works beautifully for outdoor celebrations. A basic pergola requires treated timber posts, crossbeams, and rafters. You’ll need a post-hole digger to create foundation holes at least 600mm deep, a spirit level for alignment, and a power drill with appropriate bits for assembly. Circular saws or mitre saws help achieve clean, precise cuts for professional results. These backyard transformation projects typically take a weekend to complete with two people working together.
Retractable canopies provide flexible shade control and require less construction expertise. Most systems mount to existing structures or freestanding posts using brackets and heavy-duty screws. You’ll need a ladder, drill, and socket set for installation. Always check manufacturer specifications for weight load and wind ratings.
For temporary solutions, pop-up gazebos offer instant shade without permanent installation. Secure them properly with ground stakes, guy ropes, and weight bags to prevent tipping in wind. While no power tools are necessary, having a rubber mallet helps drive stakes into firm ground.
Safety reminder: Always call before you dig to identify underground utilities, wear appropriate protective equipment including safety glasses and gloves, and ensure helpers understand lifting techniques when handling heavy timber or framework components.
Setting Up Seating and Dining Areas
Creating comfortable seating areas starts with assessing your backyard terrain. Before placing any furniture, use a spirit level to identify uneven spots that could cause wobbling tables or tipping chairs. For grassy areas, consider renting a lawn roller to compact soft ground, preventing chairs from sinking during the celebration.
DIY pallet benches offer budget-friendly seating with rustic charm. Sand pallets thoroughly using an orbital sander to remove splinters, then secure multiple pallets together with wood screws and a cordless drill. Add stability by attaching wooden feet or placing benches on patio pavers. A post hole digger helps create level spots for outdoor furniture on sloped yards.
Arrange seating in clusters to encourage conversation, leaving adequate walkways between groups. Mix traditional chairs with your handmade pieces for variety. For dining tables, rent a plate compactor to create stable gravel pads that drain well and prevent mud issues. Place rubber furniture pads under table legs for extra stability on hard surfaces.
Test all seating arrangements a day before the party, having someone sit on each piece to verify stability. This practical approach ensures guests feel comfortable and safe throughout your celebration, letting everyone focus on the happy couple rather than wobbly seats.
Defining Pathways and Traffic Flow
Establish clear pathways throughout your party space to prevent bottlenecks and ensure guests move comfortably between areas. Mark main routes using solar-powered stake lights or battery-operated string lights placed along edges—these require no electrical expertise and are available as affordable rentals. Create distinct zones by positioning furniture groupings, planters, or rope lighting to naturally guide traffic flow.
For evening celebrations, install temporary pathway lighting at ground level every three to four feet. This prevents tripping hazards while adding ambiance. Consider renting outdoor spotlights to illuminate entry points, the food station, and restroom access routes.
Make your space accessible by ensuring pathways are at least three feet wide—wide enough for two people to pass comfortably or accommodate guests with mobility aids. Remove obstacles like garden hoses, tools, or low-hanging branches. If your yard has uneven terrain, mark elevation changes with reflective tape or extra lighting.
Test your layout before party day by walking through each pathway yourself. Ask a friend to provide feedback on flow and visibility. This simple step often reveals blind spots or congestion points you can address with minor adjustments.
Lighting Solutions That Set the Mood
Installing String Lights and Festoon Lighting
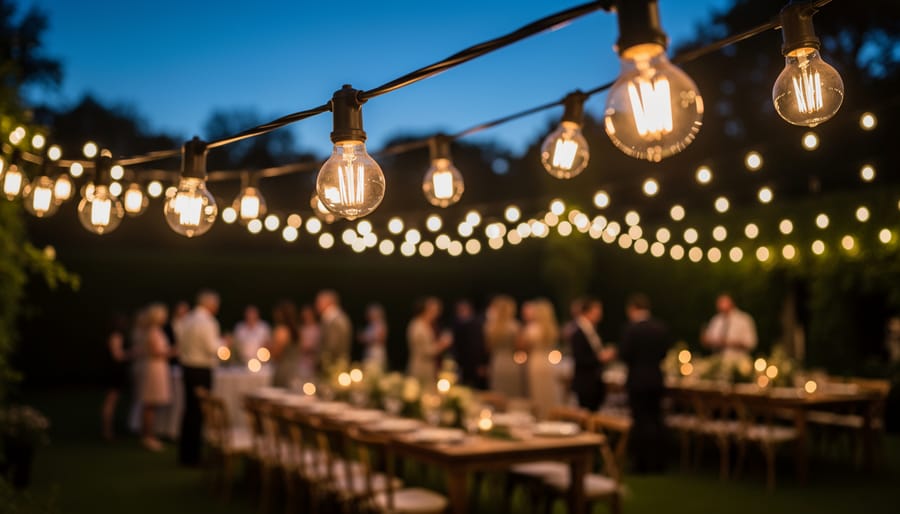
Creating a magical ambiance with string lights and festoon lighting transforms your backyard into an enchanting party venue. Start by mapping out your lighting design and identifying sturdy anchoring points like fence posts, pergola beams, or mature trees. Avoid attaching lights to weak branches or structures that can’t support the weight.
Safety comes first when working at height. Use a stable ladder on level ground and follow the four-to-one ratio rule (position the ladder base one foot away from the wall for every four feet of height). Have someone spot you while hanging lights, and never overreach. For higher installations, consider renting scaffolding for better stability and mobility.
Choose weatherproof outdoor-rated lights and check that extension cords are suitable for exterior use. Test all lights before installation to save time troubleshooting later. Use cable clips or hooks designed for outdoor use rather than nails or staples that can damage wiring insulation.
Cable management tools like zip ties and mounting clips keep wires organized and prevent tripping hazards. Create gentle swoops between anchoring points rather than pulling cables too tight, which stresses both the lights and attachment points. For temporary installations, removable adhesive hooks work well on smooth surfaces without causing damage.
Always ensure electrical connections stay dry by positioning them under eaves or using weatherproof junction boxes. If you’re uncertain about electrical safety, consult a qualified electrician.
Pathway and Safety Lighting
Proper pathway lighting prevents accidents while adding ambiance to your evening celebration. Solar stake lights offer the simplest solution—position them along walkways, around the patio perimeter, and near steps at least 24 hours before your event to ensure full charging. Space them approximately 6-8 feet apart for consistent illumination without creating dark spots where guests might stumble.
LED rope lights or strip lighting provide brighter coverage for high-traffic areas. Secure these low-voltage options along deck edges, stair treads, or garden borders using outdoor-rated clips. Most systems run on battery packs or plug into standard outlets, eliminating the need for electrical experience.
For larger gatherings requiring more substantial lighting, consider temporary electrical setups with outdoor-rated extension cords and ground fault circuit interrupter (GFCI) protection. Always tape down cords across walkways using bright-colored gaffers tape, or run them underneath outdoor rugs to eliminate tripping hazards. Test your entire lighting system the night before to identify any dark zones or malfunctioning fixtures, giving you time to adjust placement or replace components before guests arrive.
Feature and Accent Lighting
Transform your backyard into an enchanting venue by strategically highlighting its best features with accent lighting. Use spotlights to illuminate mature trees—ensuring you’ve completed any necessary tree maintenance and pruning beforehand for a polished look. Position uplights at the base of tree trunks to create dramatic shadows that add depth and elegance to your space. If you have a water feature or fountain, submersible LED lights can create a magical focal point that draws guests’ attention. Architectural elements like pergolas, columns, or garden walls benefit from grazing lights placed close to the surface, emphasizing texture and dimension. Rental spotlights with adjustable heads let you experiment with angles before the event, while color-changing options allow you to match your party theme. Test your lighting setup at dusk to ensure proper placement and adjust beam angles to avoid harsh shadows or glare.
Power and Electrical Setup for Outdoor Entertainment
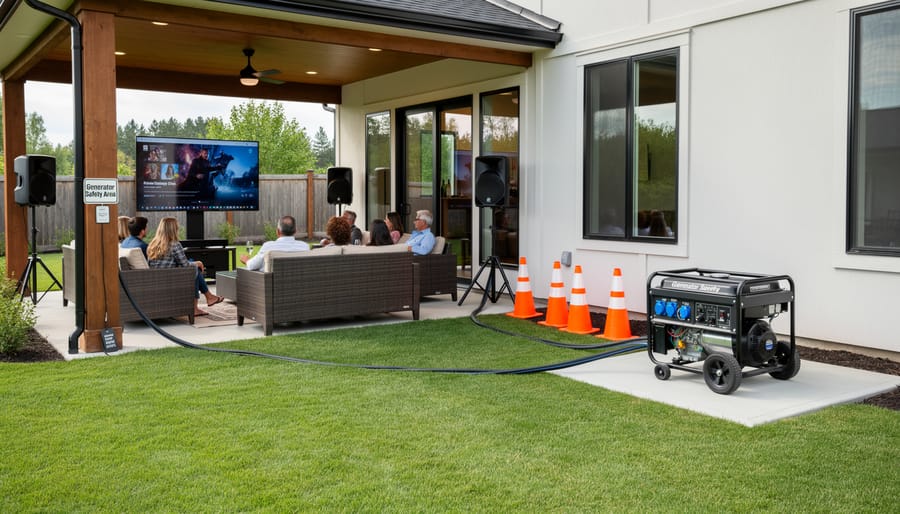
Generator Hire and Placement
Determining your power needs starts with listing all electrical items you’ll use—string lights, speakers, catering equipment, and cooling fans. Add up their wattages (found on product labels or manuals) and multiply the total by 1.5 to account for startup surges. For a typical backyard engagement party with basic lighting and sound, a 3000-5000 watt generator usually suffices, while events requiring heating elements or multiple appliances may need 7500 watts or more.
When selecting a generator, prioritize inverter models for sensitive electronics like laptops or DJ equipment, as they provide cleaner power. Check the decibel rating too—quieter units (around 50-60 dB) won’t overpower conversation.
Position your generator at least 20 feet from the party area and guest seating to minimize noise disruption. Never place it in enclosed spaces, garages, or near windows due to carbon monoxide risks. Ensure it sits on level ground with at least 3-5 feet of clearance on all sides for proper ventilation and cooling. Run extension cords away from walking paths, securing them with tape or cord covers to prevent tripping hazards.
Always review the manufacturer’s safety guidelines before operation and designate someone to monitor fuel levels throughout your event, keeping extra fuel stored safely away from the generator itself.
Extension Cords and Weather-Resistant Connections
When setting up lighting, sound systems, or other electrical equipment for your outdoor engagement party, electrical safety should be your top priority. Standard indoor extension cords aren’t designed for outdoor use and can create serious hazards when exposed to moisture, temperature changes, and foot traffic.
Always use outdoor-rated extension cords marked with a “W” designation, indicating weather resistance. These cords feature thicker insulation and can withstand exposure to sunlight, rain, and temperature fluctuations. Check the cord’s amperage rating matches or exceeds your equipment’s requirements—most outdoor lighting setups need 12 or 14-gauge cords for adequate power delivery.
Create a weatherproof connection system by elevating all plug points at least six inches off the ground using cord hangers or outdoor-rated power stakes. This simple step prevents water pooling around connections during unexpected summer showers. For added protection, cover connection points with weatherproof cord covers or specialized electrical boxes designed for outdoor events.
Inspect all cords before use for cracking, exposed wiring, or damaged plugs. Never run cords through doorways where they could be pinched, or under rugs where damage might go unnoticed. Use ground fault circuit interrupter (GFCI) outlets or adapters—these devices automatically cut power if they detect electrical leakage, preventing potential shocks.
Finally, create a clear pathway plan that routes cords away from high-traffic areas. Use cord protectors or bright tape to mark any unavoidable crossing points, preventing trips and keeping your celebration safe.
Weather Contingency Planning
Tent and Marquee Setup
Creating a comfortable covered space starts with selecting the right temporary structure for your guest count and yard dimensions. Pop-up canopies work well for intimate gatherings of 15-20 guests, while frame tents or pole marquees accommodate larger celebrations. When choosing your structure, factor in ceiling height for standing room and air circulation during warm summer evenings.
Proper anchoring is essential for safety, especially in unpredictable weather. For grass installations, use heavy-duty tent stakes (at least 12 inches long) driven at 45-degree angles away from the tent. On concrete or patio surfaces, weighted bases filled with sand or water provide stability—plan for at least 40 pounds per leg. Always attach guy ropes at tension points and secure them to ground anchors positioned several feet from the tent perimeter.
Your installation toolkit should include a rubber mallet for driving stakes, adjustable wrenches for frame connections, and a spirit level to ensure even setup. Keep ratchet straps on hand for additional reinforcement in windy conditions. Most importantly, review weather forecasts and have a takedown plan if winds exceed 20 mph—temporary structures aren’t designed to withstand severe weather, and guest safety always comes first.
Cooling and Ventilation Solutions
Summer heat can quickly turn your engagement celebration uncomfortable, but a few strategic cooling solutions will keep everyone refreshed. Start by positioning shade structures where guests will spend the most time—near seating areas, food stations, and the bar. Rented canopy tents provide instant relief and can cover significant square footage.
Consider adding misting systems around the party perimeter. These attach to existing fencing or temporary posts and reduce ambient temperature by several degrees. Many hardware stores rent commercial-grade misting kits that connect directly to your garden hose. Position misters upwind so the cooling effect reaches your guests without creating puddles near food areas.
Supplement shade with portable fan rentals. High-velocity fans work well in semi-enclosed spaces like covered patios, while oscillating pedestal fans handle open areas effectively. Place fans strategically to create cross-breezes without blowing napkins and decorations around.
Don’t overlook natural cooling methods: freeze water bottles to place in ice buckets, serve chilled beverages continuously, and schedule the party for late afternoon when temperatures typically drop. These simple adjustments, combined with rented equipment, create a comfortable environment that lets guests focus on celebrating rather than surviving the heat.
Sound System and Entertainment Infrastructure
Speaker Placement and Mounting
Proper speaker placement ensures your guests enjoy clear audio throughout the party space without creating dead zones or overwhelming certain areas. Position speakers at ear height (roughly 5-6 feet) around your party’s perimeter, spacing them evenly to create balanced coverage. For most backyard setups, placing speakers 15-20 feet apart works well.
Wall-mounted brackets offer a secure solution if you’re installing near your house or fence. These typically require a power drill, appropriate screws for your surface material (masonry bits for brick, wood screws for fencing), and a level to ensure straight installation. Portable speaker stands provide flexibility for open yard areas and don’t require permanent fixtures—simply adjust the telescoping poles to your desired height and secure the locking mechanisms.
Angle speakers slightly downward to direct sound toward guest areas rather than skyward. Test your setup before party day by walking the entire space while playing music at typical volume levels. This lets you identify weak spots and adjust positioning accordingly.
For temporary installations, consider weighted bases to prevent stands from tipping in wind. Always keep electrical connections weatherproof using outdoor-rated extension cords and elevated cable runs to prevent tripping hazards. Many DIYers successfully complete speaker setup in under an hour with basic tools and careful planning.
Creating a Dance Floor or Entertainment Area
Transform your lawn into a proper dance floor with simple DIY solutions. Start by selecting the flattest area of your yard and checking for level using a long board and spirit level. For uneven spots, fill low areas with compacted sand or fine gravel a few days before the party.
Temporary dance floor options include interlocking deck tiles, which snap together directly on grass and provide stable footing. Alternatively, lay plywood sheets (at least 3/4-inch thick) over the grass, securing edges with landscape staples to prevent shifting. For added comfort, place outdoor carpet or artificial turf over the plywood.
Define your dance space with string lights hung overhead or solar-powered path lights around the perimeter. This creates an inviting zone while helping guests navigate after sunset. Consider renting a plate compactor if your lawn has significant dips—it will help level and firm the ground beneath your flooring, preventing wobbling that could lead to twisted ankles.
Essential Tool Hire Checklist for Your Engagement Party Prep
Getting your backyard engagement party-ready requires careful planning and the right equipment. Here’s a practical checklist organized by task to help you determine which tools you’ll need and how long to hire them.
Groundwork and Landscaping (2-3 day rental recommended)
Before guests arrive, your lawn needs attention. A lawn aerator improves soil drainage if you’ve had recent rain, while a quality lawn mower ensures a pristine finish. For uneven patches, consider hiring a turf cutter and compactor. If you’re tackling DIY backyard projects like garden bed edging, a trencher or edger will create clean lines that frame your party space beautifully.
Cleaning and Preparation (1-2 day rental)
A pressure washer is essential for cleaning patios, decking, and outdoor furniture. Plan to hire this 2-3 days before your event to allow surfaces to dry completely. For timber decks, add a sander to your list if refinishing is needed. Don’t overlook a wet-dry vacuum for final cleanup tasks.
Structure Installation (3-4 day rental)
Setting up marquees, gazebos, or decorative arbors requires specific equipment. Post hole diggers are necessary for secure installations, while a spirit level and measuring tools ensure everything stands straight. For heavier structures, a small excavator might be worthwhile for a weekend rental.
Lighting and Electrical (event duration plus setup day)
Extension cable reels, outdoor lighting rigs, and generator hire (if your power supply is limited) should cover your entire event. Test all electrical equipment the day before to avoid surprises.
Safety Equipment
Always include safety gear with your rental: work gloves, safety glasses, and hearing protection if using power tools. Most hire shops bundle these together.
Pro tip: Book your equipment at least two weeks ahead during summer peak season, and always collect items the day before you need them to account for any learning curves or adjustments.
Creating an unforgettable backyard engagement party doesn’t require a professional event crew or an unlimited budget. With proper planning and access to the right tools, you can transform your outdoor space into a stunning celebration venue that rivals any hired location. The key is starting early, ideally six to eight weeks before your event, giving yourself ample time to tackle projects in manageable stages without feeling overwhelmed.
Tool hire services have democratized ambitious backyard makeovers, making previously expensive equipment accessible for weekend projects at a fraction of the purchase cost. Whether you need a power washer to revitalize your patio, a lawn aerator for that lush green carpet effect, or lighting equipment to create evening ambiance, rental options put professional-grade results within reach.
Before committing to any tool rental, take advantage of community-driven reviews from fellow DIY enthusiasts who’ve tackled similar projects. These real-world insights often reveal helpful tips about learning curves, time requirements, and potential challenges you might face. User-generated feedback can guide you toward the most efficient equipment choices for your specific yard conditions and skill level.
Start by listing your planned projects in order of priority, then research the tools you’ll need and their availability in your area. Check reviews, watch tutorial videos, and don’t hesitate to ask rental staff for guidance. With thoughtful preparation and the right equipment, your backyard engagement party will showcase not just your love story, but also your DIY capabilities.
Related Posts
Post a Comment