Cut the trunk base at a 45-degree angle before bringing your tree indoors, removing at least one inch to expose fresh wood that absorbs water efficiently. Place the tree in a sturdy stand that holds a minimum of one gallon of water—a six-foot tree can drink up to a gallon daily during the first week. Position it away from heat sources like fireplaces, radiators, and heating vents, which accelerate needle drying and create fire hazards.
Check water levels twice daily, never letting the base dry out, as even a few hours without water causes the trunk to seal with sap and dramatically reduces water absorption. Test needles regularly by gently tugging branches; fresh trees retain green, pliable needles while dried trees shed easily. Monitor the area around your tree for dropped needles and excessive dryness, which signal it’s time for removal.
Maintain room temperatures between 65-70°F to extend freshness, and consider using a room humidifier to combat dry indoor air. Inspect all light strings for frayed wires or damage before decorating, and always unplug lights when leaving home or going to bed. A well-maintained tree stays vibrant for four to five weeks, transforming your home safely while creating lasting holiday memories.
Choosing the Right Tree for Easier Maintenance
Signs of a Fresh, Healthy Tree
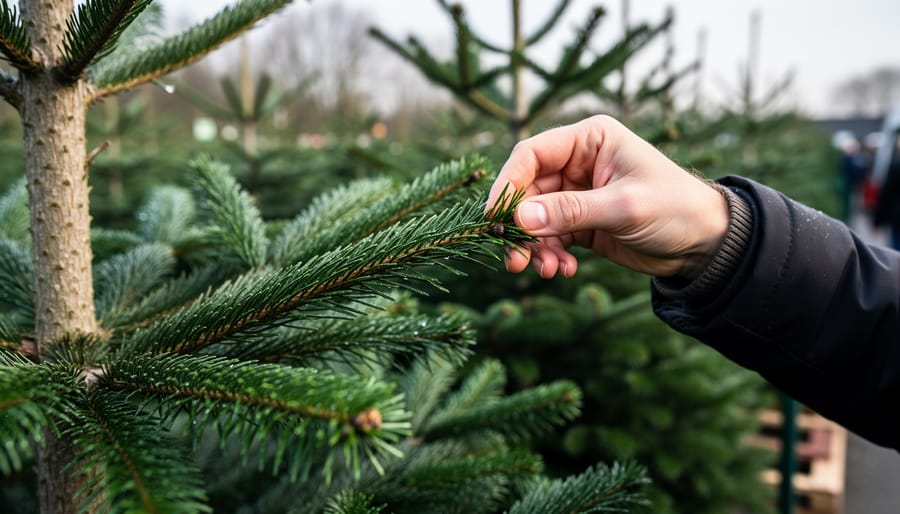
Finding a fresh tree at the lot sets you up for weeks of holiday enjoyment. Before you make your purchase, run through these simple tests that experienced tree shoppers swear by.
Start with the needle test. Gently run your hand along a branch from inside to outside. A healthy tree will hold onto its needles firmly—if more than a few green needles fall off, that’s a red flag. The needles should feel flexible and slightly springy, not brittle or dry. Bend a needle between your fingers; fresh needles will bend without snapping.
Next, check the trunk cut. The base should look moist and feel slightly sticky from sap. A dried-out, discolored cut means the tree has been sitting too long. Ask the lot attendant when it arrived—trees harvested within the past week are your best bet.
Perform the bounce test by lifting the tree a few inches and dropping the trunk on the ground. A small amount of interior brown needles falling is normal, but a shower of green needles signals trouble.
Finally, inspect the branches. Give them a gentle shake—they should feel resilient and spring back into place. Branches that feel stiff or brittle indicate dehydration. Check the overall color too; vibrant green throughout means optimal freshness.
Best Species for Longevity
Choosing the right species makes a significant difference in how long your tree stays fresh with minimal effort. Fraser firs consistently rank as the best choice for needle retention, holding their branches firm for four to five weeks with basic care. Their sturdy limbs also handle heavier ornaments without drooping. Noble firs come in a close second, known for excellent needle retention and a pleasant citrus scent that many homeowners prefer.
For those seeking low-maintenance options, Nordmann firs are increasingly popular in the community. These trees shed very few needles even when they start drying out, making cleanup much easier. However, their branches are slightly more flexible, so consider ornament weight when decorating.
Balsam firs offer a traditional Christmas scent and good needle retention for three to four weeks, though they require consistent watering. Blue spruces look stunning with their silvery-blue color but tend to drop needles faster than firs, making them better suited for shorter display periods of two to three weeks.
When selecting your tree, ask the lot attendant when it was cut. Fresher trees naturally last longer regardless of species. Give the trunk a gentle shake—minimal needle drop indicates a healthy, fresh-cut tree that will reward you with weeks of holiday beauty.
Essential Tools and Equipment for Christmas Tree Care
Must-Have Basic Supplies
Setting up your Christmas tree properly starts with having the right supplies on hand. These essential items will make care easier and help your tree stay fresh throughout the season.
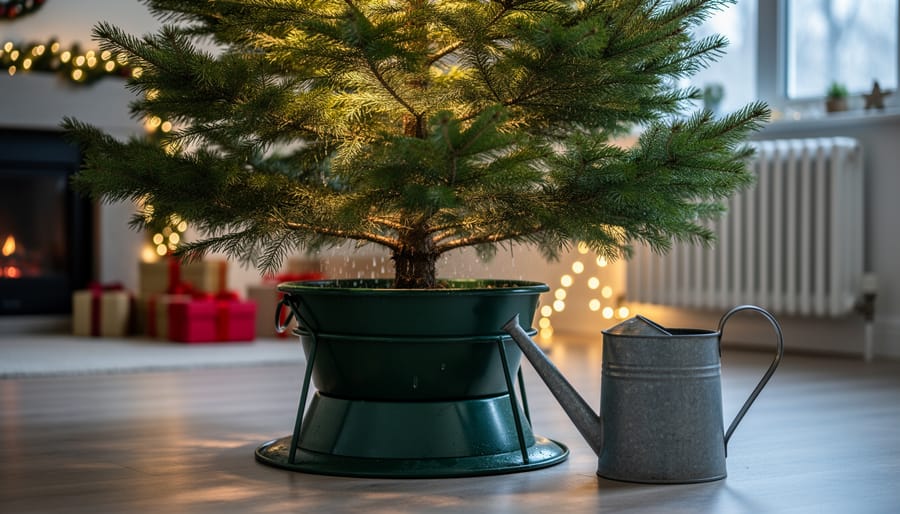
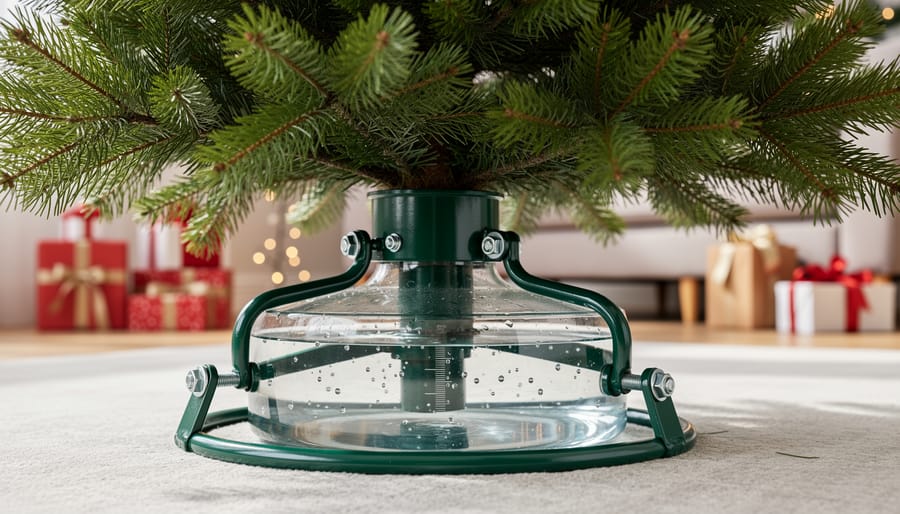
First, invest in a quality tree stand with a substantial water reservoir. Look for stands that hold at least one gallon of water, as fresh trees can drink up to a quart daily during the first week. Many community reviews highlight sturdy metal stands with adjustment screws as the most reliable option for trees up to eight feet tall.
A measuring tape is crucial for two reasons: ensuring your tree fits your space and checking water levels daily. Measure your ceiling height before purchasing a tree, leaving room for the stand and tree topper. For water level monitoring, some users recommend marking the side of your stand’s reservoir at the minimum fill line.
Keep watering devices nearby for convenient daily refills. A small watering can with a long spout works well for reaching under branches, or consider a tree watering funnel that attaches directly to your stand. Some DIY enthusiasts swear by turkey basters for topping up water in tight spaces.
A moisture meter can help you monitor your tree’s hydration status, though checking the water reservoir daily remains the most reliable method. These inexpensive tools provide peace of mind, especially for first-time tree owners.
Finally, keep pruning shears handy for trimming any dead branches and a tree skirt or mat to protect your flooring from water spills and fallen needles.
Professional-Grade Equipment Worth Hiring
Moving and maintaining a large Christmas tree doesn’t have to strain your back or your patience. Professional-grade equipment can transform challenging tasks into manageable ones, especially if you’ve selected a taller tree or have mobility concerns.
A tree moving dolly makes positioning your tree effortless, with wheeled platforms designed to support trees up to 10 feet tall while protecting your floors. These dollies typically feature adjustable straps and rotating bases, letting you spin the tree to find its best angle without lifting.
Hydraulic tree stands offer superior stability compared to standard models. They accommodate larger trunk diameters and hold more water—up to 2 gallons in some cases—reducing your refilling frequency. The hydraulic mechanism lets you adjust the tree’s vertical position even after setup, perfect for getting that topper perfectly aligned with your ceiling.
For fresh-cut trees with uneven bases, a chainsaw makes quick work of creating a clean, straight cut that maximizes water absorption. Even a small electric chainsaw handles this job safely when used with proper protective equipment.
Many equipment rental centers stock these specialized tools during the holiday season. Renting means you get professional results without the storage hassle, and community reviews can guide you toward the most reliable options for your specific tree care needs.
Preparing Your Tree: The Critical First Steps
Making the Perfect Fresh Cut
Making a fresh cut at your tree’s base is one of the most crucial steps for keeping your Christmas tree hydrated and healthy. When a tree is first cut, sap begins to seal over the exposed wood within hours, blocking the water-conducting tissues called xylem. This natural sealing process prevents your tree from absorbing water, leading to premature drying and needle drop.
Before setting up your tree, remove 1-2 inches from the bottom of the trunk with a straight, perpendicular cut. This fresh cut reopens those vital water channels, allowing your tree to drink properly. Think of it like unclogging a straw—you’re giving your tree a clear path to hydration.
For the cleanest results, use a sharp bow saw or chainsaw if you’re comfortable operating one safely. A straight, level cut ensures your tree sits securely in its stand without wobbling. Avoid angled cuts, as they reduce the surface area touching water and can make positioning difficult. If you don’t own suitable tree cutting tools, many hardware stores and tool rental shops offer affordable options.
Timing matters here—make your fresh cut right before placing the tree in water, ideally within a few hours. The longer you wait after cutting, the more those tissues begin to seal again. If you can’t set up immediately, store your tree in a cool location and recut before setup. This simple step dramatically improves water uptake and extends your tree’s freshness throughout the season.
The Acclimation Period
When you first bring your Christmas tree home, resist the urge to immediately place it in your living room. A sudden temperature change can shock the tree and cause premature needle drop. Instead, let your tree acclimate gradually to indoor conditions.
If temperatures outside are above freezing, place your tree in an unheated garage or covered porch for 24 hours. This transition zone helps the tree adjust from the cold outdoor environment to your warm home. During freezing weather, shorten this period to just a few hours to prevent ice damage to the branches.
The most critical step during acclimation is cutting one to two inches off the trunk base before placing it in water. This fresh cut removes any dried sap that has sealed the tree’s pores, allowing it to absorb water effectively. Make this cut as close to bringing the tree inside as possible.
Place your tree in a sturdy stand immediately after cutting, and fill the reservoir with fresh water right away. Trees can seal over in as little as four to six hours without water, so don’t delay this step. During the first 24 hours, your tree may drink up to a gallon of water as it rehydrates from transport and storage.
Many homeowners skip the acclimation period entirely, but taking this extra day helps your tree adjust and establishes healthy water uptake patterns from the start. This simple practice can add several days to your tree’s indoor lifespan while reducing needle drop throughout the season.
Daily and Weekly Care Routines
Daily Water Monitoring
Your Christmas tree drinks water like a thirsty athlete, especially during its first week in your home. Understanding and maintaining proper hydration is the single most important factor in keeping your tree fresh and reducing needle drop throughout the holiday season.
As a general rule, expect your tree to consume approximately one quart of water per day for every inch of trunk diameter. A tree with a 4-inch diameter trunk can drink up to one gallon daily during the initial days after cutting. This consumption rate typically decreases after the first week but remains significant throughout the tree’s display period.
Check your tree’s water level at least twice daily, morning and evening. The water reservoir in your tree stand should never drop below the base of the trunk, as even a few hours of exposure to air can cause the cut end to seal over with sap. Once this seal forms, the tree cannot absorb water effectively, dramatically shortening its lifespan. If this happens, you may need to make a fresh cut, which requires removing and repositioning the tree.
Keep a dedicated watering can or pitcher near your tree for convenient refilling. Position it within easy reach to encourage consistent monitoring. Many homeowners find that keeping a small flashlight nearby helps check water levels beneath the lower branches, where visibility can be limited.
Room temperature water works best, as cold water may shock the tree. Add water whenever the level drops to within two inches of the trunk base to maintain optimal hydration and tree health.
Weekly Safety and Freshness Checks
Making weekly safety checks ensures your Christmas tree stays beautiful and hazard-free throughout the season. Set aside five minutes each week to inspect your tree’s condition and address any issues before they become problems.
Start by checking for dryness indicators. Gently run your hand along a branch—if needles fall off easily or feel brittle, your tree needs more water immediately. The branches should remain flexible, not stiff. Look at the needle color too; browning tips signal dehydration that requires attention.
Inspect all electrical connections weekly. Unplug your lights and examine cords for fraying, exposed wires, or burn marks. Check that connections aren’t loose and extension cords aren’t overloaded. Replace any damaged lighting immediately to prevent fire hazards. Many homeowners find it helpful to test lights during daylight hours when issues are easier to spot.
Clear away dry needles that accumulate around the tree base and in the water reservoir. These create fire risks and can clog your watering system. Use a small handheld vacuum or broom to keep the area clean.
Finally, verify water levels daily but do a thorough reservoir check weekly. Your tree should consume less water as weeks pass, but the stand must never run dry. Top off the reservoir completely during your weekly inspection, even if it looks adequate.
Using Moisture Meters Effectively
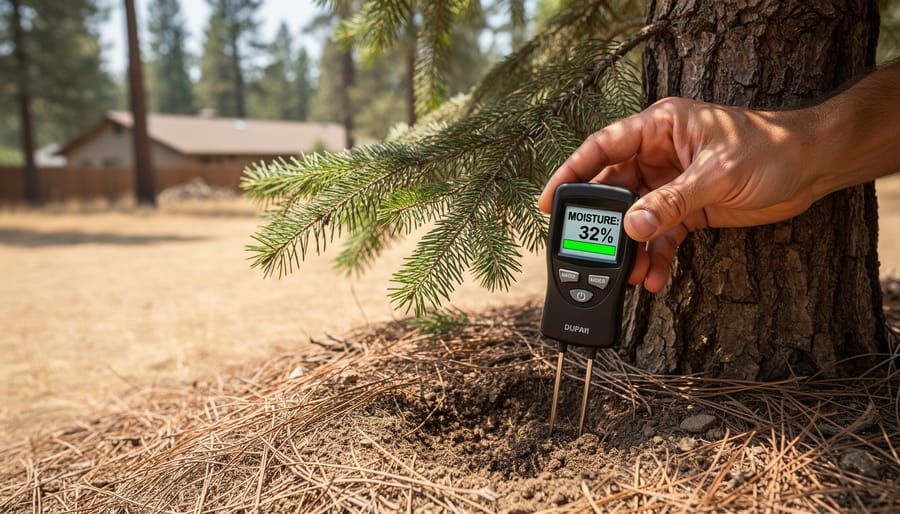
A moisture meter takes the guesswork out of determining whether your Christmas tree needs water. These handheld devices measure the moisture content in the wood, giving you an objective reading of your tree’s hydration level. Insert the meter’s prongs into the trunk about two inches above the water line in your stand. A healthy, well-hydrated tree should register in the green zone (typically 40-60% moisture content). Yellow or red readings indicate it’s time to add water immediately.
Check your tree every 2-3 days using the moisture meter, especially during the first week when trees absorb the most water. Position the meter at different spots around the trunk since moisture distribution can vary. If readings consistently show low moisture despite regular watering, your tree may have sealed over—try making a fresh cut at the base.
Many community members report that moisture meters helped them catch dehydration early, preventing needle drop and reducing fire risk. These affordable tools are available at most hardware stores or through tool rental services, making professional-grade tree monitoring accessible to every household.
Optimal Placement and Environmental Control
Keep Away from Heat Sources
Heat is one of the biggest threats to your Christmas tree’s longevity. When preparing your space for your tree, position it at least three feet away from all heat sources including fireplaces, radiators, heating vents, and space heaters. This distance isn’t arbitrary – it’s based on fire safety standards and the science of how heat affects evergreens.
Here’s what happens: heat sources create convection currents that accelerate moisture evaporation from needles. A tree near a radiator can lose water twice as fast as one in a cooler spot, causing needles to dry out and become brittle within days rather than weeks. Direct sunlight through windows has a similar effect, especially from north-facing windows in summer or west-facing windows that catch afternoon sun.
Use a basic room thermometer to check the temperature around your tree – ideally, it should stay between 15-20 degrees Celsius. If you notice the tree closest to a heat source is warmer, relocate it immediately. Many homeowners from our community report their trees lasted an extra week simply by moving them away from heating vents. Remember, a cooler tree is a safer, longer-lasting tree.
Temperature and Humidity Management
Your Christmas tree thrives in a cooler environment, ideally between 60-70°F. Higher temperatures cause the tree to dry out faster, increasing needle drop and fire risk. Position your tree away from heat sources like radiators, heating vents, fireplaces, and direct sunlight, which can raise the temperature around the tree by several degrees.
Humidity plays an equally important role in keeping your tree fresh. Central heating systems can reduce indoor humidity levels to as low as 10-20%, which is drier than most deserts. Your tree naturally loses moisture through its needles, and low humidity accelerates this process dramatically.
In dry climates or homes with forced-air heating, consider using a room humidifier near your tree to maintain humidity levels between 40-50%. This simple step can extend your tree’s freshness by a week or more. Many homeowners report positive results from this practice in community reviews.
You can also place shallow water dishes near heat vents to add moisture to the air naturally, though this method is less effective than a dedicated humidifier. Monitor your tree daily—if needles feel brittle or fall off easily when touched, your environment may be too warm or dry, and adjustments are needed immediately.
Safety Maintenance Throughout the Season
Fire Prevention Checks
Daily fire prevention checks are essential for keeping your Christmas tree safe throughout the season. Check your tree’s moisture level each morning by touching the needles and examining the trunk. If needles feel brittle or fall off easily when touched, your tree is becoming dangerously dry. The trunk should remain moist to the touch near the base.
Switch to LED lights immediately if you haven’t already. Traditional incandescent bulbs generate significant heat that accelerates drying and increases fire risk. LED lights stay cool, use less electricity, and are much safer for prolonged use. Check all light strands daily for frayed wires, broken bulbs, or overheating. Unplug lights whenever leaving home or going to bed.
Monitor your tree’s overall condition as part of your tree health and safety routine. Warning signs that your tree has become too dry include excessive needle drop creating a carpet around the base, branches that droop significantly, and a distinct dry, brittle sound when touching branches. If your tree exhibits these symptoms, remove it immediately regardless of how close to Christmas you are. A severely dried tree can ignite in seconds and burn completely within minutes, making it an unacceptable household risk.
Securing Your Tree Properly
A stable tree stand is your first line of defense against accidents. Choose a stand that holds at least one gallon of water and can accommodate your tree’s trunk diameter—the stand should grip the trunk firmly without wobbling. Before placing your tree, cut about half an inch off the base at a slight angle to help with water absorption, and remove any bark that would sit below the waterline in the stand.
For households with active pets or young children, take extra precautions. Secure your tree to the wall using fishing line, clear wire, or specialized tree straps attached to a sturdy wall anchor or nearby window frame. This simple step can prevent dangerous tip-overs if someone bumps the tree or a curious pet tries to climb it. Position the tree away from high-traffic areas and keep the lower branches free of breakable ornaments that could tempt little hands or paws.
Check your tree’s stability daily, especially during the first few days when the trunk may settle into the stand. Tighten the stand’s bolts as needed, and monitor the water level—a dehydrated tree becomes top-heavy and more likely to fall. Community feedback consistently shows that taking these precautions early prevents holiday mishaps and keeps everyone safe.
Troubleshooting Common Christmas Tree Problems
When Your Tree Stops Drinking Water
If your tree suddenly stops drinking water, don’t panic. This common problem usually has two main causes. First, the cut trunk base may have sealed over with dried sap, creating a barrier that prevents water absorption. This happens when trees sit too long before getting placed in water, or if the water level drops below the cut surface. Second, the fresh cut itself may have developed a resin blockage, especially common with pine and spruce varieties.
The good news is you can fix this issue if you catch it within the first few days. Remove the tree from its stand and make a fresh cut, removing about half an inch from the base. Use a handsaw to ensure a clean, straight cut perpendicular to the trunk. Immediately place the tree back in the stand and fill with fresh water. The tree should start drinking within a few hours.
If the tree has been up for more than a week without drinking, re-cutting may not work effectively. At this point, focus on maintaining humidity around the tree and monitor it closely for excessive needle drop or fire hazards. Consider whether it’s safer to remove the tree early rather than risk it becoming dangerously dry. Always check that your water reservoir hasn’t developed debris or algae buildup, which can also block absorption.
Excessive Needle Drop
A healthy tree naturally loses some needles, but excessive drop signals a problem that needs immediate attention. Normal shedding means finding a few brown needles daily on your tree skirt or floor. However, if green needles fall when you gently run your hand along a branch, or you’re sweeping up handfuls multiple times per day, your tree is drying out too quickly.
First, check your water reservoir. A tree can drink up to a gallon daily during the first week, and an empty stand is the most common culprit. Refill immediately and monitor levels twice daily going forward. If water isn’t the issue, your tree may be positioned too close to heat sources. Move it at least three feet away from radiators, fireplaces, heating vents, or sunny windows.
Room temperature also matters significantly. Keeping your thermostat at 68°F or below helps slow moisture loss. Consider using a room humidifier nearby to combat dry indoor air, which accelerates needle drop.
Community feedback consistently shows that trees losing green needles within the first week were often cut too long before purchase. Unfortunately, there’s limited recovery once this happens. Focus on keeping surrounding areas clear of dry needles, as they present fire hazards. If more than half the needles have dropped, it’s time to safely remove and dispose of the tree.
Disposal and Recycling Your Tree Responsibly
Safe Removal Techniques
When it’s time to say goodbye to your tree, removing it safely prevents needle scatter and sap damage to floors. Start by spreading a large tarp or specially designed tree disposal bag beneath the tree before loosening it from the stand. These bags, often available at hardware stores, contain needles and make cleanup significantly easier.
Use proper lifting techniques when carrying your tree—bend at the knees, keep your back straight, and grip the trunk near its base. For larger trees, enlist help from another person to avoid strain or accidents. Wear gloves to protect your hands from sap and sharp needles.
Consider using a tree dolly or hand truck to transport heavier trees through your home. Many hardware stores and tool rental centers offer these specifically during the holiday season. Community reviews suggest wheeled options work best on hard floors, while tarps provide better protection for carpets.
Before moving the tree, check your planned exit route and protect doorways with additional coverings. Remove any remaining decorations to prevent breakage and make the tree lighter to handle.
Recycling and Repurposing Options
Once the holidays end, your Christmas tree can serve useful purposes beyond the curb. Check with your local council for tree collection schedules—many communities offer curbside pickup in early January specifically for Christmas trees. These programs typically chip trees into mulch for parks and gardens, giving your tree a second life.
Consider creating your own garden mulch by running branches through a wood chipper (available at most tool rental shops). The fresh pine mulch works wonderfully around acid-loving plants like azaleas and blueberries. Strip the needles and scatter them as natural garden bedding.
For wildlife enthusiasts, place your undecorated tree in your backyard to create temporary shelter for birds during winter months. Secure it firmly and add birdseed or suet feeders nearby. Fish and wildlife departments sometimes accept trees for lake and pond habitats, creating structures where fish can hide and spawn.
Many garden centers and community groups organize tree collection events, often accepting trees in exchange for compost or mulch. These recycling options keep trees out of landfills while benefiting your local environment. Remove all decorations, tinsel, and stands before recycling—these contaminate the mulching process and can damage equipment.
Caring for your Christmas tree doesn’t have to be complicated when you establish consistent routines and use the right approach. The key is staying on top of daily watering, conducting regular safety checks, and keeping your tree away from heat sources. These simple habits will keep your tree looking vibrant and minimize fire risks throughout the holiday season.
Remember that fresh-cut trees naturally lose moisture over time, so monitoring water levels should become part of your daily routine—just like checking your lights or straightening ornaments. If you notice your tree drying out faster than expected, revisit the basics: water temperature, stand capacity, and room conditions.
We’d love to hear from you in our community section below. What tree care tricks have worked best in your home? Have you discovered any creative solutions for keeping your tree fresh longer? Sharing your experiences helps fellow readers navigate their own holiday preparations.
If tree maintenance tasks feel overwhelming—whether it’s hauling your tree home, setting up a sturdy stand, or managing disposal—explore our tool rental options to make the job easier. The right equipment transforms tree care from a chore into a straightforward seasonal task you can confidently handle year after year.
Related Posts

Post a Comment