
Water waste in building projects costs money, damages the environment, and violates increasingly strict regulations. Implementing sustainable water management reduces your utility bills by up to 40%, protects local water supplies, and future-proofs your property against water scarcity.
Install dual-flush toilets and low-flow fixtures immediately to cut indoor water consumption by 20-30% without sacrificing performance. Redirect greywater from sinks, showers, and washing machines to irrigation systems using simple gravity-fed or pump-assisted setups that require minimal plumbing modifications. Capture rainwater through roof collection systems with first-flush diverters and storage tanks, then use this free resource for landscaping, toilet flushing, and construction activities like concrete mixing and dust suppression.
The construction phase offers your best opportunity to integrate water-saving infrastructure. Position plumbing strategically to minimize pipe runs and heat loss, reducing the gallons wasted while waiting for hot water. Install submeters to track consumption across different building zones, helping identify leaks and wasteful practices before they become expensive problems. Choose permeable paving materials for driveways and walkways to reduce stormwater runoff and recharge groundwater naturally.
Professional contractors and DIY builders alike struggle with selecting appropriate equipment and avoiding common installation mistakes. This guide provides step-by-step implementation methods, explains which tools you need for each technique, and shares real user experiences to help you avoid costly errors while building truly sustainable water systems.
What Sustainable Water Management Actually Means for Builders
Sustainable water management in construction boils down to three straightforward principles: using less water, reusing what you can, and conserving resources throughout the build. Think of it as getting smarter about every drop that flows through your project, from foundation to finish.
Reduction means cutting water consumption at the source. On a typical residential build, this includes installing low-flow fixtures, dual-flush toilets, and water-efficient appliances from day one. For commercial projects, consider high-efficiency cooling systems and landscaping designs that minimize irrigation needs. One builder we spoke with reduced water usage by 40% on a suburban housing development simply by specifying WaterMark-certified taps and showerheads throughout.
Reuse involves capturing and repurposing water that would otherwise go down the drain. Greywater systems collect runoff from showers, sinks, and washing machines, then filter it for toilet flushing or garden irrigation. Rainwater harvesting tanks store stormwater for outdoor use, reducing reliance on mains supply. A commercial warehouse project in Melbourne installed a 10,000-liter rainwater tank that now handles all toilet flushing and landscape watering, cutting municipal water costs by thousands annually.
Conservation extends beyond fixtures to include construction practices themselves. This means fixing leaks immediately during the build, using water-efficient concrete mixing techniques, and timing landscaping installation to coincide with natural rainfall patterns. Similar to how green insulation reduces energy waste in buildings, sustainable water management tackles resource efficiency from multiple angles.
The practical reality for builders is that these strategies often pay for themselves within a few years through lower water bills and increased property value. More importantly, they are becoming standard requirements in many council approvals, making sustainable water management less of an option and more of a necessity for modern construction projects.
Water-Smart Planning: Getting It Right Before You Break Ground
Site Assessment and Water Auditing
Before implementing any sustainable water management system, you need a clear picture of your site’s current water situation. Start by mapping all existing water sources, including mains supply, rainwater collection points, and any natural features like streams or groundwater. Walk your property during and after rainfall to identify drainage patterns, pooling areas, and runoff paths. This observation helps you understand where water naturally flows and accumulates.
Next, conduct a thorough water audit by tracking consumption across all uses. For residential projects, examine indoor usage (bathrooms, kitchen, laundry) and outdoor needs (irrigation, pools, cleaning). Commercial sites require detailed breakdowns by department or function. Install water meters at key points to measure actual usage over several weeks, giving you baseline data to work with.
Essential assessment tools include a flow meter to measure water pressure and volume, moisture meters for checking soil saturation levels, and pH testing kits if you’re planning greywater reuse systems. A handheld GPS or smartphone mapping app helps document site features accurately. For larger projects, consider hiring a thermal imaging camera to detect hidden leaks in existing plumbing.
Document everything with photos, measurements, and notes. This assessment works hand-in-hand with passive building design principles, where understanding site conditions early prevents costly mistakes later. Most tool hire centres stock the equipment needed for comprehensive water audits, making professional-grade assessment accessible without major upfront investment. Your assessment data becomes the foundation for designing an effective, site-specific water management strategy.
Choosing Water-Efficient Materials and Fixtures
Selecting the right water-efficient products starts with understanding basic measurements. Low-flow fixtures are rated by gallons per minute (GPM) for taps and showerheads, or gallons per flush (GPF) for toilets. Look for products with WaterSense certification, which guarantees at least 20% water savings compared to standard models.
For bathroom fixtures, choose dual-flush toilets (0.8/1.6 GPF) over traditional single-flush models (3.5+ GPF). Install aerators on taps to reduce flow from 2.2 GPM to 1.5 GPM without sacrificing pressure. Showerheads rated at 2.0 GPM or less can cut water use by 40% while maintaining comfort.
Kitchen appliances matter too. Dishwashers with Energy Star ratings use as little as 3 gallons per cycle, compared to 10+ gallons for older models. Front-loading washing machines consume 40% less water than top-loaders.
Outdoors, permeable paving materials allow rainwater to filter naturally into soil rather than running off into drains. Options include permeable concrete, porous asphalt, or gravel grids. These integrate well with other sustainable building materials in your project.
Where to source: Major hardware chains stock basic low-flow fixtures, but specialty plumbing suppliers offer wider ranges. Check manufacturer websites for certified installer networks and bulk pricing on larger projects. Many community members recommend visiting local showrooms to test water pressure before purchasing.
Pro tip: Keep old fixtures as backups when renting installation tools like basin wrenches or pipe cutters, giving you confidence to tackle installations yourself.
Designing for Rainwater Harvesting and Greywater Systems
Rainwater harvesting and greywater systems range from basic DIY setups to complex integrated solutions. For small-scale projects, a simple rain barrel system connects to your downspout and requires minimal equipment—just a food-grade barrel, overflow valve, and spigot. These typically hold 50-100 gallons and work well for garden irrigation.
Mid-scale residential systems include underground storage tanks (500-1,000 gallons) with pump systems and basic filtration. You’ll need excavation equipment, PVC piping, and a submersible pump. These systems can supply toilets and outdoor taps, reducing household water consumption by 30-50%.
Greywater systems reuse water from sinks, showers, and washing machines. The simplest design diverts laundry water directly to landscaping through branched drain pipes—no pumps required. More advanced systems include surge tanks, filters, and treatment components.
Key design considerations include local regulations (many areas require permits), roof material compatibility (avoid asbesalt shingles for potable use), storage capacity based on rainfall patterns, and proper filtration levels for intended use. First-flush diverters are essential to remove initial roof debris. Position tanks on stable, level ground and ensure overflow routes away from foundations. Always separate greywater from blackwater (toilet waste), and use appropriate piping to prevent cross-contamination. Calculate your water needs against collection potential to size systems correctly.
Essential Tools and Equipment for Water-Conscious Construction

Water Monitoring and Measurement Tools
Effective water monitoring starts with the right measurement tools. Whether you’re tracking consumption on a renovation project or identifying wasteful leaks, these instruments provide the data you need to make informed decisions.
Flow meters measure the rate of water moving through pipes, helping you establish baseline consumption and spot anomalies. Install them at main supply points or individual fixtures to track usage patterns. Digital models offer real-time readings, while mechanical versions provide cost-effective monitoring for smaller projects. You’ll need these when commissioning new plumbing systems or investigating unexpectedly high water bills.
Pressure gauges attach to outdoor faucets or hose bibs to measure water pressure in PSI (pounds per square inch). Normal household pressure ranges between 40-60 PSI. Readings above 80 PSI indicate potential waste through leaks and fixture wear. Use them during initial site assessments and after installing pressure-reducing valves to confirm proper adjustment.
Leak detection equipment ranges from simple acoustic listening devices to advanced thermal imaging cameras. Acoustic detectors amplify the sound of water escaping pipes, even through concrete. They’re essential when you suspect hidden leaks but can’t pinpoint locations visually. For large sites, consider renting ultrasonic leak detectors that identify high-frequency sounds beyond human hearing.
Moisture meters measure water content in building materials like drywall, wood, and concrete. Insert pin-type probes directly into materials or use non-invasive scanners for surface readings. They’re crucial after suspected leaks to assess damage extent and verify repairs have eliminated moisture problems. Regular monitoring prevents mold growth and structural deterioration.
Dust Suppression Equipment That Saves Water
Traditional dust control methods can waste hundreds of gallons of water daily on construction sites, but modern dust suppression equipment offers smarter alternatives. Misting systems represent one of the most efficient solutions, using high-pressure nozzles to create ultra-fine water droplets that capture dust particles while using up to 90% less water than conventional spraying methods. These systems work by atomizing water into microscopic droplets, which bind to airborne particles and bring them to the ground without creating mud or runoff.
For power tool users, specialized attachments make a significant difference. Dust shrouds with integrated water feeds connect directly to grinders, saws, and drills, delivering precise amounts of water exactly where cutting occurs. This targeted approach eliminates wasteful overspray while keeping dust contained at the source.
Many equipment rental centers now stock these water-efficient options, making them accessible for single projects without requiring major investments. According to user feedback from construction professionals, these systems typically pay for themselves through reduced water bills within weeks.
When selecting dust suppression equipment, prioritize adjustable flow controls that let you fine-tune water usage based on conditions. Remember that wetter isn’t always better—proper misting techniques achieve superior dust control while conserving this precious resource.
Plumbing Tools for Efficient Installation
Installing water-saving systems requires the right equipment to ensure proper function and longevity. A quality pipe cutter is essential for clean, precise cuts when fitting low-flow fixtures or greywater systems—jagged edges can compromise seals and lead to leaks. For plastic pipes common in modern installations, ratcheting PVC cutters work best, while copper requires tube cutters with sharp cutting wheels.
Pressure testing kits are non-negotiable before finalizing any installation. These kits help identify leaks in your system before they cause damage, ensuring your water-saving efforts aren’t undermined by hidden waste. Most kits include a pressure gauge and pump that temporarily pressurizes the system beyond normal operating levels.
Thread sealant tape and pipe wrenches complete the basic toolkit, creating watertight connections at fixture points. According to community feedback from professional plumbers, investing in adjustable basin wrenches saves significant time when working in tight spaces under sinks.
For larger projects like rainwater harvesting systems, you’ll need hole saws for creating downpipe connections and spirit levels to ensure proper drainage angles—even a slight incline error can cause water pooling. Many of these specialized tools are available for short-term hire, making sustainable installations more accessible without major equipment investment.
On-Site Water Management: Practical Steps During Construction
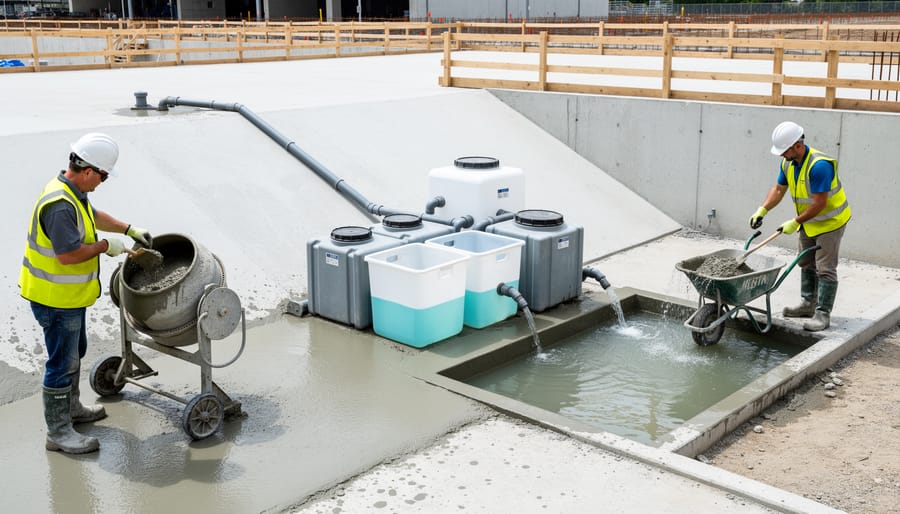
Controlling Water Use in Concrete and Masonry Work
Concrete and masonry work accounts for significant water consumption on building sites, but smart techniques can dramatically reduce waste while maintaining structural integrity. Start with precise water-to-cement ratios—typically 0.4 to 0.6 for most applications—using calibrated measuring containers rather than estimating by eye. This prevents over-watering, which weakens concrete and wastes resources.
For mixing, a drum mixer with a spray attachment provides better control than manual methods. Add water gradually in small increments, checking consistency as you go. Many experienced tradespeople recommend starting with 80% of the calculated water requirement, then adjusting as needed. This approach prevents the common mistake of adding too much water initially, which cannot be reversed.
Curing concrete requires moisture but doesn’t demand continuous water flow. Instead of constant spraying, use curing blankets or plastic sheeting to retain moisture for the critical first seven days. For smaller projects, curing compounds create a moisture-retaining membrane with a single application, eliminating daily watering entirely.
When cleaning tools and equipment, use a three-bucket system: one for initial rinse to remove heavy residue, a second for washing, and a third for final rinse. This method uses approximately 60% less water than running hoses. The first bucket’s sediment-heavy water can settle overnight, allowing you to reuse the cleaner top layer the next day.
Always position mixing areas on level ground with containment barriers to prevent runoff into drains or soil. Collect wash water for reuse in future mixes where structural requirements permit, or allow sediment to settle before proper disposal. Remember to wear protective gloves and eyewear when handling cement-based materials, as they remain caustic even when wet.
Managing Runoff and Site Drainage
Proper runoff management protects your construction site from erosion while preventing sediment from entering stormwater systems. Here’s how to implement effective drainage controls using readily available equipment.
Start by assessing your site’s topography to identify natural water flow patterns. You’ll need a laser level (available for hire), measuring tape, and stakes to map drainage routes. Mark areas where water naturally accumulates or flows fastest, as these require immediate attention.
Install silt fences along your site perimeter first. These fabric barriers trap sediment while allowing water to pass through. Dig a 150mm trench using a trenching shovel or compact excavator for larger sites. Insert the fence fabric 100-150mm into the trench, backfill with compacted soil, and secure with wooden or steel posts every 2 metres. Check community reviews to find reliable compact excavators that handle varying soil conditions.
For temporary drainage channels, hire a mini excavator to create shallow swales directing water away from work areas. Line these channels with erosion control blankets, biodegradable materials that stabilize soil while vegetation establishes. Secure blankets with metal staples every 300mm.
Place sediment traps or check dams at regular intervals using sandbags, gravel bags, or timber weirs. These slow water flow, allowing particles to settle. Position them every 10-15 metres along drainage paths.
Inspect all systems after rain events and maintain barriers weekly. Remove accumulated sediment before it reaches 50% of barrier height. Combined with other green building tools, these measures significantly reduce environmental impact while keeping your site compliant with local regulations.
Recycling and Reusing Water On-Site
Setting up water recycling systems on-site doesn’t require complex infrastructure. Start with a simple three-stage approach that works for projects of any size.
For tool washing stations, use large plastic tubs or mortar mixing trays to collect runoff water. Position these under your cleaning area and let sediment settle for 30 minutes before carefully pouring the cleaner water into storage containers. This settled water works perfectly for initial rinses or dust suppression. One community member shared how their team saved roughly 40 liters daily using this basic settling method.
Vehicle wash water needs more robust collection. Lay down heavy-duty tarps with raised edges, creating a temporary catch basin. The collected water can pass through a simple mesh filter to remove larger debris before reuse. This same water suits dust control applications when sprayed through pressure washers or garden sprayers.
For dust suppression, consider dedicated storage barrels fitted with taps for easy access. Clearly label these containers to prevent mixing potable and recycled water. According to feedback from multiple project managers, a 200-liter barrel typically serves a small to medium site for two to three days of dust control.
Remember that recycled water should never be used for mixing concrete or mortar, as contaminants affect structural integrity. Always check local regulations regarding water discharge, even when recycling on-site. These straightforward collection methods reduce water consumption by 30-50 percent without significant equipment investment.
Installing High-Performance Water Systems in New Builds
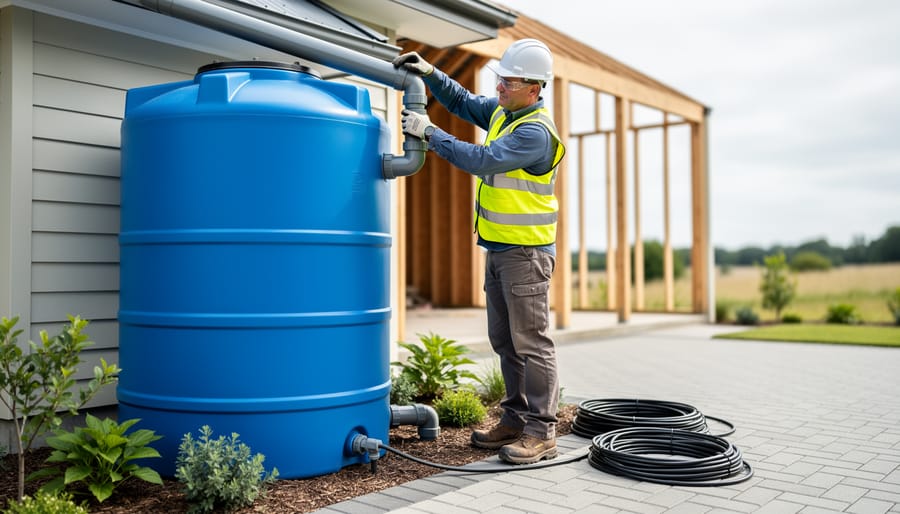
Rainwater Collection System Installation
Installing a rainwater collection system is more straightforward than many homeowners realize. With the right tools and careful planning, you can set up an effective system in a weekend.
Start by assessing your roof area and calculating potential collection capacity. Generally, one inch of rainfall on a 1,000 square foot roof yields approximately 600 gallons of water. This determines your storage tank size requirements.
Begin with gutter installation. You’ll need a ladder, measuring tape, drill, hacksaw, and gutter hangers. Position gutters with a slight slope (quarter-inch drop per 10 feet) toward downspouts to ensure proper drainage. Secure hangers every 24 inches for stability.
Next, install downspouts at collection points. Connect them to diverters, which redirect water from the drainage system into your storage tanks. These devices typically include first-flush diverters that discard initial runoff containing debris and contaminants.
For storage tanks, choose food-grade containers rated for potable water if you plan to use collected water for gardening or outdoor cleaning. Position tanks on level ground or concrete pads to distribute weight evenly. Elevating tanks improves water pressure naturally.
Install basic filtration using mesh screens at gutter entry points and inline filters before storage. For more advanced systems, consider sediment filters and UV purification units available through equipment rental services.
Common mistakes include neglecting overflow outlets, which can cause tank ruptures, and forgetting mosquito screens on tank openings. Always seal connections properly to prevent leaks, and ensure gutters remain clean through regular maintenance. Community feedback consistently emphasizes checking local regulations before installation, as some areas restrict rainwater collection or require permits for larger systems.
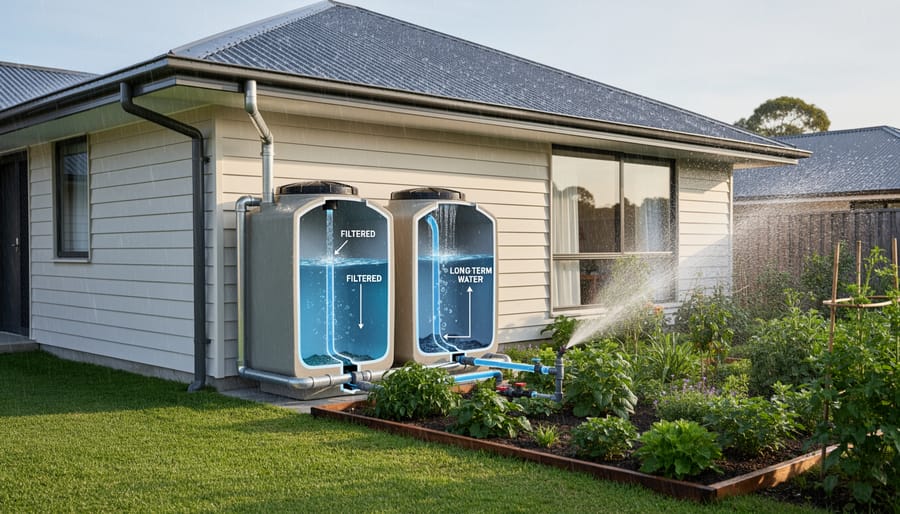
Greywater System Basics for Residential Projects
Greywater systems capture lightly used water from showers, baths, bathroom sinks, and washing machines, then redirect it for garden irrigation or toilet flushing. This approach can reduce household water consumption by up to 40%, making it an increasingly popular choice for sustainable building projects.
Before installation, check local regulations. Many areas now permit simple greywater systems, but requirements vary significantly. Most jurisdictions require that greywater never comes into contact with drinking water supplies and must be used within 24 hours to prevent bacterial growth. You’ll typically need permits for anything beyond basic laundry-to-landscape systems.
Safety is paramount when working with greywater. Only use water from showers, baths, and bathroom sinks, avoiding kitchen wastewater which contains food particles and grease. Never use greywater on root vegetables or edible plants where water contacts the portion you’ll eat. Use biodegradable, plant-friendly soaps and detergents, as chemicals will end up in your garden.
For a basic laundry-to-landscape system, the simplest DIY option, you’ll need diverter valves, irrigation tubing, and mulch basins around plants. The washing machine pump provides pressure, eliminating the need for additional equipment. More complex systems requiring filtration tanks and pumps may need professional installation.
Installation involves connecting your greywater source to a three-way diverter valve, allowing you to switch between greywater use and standard drainage. From there, piping directs water to mulch-filled basins or subsurface irrigation lines. The entire system should incorporate backflow prevention devices and clear labeling to distinguish greywater pipes from potable water lines.
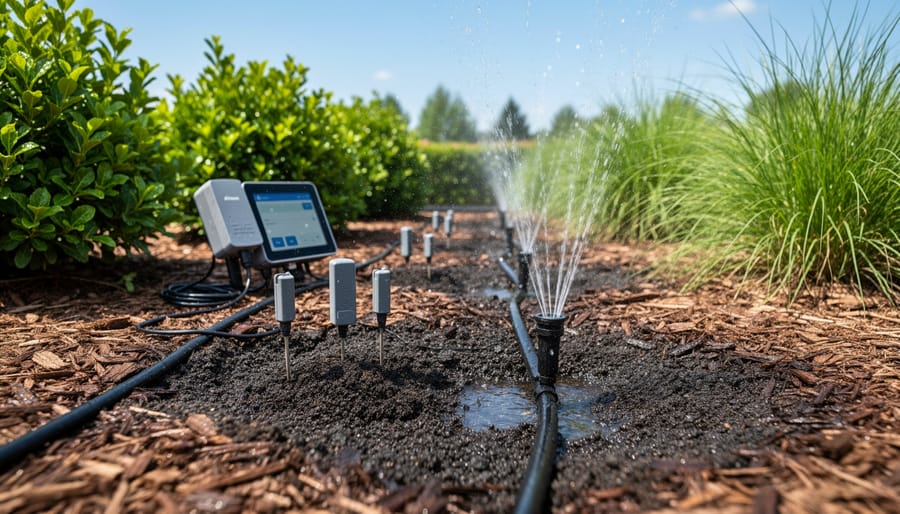
Smart Irrigation and Landscape Water Management
Modern irrigation technology transforms landscape watering from wasteful guesswork into precise water delivery. Smart controllers automatically adjust watering schedules based on weather data, soil conditions, and plant needs, reducing outdoor water use by 30-50% compared to traditional timers.
Drip irrigation delivers water directly to plant roots through a network of tubing and emitters, minimizing evaporation and runoff. When selecting components, match emitter flow rates to plant types—typically 0.5-2 gallons per hour for most applications. Pressure regulators maintain consistent flow, while filter systems prevent clogging from debris.
Soil moisture sensors are game-changers, measuring actual ground moisture and preventing your system from watering saturated soil. Install sensors 4-6 inches deep in representative planting zones. Many DIYers report immediate water savings after adding these simple devices to existing systems.
For programming smart controllers, start with basic zone settings: identify sun exposure (full sun areas need more water), soil type (clay retains moisture longer than sand), and plant categories (turf versus shrubs). Most controllers include default programs you can customize as you observe results.
Community feedback consistently highlights installation mistakes like placing drip lines too deep or positioning sensors in unrepresentative spots. Test your system thoroughly before burying lines, checking for leaks and ensuring even coverage across all zones.
Common Water Management Mistakes and How to Avoid Them
Drawing from feedback across building sites and DIY communities, we’ve identified several recurring water management mistakes that can undermine even well-intentioned sustainability efforts. Learning from these real-world experiences can save you time, money, and water.
One of the most common errors is improper grading around foundations. Community members frequently report discovering water pooling near their homes years after construction, causing foundation damage and requiring expensive repairs. The ground should slope away from buildings at a minimum gradient of 1 inch per foot for the first 6 feet. Many DIYers assume their initial grading is adequate, only to find settling has reversed the slope. Regular inspections, especially after the first year, help catch this early.
Undersizing rainwater harvesting systems represents another frequent miscalculation. Users often install tanks based on roof area alone, neglecting to factor in local rainfall patterns and intended water use. A professional builder in Manchester shared how his initial 500-litre system proved inadequate for garden irrigation, forcing him to upgrade. Calculate your requirements by multiplying your roof catchment area by average monthly rainfall, then determining your realistic water needs before purchasing equipment.
Neglecting overflow management in water collection systems causes problems ranging from foundation erosion to contaminated water supplies. Multiple homeowners have reported their rainwater barrels overflowing during heavy storms, with runoff washing back against their homes. Always install proper overflow pipes directing water at least 5 feet from structures, and consider connecting overflow to drainage systems or secondary collection points.
Filter maintenance represents perhaps the most overlooked aspect. Community reviews consistently mention decreased water quality and system efficiency stemming from clogged or outdated filters. Whether you’re using basic mesh screens on gutters or sophisticated filtration for greywater systems, establish a maintenance schedule. Most filters require quarterly cleaning at minimum, with replacements annually.
Finally, many builders skip proper water testing when implementing greywater systems. As one tradesperson noted, assuming all greywater is suitable for irrigation led to plant damage when laundry detergents proved too harsh. Test pH levels and monitor plants carefully during the first month of any greywater implementation. Simple testing kits provide peace of mind and prevent costly landscaping replacement.
Cost-Benefit Reality Check: What You’ll Actually Save
Let’s talk real numbers. Most DIYers and contractors we’ve heard from want the honest truth about what sustainable water management actually costs versus what you’ll save back.
For rainwater harvesting systems, expect an upfront investment of $2,000-$8,000 for a decent residential setup including tanks, pumps, and filtration. The good news? You’re typically looking at a 5-7 year payback period through reduced water bills. One community member reported saving $600 annually on a 5,000-litre system servicing garden irrigation and toilet flushing. The ROI gets even better for commercial projects where water consumption is higher.
Greywater systems sit in the $1,500-$5,000 range for basic installations. They offer faster returns, typically 3-5 years, especially when combined with other efficiency measures like those used in zero energy buildings. Users consistently tell us that greywater recycling for garden irrigation pays off quickest because you’re reusing water you’ve already paid to heat and treat.
Low-flow fixtures provide the fastest ROI, often paying for themselves within 1-2 years. A quality low-flow showerhead costs $50-$150 but can save a family of four around $200 annually on combined water and heating costs. That’s money back in your pocket fast.
Permeable paving runs $40-$100 per square metre versus $20-$50 for standard concrete, but municipalities often offer rebates that offset 20-40% of costs. Plus, you’ll avoid expensive stormwater fees in many areas.
Here’s the bottom line from our community: start with low-flow fixtures for immediate savings, then scale up to rainwater or greywater systems as budget allows. Renters and small projects benefit most from fixture upgrades and portable collection systems. Larger builds should factor water management into initial design stages where integration costs are lowest. The best value comes from matching your strategy to your actual water usage patterns, not just installing the fanciest system available.
Whether you’re tackling a DIY bathroom renovation or managing a large-scale construction project, sustainable water management doesn’t have to be overwhelming. The key is matching your approach to your project scale and starting with changes that deliver the biggest impact.
For homeowners and DIY enthusiasts, begin with straightforward upgrades like installing low-flow fixtures, aerators, and dual-flush toilet mechanisms. These modifications require minimal technical expertise, often just basic hand tools, and can reduce household water consumption by 20-40%. Next, consider rainwater harvesting systems for garden irrigation or greywater recycling for toilets and outdoor use. These projects may require renting specialized equipment like trenchers or pumps, but they pay dividends through reduced utility bills and environmental impact.
Professional contractors working on larger builds should prioritize water-efficient design from the planning stage. Specify low-flow plumbing throughout, incorporate rainwater collection infrastructure, and use water-saving construction techniques like dust suppression systems and equipment washing stations with recirculation. The initial investment in proper tools and materials becomes cost-effective when calculated across the project lifespan.
Regardless of your project scale, start by auditing current water use to identify the biggest waste points. This focused approach ensures your effort and budget go toward changes that matter most. Remember that sustainable water management is an ongoing commitment, not a one-time fix.
Ready to implement these strategies? Begin with one high-impact change this week. Connect with your local community of builders and DIY practitioners to share experiences and learn from their successes and challenges. Many have already navigated these waters and their insights can help you avoid common pitfalls while achieving meaningful water savings. Every gallon saved contributes to a more sustainable future.
Related Posts

Post a Comment