Place a non-combustible barrier like fire bricks, paver stones, or a metal fire pit mat directly on your concrete surface before installing any fire feature—this prevents heat cracks and discoloration that can permanently damage your patio. Check your local council regulations first, as many areas require specific clearances from structures and may mandate permits for permanent installations. Choose between three practical approaches: a portable metal fire bowl that sits on protective feet, a DIY built-in design using concrete blocks and fireproof mortar, or a pre-fabricated fire pit kit designed specifically for concrete surfaces.
Building a fire pit on concrete requires understanding that concrete can crack, spall, or explode when exposed to intense heat without proper protection. Position your fire pit at least three meters from your home, fence lines, and overhanging structures while ensuring adequate ventilation. Use refractory cement rated to withstand 1,500°C for any permanent installations, and always include drainage considerations since trapped moisture in concrete can cause explosive failures when heated. Keep a fire extinguisher or water source within five meters, and never build fires larger than your pit’s design specifications.
Why Concrete Patios Make Great Fire Pit Foundations (With Precautions)
Concrete patios offer several compelling advantages as fire pit foundations that make them an excellent starting point for your project. The existing solid, level surface eliminates the need for extensive ground preparation or creating a new base from scratch, saving you both time and materials. You’ve already got stable infrastructure in place, which means your fire pit won’t shift, settle, or become unlevel over time like it might on soil or gravel.
The non-combustible nature of concrete provides an inherent safety advantage. Unlike wooden decks or grass, concrete won’t catch fire from stray sparks or embers. This built-in fire resistance gives you a head start on safety compared to other locations.
However, concrete does present specific challenges you’ll need to address. Thermal expansion is a primary concern. When concrete heats up rapidly, it expands, and if it can’t expand evenly, cracking can occur. Similarly, the material retains heat longer than you might expect, potentially causing damage to both the concrete surface and your fire pit structure if proper precautions aren’t taken.
Moisture trapped within concrete is another consideration. Concrete is porous and holds water, which can turn to steam when heated. This steam buildup creates pressure that leads to spalling, where the surface flakes or chips away. In severe cases, this can cause explosive popping as moisture rapidly converts to steam.
The good news is that all these concerns are manageable with proper preparation. Creating an air gap beneath your fire pit, using heat-resistant barriers, and ensuring adequate drainage will protect your concrete investment. Many DIYers and professionals have successfully built fire pits on concrete patios by following proven protective measures, as evidenced by community feedback and shared experiences.
Essential Tools and Equipment You’ll Need to Hire or Own
Safety Gear Checklist
Before starting your fire pit construction project, gather the essential safety gear to protect yourself from burns, flying debris, and heavy materials. Start with heavy-duty work gloves—leather or heat-resistant options work best when handling hot materials, blocks, or metal components. Eye protection is non-negotiable; safety glasses or goggles will shield your eyes from concrete dust, mortar splashes, and any fragments that might chip off during cutting or placement.
Wear closed-toe work boots with steel toes to protect your feet from dropped pavers or concrete blocks, which can weigh several pounds each. Long pants made from durable material like denim will guard your legs against scrapes and heat. When working with mortar or sealants, consider adding a dust mask or respirator to avoid inhaling harmful particles, especially in poorly ventilated areas.
Keep a first aid kit nearby and ensure a fire extinguisher or water source is within easy reach throughout the construction process. These simple precautions make the difference between a successful DIY project and a trip to urgent care.
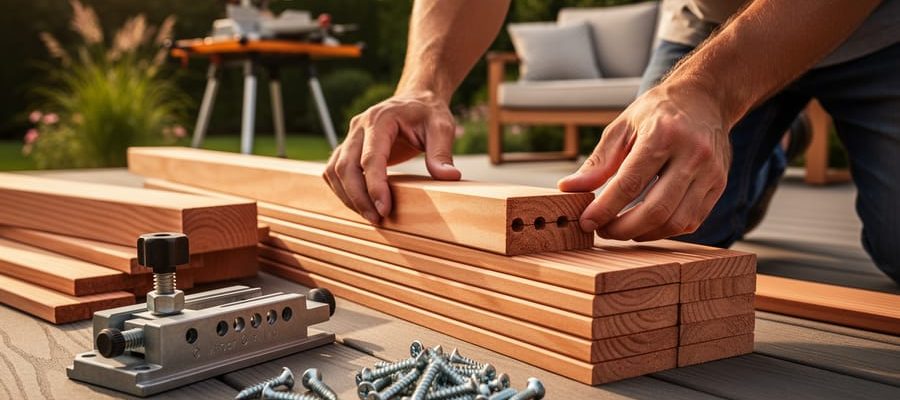
Construction Tools
Building a fire pit on your concrete patio requires several essential tools to ensure proper assembly and safety. Before purchasing expensive equipment, consider our rental vs. purchase recommendations to determine which tools make sense for this one-time project.
For layout and measurement, you’ll need a tape measure, chalk line, and carpenter’s level to mark your fire pit location and ensure everything sits flat on your patio surface. A spirit level is particularly important since any unevenness can affect stability and drainage.
The primary construction tools include a masonry trowel for applying adhesive between blocks or stones, a rubber mallet for tapping components into place without damaging them, and work gloves rated for construction to protect your hands. If you’re cutting pavers or fire bricks to size, a wet tile saw or angle grinder with a masonry blade will be necessary. These cutting tools are ideal candidates for rental since they’re expensive and unlikely to see regular use after your project.
For securing metal fire rings or installing hardware, have a cordless drill with masonry bits on hand, along with basic hand tools like screwdrivers and adjustable wrenches. A wheelbarrow simplifies transporting materials around your workspace.
Safety equipment is non-negotiable: wear safety glasses when cutting materials, dust masks to avoid inhaling concrete particles, and steel-toed boots for foot protection. Many DIYers in our community recommend renting specialized tools like concrete grinders or compactors rather than buying them outright for single-use projects.
Choosing the Right Fire Pit Design for Concrete Installation
Portable vs. Permanent Options
When deciding on a fire pit for your concrete patio, you’ll need to choose between portable and permanent installations, each offering distinct advantages for your space.
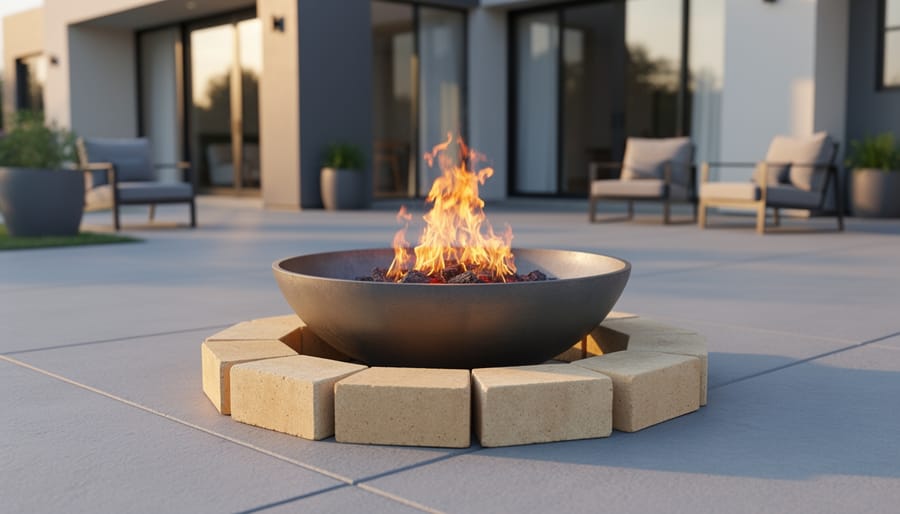
Portable fire pit bowls sit directly on your patio and can be moved as needed. These range from simple metal bowls to decorative chimineas and propane-fueled units. The main advantage is flexibility – you can reposition them for gatherings, store them during winter, or take them when you move. They’re also budget-friendly and require no construction skills. However, portable units still need proper heat shields beneath them to protect your concrete from thermal shock and discoloration. Community reviews consistently highlight that portables work best for renters or those wanting to test fire pit placement before committing.
Built-in fire pits create a permanent focal point and typically offer larger gathering spaces. These involve constructing a fire ring with concrete blocks, pavers, or stone, often with integrated seating. Permanent installations add property value and can incorporate natural gas lines for convenience. The trade-offs include higher upfront costs, potential tool rental needs for cutting and leveling, and commitment to a fixed location. Built-in options work best for homeowners planning long-term outdoor living improvements who want a polished, custom look that matches their patio design.
Size and Placement Considerations
Choosing the right size and positioning for your fire pit directly impacts both safety and enjoyment of your outdoor hangout space. For fire pit dimensions, a diameter of 90-120cm works well for most patios, providing adequate warmth without overwhelming the space. The fire bowl itself should be 60-90cm across, which generates sufficient heat for 4-8 people while remaining manageable.
Safety clearances are non-negotiable. Position your fire pit at least 3 metres from your house, fences, overhanging branches, and any combustible materials. Allow a minimum 60cm clearance from patio furniture, creating a safe buffer zone. If your patio has a roof or pergola overhead, maintain at least 3 metres of vertical clearance or consider relocating the fire pit.
Consider prevailing wind direction when positioning your fire pit to prevent smoke from blowing toward seating areas or neighbouring properties. Place it centrally within your gathering space to maximize heat distribution and create an inviting focal point. Ensure easy access from all sides for maintenance and emergency response, and verify the concrete beneath can support the combined weight of the fire pit structure and materials.
Protecting Your Concrete: Heat Shields and Insulation Methods
Understanding Heat Transfer and Concrete Damage
Concrete might seem tough, but extreme heat from fire pits can cause serious damage if you’re not careful. When exposed to temperatures above 300°C (570°F), concrete begins to experience chemical changes that weaken its structure. The most common issues you’ll face are cracking, spalling (where chunks of surface concrete pop off), and permanent discoloration.
Here’s what happens: concrete contains moisture, even when it appears dry. Intense heat causes this moisture to rapidly expand and turn to steam, creating internal pressure. If temperatures reach 400-600°C (750-1110°F)—typical for wood-burning fires—the risk of spalling increases significantly. You’ll notice the damage as pitting, flaking, or explosive pop-offs that leave crater-like marks.
Temperature thresholds matter when working with concrete around fire features. Below 200°C, you’re generally safe. Between 200-400°C, expect gradual weakening and discoloration. Above 400°C, structural damage becomes likely without proper protection.
The good news? Understanding these risks means you can take preventive measures. Heat shields, fire-rated barriers, and proper clearances will protect your investment and keep your patio looking great for years.
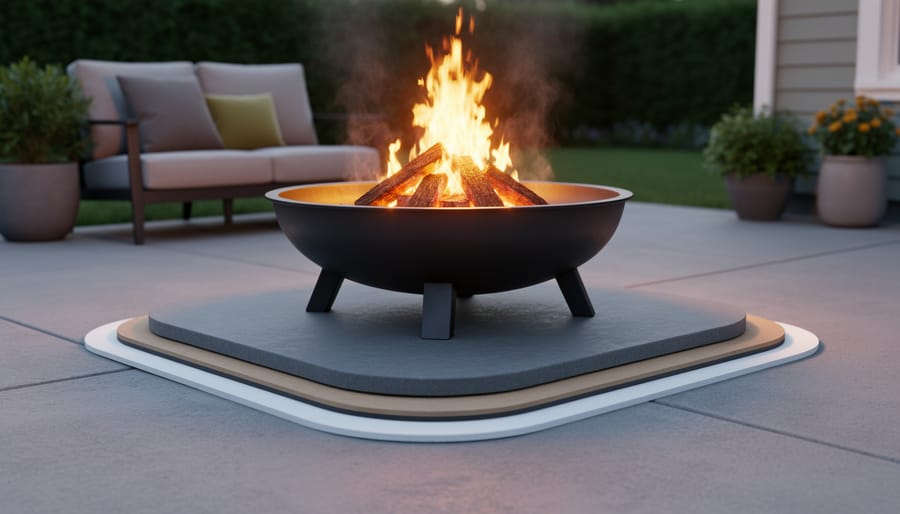
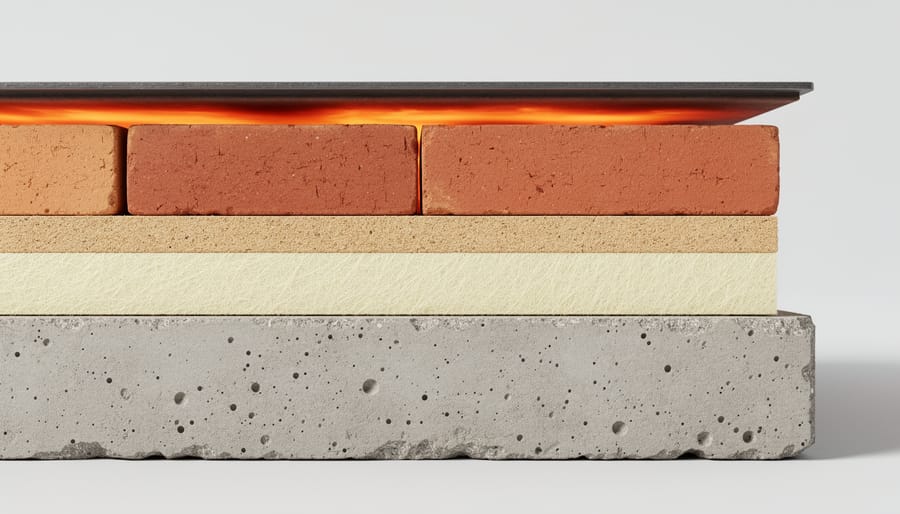
Layering Your Heat Barrier
Creating an effective heat barrier requires building up protection in distinct layers, each serving a specific purpose. Think of it like constructing a shield between your fire pit and concrete surface.
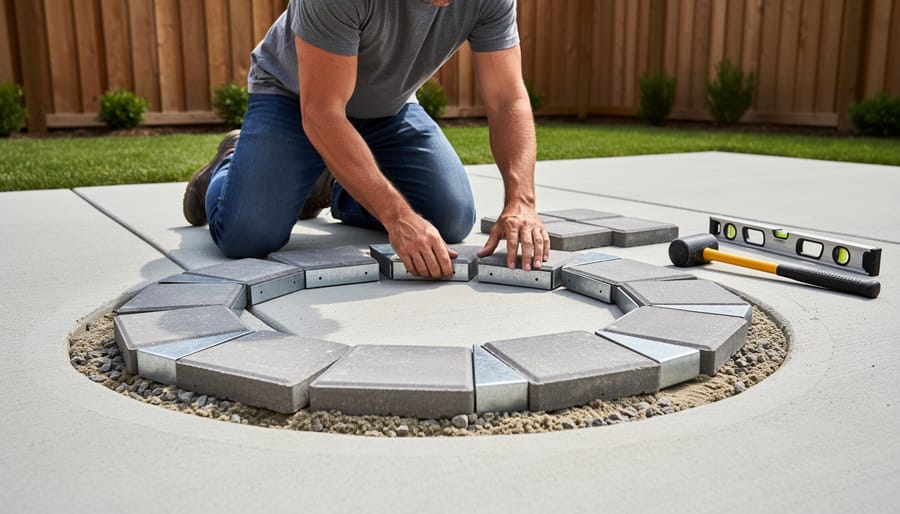
Start with your base layer by placing firebrick pavers or concrete paver bases directly on your patio. These should extend at least 12 inches beyond your fire pit’s footprint in all directions. This foundational layer distributes weight and provides initial heat resistance. Many community members recommend scoring the concrete beneath first to improve adhesion, though this step is optional for portable setups.
Next, add a thermal break layer using fire-rated cement board or calcium silicate board. These materials can withstand temperatures exceeding 1200 degrees Fahrenheit and prevent direct heat transfer. Cut the boards to match your base layer dimensions using a utility knife and straightedge. According to user feedback, quarter-inch thickness works well for most backyard fire pits, while half-inch boards offer extra protection for larger installations.
The critical third element is creating an air gap. This ventilation space allows heat to dissipate rather than concentrating on your concrete. You can achieve this by placing metal spacers or additional firebrick pieces between layers, creating a half-inch to one-inch gap. This simple addition dramatically improves heat protection based on real-world testing shared by DIY community members.
Finally, top your layered system with a steel fire pit pad or additional fireproof material as your fire pit’s direct contact surface. Secure all layers to prevent shifting, but avoid permanent adhesives if you want seasonal flexibility. This complete assembly distributes heat across multiple barriers while allowing air circulation, protecting your concrete patio investment from thermal shock and cracking.
Step-by-Step Construction Process
Preparing the Concrete Surface
Start by thoroughly cleaning your concrete patio surface where the fire pit will sit. Sweep away debris, dirt, and leaves, then use a pressure washer or stiff brush with soapy water to remove stubborn grime and stains. A clean surface ensures proper adhesion if you’re using heat-resistant mats or pads underneath.
Next, inspect the concrete carefully for cracks, chips, or significant damage. Small hairline cracks are generally acceptable, but larger cracks may indicate structural issues that could worsen with heat exposure. If you find major damage, consider patching these areas with concrete repair compound before proceeding.
Check that your concrete patio is level using a spirit level or straight edge. An uneven surface can cause fire pits to wobble and create safety hazards. Minor variations are tolerable, but significant slopes may require shimming or selecting a fire pit design with adjustable legs.
Finally, mark your installation area using chalk or painter’s tape. Measure and outline where your fire pit will sit, ensuring you maintain proper clearance distances from structures, furniture, and overhead obstacles. This visual guide helps you plan the layout and prevents accidental damage to surrounding areas during installation.
Installing the Heat Protection Layer
Begin by thoroughly cleaning your concrete patio where the fire pit will sit. Remove any debris, dirt, or moisture to ensure proper adhesion of your heat protection materials.
For the first layer, lay fire-rated bricks or pavers across the entire footprint of your fire pit, extending at least 6 inches beyond where the outer edge will rest. This creates a crucial buffer zone. Space these materials tightly together with minimal gaps to prevent heat from reaching the concrete below.
Next, place a metal heat shield or fire-resistant mat directly on top of the brick layer. These specialized barriers, available at most hardware stores, are designed to withstand temperatures exceeding 1,000 degrees Fahrenheit. Position the shield so it covers the brick layer completely, with no overhanging edges that could create tripping hazards.
If you’re building a permanent fire pit, secure the base layer using high-temperature mortar between the bricks. Apply a thin, even coat and press firmly. For portable fire pits, the weight of the structure typically provides sufficient stability, though you can use heat-resistant adhesive pads for added security.
Pro tip from our community: One user recommends testing your setup with a small controlled fire before full use, checking underneath the protection layer after cooling to verify no heat transfer occurred.
Assembling Your Fire Pit Structure
Begin by laying your first course of fire bricks or pavers in a complete circle on your heat-resistant base, ensuring each piece sits level. Use a rubber mallet to gently tap blocks into place, checking alignment with a spirit level as you work around the ring. For mortared designs, apply a half-inch layer of refractory mortar between each course, staggering joints like brickwork to maximize structural integrity.
As you stack subsequent layers, maintain consistent spacing and vertical alignment. Most fire pits require 3-5 courses for adequate height, typically reaching 12-18 inches. Leave small gaps between blocks on the bottom course for air intake, essential for proper ventilation and combustion. These openings should be roughly 2-3 inches wide, spaced evenly around the circumference.
For metal ring inserts, position them according to manufacturer specifications, usually after completing 2-3 courses. Secure with construction adhesive rated for high temperatures. If building a freestanding steel fire pit, ensure all welded joints are complete and grind smooth any rough edges.
Before proceeding, verify your structure is plumb and stable. Test by applying gentle pressure from different angles. For added security on windy patios, consider using masonry adhesive between courses even in dry-stacked designs. Allow mortared constructions to cure for 24-48 hours before first use, following product recommendations.
Final Touches and Safety Features
Installing a spark screen is essential for concrete patio fire pits, preventing flying embers from landing on furniture, decking, or guests. Choose a mesh screen sized to fully cover your fire pit opening—these typically attach with handles or hinges for easy access when adding fuel. Metal screens withstand high temperatures and many users report they last several seasons with proper storage.
Position seating at least three feet from the fire pit edge, ensuring guests can move freely without tripping hazards. Consider heat-resistant outdoor rugs to define the space and protect additional concrete areas from stray sparks. Many DIYers recommend arranging chairs in a semicircle rather than full circle to maintain clear pathways.
Apply high-temperature sealant around the fire pit base if you’ve installed pavers or decorative stone—this prevents moisture from seeping between materials and causing freeze-thaw damage. Keep a fire extinguisher or garden hose within easy reach, and establish a designated spot for fire-tending tools like pokers and log holders.
Finally, check with neighbors about your fire pit location and usage times, as smoke and light can affect nearby properties. Community feedback suggests testing your first fire during daylight hours to identify any unexpected issues before evening gatherings.
Safety Guidelines and Local Regulations
Before you break ground on your fire pit project, taking time to understand safety requirements and local regulations can save you from costly mistakes and potential legal issues. Here’s what you need to know to build safely and compliantly.
Start by checking your local fire codes and municipal ordinances. Many jurisdictions have specific rules about outdoor fire features, including restrictions during dry seasons or complete bans in certain areas. Contact your city’s building department or fire marshal’s office to determine if you need a permit. This step is especially important in urban and suburban areas where regulations tend to be stricter.
If you live in a community with a homeowners association, review your HOA guidelines before purchasing materials. Some associations prohibit open flames entirely or require approval for any permanent outdoor structures. Getting written permission upfront prevents conflicts with neighbors and compliance issues down the road.
Maintain proper clearance distances from all structures. Your fire pit should be at least 10 feet away from your house, garage, fences, overhanging trees, and any combustible materials. Some codes require even greater distances, so verify local requirements. Consider overhead clearance too—ensure at least 21 feet of vertical space above the fire to prevent damage to eaves, awnings, or tree branches.
Wind direction plays a crucial role in fire pit placement. Observe prevailing wind patterns in your yard and position your fire pit so smoke naturally blows away from your home and neighboring properties. Never use your fire pit during high wind conditions, as embers can travel significant distances.
Keep a fire extinguisher rated for wood and coal fires within easy reach—no more than 10 feet from your fire pit. A garden hose or bucket of sand provides additional backup for quick response. Install the fire pit on stable, level ground, and never leave fires unattended, even briefly.
Maintenance Tips to Extend Your Fire Pit’s Life
Regular maintenance keeps your fire pit safe and your concrete patio looking its best for years to come. After each use, allow the fire pit to cool completely—typically 12-24 hours—before removing ash. Use a metal ash bucket rather than plastic, as hidden embers can remain hot for longer than expected. Sweep or vacuum remaining fine ash, as it can stain concrete when wet.
Check your concrete patio monthly for discoloration or surface damage around the fire pit base. Light staining often responds to a concrete cleaner and stiff brush. For stubborn stains, community members have reported success with a paste of baking soda and water, left for 15 minutes before scrubbing. If you notice hairline cracks developing in the concrete, seal them promptly with concrete crack filler to prevent water infiltration and further damage.
Before winter or extended periods of non-use, clean your fire pit thoroughly and apply a weatherproof cover. Metal fire pits benefit from high-temperature spray paint to touch up rust spots. For built-in masonry fire pits, inspect mortar joints annually and repoint any crumbling sections.
Monitor your heat shield or fire-resistant barrier seasonally. These protective layers can degrade over time, reducing their effectiveness. Replace fire bricks showing significant cracking and refresh insulation materials if they appear compressed or damaged.
Keep a maintenance log noting any repairs or observations. This helps you spot patterns and address small issues before they become expensive problems. Many DIYers in our community share that consistent care takes minimal time but significantly extends both the fire pit’s lifespan and the concrete’s condition underneath.
Common Mistakes and How to Avoid Them
Even experienced DIYers make avoidable mistakes when building fire pits on concrete patios. Learning from these common errors can save you time, money, and potential safety hazards.
The most frequent mistake is inadequate heat protection. Many homeowners place fire pits directly on concrete without any barrier, assuming the surface can handle the heat. Professional contractor Mike Stevens shares: “I’ve seen too many cracked patios from direct heat exposure. The concrete expands and contracts, leading to structural damage.” Always use a fire-resistant mat, fire bricks, or a raised base to create an air gap between the fire pit and your patio. This simple step prevents heat transfer and extends your patio’s lifespan.
Drainage considerations often get overlooked until the first rainfall. Without proper planning, water pools around your fire pit, creating slip hazards and accelerating concrete deterioration. Before installation, observe how water flows across your patio during rain. Position your fire pit away from natural drainage paths, or consider adding subtle grading to direct water away from the area.
Sizing errors rank high among DIYer complaints. Community member Sarah T. notes: “We built our fire pit too large for our 10×12 patio. There’s barely room to walk around it safely.” Measure your available space and subtract at least 3-4 feet on all sides for seating and safe movement. Remember that fire pits require clearance from structures, typically 10-20 feet depending on local codes.
Finally, many skip the critical step of checking local regulations before starting. Building without proper permits can result in fines or mandatory removal. Always verify requirements with your local fire marshal and homeowners association before purchasing materials.
Building a fire pit on your concrete patio is an achievable project that adds warmth and ambiance to your outdoor space, but success depends on proper planning and heat protection. Remember that concrete can crack, spall, or discolor when exposed to high temperatures, so never skip the crucial step of using heat-resistant barriers like fire bricks, pavers, or purpose-built fire pit pads. Whether you’ve chosen a permanent built-in design or a portable option, the right materials and careful construction will protect your investment for years to come.
Like many DIY projects, having access to quality tools makes all the difference. We’d love to hear about your fire pit journey—share your experiences, photos, or ask questions in our community section below. Your insights help fellow DIY enthusiasts tackle their own projects with confidence.
Finally, always prioritize safety. Keep a fire extinguisher or water source nearby, maintain proper clearances from structures and overhead obstacles, never leave fires unattended, and check local regulations before building. Enjoy your new outdoor gathering space responsibly.
Related Posts
Post a Comment