
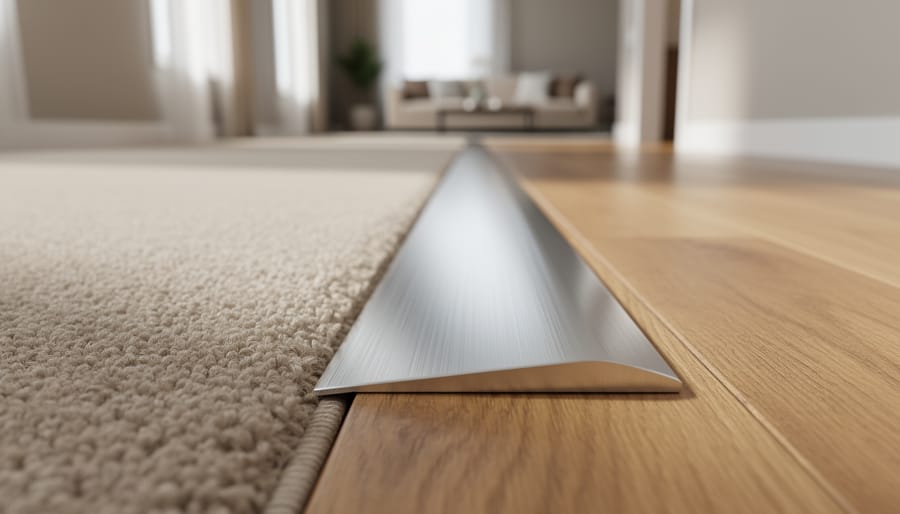
Identify where different flooring materials meet in your home—these transitions between rooms create awkward gaps and height differences that need proper finishing. Z bar flooring transitions, also called Z-trim or Z-molding, solve this problem by bridging two floors of different heights while creating a clean, professional look. Install them where carpet meets hardwood, vinyl connects to tile, or any situation where flooring types change and one surface sits higher than the other.
The Z-shaped metal or vinyl profile tucks under the taller flooring material while covering the edge of the lower surface, creating a smooth ramp that prevents tripping hazards and protects exposed flooring edges from damage. When choosing the right flooring for different rooms, planning your transitions early saves headaches during installation.
Most DIYers overlook transition strips until the final installation day, leading to rushed decisions and mismatched finishes. Understanding which Z bar type works for specific room combinations—bedroom carpet to hallway laminate, kitchen tile to living room hardwood—ensures you order the correct profile depth and finish. Proper installation requires basic tools like a hacksaw, drill, and measuring tape, though specialized flooring tools make the job faster and deliver cleaner results that rival professional installations.
What Is Z Bar Flooring and When Do You Need It?
A Z bar transition strip is a specialized flooring accessory designed to create a smooth, professional transition between two rooms that have different flooring heights. The name comes from its distinctive cross-sectional shape, which resembles the letter “Z” when viewed from the side. You might also hear this component called Z-trim, Z-molding, or a Z-channel, but they all refer to the same essential product.
The Z-shaped profile consists of three connected segments: a flat top piece that sits on the higher flooring surface, a vertical drop section that covers the exposed edge where the height difference occurs, and a bottom flange that tucks under the lower flooring material. Picture it like a tiny staircase in profile, where each level of the “Z” serves a specific purpose in bridging the gap between your floors.
You’ll need a Z bar transition strip whenever you’re joining two flooring types at different elevations. Common scenarios include transitioning from tile to hardwood where the tile sits higher due to mortar bed thickness, moving from carpet with thick padding to vinyl plank flooring, or connecting rooms where subfloor heights differ. Without proper transition strips, you’d have an exposed edge that’s not only unsightly but also a tripping hazard and vulnerable to damage.
These transition pieces are particularly critical in doorways between rooms, at the junction between hallways and living spaces, or anywhere your flooring project involves materials of varying thicknesses. The Z bar creates a finished look while protecting the edges of both flooring surfaces from chipping, fraying, or other wear. Many DIYers and professionals consider them essential finishing touches that elevate a flooring installation from amateur to polished.
Room-by-Room Z Bar Applications
Hallways and Doorways: The Most Common Use Case
If there’s one spot in your home practically begging for a Z bar transition, it’s the hallway. These high-traffic corridors often connect multiple rooms, each with different flooring materials. Picture a carpeted bedroom opening into a tiled bathroom, or hardwood in the living area meeting laminate in the kitchen. These junctions need a transition strip that handles not just visual appeal, but real-world challenges.
Z bars excel here because they’re specifically designed to bridge height differences between flooring types. Carpet typically sits higher than hard surfaces due to padding underneath, creating an uneven edge that’s both unsightly and potentially dangerous. A Z bar’s unique profile tucks under the carpet edge while overlapping the hard flooring, creating a smooth, trip-free transition even when materials differ by a quarter-inch or more.
Foot traffic is another critical consideration. Hallways see constant use, meaning your transition needs durability. Z bars secured properly with screws or adhesive stand up to daily wear far better than simple edge trim. They protect vulnerable flooring edges from chipping, fraying, or separating.
When selecting a Z bar for hallway use, measure the height difference carefully and choose a profile rated for that gap. Community feedback consistently highlights that properly matched Z bars virtually disappear underfoot while providing years of reliable service in these demanding locations.
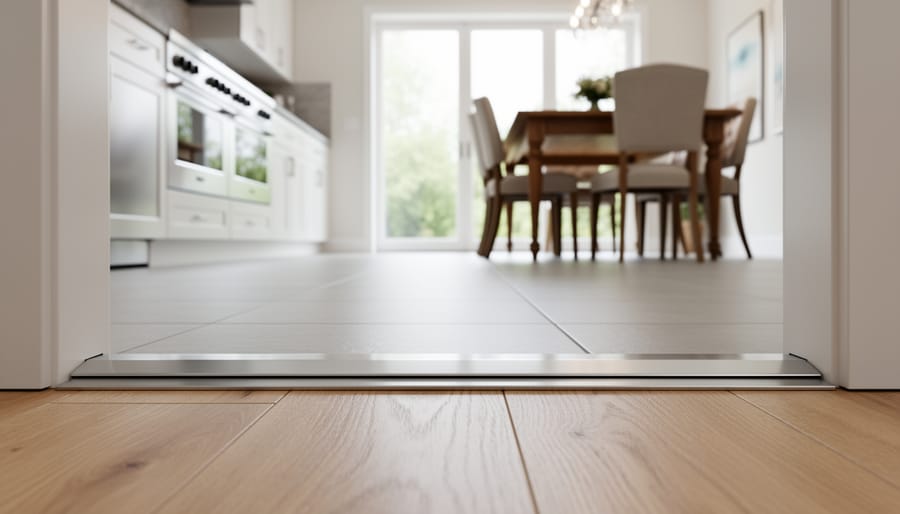
Kitchen to Dining Room Transitions
The transition between kitchens and dining rooms presents unique challenges due to differing moisture levels and flooring materials. Kitchens typically feature water-resistant surfaces like tile or vinyl, while dining areas often showcase hardwood or carpet. A Z bar transition handles this height difference and material change effectively while providing a clean, finished appearance.
When selecting your Z bar for this transition, moisture protection is your top priority. Position the Z bar at the threshold where kitchen humidity and spill risk end. The raised lip of the Z bar creates a small barrier that helps prevent water migration from the kitchen into adjacent flooring materials that could warp or stain.
For aesthetic matching, choose a Z bar finish that complements both sides of the transition. Bronze or brushed nickel works well with modern kitchens and gray-toned hardwood, while oil-rubbed bronze suits traditional spaces. If your flooring heights differ significantly (more than 1/4 inch), opt for a wider Z bar profile to create a gradual slope rather than an abrupt edge.
Many DIYers find success using a power drill and wood screws for installation on wood subfloors, though concrete requires masonry bits and anchors. Take time to measure precisely where your flooring materials meet to ensure the Z bar covers any exposed edges completely.
Bathroom Thresholds
Bathrooms present unique challenges for Z bar installations due to constant moisture exposure and frequent height variations between flooring types. When transitioning from bathroom tile to adjacent carpet or hardwood, you’ll often encounter significant height differences that a Z bar transition is designed to bridge smoothly.
The most critical consideration in bathroom applications is waterproofing. Always choose a Z bar specifically rated for wet areas, typically made from materials like vinyl, aluminum, or stainless steel that resist corrosion. Before installation, ensure the subfloor beneath the transition has proper moisture barriers in place. Apply a bead of waterproof silicone caulk along the edge where the Z bar meets the tile to prevent water from seeping underneath and damaging adjacent flooring.
Height difference is another key factor. Bathroom tiles with mortar beds often sit higher than hallway flooring. Measure the exact height gap before purchasing your Z bar, as they come in various profiles to accommodate differences ranging from 1/8 inch to over 1/2 inch.
Many DIYers find that securing Z bars in bathrooms requires pre-drilling holes to avoid cracking tiles. A quality rotary hammer drill, available at most tool rental centers, makes this task manageable. Remember that bathroom transitions experience heavy foot traffic and water exposure, so proper installation with corrosion-resistant fasteners ensures long-lasting performance.
Living Areas and Open Floor Plans
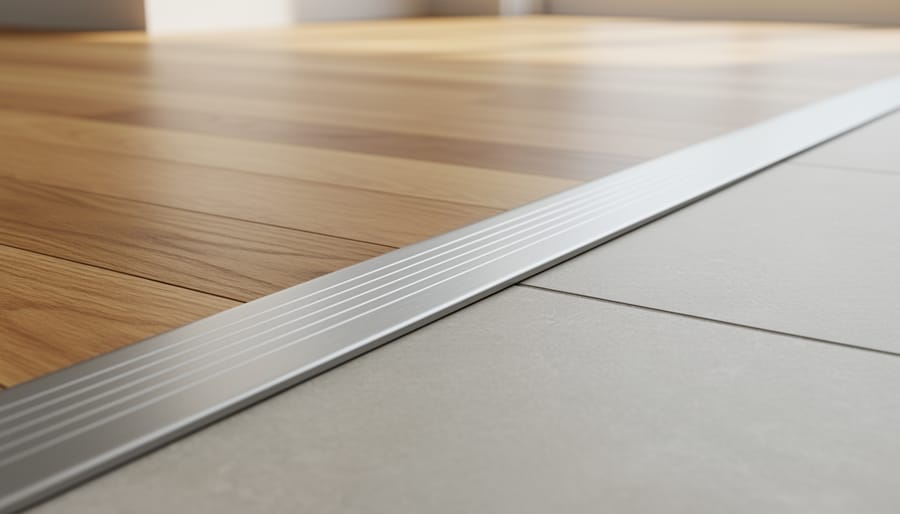
In open floor plans, Z bars serve as subtle visual dividers that manage transitions between different flooring materials without interrupting the flow of your space. Unlike bulkier T-molding or reducers, Z bars create a clean, low-profile break between materials like hardwood and tile or laminate and vinyl. They’re particularly useful when flooring heights differ slightly, as the overlapping design accommodates up to 1/4-inch height variations while keeping the transition smooth underfoot.
Z bars work best in open concepts when you want to define distinct zones—like separating a kitchen’s tile from a living room’s hardwood—without adding visual weight. They’re preferable to square-nose molding when both floor surfaces need protection at the edges, and better than transition strips when you’re working with rigid flooring materials that expand and contract. The key is proper placement: position Z bars at natural sight lines or doorway thresholds to maintain the open feel while providing necessary material separation. This approach keeps your space cohesive while addressing the practical needs of different flooring types.
Basements and Laundry Rooms
Basements and laundry rooms present unique challenges that make Z bars essential transition pieces. These spaces commonly feature concrete slabs transitioning to laminate, vinyl, or carpet, and Z bars bridge the height difference while accommodating the concrete’s uneven surface. When installing Z bars over concrete, you’ll need a hammer drill and masonry bits to secure the track properly.
Moisture is your primary concern in these below-grade spaces. Choose Z bars made from rust-resistant materials like aluminum or stainless steel, as standard metal options can corrode over time. The track design should allow airflow beneath to prevent moisture from becoming trapped between flooring materials, which leads to mold and warping.
Temperature fluctuations in basements cause flooring materials to expand and contract at different rates. Z bars with flexible rubber gaskets accommodate this movement better than rigid designs. Leave a small expansion gap when cutting your finished flooring to allow for seasonal changes.
For laundry room applications where water splashes are common, opt for waterproof Z bar styles with integrated seals. These prevent liquid from seeping underneath and damaging your subfloor.
Choosing the Right Z Bar for Your Flooring Combination
Material Options: Metal vs. Wood vs. Vinyl
Choosing the right material for your Z bar depends on your room’s traffic level, moisture exposure, and aesthetic preferences. Here’s what you need to know about each option.
Aluminum Z bars are the most popular choice for DIYers and professionals alike. They’re lightweight, rust-resistant, and affordable, making them ideal for medium-traffic areas like bedrooms and living rooms. Aluminum works well in slightly humid environments such as laundry rooms, though it may dent under heavy impacts.
Brass Z bars offer a premium look with excellent durability. They develop a natural patina over time, adding character to your floors. Best suited for low to medium-traffic areas like dining rooms or hallways, brass is heavier and pricier than aluminum but provides superior longevity.
Stainless steel represents the most durable option, perfect for high-traffic zones and commercial applications. It resists moisture exceptionally well, making it the top choice for bathroom and kitchen transitions. The trade-off is higher cost and weight.
Wood Z bars blend seamlessly with hardwood flooring, offering a cohesive appearance. They’re best for low-traffic, dry areas since moisture can cause warping. Many homeowners choose wood for bedroom-to-bedroom transitions where visual continuity matters most.
Vinyl Z bars provide the most budget-friendly solution and work well in low-traffic areas. They’re moisture-resistant but less durable than metal options, making them suitable for rental properties or temporary installations where cost is the primary concern.
Matching Finishes to Your Flooring
Choosing the right finish for your Z bar is just as important as selecting the correct profile. The goal is to create a seamless visual flow between rooms while protecting your flooring edges. Start by examining your existing flooring closely in natural light, as finishes can look different under various lighting conditions.
For exact matches, bring a flooring sample when shopping for Z bars. Many manufacturers offer finishes that coordinate with popular flooring lines, including options like brushed nickel, oil-rubbed bronze, silver, gold, and wood-grain laminates. When an exact match isn’t available, complementary finishes often work better than mismatched attempts at matching. For example, if transitioning between light oak and dark walnut floors, a brushed nickel or satin silver Z bar provides neutral ground that coordinates with both.
In modern or minimalist spaces, sleek metal finishes in silver or black create clean lines. Traditional homes benefit from warm brass or bronze tones. High-traffic areas handle brushed or textured finishes better than polished ones, as they hide scratches and wear more effectively. Remember that community reviews often highlight which finishes hold up best over time, so check user feedback before making your final selection.
Essential Tools and Installation Steps
Tools You’ll Need (And Where to Hire Them)
Installing Z bar flooring transitions requires both basic and specialized tools. For measuring and marking, you’ll need a quality measuring tape and pencil to ensure accurate placement. A hacksaw or miter saw is essential for cutting the Z bar to the correct length—while a hacksaw works for occasional use, a miter saw delivers cleaner, more precise cuts.
For installation, gather a drill with appropriate bits for your subfloor type, along with screws or construction adhesive depending on your installation method. A rubber mallet helps secure the flooring into the Z bar channel without damage. Other helpful flooring installation tools include a pry bar for positioning planks and a tapping block for tight fits.
Consider hiring rather than buying expensive equipment like powered miter saws or specialty flooring tools if this is a one-time project. Most homeowners find exploring tool rental options more cost-effective than purchasing tools they’ll rarely use. Safety gear including eye protection and work gloves should never be overlooked, regardless of whether you’re renting or using your own equipment.
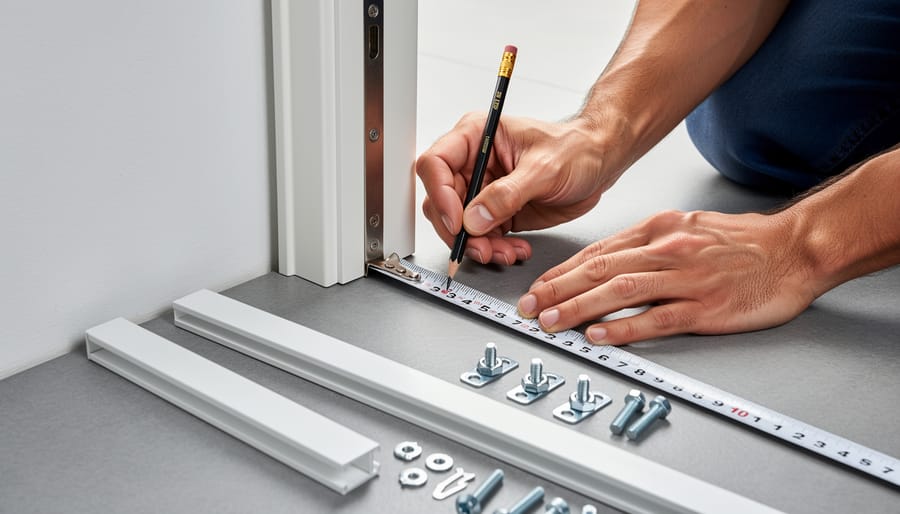
Installation Process Walkthrough
Follow these steps to install your Z bar transition securely and professionally:
1. Measure the doorway or transition area width carefully. Add an extra half-inch to your measurement to ensure complete coverage.
2. Mark your cutting line on the Z bar using a pencil and straightedge. Double-check measurements before cutting to avoid waste.
3. Cut the Z bar to size using a hacksaw or angle grinder with a metal cutting blade. Always wear safety glasses and work gloves during cutting. Secure the bar in a vise or clamp to prevent movement.
4. Test-fit the Z bar between your flooring materials before securing. The track should sit flush with the lower flooring surface, and the raised lip should overlap the edge of the higher flooring.
5. Mark drilling points every 8 to 10 inches along the Z bar’s base. Remove the bar and drill pilot holes into the subfloor using an appropriate bit size for your fasteners.
6. Apply a thin bead of construction adhesive along the subfloor where the Z bar will sit (optional but recommended for extra stability).
7. Position the Z bar and secure it using screws or nails through pre-drilled holes. Ensure fasteners are countersunk slightly below the surface.
8. Install your flooring materials, sliding the edge of the higher floor into the Z bar’s track channel until it clicks or sits firmly in place.
Common pitfalls to avoid include forcing flooring into an undersized track, skipping the test-fit step, and over-tightening fasteners which can warp the bar. If working with thick hardwood, uneven subfloors, or complex room layouts, consider consulting a professional installer to ensure proper results and avoid costly mistakes.
Common Z Bar Problems and How to Fix Them
Even experienced DIYers run into challenges when installing Z bars. Here are the most common problems and their fixes:
Gap between Z bar and flooring is the issue you’ll likely encounter first. This happens when the flooring wasn’t cut close enough to the track. The solution is simple: remove the Z bar, trim your flooring to sit within 1/8 inch of the track edge, then reinstall. If you’ve already committed to the cut, apply a thin bead of color-matched caulk along the gap for a cleaner look.
Z bar won’t snap into track typically means debris is blocking the channel. Remove the Z bar completely and vacuum out the track thoroughly. Check that you’re inserting the bar at the correct angle—it should slide in at about 45 degrees before snapping down flat. If resistance continues, inspect the track for dents or damage that might prevent proper seating.
Visible track edges occur when the Z bar trim piece doesn’t fully cover the track. This often happens in rooms with uneven subfloors. The fix involves shimming the lower flooring side to bring both surfaces level before installation. Use thin cardboard or proper flooring shims to adjust the height difference.
Z bar pops out after installation suggests insufficient pressure during the initial snap-in. Walk along the entire length of the transition, applying firm downward pressure every few inches. For stubborn sections, place a protective cloth over the bar and gently tap with a rubber mallet. In high-traffic areas like doorways, consider adding a small amount of construction adhesive to the track before snapping in the bar for extra hold.
User Tips: What the Community Says Works Best
Community members consistently emphasize the importance of dry-fitting your Z bar before committing to any adhesive or fasteners. “I always place the Z bar down first, walk on it, and check the height difference,” shares one experienced DIYer. “It saves you from costly mistakes.” Many professionals recommend using a quality rubber mallet rather than a hammer to tap Z bars into place, as it prevents damage to the metal finish.
When it comes to product selection, installers frequently mention that wider Z bars (those covering 1.5 to 2 inches) are more forgiving for beginners and hide minor cutting imperfections better. For DIY tool rentals, users note that a quality mitre saw makes cutting Z bars significantly easier, especially when dealing with metal versions.
A common time-saving trick involves pre-drilling screw holes before installation, particularly in concrete subfloors. “Pre-drilling eliminated all my splitting issues,” one homeowner reports. Community members also stress measuring twice and cutting once, as Z bars cannot be easily adjusted once secured.
The biggest lesson learned? Don’t skip the underlayment prep. Uneven subfloors will telegraph through even the best Z bar installation, creating trip hazards and an unprofessional appearance.
Choosing the right Z bar transition and installing it properly transforms your flooring project from amateur to professional-grade. These simple metal strips protect your flooring edges, prevent tripping hazards, and create clean visual boundaries between rooms with different flooring materials or heights. Whether you’re bridging carpet to tile in your bathroom entryway or transitioning hardwood to vinyl in your kitchen, selecting the appropriate Z bar profile and finish ensures both functionality and aesthetic appeal.
For DIY enthusiasts tackling this project, remember that proper installation requires only basic tools and patience. Most hardware stores and home improvement centers offer tool rental options if you need specialized equipment like power saws for cutting metal transitions or oscillating tools for tight spaces. Take advantage of online communities and user reviews when selecting your materials—fellow DIYers often share invaluable insights about which products perform best in real-world applications.
Investing time in quality transitions pays dividends in home value and daily safety. Your floors deserve finished edges that last.
Related Posts

Post a Comment