
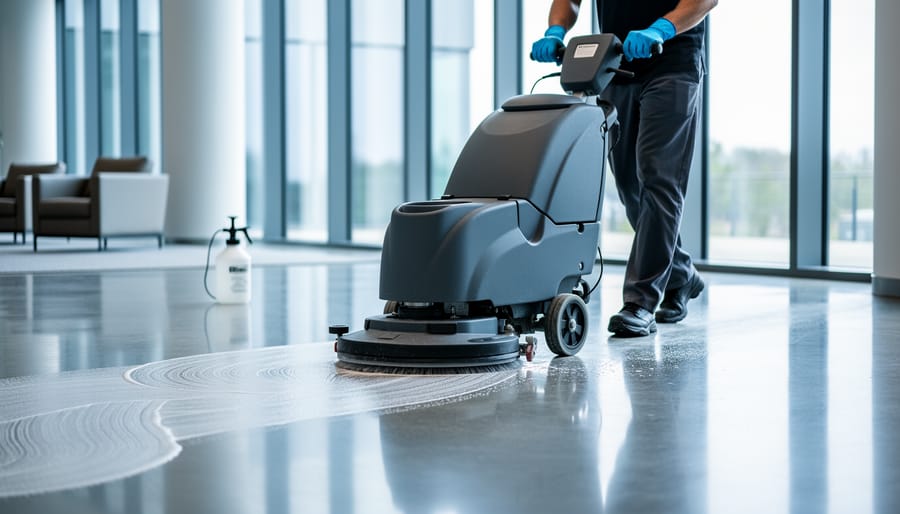
Maximize every hour of your professional cleaning equipment rentals by pre-treating high-traffic areas with enzymatic cleaners 15 minutes before using extraction equipment, allowing the solution to break down organic matter for superior results in half the time. Run floor scrubbers in overlapping S-patterns rather than straight lines to eliminate streaking and ensure consistent chemical distribution across all surface types. Reduce equipment downtime by performing quick maintenance checks between jobs: empty recovery tanks at 75% capacity, rinse vacuum hoses with clean water after each use, and inspect squeegee blades for tears that compromise suction performance.
Professional cleaning demands efficiency that separates profitable jobs from time-consuming disasters. Whether you’re managing a commercial contract or building your service business, understanding how to extract maximum performance from rented equipment directly impacts your bottom line. The difference between amateur and professional results often comes down to technique rather than equipment cost.
This guide delivers field-tested methods from experienced cleaning professionals who rely on rented equipment to service multiple clients. You’ll discover how to optimize machine settings for different surfaces, extend cleaning solution effectiveness, troubleshoot common equipment issues on-site, and develop systematic workflows that reduce labor hours while improving outcomes. These strategies prove especially valuable when working with unfamiliar rental equipment or tight project deadlines where every minute counts toward profitability.
Understanding Your Professional Cleaning Equipment Before You Start
Matching Equipment to Surface Types
Selecting the appropriate cleaning machine for each surface type prevents damage and ensures efficient results. Different materials require specific equipment to avoid costly mistakes and achieve professional-quality cleaning.
For hard flooring like tile, concrete, and vinyl, rotary floor machines with stiff bristle brushes work exceptionally well. These machines handle heavy-duty scrubbing without damaging durable surfaces. However, avoid using them on wood floors, as the aggressive brush action can scratch protective finishes. Community member Sarah M. learned this the hard way: “I used my rotary scrubber on engineered hardwood and stripped the sealant in patches. Always use a soft pad attachment or switch to a microfiber flat mop system for wood.”
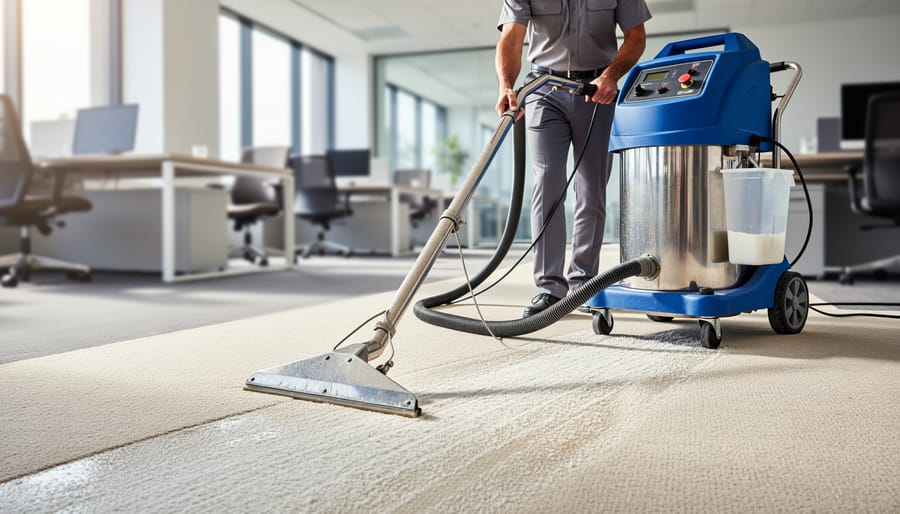
Carpet cleaning requires matching the extractor to pile depth and fiber type. Hot water extractors (commonly called steam cleaners) suit most commercial carpets, but delicate wool or antique rugs need gentler portable extractors with adjustable pressure settings. Upholstery cleaning demands even more precision—always test fabric codes first. Code W fabrics accept water-based cleaning, while Code S requires solvent-based solutions. Using the wrong method can cause permanent staining or shrinkage.
For stone surfaces like marble and granite, never use acidic cleaners or abrasive pads with your equipment. Neutral pH solutions paired with soft microfiber pads preserve the finish. Professional cleaner James T. notes: “I always carry multiple pad types in my kit—color-coded by aggressiveness. Red for stripping, black for heavy scrubbing, blue for light cleaning, and white for polishing. This simple system prevents me from grabbing the wrong pad.”
When renting equipment, ask the rental provider for surface-specific recommendations. Many locations offer quick-reference guides matching machines to common cleaning scenarios, helping you avoid expensive mismatches during your rental period.
Pre-Use Equipment Checks That Save Hours
Before you start any cleaning job, spending five minutes on equipment checks can prevent frustrating breakdowns that cost you time and money. Whether you own or rent your equipment, this simple routine protects your investment and keeps you working efficiently.
Start with a visual inspection of your vacuum or cleaning machine. Look for obvious damage like cracked housings, frayed power cords, or loose parts. Check that all attachments are present and properly secured. If you’re renting equipment, document any pre-existing damage before leaving the rental location to avoid liability issues.
Next, inspect filters and collection systems. Remove and examine vacuum filters for tears, excessive dirt buildup, or moisture damage. A clogged filter reduces suction power by up to 50 percent, making your job take twice as long. If the filter looks dirty, clean or replace it according to manufacturer guidelines. Empty collection tanks or bags even if they seem partially full, as this maximizes airflow and prevents mid-job interruptions.
Examine all hoses carefully by running your hand along their length. Feel for cracks, holes, or soft spots that indicate wear. Even small punctures dramatically reduce suction efficiency. Check that hose connections fit tightly at both ends without gaps.
Test power connections before you begin work. Plug in the equipment and listen for unusual sounds like grinding, squealing, or rattling, which suggest internal problems. Verify that switches respond correctly and safety features engage properly.
Finally, ensure you have the right cleaning solutions and supplies on hand. Running out of product mid-job wastes valuable time and looks unprofessional to clients.
Professional Extraction and Carpet Cleaning Techniques
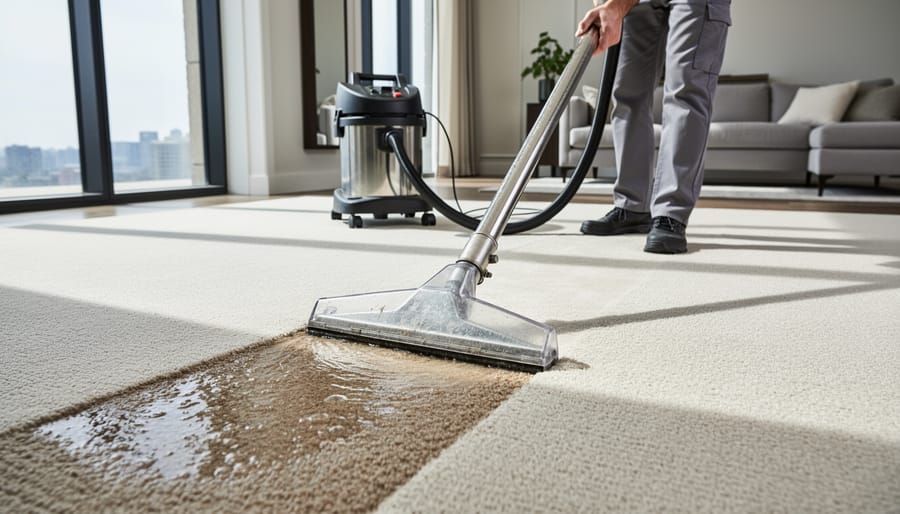
The Two-Pass Method for Deeper Extraction
The two-pass method is a game-changing technique that separates amateur carpet cleaning from professional results. This approach maximizes moisture removal and eliminates the sticky residue that attracts dirt back to freshly cleaned carpets.
Here’s how it works: Start with your wet pass, applying cleaning solution and water while the machine simultaneously extracts. Move at a steady, moderate pace—roughly one foot per second. This initial pass lifts embedded dirt and breaks down soils. Many DIYers make the mistake of stopping here, but you’ve only completed half the job.
The second phase involves dry extraction passes. Without applying any water or solution, make two to three additional passes over the same area using only the vacuum function. Move slightly slower this time, allowing maximum dwell time for extraction. You’ll be amazed at how much additional moisture the machine pulls out with each pass.
Professional cleaners report that this technique reduces drying time by 30-50 percent compared to single-pass cleaning. This matters tremendously when you’re working against a rental period deadline or need to return spaces to service quickly. Customers also appreciate faster dry times, reducing the inconvenience of wet carpets.
The key is patience. Each dry pass removes residual cleaning solution that would otherwise remain in carpet fibers. This residue acts like a dirt magnet, causing carpets to re-soil faster and making your hard work short-lived. By thoroughly extracting during those extra passes, you’re delivering results that last weeks longer and building a reputation for quality that brings repeat business.
Chemical Dilution Ratios That Actually Work
Getting your dilution ratios right can mean the difference between wasting product and getting professional results. Most professional cleaners work with concentrated solutions that need proper mixing, and rental equipment often requires specific dilution ratios to function optimally without damage.
Start with the manufacturer’s guidelines printed on your cleaning solution bottle. These ratios typically appear as numbers like 1:32 or 1:64, meaning one part concentrate to 32 or 64 parts water. For quick measuring, use a dilution chart or mixing bottle with marked measurements. A simple trick from experienced cleaners: mark your spray bottles permanently with a line showing where concentrate should reach before adding water.
For heavy-duty extraction machines and carpet cleaners, follow the equipment’s recommended solution strength closely. Too strong can leave residue that attracts dirt faster, while too weak wastes your rental time with multiple passes. Community feedback consistently shows that the “more is better” approach costs money without improving results.
Safety matters when mixing chemicals. Always add concentrate to water, never the reverse, to prevent splashing or unwanted reactions. Wear gloves and eye protection, especially with stronger commercial products. Work in ventilated areas and never mix different cleaning products together unless specifically instructed.
Cost-saving tip from professional users: buy concentrates in bulk and mix as needed rather than purchasing ready-to-use solutions. You’ll typically save 60-70 percent while having fresher, more effective cleaning solutions. Keep a dilution ratio reference card in your cleaning kit to avoid guesswork when you’re on the job.
Maintaining Peak Performance Throughout Long Jobs
When and How to Empty Collection Tanks
Knowing when to empty your collection tanks can mean the difference between a smooth job and costly downtime. For wet/dry vacuums, empty the tank when it reaches the three-quarter mark rather than waiting until full. This prevents suction loss and keeps your equipment working at peak efficiency. Watch for telltale signs like reduced pickup power or unusual motor sounds, which signal it’s time to stop and empty.
Carpet extractors require more frequent attention since dirty water accumulates quickly during cleaning jobs. Check the recovery tank every 15-20 minutes during intensive work, especially when tackling heavily soiled areas. Most units have a visual indicator or float mechanism that automatically shuts off suction when full, but emptying before this point keeps you productive.
For quick disposal, scout out dump locations before starting your job. Commercial mop sinks, floor drains, or designated disposal areas work best. Keep a clear path between your work area and disposal point to minimize travel time. If you’re using rental equipment, ask about tank capacity and recommended emptying frequency specific to your model during pickup. This simple conversation can save you from mid-job surprises and help you plan breaks strategically throughout your cleaning schedule.
Filter Cleaning Intervals for Continuous Suction
Clogged filters are the silent productivity killer for professional cleaners. A filter at 50% capacity can reduce suction power by up to 40%, forcing you to make multiple passes over the same area and wasting valuable time on rental equipment.
The key is implementing quick-clean intervals rather than waiting until suction noticeably drops. Professional cleaners follow the 15-minute rule: after every 15 minutes of continuous use on heavy debris or fine dust, take 30 seconds to tap out or rinse the filter. This prevents buildup from compacting into the filter material, which becomes much harder to remove later.
For foam filters, keep a spray bottle of clean water nearby. A quick rinse and squeeze takes seconds and restores most of the suction immediately. Let the filter air while you empty the collection tank. Many professionals keep a backup filter on hand, allowing them to swap filters mid-job and clean the dirty one during breaks rather than stopping work entirely.
Paper or pleated filters benefit from the tap-and-blow technique. Remove the filter, tap it firmly against a waste bin to dislodge surface debris, then use compressed air to blow from the inside out. This method takes under a minute and can restore 70-80% of original suction between deep cleans.
Hard Floor Cleaning Equipment Optimization
Pad Selection and Pressure Settings
Selecting the right scrubbing pad is essential for achieving professional results without damaging floor surfaces. Think of pads like sandpaper—they come in different abrasiveness levels, and using the wrong one can scratch delicate finishes or prove ineffective on tough buildup.
For daily maintenance cleaning on most sealed hard floors, white or tan pads work best. These are the gentlest options and won’t strip protective coatings during routine passes. When tackling moderate soil or light scuff marks, switch to blue or green pads, which offer more aggressive scrubbing action. Reserve black or brown pads for heavy-duty stripping jobs only, as they’ll remove existing floor finish along with the dirt.
Here’s a practical tip from experienced rental users: always test your pad selection in an inconspicuous area first, especially when working with unfamiliar flooring. Run the machine for about thirty seconds and check for any dulling or scratching before proceeding with the entire space.
Pressure settings matter just as much as pad choice. Most professional floor machines allow you to adjust downward pressure—the force pushing the pad against the floor. For delicate surfaces like polished marble or luxury vinyl tile, use minimal pressure and let the pad’s rotation do the work. Sealed concrete and heavily soiled commercial tile can handle maximum pressure settings.
A common mistake is cranking up the pressure to speed through jobs. This approach often damages floors and wears out pads faster, costing you money. Instead, make multiple passes at moderate pressure for stubborn areas. If you’re renting equipment, ask the rental associate about recommended settings for your specific flooring type—their insights from other customers can save you costly trial-and-error learning.
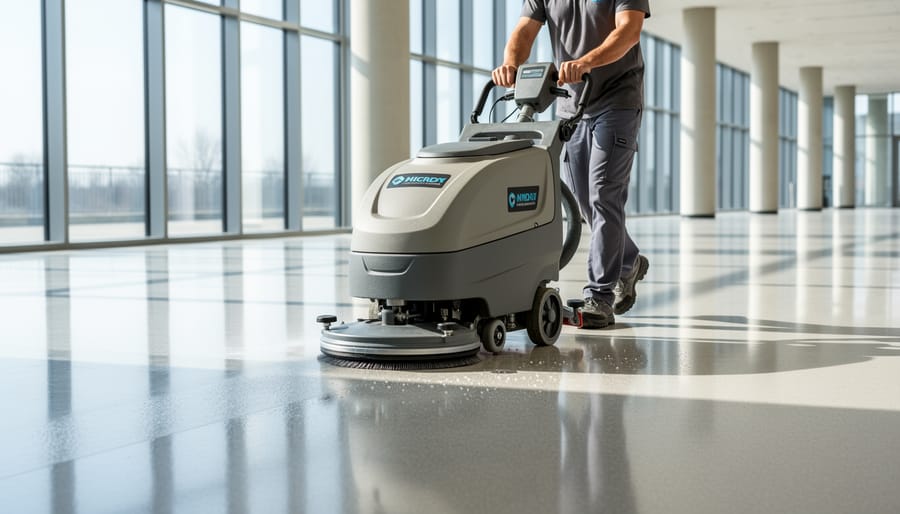
Overlapping Patterns That Eliminate Streaks
Professional cleaners know that the secret to streak-free floors isn’t just the equipment—it’s the pattern you follow. The overlapping figure-eight technique delivers consistently clean results by ensuring no area gets missed while preventing visible lines.
Start by dividing the floor into manageable sections, roughly 10-foot squares. Begin at the farthest corner from your exit point to avoid walking on cleaned areas. Move your mop or floor machine in a continuous figure-eight motion, overlapping each pass by approximately 30 percent. This overlap is critical—it ensures that any cleaning solution or dirt picked up on one pass gets addressed by the next.
For rectangular rooms, work in parallel rows moving backward toward your exit. Each row should overlap the previous one by that same 30 percent margin. Think of it like mowing a lawn—you want those slight overlaps to blend seamlessly.
When using rental floor machines, maintain consistent speed and pressure throughout each pass. Rushing through sections or varying your pressure creates uneven cleaning and visible streaking. Many renters make the mistake of trying to cover too much ground too quickly to maximize their rental period, but steady, overlapping coverage actually saves time by eliminating the need for touch-ups.
Post-Job Cleaning and Storage That Extends Equipment Life
The Five-Minute Rinse Routine
After each cleaning job, spending just five minutes on a proper rinse routine can dramatically extend your equipment’s lifespan and prevent costly repairs. This simple process flushes out residual chemicals and debris that cause blockages, corrosion, and bacterial growth in extraction machines.
Start by emptying both your solution tank and recovery tank completely. Rinse the recovery tank thoroughly with clean water to remove any remaining dirty water and debris. For the solution tank, fill it halfway with fresh, lukewarm water only—no cleaning chemicals at this stage.
Next, run the machine as if you’re cleaning, spraying the plain water through the system for 2-3 minutes. This flushes extraction lines, pump mechanisms, and spray jets, removing chemical residue that can crystallize and clog components overnight. Pay special attention if you’ve been using heavy-duty degreasers or acidic solutions during post-renovation cleaning, as these products are particularly prone to leaving deposits.
While the water runs through, move the wand or floor tool as normal to ensure spray jets receive full flow. Watch the spray pattern—it should be consistent and even. Any sputtering indicates partial blockages that need attention.
Finally, empty both tanks again and leave their lids open to air dry. This prevents moisture buildup that promotes mould and bacteria growth. Store spray tips and hoses off the ground where air can circulate freely around them.
This routine takes minimal time but prevents the majority of equipment issues rental customers encounter.
Proper Drying and Storage Positions
Proper storage directly impacts equipment lifespan and performance between jobs. After completing the drying process, position your pressure washer or carpet cleaner upright on a stable, level surface. This prevents fluid pooling in seals and valves, which causes premature wear.
For hose storage, avoid tight coils that create memory kinks. Instead, use the figure-eight method: loop the hose in alternating directions to maintain flexibility. Community members working from vans recommend mounting PVC pipe holders on walls to hang hoses vertically—this prevents kinking while saving floor space.
Store nozzles and attachments in labeled containers or pegboards where air can circulate freely. Moisture trapped in sealed boxes promotes mold growth, especially on fabric components. One popular user-tested solution involves using mesh bags hung near equipment, allowing accessories to air-dry continuously.
Temperature matters too. Equipment stored in freezing garages risks cracked pumps and split hoses. If climate-controlled space isn’t available, community feedback suggests insulated storage bins as an affordable middle-ground solution.
For those renting equipment, always return machines in proper storage position with hoses loosely coiled. This courtesy ensures the next user receives equipment in optimal condition—and rental companies often prioritize repeat customers who demonstrate proper care habits.
Troubleshooting Common Equipment Performance Issues
Loss of Suction: Quick Diagnostics
When your vacuum or extraction equipment suddenly loses suction, a systematic approach saves valuable time on the job. Start with the simplest solutions first, as they account for roughly 80% of suction problems according to equipment repair technicians.
Begin by checking the collection container or bag. A full canister is the most common culprit, reducing airflow even when it doesn’t appear completely packed. Empty it when two-thirds full for optimal performance. Next, inspect the hose along its entire length. Run your hand along the outside while the machine is on to feel for escaping air, or pass a tissue along the hose to detect breaches. Small tears can be temporarily sealed with duct tape, though replacement is better for rental returns.
Move to the filters next. Clogged filters restrict airflow dramatically. Remove and tap HEPA filters gently to dislodge dust, or rinse washable filters according to manufacturer specifications, ensuring they’re completely dry before reinstalling. Many professionals don’t realize that wet filters can damage motors.
Check all connection points where attachments meet the hose and where the hose connects to the machine body. Even slight gaps here cause significant suction loss. Wiggle connections while the vacuum runs to identify loose fittings.
Finally, examine the brush roll area for wrapped hair, string, or debris creating blockages at the suction inlet. This is especially common in carpet extraction equipment.
If these steps don’t restore suction, the issue likely involves internal components requiring professional service, which means swapping your rental unit for a functioning replacement.
Spray System Blockages and Solutions
Reduced spray pressure or inconsistent chemical delivery often signals a blockage somewhere in your system. Start by checking the most accessible points first: spray nozzles and filter screens. Remove spray tips and soak them in warm water or manufacturer-recommended cleaning solution for 15-20 minutes to dissolve chemical buildup. Use a small wire or needle to carefully clear individual jet holes, working from the inside out to avoid enlarging the opening.
Next, inspect inline filters, which catch debris before it reaches pumps and nozzles. Turn off and depressurize your equipment completely before removing filter housings. Rinse mesh filters under running water and replace disposable cartridges according to the manufacturer’s schedule. Pro tip from experienced users: keep spare filters on hand during rental periods to avoid downtime.
For chemical feed line blockages, disconnect the line from both the chemical container and pump inlet. Run clean water through the line using a garden hose connection or pump flush setting. If blockages persist, chemical lines may need replacement—a quick fix that prevents more expensive pump damage.
Always document any persistent blockage issues when returning rental equipment. Your feedback helps the rental provider maintain their fleet and assists future users in avoiding similar problems.
The difference between amateur and professional cleaning results comes down to two equally important factors: the quality of your equipment and how effectively you use it. Throughout this guide, we’ve explored techniques that professional cleaners rely on daily—from proper equipment setup and maintenance to time-saving methods that maximize productivity. Whether you’re renting specialized cleaning equipment for a one-time deep clean or building your professional cleaning business, these strategies will help you achieve consistently superior results.
Implementing these professional tips delivers measurable benefits beyond just cleaner surfaces. You’ll reduce your equipment rental time through improved efficiency, saving money on extended rental periods. Proper technique also minimizes equipment wear, helping you avoid damage fees and ensuring the tools perform at their peak throughout your project. Additionally, following recommended maintenance routines prevents costly breakdowns that can derail your cleaning schedule.
Remember that becoming proficient with professional cleaning equipment takes practice. Don’t be discouraged if your first attempts don’t match expert-level results immediately. Each project provides valuable experience that refines your technique and builds confidence.
We’d love to hear from you in the community section below. What equipment tips have worked best for your cleaning projects? Have you discovered any time-saving techniques or maintenance shortcuts? Your real-world experiences help fellow cleaners learn and improve, creating a knowledge base that benefits everyone. Share your insights, ask questions, and connect with others who are mastering professional cleaning methods.
Related Posts

Post a Comment