
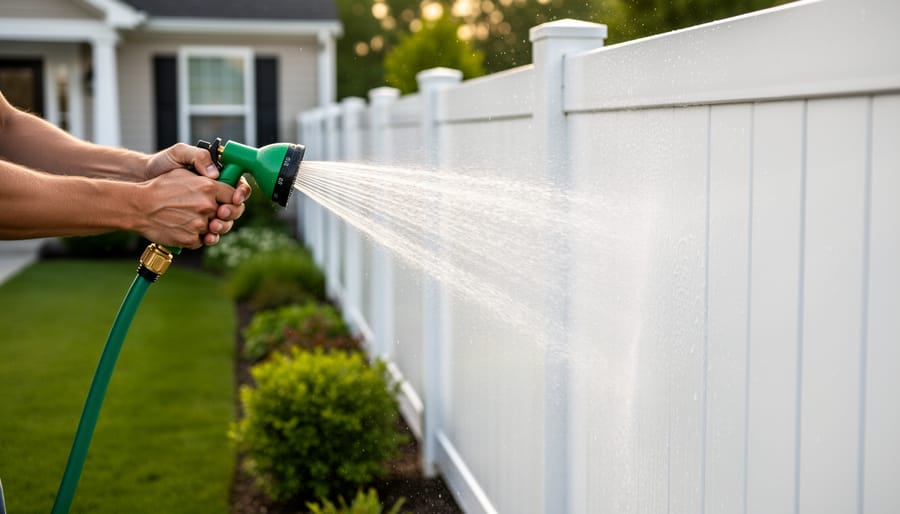
Spray your vinyl fence with a garden hose every 4-6 weeks to remove loose dirt and prevent buildup that leads to stubborn staining. Mix one cup of white vinegar with one gallon of warm water for routine cleaning, applying with a soft-bristle brush in circular motions from bottom to top to avoid streaking. Address mildew immediately when spotted by creating a solution of oxygen bleach and water, letting it sit for 10 minutes before scrubbing and rinsing thoroughly.
Inspect fence panels quarterly for cracks, warping, or loose posts, paying special attention to areas near sprinklers or ground contact where moisture damage occurs first. Most minor issues like small cracks can be repaired with PVC cement, while separated panels often just need hardware tightening rather than full replacement. Schedule deep cleaning twice yearly in spring and fall when temperature changes make dirt more visible and easier to remove.
Vinyl fencing requires minimal effort compared to wood alternatives, but consistent attention prevents the three most common problems: discoloration from environmental factors, structural damage from impact or weather, and hardware deterioration. Understanding proper cleaning agents matters since abrasive cleaners and pressure washers set above 1,500 PSI can permanently damage the vinyl surface, creating tiny scratches that trap dirt and accelerate aging.
Why Vinyl Fences Need Regular Care (Even Though They’re Low-Maintenance)
Many homeowners choose vinyl fencing because they’ve heard it’s maintenance-free, but that’s not entirely accurate. While vinyl certainly requires less upkeep than wood or metal alternatives, it’s more accurately described as low-maintenance rather than no-maintenance. Understanding this distinction will help you protect your investment and keep your fence looking pristine for decades.
The term “maintenance-free” became popular marketing language, but it oversimplifies reality. Vinyl fences don’t need painting, staining, or sealing like wooden fences do, which is where the confusion starts. However, they still face environmental challenges that demand attention.
UV rays from constant sun exposure can cause vinyl to fade, discolor, or become brittle over time, particularly in regions with intense sunlight. This process happens gradually, but without proper care, your once-bright fence can develop a chalky appearance or yellowing.
Moisture creates another set of problems. Mold and mildew thrive on vinyl surfaces, especially in shaded areas or humid climates. These growths appear as dark spots or greenish stains that detract from your fence’s appearance. Left unchecked, they become harder to remove and can spread across entire panels.
Debris accumulation also affects vinyl fences more than people realize. Dirt, pollen, bird droppings, and lawn clippings stick to the surface, creating a grimy layer that dulls the finish. In areas near trees, sap and leaves can cause stubborn staining. Ground-level sections often develop mud splatter from rainfall or sprinkler systems.
The good news is that addressing these issues doesn’t require specialized skills or expensive professional services. With basic cleaning tools and a regular schedule, you can easily prevent most problems and extend your fence’s lifespan significantly. Regular care takes minimal time compared to maintaining other fence types.
Essential Tools and Equipment for Vinyl Fence Maintenance
Tools You Can Rent to Save Money
Renting a pressure washer is the most cost-effective way to deep clean your vinyl fence without the upfront investment of buying equipment. For vinyl fencing, choose a pressure washer with 1,300 to 2,000 PSI (pounds per square inch). Anything higher risks damaging the surface or forcing water behind panels, while lower PSI may not effectively remove stubborn dirt and mildew.
When selecting your rental, look for models with adjustable nozzles or multiple tip options. A 25-degree or 40-degree wide-angle nozzle works best for vinyl, providing adequate cleaning power while distributing water pressure safely across the surface. Avoid zero-degree or narrow nozzles that concentrate pressure into a single point.
Consider renting a soft-bristle brush attachment specifically designed for pressure washers. This combination lets you agitate dirt while rinsing simultaneously, cutting your cleaning time significantly. For hard-to-reach fence tops or tall sections, an extension wand attachment prevents the need for ladders and reduces safety risks.
Most rental shops also stock appropriate cleaning solution tanks that attach directly to pressure washers, making it easy to apply vinyl-safe detergent evenly. Ask staff for recommendations on attachments and always test the pressure on an inconspicuous area before starting your full fence cleaning project.
Basic Supplies You’ll Need to Own
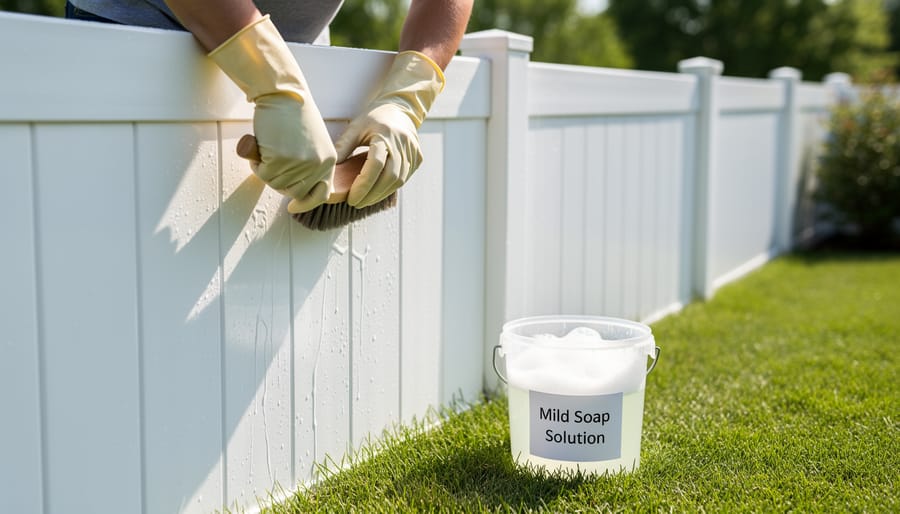
Keeping your vinyl fence in top condition doesn’t require expensive equipment. Start with two sturdy buckets—one for your cleaning solution and another for rinsing. A soft-bristle brush or large sponge works perfectly for scrubbing without scratching the vinyl surface. Avoid abrasive scrubbers that can damage the finish.
Microfiber cloths are essential for wiping down surfaces and buffing away water spots after cleaning. They’re reusable and gentle on vinyl, making them a cost-effective choice. Keep a few on hand so you always have clean ones available.
For cleaning solutions, mild dish soap mixed with warm water handles most dirt and grime effectively. You can also purchase vinyl-specific cleaners from hardware stores, though they’re not always necessary for routine maintenance. A standard garden hose with an adjustable nozzle provides adequate water pressure for rinsing.
Don’t forget basic safety equipment like rubber gloves to protect your hands from cleaning solutions and the sun. Safety glasses are wise when working with spray cleaners. These affordable supplies form your vinyl fence maintenance toolkit and will serve you for years of regular care.
The Complete Vinyl Fence Cleaning Process
Routine Cleaning (Monthly to Quarterly)
Regular cleaning every one to three months keeps your vinyl fence looking fresh and prevents dirt, mildew, and grime from becoming stubborn problems. The good news is that vinyl’s non-porous surface makes routine maintenance straightforward with basic equipment you likely already have at home.
Start by rinsing your fence with a standard garden hose to remove loose debris, dust, and surface dirt. Work from top to bottom in sections, ensuring you reach all fence panels and posts. For the washing solution, mix a bucket of warm water with ordinary dish soap or a mild household detergent—avoid harsh chemicals that might damage the vinyl’s finish.
Using a soft-bristled brush or a long-handled car wash brush, gently scrub the fence in circular motions, paying extra attention to textured areas where dirt accumulates. These proper cleaning techniques prevent scratching while effectively removing buildup. For hard-to-reach upper sections, extension poles make the job easier without requiring a ladder.
Rinse thoroughly with your garden hose after scrubbing each section, ensuring no soap residue remains. Soap left to dry can attract more dirt and create streaking. If you notice any remaining spots, give those areas a second quick scrub and rinse.
This simple maintenance routine typically takes just an hour or two for an average-sized residential fence and significantly extends your vinyl’s lifespan while maintaining its attractive appearance year-round.
Deep Cleaning (Annual or As Needed)
When your vinyl fence faces stubborn stains, mold, or mildew buildup that regular cleaning cannot remove, it’s time for a more intensive approach. Most homeowners find an annual deep clean sufficient, though fences in humid climates or shaded areas may require attention twice yearly.
For heavy-duty cleaning, a pressure washer delivers excellent results when used correctly. Set the pressure to 1,300-1,600 PSI maximum, as higher settings can damage vinyl surfaces or force water behind panels. Hold the nozzle at least 12 inches from the fence at a 45-degree angle, using sweeping motions rather than concentrated streams on one spot. Many tool rental centers offer pressure washers specifically suited for vinyl, making this an affordable option without the commitment of purchasing equipment.
Before pressure washing, pre-treat problem areas with specialized vinyl cleaners designed to tackle mold, mildew, and oxidation. Apply the solution according to manufacturer instructions, allowing adequate dwell time for the chemicals to break down stubborn contaminants. For those preferring homemade solutions, a mixture of one cup oxygen bleach (safer than chlorine bleach) per gallon of water effectively removes organic stains without harming surrounding vegetation.
Target common trouble spots including the fence bottom where moisture accumulates, corners where debris collects, and north-facing sections that receive less sunlight. Use a soft-bristle brush on textured vinyl surfaces to work cleaning solutions into grooves where grime hides.
Always wear safety goggles and gloves when handling cleaning chemicals or operating pressure washing equipment. Rinse thoroughly after cleaning to prevent residue buildup, and inspect for any damage that deep cleaning may have revealed.
Tackling Tough Stains and Discoloration
Different stains require targeted approaches for effective removal. For rust stains caused by metal fixtures or fertilizers, create a paste using oxalic acid-based cleaner (found at most hardware stores) or try a mixture of lemon juice and salt as a gentler alternative. Apply directly to the stain, let sit for 10 minutes, then scrub with a soft brush.
Algae and mildew respond well to a solution of one part white vinegar to three parts water, or use a commercial mildew remover specifically labeled as vinyl-safe. For stubborn green growth, add a tablespoon of oxygen bleach per gallon of cleaning solution. Grease stains often surrender to dish soap mixed with warm water, though tougher spots may need a degreasing agent designed for outdoor surfaces.
Weathering marks and yellowing benefit from specialized vinyl restorers available at home improvement centers. Test any cleaning solution on an inconspicuous area first to ensure it won’t damage or discolor your fence. When using commercial products, always follow manufacturer instructions and wear appropriate protective equipment like gloves and eye protection.
Inspecting Your Vinyl Fence for Damage
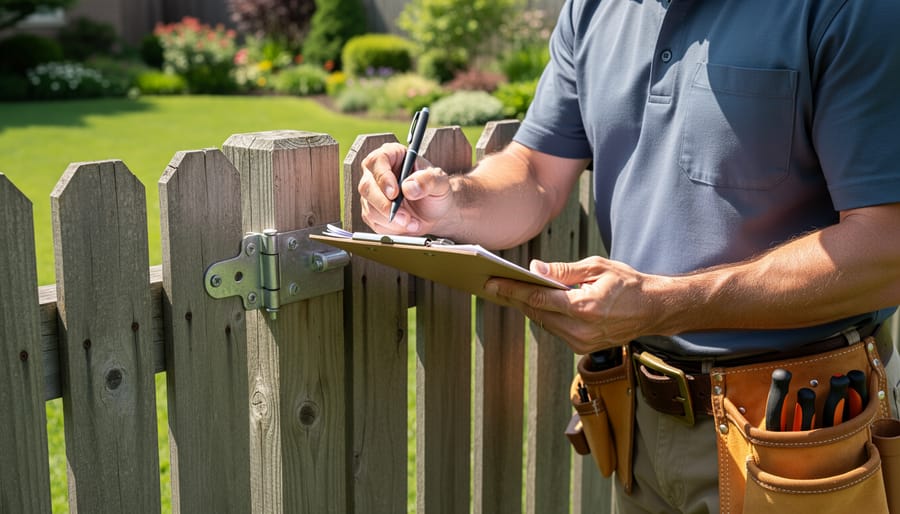
Regular inspections are your first line of defense against costly fence repairs. Plan to walk your entire fence line at least twice a year, ideally in spring and fall, to catch problems before they escalate.
Start by examining each post carefully. Grab the top of each post and give it a gentle shake to check for looseness or wobbling. Posts should be firmly anchored in the ground. If you notice movement, the concrete footing may have deteriorated or shifted, requiring attention before the post pulls completely free. Look at the base of each post for cracks or splits, which often develop from ground movement or freeze-thaw cycles.
Next, inspect the fence panels themselves. Run your hand along both sides of each panel, feeling for cracks, especially near mounting holes where stress concentrates. Small hairline cracks under a quarter-inch can typically be repaired with vinyl patching kits, but larger cracks or multiple fractures in a single panel usually mean replacement is more cost-effective.
Check for warping or bowing, particularly on panels that receive full sun exposure. Minor warping may correct itself with temperature changes, but severe bowing that affects structural integrity needs panel replacement. Don’t forget to examine the color consistency. While slight fading is normal, dramatic discoloration or chalky residue might indicate UV damage that compromises the vinyl’s strength.
Finally, inspect all hardware components including hinges, latches, post caps, and brackets. Tighten loose screws and replace any rusted or broken hardware immediately. Missing post caps should be replaced promptly, as they prevent water from entering hollow posts and causing internal damage. Document any issues you find with photos and measurements to track whether problems worsen over time.
Common Vinyl Fence Repairs You Can Handle Yourself
Fixing Loose Posts and Panels
Loose vinyl fence components are a common issue that’s easier to fix than you might think. Start by inspecting your fence posts, which are the main support structure. If a post wobbles, dig around its base to expose the concrete footing. You may need to add quick-setting concrete mix to stabilize it properly—let it cure for at least 24 hours before reattaching panels.
For loose panels, check the mounting brackets and rails. Vinyl expands and contracts with temperature changes, so some movement is normal. However, if brackets have cracked or screws have stripped their holes, you’ll need replacements. Remove damaged hardware carefully to avoid cracking the vinyl. When reinstalling, use stainless steel screws designed for vinyl fencing—they resist corrosion and won’t rust.
If rail slots have widened and no longer grip panels securely, try installing panel clips or reinforcement brackets available at most hardware stores. These small accessories can make a significant difference in stability.
Safety tip: Always wear work gloves when handling fence components, as vinyl edges can be surprisingly sharp. For posts that require extensive digging or repair, consider the task during cooler weather when the ground is more workable. Regular checks every few months will help you catch loose components before they cause panel damage or complete failure.
Repairing Small Cracks and Holes
Small cracks and holes in vinyl fencing are common issues that you can easily fix yourself with the right materials. Most hardware stores carry vinyl repair kits specifically designed for fencing, which typically include patching compound, colour-matched filler, and adhesive. For hairline cracks, start by cleaning the damaged area thoroughly with soapy water and allowing it to dry completely. Apply a vinyl-specific adhesive or epoxy along the crack, then use a putty knife to smooth it flush with the surface.
For holes smaller than a quarter, vinyl patch kits work excellently. Cut a piece of patching material slightly larger than the hole, apply adhesive to both surfaces, and press firmly into place. Hold pressure for the time specified on the product instructions, usually 30 seconds to a minute. Some community members have shared that using painter’s tape to hold patches while curing produces better results.
Temperature matters when making repairs. Work in mild conditions between 10-25 degrees Celsius, as adhesives bond poorly in extreme heat or cold. Allow repairs to cure for at least 24 hours before exposing them to stress or moisture. While these patches won’t be invisible, choosing colour-matched materials ensures they blend reasonably well. For extensive damage, consider replacing the entire panel rather than patching multiple areas.
When to Call a Professional
While many vinyl fence issues can be tackled DIY-style, some situations require professional expertise. If your fence posts are leaning significantly or pulling away from the ground, this indicates foundation problems that need specialized repair. Posts damaged below ground level or those with compromised concrete footings are beyond typical homeowner fixes and require proper excavation and reinstallation.
Extensive cracking across multiple panels, especially if the vinyl has become brittle from age or sun exposure, usually means replacement rather than repair is the most cost-effective solution. Professionals can properly assess whether the entire fence or just sections need replacing.
Large sections that have separated from posts or sustained major impact damage from falling trees or vehicles should be evaluated by experienced installers who can determine if the structural integrity has been compromised. If you’re planning complete panel replacement, consider hiring a skip bin for efficient rubbish removal of old materials.
When gate mechanisms fail repeatedly or gates no longer hang square despite your adjustment attempts, professionals have the specialized hardware and alignment tools needed for proper repair.
Seasonal Maintenance Tips for Long-Term Fence Health
Protecting your vinyl fence throughout the year requires adapting your care routine to address weather-related challenges each season brings. Following these seasonal maintenance tips will help extend your fence’s lifespan and maintain its appearance.
Spring is the ideal time for a thorough inspection after winter’s harsh conditions. Check for any panels that may have shifted during storms, examine posts for stability, and look for damage from fallen branches or debris. This is also the perfect season for deep cleaning. Remove accumulated dirt, pollen, and mildew using a pressure washer (available for hire if you don’t own one) on a low setting, keeping the nozzle at least 30 centimeters from the fence surface.
Summer heat can cause vinyl to expand slightly, so ensure gate hardware has adequate clearance to prevent binding. Trim back vegetation growing near the fence, as plants can trap moisture against the vinyl and create ideal conditions for mould growth. Apply a vinyl protectant spray to prevent UV damage and fading in areas with intense sun exposure.
Autumn maintenance focuses on preparation for winter. Clear fallen leaves and debris from fence bases where moisture can accumulate. Inspect and tighten any loose hardware before cold weather arrives. Check drainage around fence posts to prevent water pooling and freezing.
Winter requires minimal intervention, but remove heavy snow buildup promptly to prevent stress on panels. Avoid using metal shovels or sharp tools near the fence, as vinyl becomes more brittle in cold temperatures. After ice storms, gently remove ice accumulation rather than forcing frozen gates open, which can damage hinges and latches.
What NOT to Do When Maintaining Your Vinyl Fence
Even well-intentioned homeowners can inadvertently damage their vinyl fencing by using improper maintenance methods. Understanding what to avoid is just as important as knowing the right techniques.
Never use abrasive cleaning tools like steel wool, scouring pads, or stiff wire brushes on your vinyl fence. These materials create scratches and micro-abrasions that trap dirt and make your fence appear dull over time. Stick to soft-bristled brushes, microfiber cloths, or foam sponges instead.
Avoid harsh chemical cleaners, particularly those containing organic solvents, undiluted bleach, or acetone. These substances can break down the vinyl’s protective coating, causing discoloration, brittleness, and premature aging. Products designed for removing paint or heavy-duty industrial cleaning are especially problematic. Always test any cleaning solution on an inconspicuous area first.
While pressure washers can be effective, using excessive pressure (above 1,500 PSI) or holding the nozzle too close to the fence surface risks damaging the material. High pressure can force water behind panels, crack posts, or blast away the protective UV coating. Maintain a safe distance of at least 12 inches and use a wide-angle nozzle.
Don’t ignore manufacturer guidelines about chemical exposure. Certain lawn fertilizers, pesticides, and pool chemicals can stain or damage vinyl on contact. When using these products, create a barrier or ensure responsible disposal practices to prevent runoff onto your fence. Community feedback consistently shows that prevention saves time and money compared to attempting stain removal later.
Creating Your Vinyl Fence Maintenance Schedule
Establishing a regular maintenance routine keeps your vinyl fence looking great without demanding excessive time. Here’s a practical schedule that fits into most homeowners’ lives.
For routine cleaning, plan a thorough wash twice yearly—spring and fall work well for most climates. If you live in coastal areas with salt exposure or regions with heavy pollen, bump this up to three or four times annually. Between deep cleans, do a quick spot-check monthly, wiping away any obvious dirt or mildew with a damp cloth.
Inspect your fence quarterly, walking the entire perimeter to identify loose posts, damaged panels, or hardware issues. Check gates especially carefully, as they experience the most stress. Address small problems immediately to prevent costly repairs later.
Apply mildew treatments as needed, typically once or twice yearly in humid climates. If you notice stubborn stains developing, tackle them within a few weeks rather than waiting for your next scheduled cleaning.
During winter months in snowy regions, clear heavy snow accumulation from fence bases monthly to prevent pressure damage. Remove any vegetation growing against the fence every spring and fall.
Keep a simple log noting when you complete each task—this helps you stay consistent and identifies patterns, like areas requiring more frequent attention.
Regular vinyl fence maintenance doesn’t require significant time or expertise, yet the payoff is substantial. With just a few hours of attention each season, you’ll preserve your fence’s pristine appearance, prevent minor issues from becoming costly repairs, and potentially add years to its lifespan. The basic cleaning routine takes minimal effort—usually just soap, water, and a soft brush—making it one of the most homeowner-friendly maintenance tasks you can tackle.
If you’re new to fence care, start with the simplest steps: a quick visual inspection and gentle cleaning. As you become familiar with your fence’s needs, you can expand to more thorough seasonal care. Don’t let specialized tasks intimidate you either. When facing repairs that need specific equipment, remember that tool rental options make professional-grade results accessible without the investment of purchasing tools you’ll rarely use. Your vinyl fence is designed to last decades with proper care, and these straightforward maintenance practices ensure you’ll enjoy its beauty and functionality for the long haul.
Related Posts

Post a Comment