

Subscribe to channels that demonstrate complete restoration projects from start to finish, not just highlight reels. Look for creators like Thomas Johnson Antique Furniture Restoration, Dashner Design & Restoration, and Village Carpenter, who explain their decision-making process, material choices, and problem-solving approaches in real time. These channels reveal the unglamorous reality of furniture restoration—the failed attempts, the time investment, and the patience required—which prepares you for actual projects better than polished tutorials ever could.
Filter your YouTube learning by technique rather than by project. Search specific terms like “veneer repair technique,” “chair joint regluing,” or “hand-rubbed finish application” to find focused instruction that addresses your immediate challenge. This targeted approach helps you build a mental library of solutions you can apply across different furniture pieces, rather than simply copying one person’s specific project.
Evaluate channel credibility by checking whether creators discuss tool alternatives and budget options. The best restoration educators acknowledge that not everyone owns a full workshop—they suggest rental solutions for expensive equipment like belt sanders, orbital sanders, and specialty clamps, making their techniques accessible to DIYers. This practical mindset often indicates authentic experience rather than purely aesthetic content creation.
Cross-reference multiple YouTube tutorials before attempting unfamiliar techniques on valuable furniture. Different restorers have varying philosophies about preservation versus transformation, and understanding these perspectives helps you make informed choices that align with your goals. Some favour minimal intervention to maintain authenticity, while others embrace complete refinishing—both approaches have merit depending on the piece’s value, condition, and intended use. YouTube’s restoration community offers insights comparable to having experienced mentors, especially when combined with hands-on practice and access to quality property renovation tools through local rental services.
Why YouTube Has Become the Go-To Resource for Furniture Restoration
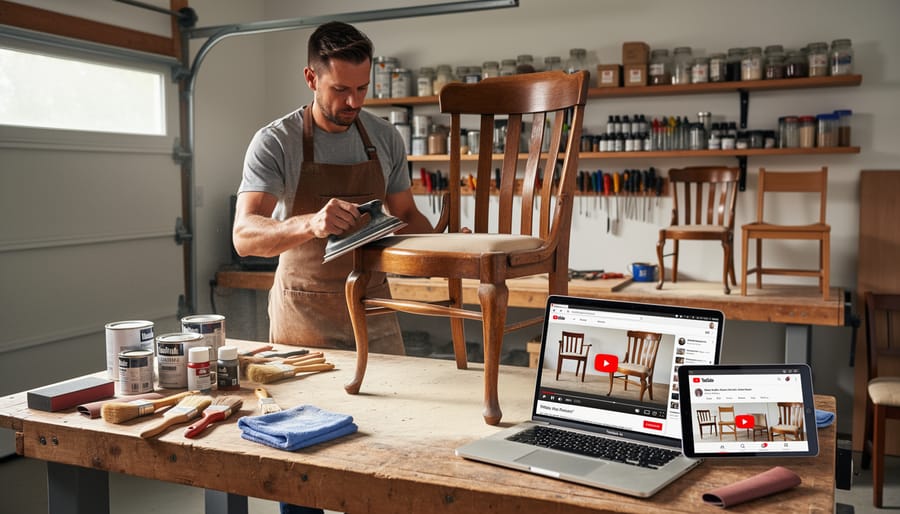
YouTube has revolutionized how people learn furniture restoration, transforming what was once the domain of professional craftspeople into an accessible hobby for anyone with an internet connection. Unlike traditional learning methods that relied on expensive workshops or apprenticeships, YouTube provides free, on-demand access to thousands of restoration tutorials covering every skill level.
The visual nature of video content makes all the difference when learning hands-on skills. Written instructions or static images simply can’t convey the nuances of techniques like hand-planing wood grain, applying the perfect amount of pressure when sanding, or achieving an even stain application. Watching an experienced restorer demonstrate these techniques in real-time helps you understand the rhythm and flow of each movement, making it easier to replicate in your own workshop.
The pause-and-replay capability is perhaps YouTube’s greatest advantage. You can watch a tricky segment multiple times, slow down the playback to catch specific details, and work at your own pace without feeling rushed or embarrassed. This is especially valuable when learning complex joinery techniques or intricate finishing methods that require precision.
Community engagement through comments sections creates an invaluable feedback loop. Viewers share their own experiences, troubleshoot common problems, and often provide updated techniques or product recommendations. This user-generated content adds layers of practical wisdom beyond what the original video creator shared. Many restoration channels actively respond to questions, creating a supportive learning environment that traditional resources simply can’t match.
For DIY enthusiasts working with limited budgets, YouTube also demystifies professional tools and techniques. When videos feature specialized equipment like orbital sanders, biscuit joiners, or HVLP spray systems, you can research affordable rental options rather than assuming these projects are beyond reach. This democratization of knowledge has empowered countless homeowners to tackle restoration projects they previously would have outsourced to professionals.
The Best YouTube Channels for Furniture Restoration (Tested and Verified)
Finding quality furniture restoration content on YouTube can feel overwhelming with thousands of channels available. We’ve tested and verified these channels based on teaching clarity, technique accuracy, and community feedback to help you find the right fit for your skill level and restoration goals.
For Beginners:
Thomas Johnson Antique Furniture Restoration stands out as the gold standard for newcomers. Johnson explains each step with remarkable patience, from basic wood identification to simple repairs. His close-up camera work helps you see exactly what’s happening, and he regularly responds to viewer questions in the comments. The channel covers everything from fixing wobbly chairs to addressing minor water damage.
See Jane Drill offers an approachable introduction to refinishing basics. Her videos focus on making restoration accessible, covering tool selection and basic techniques without assuming prior knowledge. She’s particularly helpful for those concerned about safety, as she explains protective equipment and proper ventilation throughout her demonstrations.
For Intermediate to Advanced Techniques:
Dashner Design & Restoration showcases professional-level work while remaining educational. The channel excels at explaining advanced joinery repairs, veneer restoration, and period-appropriate finishing techniques. Comments frequently mention viewers successfully replicating his methods, which speaks to his teaching effectiveness.
Furniture Restoration by Albert specializes in traditional European restoration methods. His detailed approach to French polishing and hand-cut dovetails provides invaluable insight for those pursuing historically accurate restoration work.
For Specific Styles:
Mid-century modern enthusiasts should bookmark Modern Builds. While not exclusively focused on restoration, the channel demonstrates excellent refinishing techniques for teak and walnut pieces common in mid-century furniture. The contemporary aesthetic makes these skills transferable to other styles.
For Tool Knowledge and Reviews:
Bourbon Moth Woodworking provides honest assessments of both professional and consumer-grade tools. He frequently discusses which tools are worth purchasing versus renting for occasional projects, making his content particularly valuable for DIY enthusiasts weighing investment decisions. His community often shares rental experiences in the comments, offering real-world feedback on equipment performance.
Each channel offers closed captions and most maintain active comment sections where experienced restorers share additional tips. Start with channels matching your current skill level, then gradually explore more advanced content as your confidence grows.
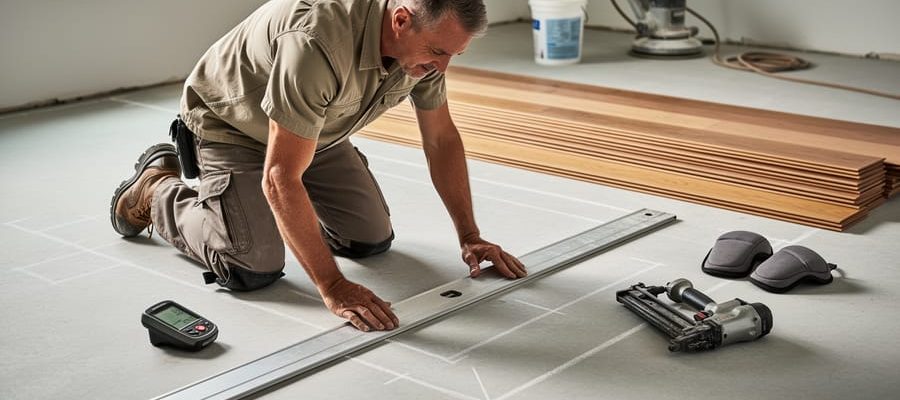
Essential Tools You’ll See in Every Quality Restoration Video
Hand Tools for Stripping and Sanding
YouTube furniture restoration channels consistently showcase essential hand tools that form the foundation of any stripping and sanding project. Paint scrapers appear in nearly every tutorial, with creators demonstrating both rigid metal scrapers for thick paint removal and flexible putty knives for delicate veneer work. Popular videos emphasize the importance of keeping scrapers sharp and angled correctly to avoid gouging wood surfaces.
Sanding blocks feature prominently in finish-work tutorials, with restorers explaining how they provide more even pressure than hand-sanding alone. Many channels show viewers how to wrap sandpaper around cork or rubber blocks for better control on flat surfaces and curved profiles. You’ll notice experienced restorers keeping multiple blocks on hand for different grit progressions.
Steel wool receives particular attention in refinishing videos, where creators break down the grading system from coarse 0 grade through superfine 0000 grade. Tutorials demonstrate using coarser grades between paint stripper applications and finer grades for achieving smooth finishes before applying stain or wax. Safety-conscious channels remind viewers to wear gloves when handling steel wool and to dispose of used material carefully, as it’s highly flammable when soaked in finishing products.
Community feedback on these videos often highlights that these hand tools require no rental investment, making them perfect starting points for newcomers to furniture restoration.
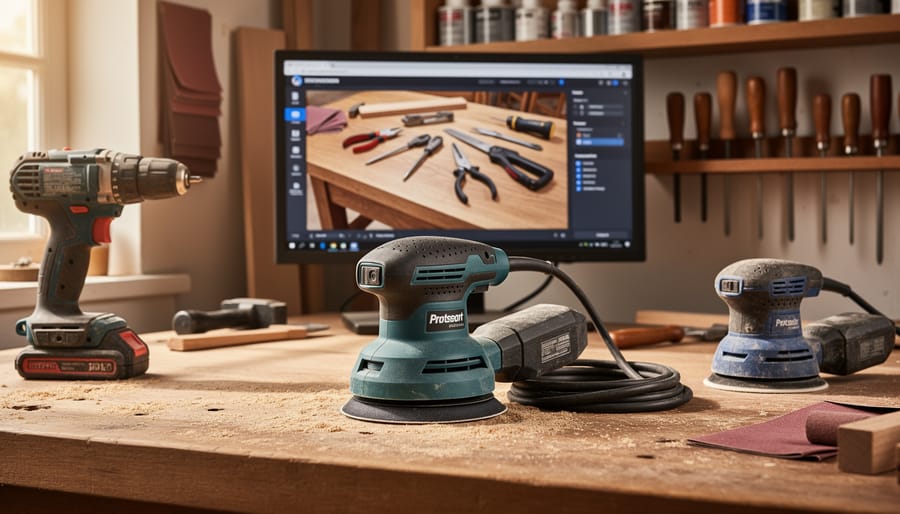
Power Tools That Make the Job Easier
YouTube restoration channels frequently showcase power tools that dramatically speed up refinishing projects. Orbital sanders are the workhorses you’ll see in most videos, efficiently removing old finishes from flat surfaces without the arm fatigue of hand sanding. For intricate details around chair spindles or carved decorative elements, detail sanders (also called mouse sanders) reach tight spaces that larger tools can’t access.
Heat guns appear regularly for paint stripping and veneer removal, providing controlled heat to soften adhesives and finishes. Many creators demonstrate using them alongside scrapers for gentler paint removal compared to harsh chemical strippers. Rotary tools with various attachments help clean crevices and remove stubborn residue from decorative moldings.
The good news for occasional restorers is that you don’t need to purchase all these tools. Most hire shops stock orbital sanders, heat guns, and specialty equipment at daily or weekly rates. This approach lets you tackle one or two furniture pieces annually without the expense of buying professional-grade equipment. When watching tutorials, note which tools the creator uses most often—those are prime candidates for hiring rather than purchasing. Always review the hire shop’s safety instructions before operating any power tool, as YouTube demonstrations don’t always emphasize proper safety protocols for your specific model.
Finishing and Refinishing Supplies
YouTube restoration experts consistently recommend specific finishing products based on real-world testing and viewer feedback. For brushes, natural bristle brushes receive praise for oil-based finishes, while synthetic brushes work best with water-based products. Popular creators emphasize investing in quality brands like Purdy or Wooster, which provide smooth, streak-free application.
When it comes to stains, Minwax and General Finishes top community recommendations across numerous channels. Viewers appreciate that these brands offer predictable color results and excellent wood penetration. Many YouTubers demonstrate gel stains for vertical surfaces, as they minimize dripping and provide better control for beginners.
For protective topcoats, polycrylic and polyurethane dominate discussions. Water-based polycrylic dries quickly and has minimal odor, making it ideal for indoor projects. Oil-based polyurethane offers superior durability for high-traffic furniture pieces.
Spray equipment deserves special mention, with HVLP sprayers frequently featured in professional-quality tutorials. Since quality sprayers represent a significant investment, many creators suggest renting these tools for occasional projects rather than purchasing outright. This practical advice aligns perfectly with budget-conscious restoration work while still achieving professional results.
How to Identify High-Quality Restoration Tutorials (Red Flags and Green Flags)
Not all restoration tutorials are created equal, and learning to spot the difference can save you time, money, and potential safety hazards. Before diving into a lengthy video series, take a few minutes to assess whether the creator demonstrates genuine expertise and prioritizes viewer safety.
Green flags indicating high-quality tutorials include creators who explain their credentials or experience upfront, even if informally. Look for videos that show the entire process rather than jumping between steps with vague time references. Quality tutorials acknowledge when something goes wrong and demonstrate how to fix mistakes, which reflects real-world restoration work. Pay attention to whether safety equipment is worn and discussed, not just visible in the background. The best creators explain why they’re using specific techniques and tools, helping you understand the reasoning rather than just copying actions blindly.
Transparent discussions about project timelines matter significantly. A creator who mentions that a finish needs 24 hours to cure between coats demonstrates honesty about the patience restoration requires. Similarly, videos that discuss alternative methods or tool options show consideration for viewers with different budgets and skill levels. Check the comments section for community engagement where the creator responds to questions and clarifies confusion.
Red flags should make you pause before following a tutorial. Be wary of videos that skip surface preparation steps or rush through sanding with minimal explanation, as proper prep work determines your final result. Tutorials showing power tool use without safety glasses, dust masks, or hearing protection normalize dangerous practices. Watch out for creators who never mention ventilation when working with strippers, stains, or finishes, as these chemicals require proper airflow. Videos with suspiciously fast transformations likely edited out crucial steps you’ll need to complete. Finally, avoid tutorials that dismiss cheaper alternatives without explanation, as this may indicate sponsored content rather than objective guidance. Taking time to evaluate tutorial quality upfront ensures your restoration education builds proper techniques from the beginning.
Core Techniques You Can Master from YouTube Videos
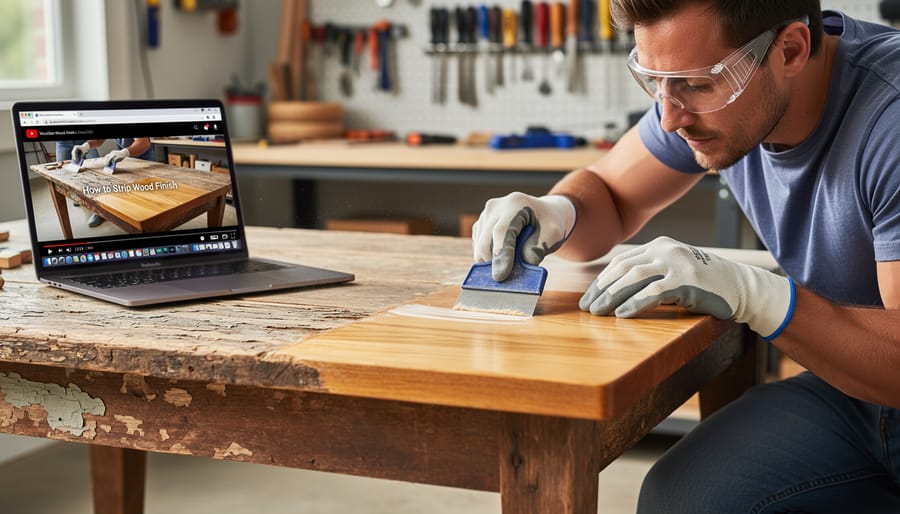
Stripping Old Finishes Safely
YouTube tutorials frequently cover three main methods for removing old finishes, each with specific safety requirements. Chemical stripping involves applying gel or liquid removers that dissolve varnish, lacquer, or paint. Quality videos will stress the importance of working in well-ventilated areas, wearing chemical-resistant gloves, and using eye protection. Look for tutorials that recommend testing strippers on inconspicuous areas first and explain proper disposal methods for chemical waste.
Heat stripping uses tools like heat guns to soften finishes for scraping away. The best instructional content will warn against overheating wood, which can cause scorching or fire hazards. Presenters should demonstrate proper distance techniques and emphasize keeping a fire extinguisher nearby.
Mechanical removal through sanding or scraping is the most labor-intensive option. Top-rated videos highlight dust mask usage and proper ventilation, as old finishes may contain harmful substances. Many professionals recommend orbital sanders for efficiency, though these can be expensive investments. For occasional projects, consider exploring tool rental options rather than purchasing equipment outright.
Pay attention to comment sections where viewers share their experiences with different methods. Community feedback often reveals which techniques work best for specific furniture types and warns about potential pitfalls not covered in the main video content.
Repairing Wood Damage and Structural Issues
YouTube creators excel at demonstrating structural repair techniques through close-up camera work that reveals every detail. When searching for wood damage tutorials, look for videos that show the entire process from assessment to finishing. Popular techniques include using wood filler or epoxy for gouges and cracks—quality videos will demonstrate how to slightly overfill the damaged area, then sand flush once cured. For veneer replacement, seek tutorials showing both heat gun removal of damaged sections and proper adhesive application for new pieces.
Joint repair videos are particularly valuable, as creators often use multiple camera angles to show how they clean out old glue, apply fresh adhesive, and clamp pieces properly. Pay attention to comments sections where experienced woodworkers share which clamps work best for specific joints. Water damage restoration requires patience; effective videos demonstrate how to gradually dry affected areas and assess whether wood needs replacing or can be salvaged with sanding and refinishing.
When these tutorials mention specialized tools like moisture meters, orbital sanders, or spring clamps, consider tool rental options rather than purchasing equipment for a single project. Many commenters share their rental experiences, helping you identify which tools justify the investment versus occasional hire.
Achieving Professional-Looking Finishes
YouTube tutorials excel at demonstrating the intricate steps required for professional-quality finishes. Creators often use close-up camera angles to show brush technique when applying stain, revealing how to achieve even coverage without lap marks or blotches. Many videos compare water-based versus oil-based products side-by-side, helping you understand drying times and final appearance before committing to purchase.
For those interested in achieving a modern look, tutorials on high-gloss lacquer finishes demonstrate spray equipment techniques, though hand-applied polyurethane methods offer accessible alternatives. Distressing techniques popular for farmhouse styles show how to strategically sand edges and apply dark wax for aged character.
Waxing tutorials typically demonstrate the circular buffing motion needed for smooth application and the importance of allowing proper curing time. YouTube creators frequently share their mistakes, showing what happens when rushing between coats or skipping surface preparation steps.
For a luxurious home aesthetic, advanced videos cover grain-filling techniques for open-pore woods and French polishing methods. Community comments often provide troubleshooting tips for common issues like orange peel texture or fish-eye defects, making these resources invaluable for achieving salon-quality results at home.
Making the Most of YouTube’s Features for Learning
YouTube offers powerful built-in features that can transform how you learn furniture restoration techniques. By using these tools strategically, you’ll retain more information and build practical skills faster.
Start by creating dedicated playlists for specific projects you’re planning. Group videos by technique rather than just saving everything to “Watch Later.” For example, create separate playlists for “Veneer Repair,” “French Polishing,” or “Chair Reupholstery.” This organization helps you find relevant content quickly when you’re mid-project and need a refresher.
The playback speed control is your friend when following complex techniques. Slow videos down to 0.75x or 0.5x speed when watching intricate hand movements or detailed finishing work. You’ll catch subtle techniques that might otherwise pass unnoticed. Conversely, speed up longer videos to 1.25x or 1.5x during sections covering familiar ground.
Take screenshots of critical steps, especially measurements, product ratios, or tool settings. Your phone or computer’s screenshot function creates a personal reference library you can consult without rewinding. This proves particularly valuable when you’re hands-on and can’t easily navigate back through a video.
Don’t overlook the comment section as a learning resource. Many creators respond to questions and provide clarifications that enhance the original video content. Reading through existing comments often answers questions you hadn’t considered yet. When posting your own questions, be specific about your furniture piece and what you’re uncertain about.
Always check video descriptions for linked resources. Creators frequently include product recommendations, tool lists, written tutorials, and affiliate links that provide additional context. Many also link to community forums where DIY enthusiasts share experiences and troubleshoot problems together.
Common Mistakes YouTube Learners Make (And How to Avoid Them)
Learning furniture restoration through YouTube can be incredibly rewarding, but many beginners fall into avoidable traps that can compromise their safety, results, and motivation. Understanding these common pitfalls will help you learn more effectively and enjoy the process.
One of the most serious mistakes is skipping safety equipment. As DIYer Sarah M. from Manchester shares: “I watched hours of restoration videos where creators weren’t wearing masks while sanding. I figured it wasn’t necessary until I ended up with a respiratory infection after my first project.” Many YouTube creators don’t emphasize protective gear because it’s visually unappealing or they’re working in well-ventilated professional spaces. Always wear appropriate safety glasses, dust masks or respirators, and gloves regardless of what you see on screen. This is especially important when working with chemical strippers, old finishes that may contain lead, or power tools.
Another frequent error is attempting advanced techniques before mastering basics. Community member James T. learned this the hard way: “I jumped straight into French polishing after watching a few videos. Total disaster. I should have practiced finish application on scrap wood first.” Start with simpler projects like cleaning and waxing before progressing to stripping, staining, or complex joinery repairs.
Testing methods on scrap pieces is something experienced restorers always do, but videos rarely show. Before applying any stain, stripper, or finish to your actual furniture, test it on a hidden area or similar scrap wood. This prevents costly mistakes and helps you understand how products react.
Finally, underestimate project timelines at your peril. A twenty-minute video might condense three days of work. Rachel P. notes: “I thought I’d refinish my dining table in a weekend. It took three weeks between drying times and unexpected complications.” Build in extra time for drying, fixing mistakes, and dealing with surprises that every restoration project brings. Patience truly is a virtue in furniture restoration.
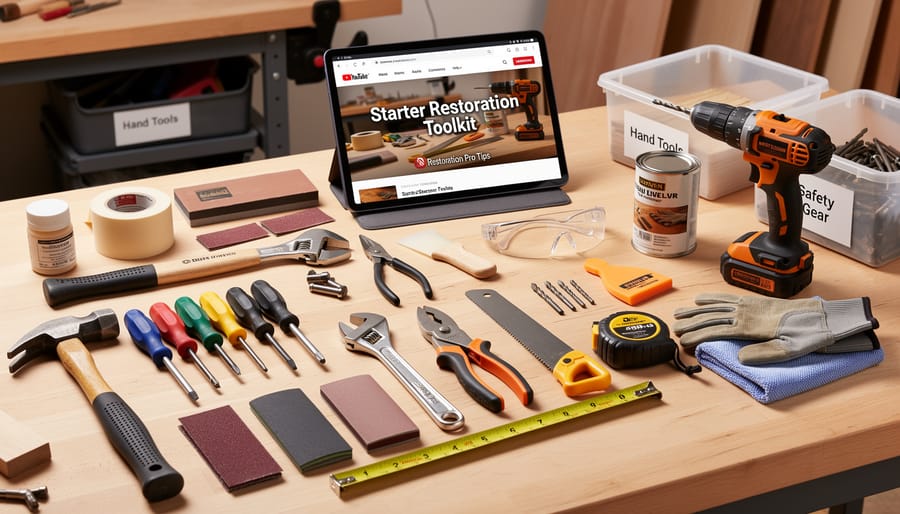
Building Your First Restoration Tool Kit Based on YouTube Recommendations
After analyzing hundreds of furniture restoration videos from top YouTube channels, a clear consensus emerges on essential starter tools. Here’s how to build your kit strategically without breaking the bank.
Must-Have Purchases (Under $200):
Start with quality safety equipment: respirator mask with P2 filters ($40-60), safety glasses ($15), and nitrile gloves ($10 for a box). These are non-negotiable and appear in virtually every restoration tutorial. Next, invest in basic hand tools: paint scrapers ($12-20), sandpaper assortment in 80, 120, and 220 grits ($25), tack cloths ($8), quality brushes in various sizes ($30-50), and lint-free rags. YouTubers consistently emphasize that cheap brushes leave bristles in your finish, so don’t skimp here.
Worth Renting Rather Than Buying:
The restoration community overwhelmingly recommends renting power tools for your first projects. Orbital sanders ($25-35 per day) feature prominently in tutorials but collect dust between projects. Heat guns for stripping paint ($15-20 per day) and spray guns for finishing ($30-40 per day) also make better rental candidates initially. Many projects require these tools for just one or two days, making purchase unnecessary until you’re tackling regular restorations.
Finding Quality Tool Hire Locally:
Most hardware chains offer daily and weekly rental rates, with weekend specials providing excellent value. Local tool hire specialists often stock professional-grade equipment and provide usage demonstrations. Community tool libraries, mentioned frequently in YouTube comments sections, offer membership-based borrowing at minimal cost.
Smart budgeting tip: If you need to fund your restoration project, consider rental costs in your planning. You’ll typically spend $100-150 renting specialized equipment per project versus $500-800 purchasing everything outright. Start small, rent strategically, and invest in quality hand tools that’ll serve you for years.
YouTube has genuinely transformed furniture restoration from a closely guarded craft into an accessible skill for anyone willing to learn. The platform’s vast library of tutorials means you can watch professionals tackle everything from simple chair repairs to intricate veneer work, all from the comfort of your workshop. The best part? You can pause, rewind, and replay techniques until you’ve mastered them.
If you’re ready to begin your restoration journey, start small. Choose a straightforward project like refinishing a side table or repairing a wobbly chair leg. These foundational skills will build your confidence before you tackle more complex pieces like restored dining room furniture.
Remember, you don’t need to invest thousands in equipment right away. Tool rental services let you test different sanders, spray guns, and specialized equipment before committing to purchases. This approach allows you to experiment with various techniques you’ve seen on YouTube without the financial pressure.
The restoration community thrives on sharing knowledge and celebrating progress. Once you complete your first project, don’t hesitate to share your results in comment sections or community forums. Your experience, whether successful or challenging, helps others learn and reinforces your own understanding.
Take that first step today. Search for a beginner-friendly tutorial, gather your materials, and start transforming a tired piece into something beautiful. Your restoration journey begins with a single project.
Related Posts
Post a Comment