

Access OSHA’s free e-Tool resources at osha.gov to transform your workshop’s safety compliance from guesswork into a systematic, defensible process. These interactive web-based tools translate complex federal regulations into practical inspection checklists you can implement today—no legal degree required.
Start with the Hand and Power Tools e-Tool, which breaks down 29 CFR 1910 Subpart P into visual guides showing exactly what “good condition” means for grinders, drills, saws, and pneumatic equipment. You’ll find photo examples of defects, specific inspection frequencies, and documentation templates that satisfy OSHA requirements while keeping your team protected.
Create your inspection protocol by selecting the relevant e-Tool module for your operation, downloading their customizable checklists, and assigning clear responsibility for daily, weekly, and monthly checks. OSHA designed these tools for real-world application—not just compliance theater—so they include troubleshooting guides and common violation scenarios based on thousands of workplace inspections.
The beauty of OSHA e-Tools lies in their accessibility: they’re permanently free, regularly updated to reflect current standards, and designed for people who work with tools rather than lawyers who write about them. Whether you’re running a professional shop, managing a construction site, or maintaining a serious home workshop, these resources provide the framework for protecting yourself, your employees, and your liability exposure. This guide will show you how to leverage these powerful compliance tools effectively and efficiently.
What Is the OSHA E-Tool and Why Should You Care?
OSHA e-tools are free, web-based resources developed by the Occupational Safety and Health Administration to help employers and workers understand and comply with workplace safety regulations. Think of them as interactive guides that break down complex safety requirements into digestible, actionable steps—without requiring a law degree to understand them.
These digital tools cover a wide range of topics, from fall protection and electrical safety to personal protective equipment (PPE) requirements. Unlike dense regulatory documents, e-tools present information through user-friendly formats: flowcharts, checklists, illustrated guides, and even virtual walkthroughs. You can access them anytime from any device with internet connection, making them perfect for quick consultations on job sites or in rental shops.
For tool rental businesses, OSHA e-tools provide clear guidance on equipment maintenance standards and what customers should expect from properly inspected tools. Professional tradespeople can use them to verify their own equipment meets safety requirements before heading to a job site, potentially avoiding costly delays or citations. Even serious DIYers tackling major home projects benefit from understanding the same safety standards professionals follow—especially when renting commercial-grade equipment.
What makes these resources particularly valuable is their practical focus. Rather than simply listing what you must do, e-tools explain how to do it. They include visual examples of compliant versus non-compliant conditions, helping you recognize safety issues before they become hazards. Many tools also feature assessment modules that guide you through evaluating your specific situation, then provide customized recommendations based on your answers.
The best part? There’s no registration required, no fees, and no catch. OSHA designed these tools specifically to make compliance easier and more accessible, recognizing that understanding safety requirements benefits everyone—from individual workers to business owners managing equipment fleets.
Understanding OSHA’s Tool Inspection Requirements
Hand Tools vs. Power Tools: Different Rules Apply
OSHA applies different inspection standards depending on whether you’re using hand tools or power tools—and understanding this distinction can save you time and help you stay compliant.
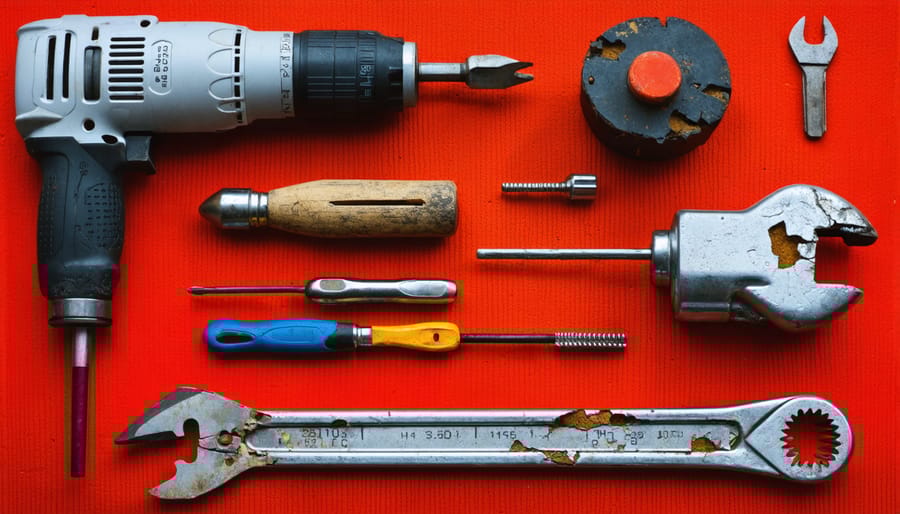
**Hand tools** like hammers, wrenches, and screwdrivers require visual inspections before each use. You’re looking for obvious defects: cracked handles, mushroomed striking surfaces, or worn jaws on wrenches. These tools rely on your physical force, so damaged components can slip or break under pressure, causing hand injuries. The OSHA e-tool emphasizes checking wooden handles for splinters and ensuring striking tools aren’t chipped.
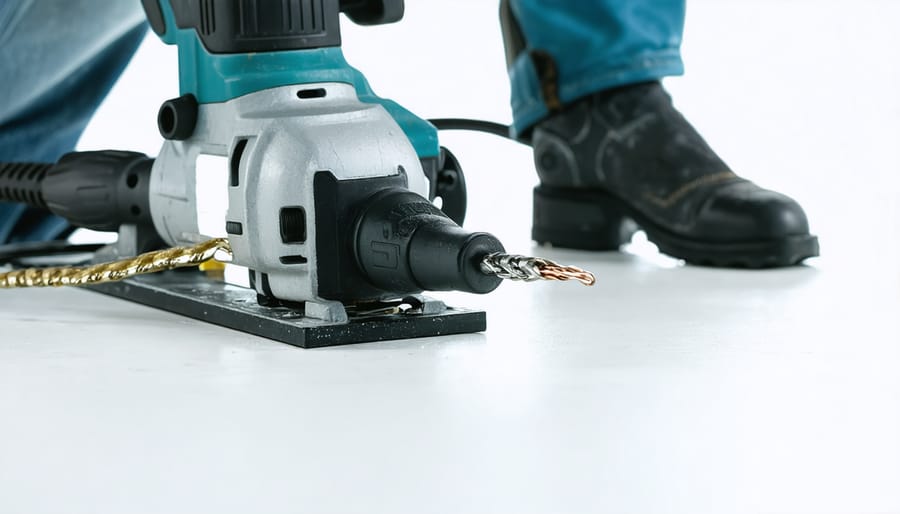
**Power tools** demand more rigorous scrutiny because they involve electrical, pneumatic, or fuel-powered mechanisms. Before each use, inspect power cords for fraying, check guards are properly attached, and verify safety switches function correctly. For common rental items like circular saws, ensure blade guards snap back into place. Grinders need secure wheel guards, and drills require properly functioning trigger locks.
The key difference? Hand tools need defect checks, while power tools require both defect *and* functionality testing. Document your findings for both categories, especially with rental equipment where multiple users share the same tools. Many community members recommend creating simple photo logs on your phone to track equipment condition throughout a project.
Your Inspection Schedule: How Often Is Enough?
How often should you inspect your tools? The answer depends on three key factors: what you’re using, how hard you’re working it, and what environment you’re in.
OSHA recommends inspecting power tools before each use—a quick visual check takes just 30 seconds but can prevent serious injuries. For hand tools used daily, conduct thorough weekly inspections alongside your regular tool maintenance. Tools used occasionally need monthly check-ups at minimum.
Here’s a simple framework to follow:
**Before Every Use:** Check cords, guards, and switches on power tools. Look for loose parts, cracks, or damage on hand tools.
**Weekly:** Deep-clean heavily used tools and test all safety features. Document any wear patterns.
**Monthly:** Inspect backup tools and equipment in storage. Verify that guards, triggers, and emergency stops function properly.
**Quarterly:** Professional calibration for precision tools and comprehensive safety audits of your entire workshop.
High-risk environments—construction sites, metalworking shops, or anywhere with dust and moisture—demand more frequent checks. Community feedback consistently shows that shops following this schedule catch 90% of potential failures before they become hazards.
Step-by-Step: Using OSHA E-Tools for Tool Inspection Protocols
Accessing the Right E-Tool for Your Equipment
Finding the right OSHA e-tool starts with identifying your equipment category. OSHA organizes its digital resources by industry and hazard type, making navigation straightforward once you understand the system.
For construction-related equipment, visit OSHA’s main e-tool page at www.osha.gov/etools and select “Construction” from the industry menu. Here you’ll find specialized modules for scaffolding, excavation equipment, and power tools. Each module includes interactive checklists and photo examples from real worksites—content that community members consistently rate as extremely helpful.
Electrical equipment users should navigate to the “Electrical” e-tool, which covers everything from portable power tools to testing equipment. This section breaks down complex grounding requirements into plain language, with visual diagrams that clarify proper connections.
For machinery and manufacturing equipment, the “Machine Guarding” e-tool provides detailed inspection criteria. It explains guard types, clearance requirements, and maintenance schedules without overwhelming technical jargon.
Pro tip from our community: bookmark the specific e-tools relevant to your shop’s equipment. Many professionals report that creating desktop shortcuts to their most-used modules saves significant time during daily inspections. The search function within each e-tool also helps you quickly locate specific equipment types or hazard scenarios.
Creating Your Custom Inspection Checklist
Once you’ve explored the OSHA e-tool resources and identified the equipment in your workshop or job site, it’s time to create practical inspection checklists tailored to your specific tools. The beauty of OSHA e-tools is that they provide the framework—you just need to adapt it to your situation.
Start by selecting one category of tools from the OSHA e-tool database. For example, if you frequently use power drills, grinders, and circular saws, begin with portable power tools. Navigate to the relevant OSHA e-tool section and note the specific inspection criteria listed. These typically include checking for damaged cords, proper grounding, guard functionality, and switch operation.
Create a simple spreadsheet or document with three columns: “Inspection Item,” “Pass/Fail,” and “Notes.” Under “Inspection Item,” list each criterion from the OSHA e-tool. For a circular saw, this might include “blade guard operates smoothly,” “lower guard retracts freely,” “power cord shows no damage,” and “trigger lock functions properly.”
Many community members find success with weekly inspection routines for high-use equipment and monthly checks for occasional-use tools. Color-coding your checklist by frequency helps maintain consistency—green for weekly items, yellow for monthly.
Consider downloading free templates from OSHA’s website or creating digital versions using apps that allow photo documentation. This becomes especially valuable if you’re managing multiple tools or coordinating with a team.
The key to customization is relevance. If you’re a woodworker who never uses pneumatic tools, don’t waste checklist space on air compressor items. Focus your inspection efforts where they matter most for your actual tool inventory. Remember, fellow users in online communities often share their customized checklists—don’t hesitate to learn from others’ experiences and adapt what works for your needs.

Critical Inspection Points OSHA Wants You to Check
Electrical Tools: Cords, Guards, and Grounding
Electrical power tools require thorough inspection before each use to prevent shock hazards and electrical fires. Start by examining the entire length of the power cord for cuts, fraying, or exposed wiring—damage here creates serious electrocution risks. Check that strain reliefs at both the plug and tool body are intact and secure, as these protect the cord from damage during normal use.
Test the on/off switch to ensure it operates smoothly without sticking. A malfunctioning switch can prevent you from quickly shutting down the tool during an emergency. Verify that all safety guards are present and properly attached—missing blade guards or tool shields expose users to dangerous contact points.
Grounding is your critical protection against electrical shock. Three-prong plugs must never have the ground pin removed or bypassed. If using a two-wire double-insulated tool (marked with a square-within-a-square symbol), confirm the housing shows no cracks that could compromise the insulation system.
For extension cords, match the gauge to your tool’s power requirements—undersized cords overheat and create fire hazards. OSHA’s e-tool provides specific charts showing proper cord sizes for different amperages and lengths.
Community feedback consistently emphasizes documenting these checks with simple logbooks or tags—creating accountability that keeps everyone safer on the job site.
Hand Tools and Struck Tools: Hidden Dangers
Hand tools might seem straightforward, but OSHA e-tool emphasizes several critical inspection points that prevent serious injuries. Start by examining hammer heads for mushrooming—those dangerous metal splinters that form around striking surfaces. These sharp fragments can break off and become projectiles. Check that hammer handles are tight, splinter-free, and properly secured with wedges. For chisels and punches, look for the same mushroomed heads and replace or grind them down immediately.
Wrenches deserve special attention. Inspect jaw alignment by holding them up to light—gaps indicate wear that can cause slippage and hand injuries. Cracked or bent handles compromise leverage and control. Check that adjustable wrenches move smoothly without excessive play. According to community feedback, many injuries occur when workers compensate for worn tools by applying extra force.
Files need intact handles and shouldn’t be used as prying tools. Screwdrivers with chipped tips or damaged handles are accident magnets. OSHA’s guidance is clear: damaged hand tools must be tagged out and removed from service until repaired or replaced. Document these inspections regularly, as this creates accountability and demonstrates compliance during workplace audits.
Pneumatic and Hydraulic Equipment: Pressure Point Checks
Pneumatic and hydraulic tools operate under significant pressure, making regular inspection essential for preventing dangerous failures. Before each use, examine all hoses for cracks, abrasions, or weak spots—a damaged hose can whip violently when pressurized, causing serious injury. Check that all connections remain tight and secure, as loose fittings lead to pressure loss and potential hazards.
OSHA requires safety clips or retaining devices on pneumatic hose connections to prevent accidental disconnection during operation. Inspect these clips before powering up equipment. For hydraulic systems, look for fluid leaks around seals and connections, which indicate worn components needing replacement.
Always verify that pressure relief valves function properly—these critical safety devices prevent dangerous over-pressurization. Test them according to manufacturer specifications, and never bypass or disable these systems. Keep operating pressures within the tool’s rated capacity, clearly marked on the equipment nameplate.
According to community feedback, maintaining a simple pressure check log helps shops catch recurring issues before they become safety problems. Document pressure readings, leak checks, and hose conditions regularly to establish baseline performance and identify degradation patterns early.
Documenting Your Inspections: OSHA’s Expectations
OSHA doesn’t require a specific format for inspection records, but they do expect you to prove your tools have been checked regularly. Think of documentation as your safety insurance—it protects both your team and your business. When an inspector visits or an incident occurs, solid records demonstrate your commitment to workplace safety.
At minimum, your documentation should include the date of inspection, who performed it, the tool’s identification (serial number or unique ID), condition findings, and any corrective actions taken. OSHA recommends keeping these records for at least the duration of equipment use, plus any warranty periods.
**Digital Options for Modern Workflows**
Smartphone apps and cloud-based systems work well for businesses of any size. Many free apps let you photograph tools, add notes, and automatically timestamp entries. These digital logs are searchable, can’t be lost in a filing cabinet, and easily sync with your maintenance schedule. Popular choices include basic spreadsheet programs with photos attached or dedicated equipment management platforms.
**Paper-Based Systems That Work**
Don’t overlook simple solutions. A three-ring binder with inspection checklists organized by tool type remains effective, especially for smaller operations. Attach a weather-resistant tag to each tool showing the last inspection date—this provides instant visual confirmation for workers.
**What OSHA Inspectors Look For**
Inspectors want consistency and completeness. They’ll check whether your records show regular intervals between inspections, whether identified problems were addressed, and if you’ve followed manufacturer guidelines. Missing documentation raises red flags, suggesting potential safety gaps.
Community feedback consistently shows that businesses maintaining detailed records experience fewer violations and reduced liability. Start simple—even basic logbooks outperform no documentation—then refine your system as needed.
Real-World Impact: When Tool Inspections Prevent Accidents
According to OSHA data, proper tool inspection programs reduce workplace injuries by up to 30% annually. In one documented case, a construction crew’s daily pre-shift inspections caught a frayed power cord on a rented angle grinder—preventing what could have been a fatal electrocution. The worker noted the damage during his checklist review, tagged the tool out of service, and requested a replacement before starting the day’s work.
Community members from various industries have shared similar experiences. Mike, a plumbing contractor from Brisbane, reported: “Our weekly inspection routine identified a cracked hammer head that was ready to break. If that had happened mid-swing, someone could’ve lost an eye.” This real-world example underscores why integrating comprehensive tool safety protocols matters beyond mere compliance.
Statistics from rental facilities implementing OSHA-aligned inspection systems show compelling results. One Queensland-based equipment rental company reported zero tool-related injuries over three years after introducing documented pre-rental inspections and user education programs—a dramatic improvement from their previous average of four incidents annually.
Small business owner testimonials reveal another benefit: reduced liability costs. “Implementing structured inspections saved us thousands in insurance premiums,” shared Jenny, who manages a small renovation company. “More importantly, our crew works confidently knowing their tools are safe.”
These outcomes demonstrate that inspection protocols aren’t bureaucratic obstacles—they’re practical safeguards with measurable benefits for everyone handling tools professionally or recreationally.
Common Mistakes That Put You at Risk
Even experienced workers fall into predictable patterns that OSHA inspections frequently catch. Understanding these common oversights helps you protect both your team and your business from preventable citations.
**Skipping the visual inspection** tops the list. Many workers grab tools and get straight to work without checking for obvious damage like frayed cords, cracked housings, or missing guards. OSHA data shows that a simple 30-second look-over before each use prevents countless injuries. Make it a habit, not an afterthought.
**Ignoring manufacturer guidelines** is another frequent mistake. That user manual isn’t just legal protection for the manufacturer—it contains specific inspection intervals and maintenance requirements that OSHA expects you to follow. If the manufacturer says inspect monthly, OSHA will too.
**Inadequate documentation** creates serious compliance headaches. You might be conducting thorough inspections, but if you can’t prove it with dated records and signatures, OSHA considers it undone. Keep simple logs—they don’t need to be fancy, just consistent and complete.
**Using “good enough” as a standard** puts people at risk. A slightly damaged tool that “still works fine” is still a violation. If a guard is cracked, a switch is loose, or a blade shows unusual wear, remove it from service immediately.
**Forgetting about personal protective equipment** during inspections rounds out the top mistakes. Workers often check the tool itself but overlook whether appropriate safety gear is available and in good condition for that specific equipment.
OSHA e-tools offer invaluable resources for creating safer workplaces and project environments, whether you’re managing a professional shop or tackling home renovations. By implementing the inspection protocols and checklists we’ve covered, you’re taking proactive steps to protect yourself, your team, and everyone who uses your tools. The best part? These resources are completely free and designed to be user-friendly, even if you’re new to formal safety standards.
Don’t wait to start your inspection routine—begin today with the simple visual checks and documentation methods outlined in this guide. Remember, consistent tool maintenance not only prevents accidents but also extends equipment life and performance.
Now we’d love to hear from you! What safety practices have worked best in your workshop? Have questions about specific tools or inspection techniques? Share your experiences in the comments below to help fellow community members stay safe.
Ready to expand your toolkit? Explore our equipment rental options with confidence, knowing that safety-conscious choices lead to better project outcomes and peace of mind.
Related Posts

Post a Comment