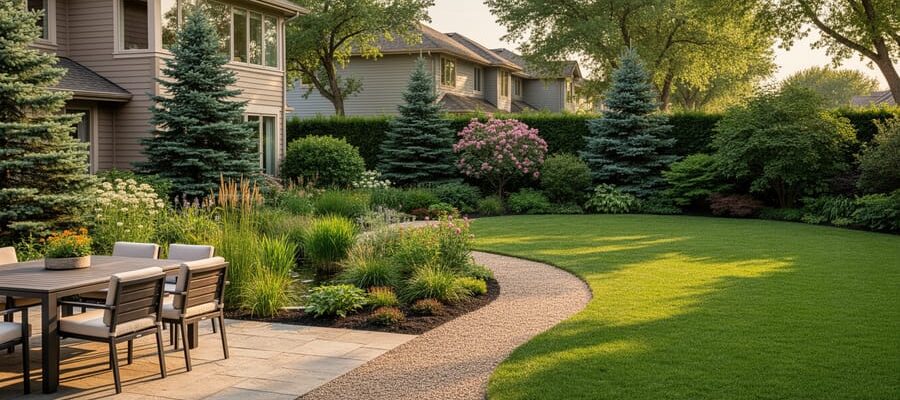
Transform your backyard into an inviting outdoor retreat for under $500 by focusing on high-impact, low-cost projects that deliver professional results. Start by defining specific zones using affordable materials like decomposed granite for pathways ($40 per ton) or reclaimed bricks for borders, which instantly create structure without the price tag of poured concrete. Rent a sod cutter or tiller rather than purchasing equipment you’ll use once, cutting project costs by 70% while accessing professional-grade tools that make demanding tasks manageable.
Layer perennials and native plants from local nurseries during end-of-season sales when prices drop 50-75%, choosing varieties that multiply naturally to fill empty spaces within two growing seasons. Create vertical interest using repurposed pallets as living walls or trellises, transforming $15 worth of materials into statement pieces that rival expensive garden features.
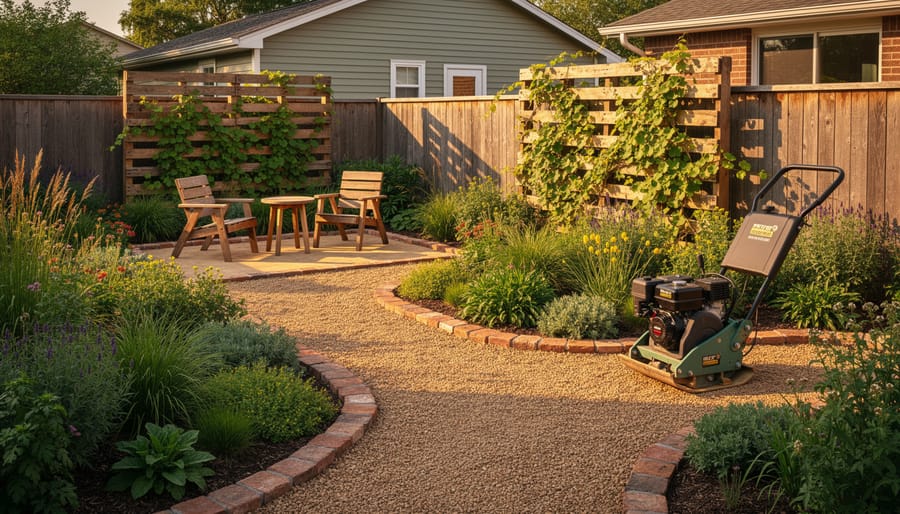
Tackle hardscaping with rented equipment like plate compactors for patio bases or post hole diggers for pergola installation, ensuring your DIY projects meet the same standards as professional work. These backyard transformation tips prove that strategic planning and smart tool choices matter more than big budgets.
The following guide breaks down specific projects by category, providing exact cost estimates, material lists, and step-by-step instructions that empower you to execute each element confidently. Whether you’re working with a compact courtyard or sprawling lawn, these proven techniques help you maximize every dollar while building outdoor spaces that genuinely enhance your lifestyle.
Planning Your Low-Budget Backyard Transformation
Assess What You Already Have
Before spending money on new materials, take a thorough inventory of what you already have. Walk your backyard with a notepad and camera, documenting existing plants, trees, pavers, borders, and decorative elements. Many features can be refreshed rather than replaced, saving significant costs.
Check the condition of established plants. Overgrown shrubs can often be pruned into shape, while perennials may simply need dividing to create fuller garden beds. Even neglected areas might hide salvageable plants beneath weeds.
Examine hardscaping like pathways, edging, and retaining walls. Stained concrete can be pressure-washed, loose pavers can be reset, and faded timber borders might just need sanding and re-oiling. These simple improvements cost far less than full replacement.
Look for materials you can repurpose. Old bricks make excellent garden edging, leftover timber can become planter boxes, and existing rocks might anchor a new feature bed. Before reviewing landscaping project do’s and don’ts, document everything with photos and measurements. This inventory becomes your free material stockpile and helps you identify which tools you’ll need to rent for renovation rather than replacement projects.
Create a Phased Approach
You don’t need to transform your entire backyard in one weekend or drain your savings all at once. Breaking your landscaping project into phases makes it financially manageable and less overwhelming. Start with the area that bothers you most or would deliver the biggest visual impact, perhaps a bare front entryway or an unused corner of the yard.
Phase one might focus on defining borders and creating pathways using simple materials like gravel or stepping stones. This establishes your layout without major expense. Phase two could tackle planting, starting with hardy, low-maintenance perennials that spread over time. Phase three might add seating or lighting elements once you’ve seen how you actually use the space.
This staged approach offers real advantages beyond spreading costs. You’ll learn which DIY garden projects match your skill level and which tools justify renting versus buying. You can also observe how sunlight, drainage, and foot traffic patterns affect different areas before committing to permanent features. Each completed phase builds your confidence and skills for the next, while early successes keep you motivated through the longer journey.
Budget-Friendly Hardscaping Ideas
DIY Gravel Pathways and Patios
Gravel pathways and patios deliver impressive visual impact at a fraction of the cost of concrete or pavers. For a typical 10×10-foot patio, expect to spend $150-$300 on materials, making this one of the most budget-friendly hardscaping options available.
Start by marking your pathway or patio area with spray paint or stakes and string. Remove existing grass and dig down 4-6 inches to create a stable base. You’ll need a wheelbarrow for hauling materials, which you can rent affordably if you don’t own one. A flat shovel and garden rake are essential for leveling.
Next, lay landscape fabric across the entire area to prevent weed growth. This step saves considerable maintenance time and keeps your gravel looking pristine. Add a 3-4 inch base layer of crushed stone or decomposed granite and compact it thoroughly. Renting a plate compactor is worth the investment here, typically costing $40-$70 per day. Proper compaction prevents settling and ensures your pathway stays level for years.
Finish with a 2-inch top layer of decorative gravel in your chosen color and texture. Pea gravel costs approximately $30-$50 per cubic yard, while crushed granite runs slightly higher at $40-$60. Install metal or plastic edging along borders to contain the gravel and create clean lines.
The entire project takes one weekend for most DIYers. Community feedback consistently highlights gravel features as beginner-friendly projects with professional-looking results, proving you don’t need extensive experience to transform your backyard on a modest budget.
Repurposed Material Borders and Edging
Before spending money on new materials, take a walk around your property and neighbourhood to spot reclaimed treasures that can transform into stunning garden borders. Old bricks from demolished structures, salvaged timber from renovation projects, and river stones collected over time create authentic character that new materials simply can’t match.
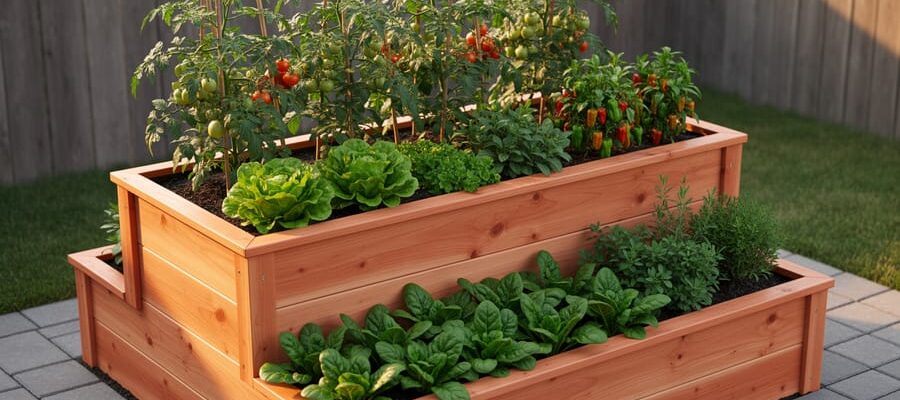
Reclaimed timber makes excellent raised bed borders and pathway edging. Stack weathered railway sleepers or pallet wood horizontally for rustic charm, securing them with rebar driven through pre-drilled holes. Always check that salvaged timber hasn’t been treated with harmful chemicals if you’re growing edibles nearby. For a polished look, sand rough edges and apply outdoor sealant.
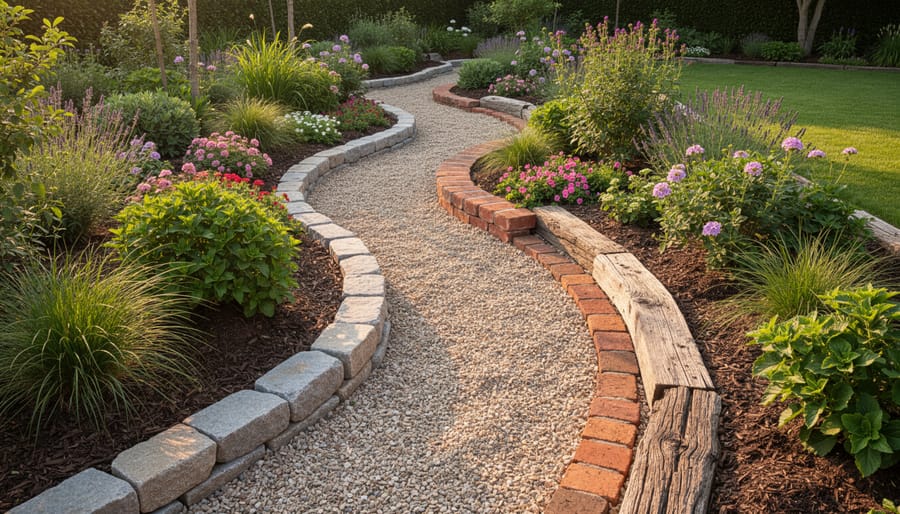
Mismatched bricks and pavers tell a story while defining garden beds beautifully. Lay them end-to-end for traditional borders, or stand them diagonally for a sawtooth effect. No mortar needed for basic decorative edging options, just dig a shallow trench and pack soil firmly around each piece.
Broken concrete chunks, often free from demolition sites, create dramatic modern edging when arranged vertically. Smooth river rocks collected from beaches or creek beds work beautifully for curved borders, while wine bottles buried neck-down add colourful whimsy.
Check community marketplaces, council cleanup days, and local builders for free materials. One person’s construction waste becomes your landscaping gold.
Pallet Projects for Vertical Interest
Pallets offer incredible versatility for vertical landscaping projects at virtually zero cost. Start by sourcing untreated pallets marked “HT” (heat-treated) rather than “MB” (methyl bromide), which contains chemicals unsafe for garden use. Check local hardware stores, garden centers, or marketplace listings where businesses often give them away free.
For vertical planters, stand a pallet upright and staple landscape fabric to the back and sides, creating pockets between slats. Fill with potting mix and plant herbs, succulents, or flowers. You can also create a simple herb garden using pallets positioned horizontally with minimal modification.
Privacy screens require just two pallets secured together with outdoor screws and anchored to posts or fence lines. Sand rough edges with basic sandpaper to prevent splinters, then leave natural or paint with exterior stain.
Tool requirements remain minimal: a hand saw or circular saw for cutting, drill for assembly, and staple gun for fabric attachment. Most tool rental centers stock these items affordably if you don’t own them. Always wear safety glasses and work gloves when handling pallets, as splinters and protruding nails are common. Inspect each pallet thoroughly before use, discarding any with structural damage or unknown chemical exposure.
Affordable Planting Strategies That Look Expensive
Propagation and Plant Swapping
Growing your own plants is one of the most effective ways to landscape on a budget. Propagation involves creating new plants from existing ones through simple techniques anyone can master. Take stem cuttings from plants like pothos, succulents, or hydrangeas by snipping a 4-6 inch piece below a leaf node and placing it in water or soil until roots develop. Collect seeds from mature flowers like marigolds or sunflowers at the end of the season, dry them, and store for spring planting. Division works well for perennials such as hostas or daylilies; simply dig up the plant, separate the root ball into sections, and replant.
Community plant swaps offer incredible opportunities to expand your garden for free. Check local Facebook groups, neighborhood associations, or community gardens for swap events where gardeners trade cuttings, divisions, and excess seedlings. Many public libraries now host seed libraries where you can borrow seeds and return harvested seeds later. Online platforms like local Buy Nothing groups frequently feature plant giveaways from neighbors dividing overgrown perennials. Start your own swap by inviting gardening friends to exchange plants they have in abundance. With patience and community connections, you can fill your yard with thriving plants at zero cost.
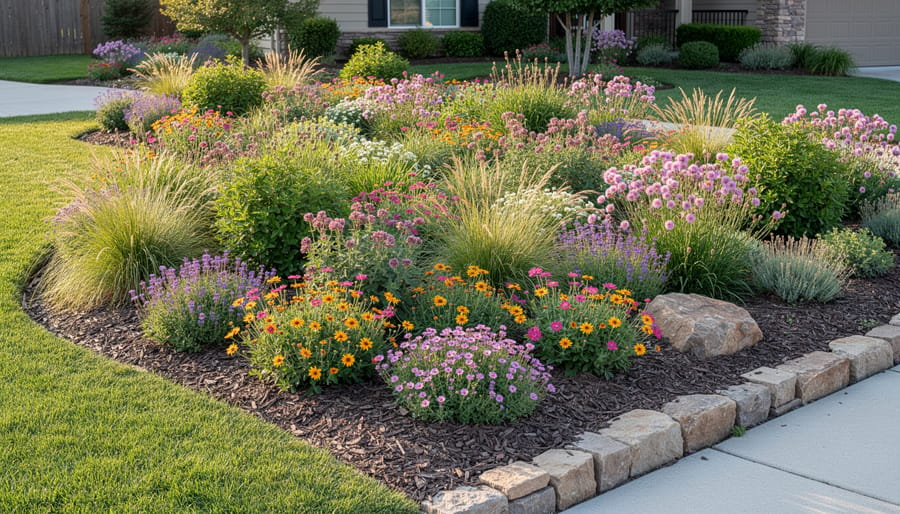
Native Plants for Low-Maintenance Beauty
Native plants are one of the smartest investments for budget-conscious landscapers. Because these species evolved in your local climate, they require significantly less water, fertilizer, and maintenance than non-native alternatives. This translates directly to lower ongoing costs and less time spent on upkeep.
The initial investment is minimal too. Many native plant nurseries offer species at lower prices than exotic varieties, and once established, these plants rarely need replacing. They’re naturally resistant to local pests and diseases, eliminating the need for expensive treatments.
For Northeast regions, consider black-eyed Susans, coneflowers, and native ferns. Southeast homeowners can plant beautyberry, coral honeysuckle, and muhly grass. In the Southwest, desert marigold, penstemon, and sage create stunning displays with minimal water. Pacific Northwest gardeners should look at salal, sword ferns, and Oregon grape.
Start by checking with your local extension office or native plant society for free or low-cost plant guides specific to your area. Many communities host native plant sales where you can purchase starter plants at fraction of retail costs. You can also propagate many natives from cuttings, multiplying your investment without spending extra money.
Strategic Plant Placement for Maximum Impact
Smart plant placement creates the illusion of abundance without breaking your budget. Start by working in odd-numbered groupings, as groups of three, five, or seven plants appear more natural and fuller than even numbers. Position your most eye-catching plants, like colorful perennials or ornamental grasses, as focal points at key viewing angles from your patio or windows.
Layering is your secret weapon for visual depth. Place taller plants at the back of beds, medium-height varieties in the middle, and low-growing ground covers in front. This technique makes even a modest collection look professionally designed and intentional.
Use repetition strategically by planting the same species in multiple locations throughout your yard. This creates visual rhythm and makes your space feel cohesive. For example, three clusters of the same lavender variety scattered across different beds will appear more impressive than six different plant types crammed together.
Consider mass planting inexpensive options like hostas or daylilies in larger drifts rather than buying expensive statement plants individually. A sweep of ten affordable perennials creates more impact than two pricey specimens. Fill gaps temporarily with self-seeding annuals that return year after year, naturally expanding your garden without additional investment.
Creating Cozy Seating and Entertainment Spaces
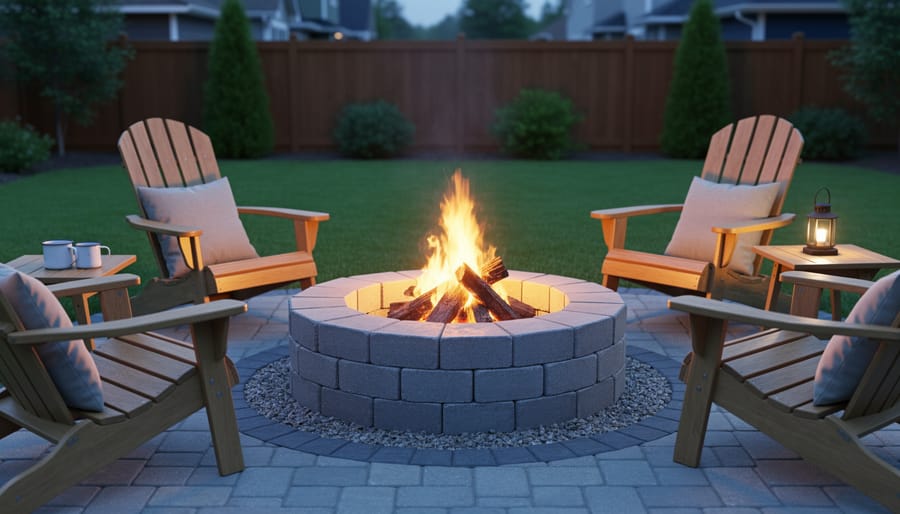
DIY Fire Pit on a Shoestring
A fire pit instantly transforms your backyard into a gathering space, and you can build one for under $75. The simplest approach uses concrete blocks or pavers arranged in a circular pattern, typically 36-48 inches in diameter. Stack blocks two or three layers high, leaving gaps between blocks for airflow. For even less cost, a metal fire ring (around $30-40) placed directly on gravel or pavers provides a ready-made solution.
Before starting, check local fire codes and maintain at least 10 feet clearance from structures, trees, and fences. Choose a level spot and clear away grass, creating a base layer of gravel or sand for drainage and heat protection.
Essential tools include a level, rubber mallet, and shovel. If you’re creating a more permanent installation with buried blocks or a gravel base requiring compaction, consider renting a plate compactor to ensure stability. Many rental centers offer half-day rates perfect for this quick project.
Safety tip: Never use river rocks or wet stones near heat, as trapped moisture can cause them to explode. Stick with fire-rated materials specifically designed for high temperatures. Add inexpensive pea gravel or fire glass inside your pit for a polished look that costs just $15-20 per bag.
Budget Seating Solutions
Creating comfortable outdoor seating doesn’t require expensive patio furniture. With a bit of creativity and basic tools, you can build inviting seating areas for a fraction of retail costs.
Cinder blocks offer incredible versatility for budget seating. Stack them to create bench supports, then top with weather-treated wood planks or outdoor cushions. A simple two-seat bench requires about 12 cinder blocks and one 6-foot board, costing roughly $25-30. Fill the block openings with potted plants or LED candles for added charm.
Fallen logs make rustic seating with minimal effort. Cut logs to 18-24 inches high, sand the top surface smooth, and treat with outdoor wood sealer. Arrange several around a fire pit for natural, conversation-friendly seating.
Check curb alerts and thrift stores for old chairs and benches. A fresh coat of outdoor paint and new cushions transform tired furniture into garden focal points. Metal chairs respond particularly well to spray paint and develop charming patina over time.
For DIY benches, two concrete blocks at each end supporting a sturdy plank creates basic seating in minutes. Add a backrest by securing a second board vertically. This project costs under $20 and requires only a drill and wood screws. Always sand rough edges and apply weatherproofing treatment to extend your seating’s lifespan and ensure safety.
Lighting Your Space for Ambiance Without Breaking the Bank
Solar and String Lighting Options
Solar lighting offers the biggest impact for the smallest investment when transforming your backyard at night. Solar stake lights typically cost $1-3 per unit and require zero electrical knowledge—just push them into the ground along pathways, around garden beds, or near seating areas. They charge during the day and automatically illuminate at dusk.
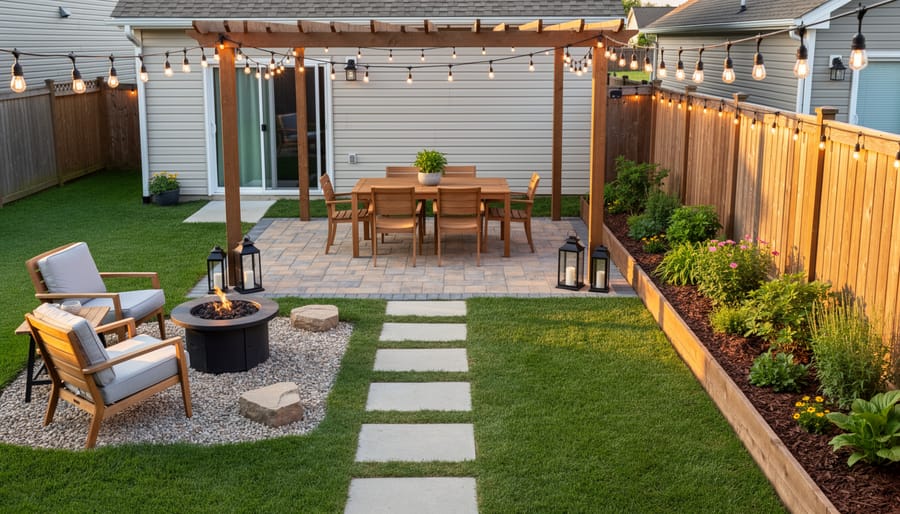
String lights create an instant ambiance that rivals expensive permanent fixtures. Solar-powered string lights range from $15-30 for a 25-foot strand and drape easily across fence lines, pergolas, or between posts. For darker areas without direct sunlight, plug-in LED string lights remain budget-friendly at $10-20 and use minimal electricity.
Solar lanterns add decorative flair while providing functional light. Hang them from shepherd’s hooks ($5-8 each) or place them on tables and steps. Many feature realistic flickering flame effects that create a cozy atmosphere.
The beauty of all these options is their flexibility—rearrange them seasonally or as your landscape evolves without calling an electrician or dealing with buried wiring.
DIY Lighting Features
Transform everyday items into charming outdoor lighting with these simple projects. Mason jar lanterns create ambient glow for under $5 each—simply wrap wire around the jar rim for hanging, add battery-operated tea lights or solar lids, and group several at varying heights. Tin can luminaries cost practically nothing: punch decorative patterns into clean, empty cans using a hammer and nail (freeze water inside first to prevent denting), spray paint them in coordinating colors, and place LED candles inside. For painted luminaries, collect glass jars or bottles, apply frosted glass spray paint or diluted white glue, then add designs with painter’s tape before spraying. Always use LED or battery-powered lights for safety, especially near flammable materials. These DIY lighting features work beautifully along pathways, hanging from tree branches, or clustered on outdoor tables. Each project takes 30 minutes or less and uses materials you likely have at home, making professional-looking lighting accessible on any budget.
Essential Tools to Rent vs. Buy for Your Project
Must-Rent Equipment for Landscaping
Certain landscaping projects require heavy-duty equipment that costs hundreds or thousands of dollars to purchase but only $50-150 per day to rent. A gas-powered tiller is essential if you’re preparing large planting beds or installing a new lawn, breaking up compacted soil in hours rather than days of manual digging. Sod cutters make removing existing grass surprisingly easy when you’re creating pathways or garden beds, slicing through turf in clean strips that you can roll up and remove. For patio or pathway installation, a plate compactor ensures your gravel base settles properly, preventing future shifting and cracking that undermines all your hard work.
Power augers drill perfect holes for fence posts, deck footings, or large plantings in minutes, saving your back and your weekend. Most rental centers provide brief operating instructions and safety equipment with each rental. Before renting, measure your project area and ask staff to recommend the right equipment size. Many locations offer half-day rates for quick projects, maximizing your budget. Always inspect equipment before leaving the rental yard and ask questions about proper operation. Community reviews often highlight which rental centers provide the best-maintained equipment and customer support, helping you avoid frustrating breakdowns mid-project.
Basic Tools Worth Owning
Investing in a few quality hand tools means you won’t need to rent basic equipment for every small project. Start with a round-point shovel for digging planting holes and moving soil—expect to spend $25-40 for one that will last years. A garden rake (around $20-30) helps level soil and spread mulch evenly. Add a sturdy bow rake for moving heavier materials like gravel.
A good pair of bypass pruners ($15-25) keeps plants healthy and shapes overgrown shrubs, while a hand trowel ($8-15) is essential for transplanting and container work. For edging beds and cutting sod, a half-moon edger ($20-30) creates clean lines that define your landscape.
Consider a wheelbarrow or garden cart ($50-80) if you’re tackling multiple projects—moving soil, mulch, or pavers by hand gets exhausting quickly. A 50-foot garden hose with a spray nozzle ($25-40) is another must-have for watering new plantings.
These tools typically pay for themselves after just two or three projects compared to hiring professionals. Keep them clean and store them in a dry location to maximize their lifespan. For specialized equipment like tillers, aerators, or pressure washers, renting remains the budget-friendly choice.
Creating a beautiful backyard doesn’t require a professional landscaper’s budget or expertise. The key to success is starting small and building on your progress over time. Choose one or two projects that excite you most, whether that’s building a simple gravel path, creating a container garden, or installing string lights for ambiance. As you complete each project, you’ll gain confidence and skills that make the next one easier.
Remember that tool rental is your secret weapon for achieving professional results without the investment. Instead of spending hundreds of dollars on equipment you’ll use once, rent specialized tools like a sod cutter, post hole digger, or power tiller for a fraction of the cost. This approach allows you to tackle bigger projects while keeping more money in your budget for materials and plants.
Your backyard transformation is a journey, not a destination. Even small changes like adding a few perennials or refreshing a tired flower bed can dramatically improve your outdoor space. The most successful landscaping projects are those that reflect your personal style and meet your family’s needs.
We’d love to hear about your low-budget landscaping wins. What creative solutions have worked in your yard? Which projects gave you the most impact for your investment? Share your photos, tips, and lessons learned in the comments below. Your experience might inspire someone else to finally tackle that backyard project they’ve been dreaming about.
Related Posts
Post a Comment