
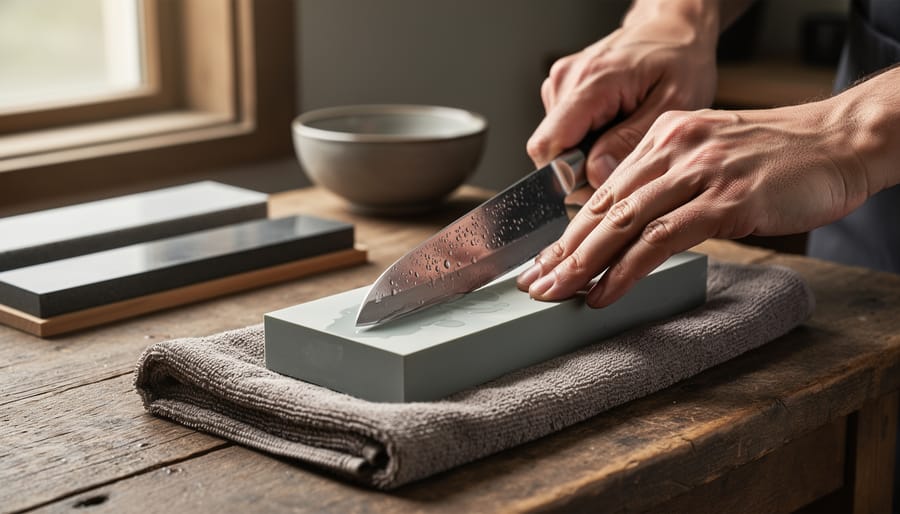
Master the precision of Japanese blade sharpening by starting with proper stone selection—choose water stones between 1000-grit for general maintenance and 3000-6000 grit for finishing edges. Position your whetstone on a damp towel at waist height, ensuring stability before you begin, because dull tools are dangerous and improper sharpening techniques create even greater risks.
Hold your blade at a consistent 15-degree angle—roughly the width of two stacked coins—and maintain this position throughout each stroke by anchoring your wrists. Apply light, even pressure while drawing the blade across the stone in smooth, deliberate motions, moving from heel to tip in sections rather than attempting the entire edge at once.
Check your progress frequently by running your thumb perpendicular to the edge, never along it, feeling for the burr that indicates metal removal. This tangible feedback tells you when to flip the blade and work the opposite side. Japanese sharpening philosophy emphasizes patience over force—ten controlled strokes outperform fifty rushed attempts. The technique protects both your tools and your safety while delivering razor-sharp results that transform your cutting experience.
What Makes Japanese Blade Sharpening Different
The Water Stone Advantage
Japanese water stones have earned their reputation as the gold standard for blade sharpening, and there’s solid science behind their superiority. Unlike mechanical sharpeners or coarse grinding wheels that can overheat and damage blade temper, water stones work gently with consistent pressure and cooling, giving you complete control over the sharpening process.
The secret lies in how these stones function. As you sharpen, the water creates a slurry that combines with particles released from the stone itself. This slurry acts as a polishing compound, producing an exceptionally refined edge that other methods simply cannot match. Think of it as the difference between sanding wood with a power sander versus hand-sanding with progressively finer grits.
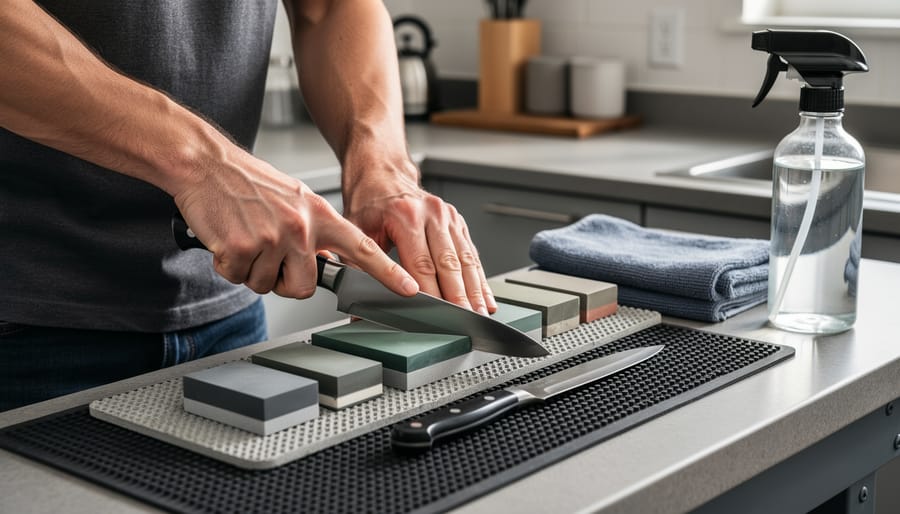
Understanding grit levels is essential for achieving professional results. Coarse stones (400-1000 grit) reshape damaged or very dull blades, removing nicks and establishing a new edge geometry. Medium stones (1000-3000 grit) refine that edge, creating a functional working sharpness suitable for most tasks. Fine stones (4000-8000 grit) polish the edge to razor-like keenness, ideal for precision cutting.
Just as maintaining your equipment requires the right approach for different tools, water stones let you customize your sharpening strategy. This versatility makes them perfect for everything from kitchen knives to chisels and plane blades, with each grit level serving a specific purpose in your sharpening progression.
Angle Consistency: The Safety Game-Changer
One of the most overlooked aspects of Japanese blade sharpening is how consistent angles directly impact your safety. When you maintain the same angle throughout the sharpening process, you create a predictable edge that behaves exactly as you expect it to during use. This predictability is what separates a safe tool from a potential hazard.
Think about it this way: an inconsistent edge has high and low spots along the blade. These variations mean some areas are sharper than others, creating unpredictable cutting behavior. The blade might suddenly catch or slip, forcing your hand toward the edge. Professional tradespeople consistently report that injuries often happen not with dull blades, but with poorly sharpened ones that behave erratically.
Japanese sharpening techniques emphasize angle consistency through several methods. The most effective approach involves maintaining a steady hand position and using your entire body, not just your wrists. Many DIY enthusiasts find success by marking the bevel with a permanent marker before starting. As you sharpen, the marker wears away, showing you exactly where metal is being removed. If the pattern is uneven, you know your angle is drifting.
According to community feedback from experienced users, practicing on inexpensive knives first builds the muscle memory needed for consistent angles. One reviewer noted that after mastering consistent angles on practice blades, their injury rate dropped significantly because their tools started responding predictably to pressure.
Remember, a consistently sharpened blade requires less force to cut, which means better control and fewer accidents. This is the safety foundation that makes Japanese sharpening methods so effective.
Essential Safety Practices Before You Start Sharpening
Workspace Setup and Lighting
Creating a safe and effective sharpening station starts with a stable, non-slip surface. Place a damp towel or rubber mat underneath your whetstone to prevent it from sliding during use. This simple step eliminates one of the most common causes of sharpening accidents. Position your stone at a comfortable height, typically waist-level when standing or slightly below chest height when seated, to maintain proper body mechanics and reduce fatigue.
Lighting is equally critical for achieving razor-sharp results. Natural daylight is ideal, but if that’s not available, use a bright LED task light positioned at a 45-degree angle to your work surface. This setup helps you see the blade’s edge clearly and identify any uneven spots or burrs that need attention. Avoid working in dim conditions, as poor visibility increases the risk of finger contact with the blade and makes it difficult to assess your progress.
Keep your workspace clutter-free with only essential items within reach: your stone, water container, and a clean towel for wiping the blade. Remove any distractions and ensure children and pets are kept at a safe distance. A dedicated sharpening area, even if temporary, helps you focus on the task and maintain consistent technique throughout the process.
Personal Protection Equipment
Sharpening Japanese blades requires proper safety gear to protect against cuts and flying debris. While the process may seem straightforward, even experienced sharpeners can slip, making protection essential.
Start with cut-resistant gloves for your non-dominant hand—the one holding the blade. Look for gloves rated Level 5 or higher, which offer excellent protection without sacrificing dexterity. Many sharpeners prefer fingerless designs that protect the palm while allowing precise control.
Eye protection is non-negotiable. Safety glasses shield your eyes from metal particles and stone debris that can dislodge during sharpening. Choose wraparound styles for maximum coverage, especially when working with coarse-grit stones that remove material more aggressively.
Wear close-fitting clothing with long sleeves to protect your arms from accidental contact with sharp edges. Avoid loose garments, jewelry, or anything that could catch on the blade. An apron provides an additional barrier and keeps your clothes clean from water and metal residue.
Finally, work in a well-lit area with stable footing. Good lighting helps you maintain proper angles, while secure footing prevents slips that could lead to serious injury.
The Japanese Sharpening Process: Step-by-Step Safety
Preparing Your Water Stone Safely
Before you begin sharpening, proper stone preparation is essential for both effectiveness and safety. Japanese water stones need adequate soaking time to work correctly and prevent dangerous slipping during use.
Most coarse and medium-grit water stones require 10-15 minutes of soaking in clean water. You’ll know they’re ready when air bubbles stop rising to the surface. Fine-grit stones (above 3000) often need only a quick splash or surface water. Always check your manufacturer’s instructions, as some synthetic stones require different preparation.
A common mistake that leads to accidents is placing stones directly on smooth countertops where they can slide unexpectedly. Always use a non-slip base like a damp towel, rubber mat, or dedicated stone holder. Position your setup at a comfortable height where your arms form roughly a 90-degree angle. This prevents strain and gives you better control.
Never sharpen on a dry stone that should be wet. The increased friction creates resistance that can cause your blade to catch and slip toward your hands. Keep a water bottle nearby to add moisture as you work, maintaining a thin slurry on the stone’s surface.
Test your setup stability before introducing the blade by pressing firmly on the stone from different angles. If it shifts even slightly, readjust your base.
The Correct Grip and Body Position
Getting your grip and body position right is essential for safe, effective sharpening. The goal is to maintain complete control over the blade while keeping your fingers well away from the cutting edge.
Start by positioning yourself directly in front of your sharpening stone, which should be at a comfortable working height, typically waist level or slightly lower. Stand with your feet shoulder-width apart for stability. You’ll want to lean slightly forward, but avoid hunching over, as this causes fatigue and reduces control.
For the grip itself, hold the blade with your dominant hand near the handle or tang (the unsharpened part where the handle attaches). Your thumb should rest on the spine (the thick, top edge opposite the cutting edge), never on the flat side of the blade where it could slip toward the sharp edge. This thumb placement gives you leverage while keeping digits safe.
Your other hand serves as a guide. Place it on top of the blade, with fingers positioned on the spine only. Think of this hand as providing steady downward pressure and guidance rather than grip. Keep all fingers well behind the cutting edge at all times.
A common mistake is gripping too close to the edge or allowing fingers to wrap around the blade. Community feedback from experienced sharpeners consistently emphasizes this: if your fingers can touch the edge during the sharpening motion, you’re holding it wrong. Adjust your grip immediately. The safe position feels secure but relaxed, allowing smooth, controlled strokes across the stone without white-knuckling the blade.
The Sharpening Motion That Prevents Accidents
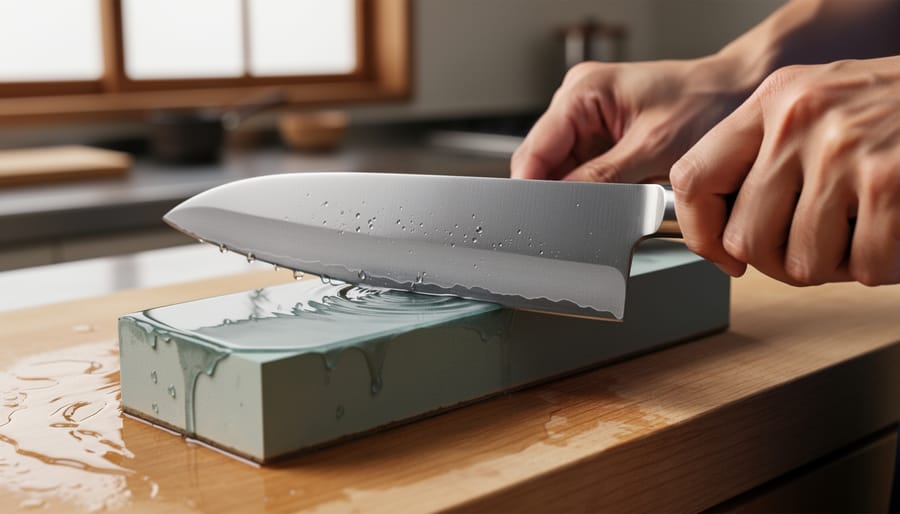
The key to safe Japanese blade sharpening lies in mastering a controlled, deliberate motion. Start by placing the blade flat against the whetstone at your predetermined angle, typically 15-20 degrees for Japanese knives. Apply moderate, even pressure with your fingers positioned safely behind the cutting edge—never in front of it.
Execute the sharpening stroke by pushing the blade forward across the stone in a smooth, continuous motion, as if you’re trying to slice a thin layer off the surface. Maintain consistent pressure throughout the entire stroke, which helps prevent the blade from skipping or catching unexpectedly. As you reach the end of the forward motion, gradually reduce pressure before pulling the blade back to the starting position without sharpening on the return stroke.
The most common accident occurs when users apply uneven pressure or rush the motion, causing the blade to slip sideways. Keep your non-dominant hand positioned on the spine of the blade, never near the edge. Work in a rhythm that feels natural—typically one stroke per two seconds—to maintain control. If you find yourself struggling to hold the angle or feel the blade shifting unpredictably, stop immediately and reassess your grip and stance before continuing.
When to Sharpen vs. When to Replace
Warning Signs of Unsafe Blades
Knowing when to retire a blade rather than sharpen it is essential for your safety and the quality of your work. Even with excellent Japanese sharpening techniques, some damage simply can’t be fixed.
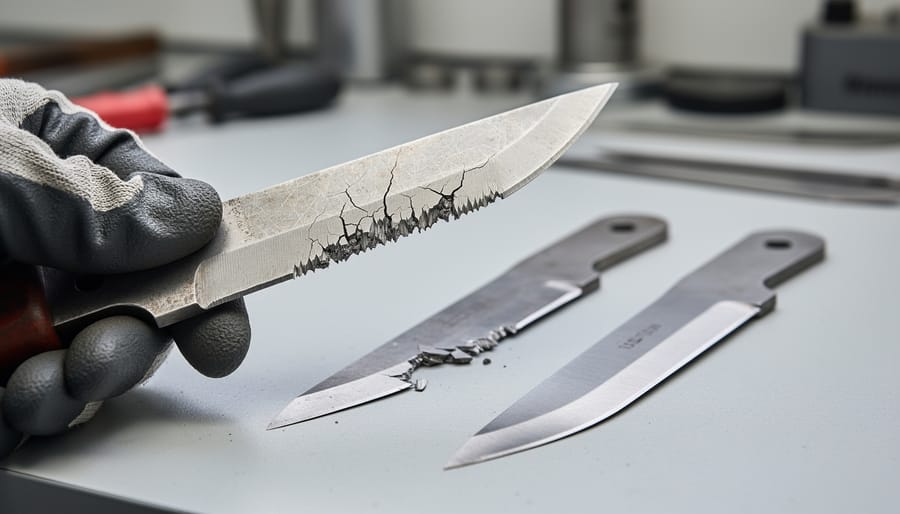
Start by inspecting the cutting edge for visible chips or nicks. Small chips under 1mm might be salvageable through careful sharpening, but larger chips require removing too much metal and compromise the blade’s structural integrity. Hold the blade up to good light and examine it closely—any breaks in the edge that feel rough or catch your fingernail are warning signs.
Cracks are an absolute deal-breaker. Run your fingers along both sides of the blade, feeling for any hairline fractures. Cracks can propagate during use, causing sudden blade failure that puts you at risk. Never attempt to sharpen a cracked blade.
Check for excessive thinning, especially near the cutting edge. If your blade has been sharpened many times and the metal feels noticeably thinner or flexible compared to when new, it’s time for replacement. A blade that’s too thin can’t hold an edge properly and may break unpredictably.
Warping or bending indicates heat damage or stress. Place the blade on a flat surface—if it rocks or doesn’t sit flush, retire it immediately. Trust your community’s experience: user reviews consistently emphasize that replacing questionable blades is cheaper than dealing with injuries or ruined projects.
Calculating the Risk vs. Reward
Before investing time in Japanese blade sharpening, consider whether the blade is worth the effort. High-quality Japanese knives, chisels, and woodworking tools typically justify the time investment since replacement costs are significant. However, inexpensive utility blades or heavily damaged edges may be more economical to replace.
Evaluate the blade’s condition carefully. Minor nicks and dullness respond well to sharpening, but deep chips, cracks, or warping indicate it’s time for replacement. A good rule of thumb: if restoring the edge requires removing more than 20% of the blade’s width, replacement is likely more practical.
Consider your skill level honestly. Beginners risk damaging valuable blades through improper technique, potentially creating safety hazards like uneven edges or weakened metal. Practice on less expensive blades first before tackling premium Japanese tools.
Factor in your time value too. Professional sharpening services typically charge between 10-25 dollars per blade, which might be worthwhile if your time is limited. Community members often report that once proficient, they can sharpen a blade in 15-20 minutes, making DIY sharpening cost-effective for regular maintenance.
Common Japanese Sharpening Mistakes That Compromise Safety
Over-Sharpening and Weak Edges
One of the most common mistakes when sharpening Japanese blades is overdoing it. While it might seem like more sharpening creates a better edge, removing too much metal actually weakens the blade structure. Japanese steel, prized for its hardness, can become brittle when ground too thin at the edge.
Think of it like filing down a metal ruler until it’s paper-thin. At first, it gets sharper, but eventually it becomes so fragile that any pressure causes it to bend or snap. The same principle applies to knife edges. When you sharpen too aggressively or too frequently, you create a feather-thin edge that might feel incredibly sharp initially but lacks the structural support needed for actual cutting tasks.
This weakness becomes dangerous during use. A brittle edge can chip or break unexpectedly, sending small metal fragments flying. These chips create jagged sections on your blade that can catch and tear rather than cut cleanly, increasing the risk of slips and injuries. Users have reported that over-sharpened blades sometimes snap during routine cutting tasks, which can cause the knife to suddenly jerk forward.
The solution is patience and moderation. Sharpen only when your blade truly needs it, not on a fixed schedule. Use consistent, light pressure on your whetstone rather than aggressive grinding motions, and always check your progress frequently by testing the edge gently.
Inconsistent Angles and Unpredictable Performance
When you sharpen a Japanese blade without maintaining a consistent angle, the cutting edge develops an uneven bevel that compromises both performance and safety. Think of it like a wobbly wheel—the blade won’t track straight through materials, requiring you to apply extra force or adjust your grip mid-cut. This unpredictability significantly increases your risk of slips and accidents.
An inconsistent sharpening angle creates high and low spots along the edge. During use, these variations cause the blade to catch unexpectedly, deflect off your intended cutting line, or suddenly bite deeper than expected. Professional woodworkers often report that poorly sharpened chisels are more dangerous than dull ones because you can’t anticipate how they’ll behave.
The problem compounds over time. Each inconsistent sharpening session builds on previous mistakes, creating a progressively more unstable edge geometry. You might notice the blade cutting smoothly in one section but grabbing or skipping in another—a clear warning sign.
Japanese blades, with their harder steel and acute angles, are particularly sensitive to these variations. A chisel sharpened at 23 degrees on one side and 27 degrees on the other won’t hold its intended cutting line, forcing you into awkward, unsafe hand positions to compensate. Maintaining angle consistency isn’t just about sharpness—it’s about predictable, controlled cutting that keeps your hands safe.
Maintaining Your Sharpening Equipment
Your Japanese water stones need proper care to perform safely and effectively over time. Unlike oil stones, water stones wear down during use, developing uneven surfaces that can compromise sharpening results and increase injury risk when blades slip unexpectedly.
Flattening your stones is essential and should be done whenever you notice dishing or uneven wear, typically after every three to four sharpening sessions. Use a flattening stone or diamond plate designed for this purpose. Work in a figure-eight pattern across the entire surface under running water until you see consistent scratch patterns, indicating a level surface. This process takes just a few minutes but dramatically improves both safety and sharpening quality.
After each use, rinse your stones thoroughly to remove metal particles and debris. Never use soap, as it can clog the stone’s pores. Allow stones to air-dry completely on a rack or towel before storing them. Avoid leaving stones soaking in water for extended periods, as this can cause cracking or deterioration, particularly with combination stones that have different grits bonded together.
Store your stones in a cool, dry location away from direct sunlight and extreme temperatures. Many users find dedicated stone storage boxes helpful for protecting their investment. Including sharpening tools in your regular tool maintenance routine ensures they’re always ready when needed and helps identify wear issues before they compromise safety or performance.
Mastering Japanese blade sharpening techniques transforms not just your tools, but your entire approach to maintenance and safety. When you prioritize proper positioning, maintain consistent angles, and respect the sharpening process, you’ll discover that truly sharp blades require less force and pressure, which directly translates to fewer slips and accidents. The precision of water stones and the methodical nature of traditional Japanese methods might seem time-intensive at first, but they develop muscle memory and awareness that keeps you safer in the long run.
Remember that practice makes perfect. Start with less critical tools, work your way up to your most valued blades, and don’t rush the learning curve. Each sharpening session teaches you something new about angles, pressure, and the feel of steel against stone.
We encourage you to share your sharpening journey with our community. Post your before-and-after results, ask questions when techniques feel unclear, and contribute your own tips once you’ve gained confidence. Whether you’re maintaining rental tools or your personal collection, the knowledge you share helps everyone work more safely and effectively. Your experiences, challenges, and successes create a valuable resource for others just beginning their sharpening education.
Related Posts
Post a Comment