
An approved site plan is your official green light to begin construction—a document stamped by your local planning authority confirming your project complies with zoning laws, building codes, and land-use regulations. Without this approval, you risk costly fines, project shutdowns, and even demolition orders for unauthorized work.
Most building projects requiring ground excavation, structural changes, or new construction need site plan approval before breaking ground. This includes home extensions, garage builds, driveways, and commercial developments. Minor repairs or interior renovations typically don’t require approval, but check with your local council to avoid assumptions that could derail your project.
The approval process involves submitting detailed drawings showing your property boundaries, proposed structures, setback distances, drainage plans, and landscaping details. Planning departments review these submissions against local regulations, a process that typically takes 4-12 weeks depending on project complexity and your location.
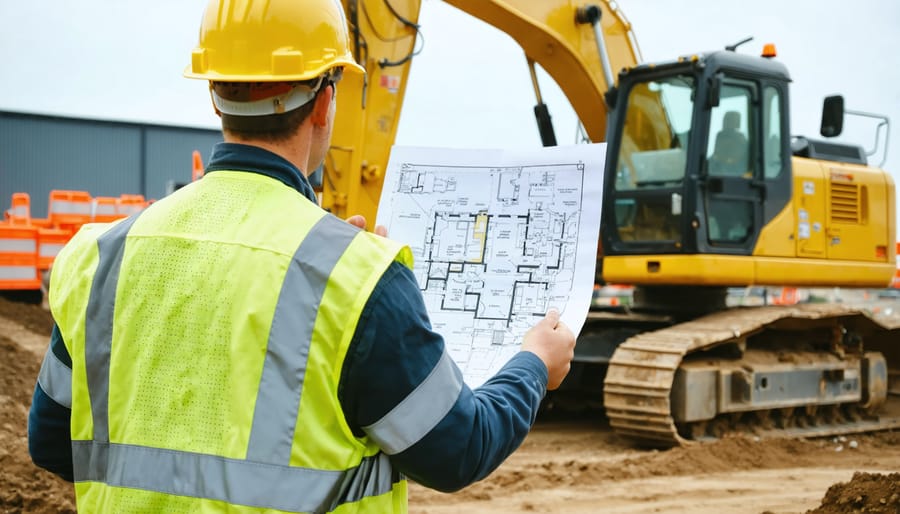
Understanding when you’ll receive approval directly impacts your equipment rental timing. Ordering excavators, concrete mixers, or scaffolding before approval wastes money on unused rental days. Savvy builders confirm their approval date before scheduling tool deliveries, ensuring equipment arrives exactly when construction can legally begin. This coordination between bureaucracy and practicality separates successful projects from expensive false starts.
What Exactly Is an Approved Site Plan?
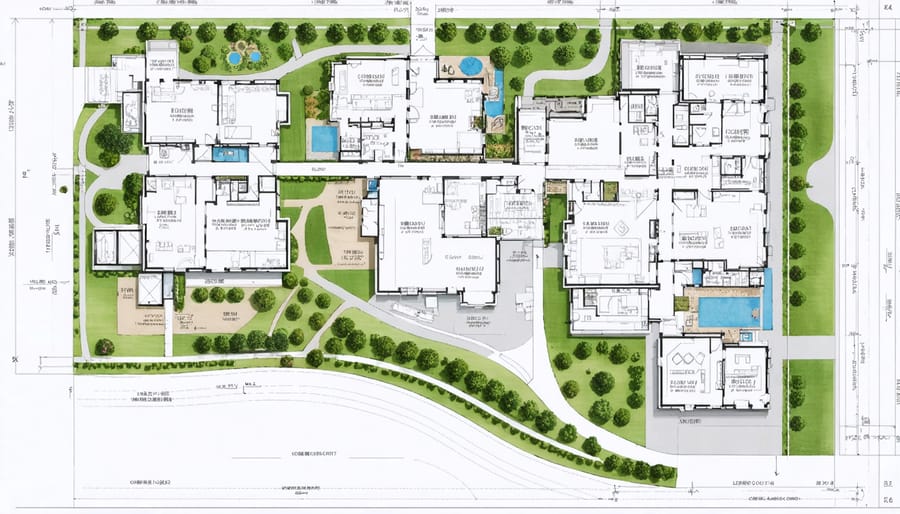
An approved site plan is essentially a detailed bird’s-eye view drawing that shows exactly what you intend to build on your property and how it will fit within your land boundaries. Think of it as a blueprint that maps out your entire construction project from above, giving planning authorities a clear picture of your development before any work begins.
This document includes several critical pieces of information. The building footprint shows the exact size and position of your proposed structure on the land. Setbacks are clearly marked, indicating the required distances between your building and property boundaries, roads, or neighboring structures. You’ll also see utility connections mapped out, including water, sewer, electricity, and gas lines. Drainage systems and stormwater management features are illustrated to demonstrate how water will flow across and off your property. Additional elements like driveways, parking areas, landscaping zones, and any existing structures that will remain are also included.
The approval comes from your local council or municipal planning authority. These bodies review your site plan against zoning regulations, building codes, and local planning policies to ensure your project complies with all requirements. They’re checking that your development won’t negatively impact neighboring properties, meets safety standards, and aligns with the area’s development guidelines.
Getting your site plan approved is a formal process that typically involves submitting detailed drawings prepared by a qualified professional, such as a surveyor, architect, or engineer. The planning authority reviews the submission, may request modifications, and ultimately grants or denies approval. Once approved, this document becomes your legal authorization to proceed with construction as specified, making it an essential milestone before you can hire equipment or break ground.
When You Actually Need One
Projects That Always Need Approval
Certain projects will always trigger the need for an approved site plan, regardless of your location. New home construction tops this list—any new dwelling requires full planning permission and detailed site plans showing building placement, access routes, and drainage. Major extensions that significantly increase your home’s footprint or height also need approval, particularly those exceeding 50 square metres or adding additional storeys.
Outbuildings like detached garages typically require approval if they’re positioned forward of the principal elevation or exceed 4 metres in height. Garden sheds and workshops usually need permission when they’re larger than 15 square metres with a pitched roof, or 10 square metres with any other roof type. Commercial developments invariably require comprehensive site plans, from small retail units to large industrial facilities. Even conversions—turning a garage into living space or a barn into a home—need approved plans. When in doubt, contact your local planning authority before ordering equipment or materials. Getting it wrong means costly delays and potential demolition orders.
Projects That Might Be Exempt
Not every home improvement project requires an approved site plan. Simple internal alterations like replacing kitchen cabinets, installing new flooring, or repainting walls typically don’t need formal approval since they don’t affect your property’s structure or footprint. Minor outdoor projects such as small garden sheds under a certain size, fences below specific heights, or basic landscaping work may also fall outside approval requirements.
However, exemption rules vary significantly between councils and states. What’s considered minor in one area might require full planning permission elsewhere. Some councils exempt structures under 10 square meters, while others set different thresholds. Internal renovations that involve plumbing relocation, electrical rewiring, or removing walls may still need building permits even without site plan approval.
Before assuming your project is exempt, always verify with your local council’s planning department. Many councils provide online exemption checklists or quick assessment tools. Getting written confirmation of exemption status protects you from compliance issues later and ensures you’re hiring the right equipment for work that’s actually permitted to proceed.
The Step-by-Step Approval Process
Preparing Your Application
Getting your paperwork right is essential to navigating the building approvals process smoothly. You’ll typically need a completed application form from your local council, current property title documents, and detailed site plans showing existing structures, proposed changes, boundary setbacks, and drainage locations.
For simple projects like sheds or carports, you might draw up basic plans yourself if you’re confident with measurements and scale drawings. However, most projects benefit from professional help. Licensed architects charge between $1,500 to $5,000 depending on complexity, while draftspeople offer more affordable options at $800 to $2,500 for straightforward residential work. They’ll ensure plans meet Australian Standards and local planning schemes.
Your plans should include dimensions, materials specifications, and how the project relates to neighbouring properties. Include elevation drawings showing height and appearance from different angles. Don’t forget supporting documents like soil reports for substantial structures or heritage assessments if your property is listed.
Council fees vary by location and project scope but typically range from $200 for minor works to $2,000-plus for new dwellings. Budget extra time and money for potential resubmissions if initial plans need adjustments.
Submitting to Local Authority
Once your site plan is ready, you’ll need to submit it to your local planning department or building control office. Most authorities now accept applications online through their planning portal, though paper submissions are typically still available. You’ll need to provide multiple copies of your plan (usually four to six), along with a completed application form and location plan showing the property’s position within the surrounding area.
Expect to pay an application fee, which varies widely depending on your location and project type. Residential extensions typically cost between £200-£500, while new builds or commercial projects run higher. Many councils publish fee calculators on their websites to help you budget accurately.
During the review period, planning officers assess whether your proposal complies with local development policies, building regulations, and any relevant planning conditions. They may consult neighbors, conduct site visits, or request additional information. Processing times generally range from 8-13 weeks for standard applications, though minor works can sometimes be approved within 4-6 weeks.
Community feedback matters here—some authorities notify neighbors who can submit comments, which officers consider alongside technical requirements. You’ll receive a formal decision notice explaining approval conditions or reasons for refusal. Keep this documentation safe, as you’ll need it before hiring equipment or starting construction work.
Dealing with Conditions or Rejections
Receiving conditions or a rejection on your site plan isn’t the end of your project—it’s actually quite common. Planning departments often request modifications to address safety concerns, zoning compliance, or environmental considerations. When you receive conditional approval, read through each requirement carefully and note the deadline for addressing them.
Most conditions are straightforward fixes. You might need to adjust setback distances, add drainage details, or clarify material specifications. Tackle these systematically, and don’t hesitate to contact the planning officer if anything’s unclear. They’re there to help you meet requirements, not create obstacles.
If your plan is rejected, request written feedback explaining the specific issues. This information is invaluable for your resubmission. Common rejection reasons include insufficient detail, non-compliance with local codes, or environmental impact concerns.
Before resubmitting, consider seeking feedback from contractors or neighbors who’ve successfully navigated the process. Community-driven insights often reveal practical solutions that worked for similar projects in your area. Some applicants find it helpful to request a pre-submission meeting with planning staff to confirm their revisions address all concerns before formally resubmitting.
Remember, resubmissions typically involve additional fees and processing time, so hold off on hiring equipment until you’ve secured final approval.
What Happens If You Skip This Step
Starting work without an approved site plan can turn your building project into a costly nightmare. Many DIYers and even experienced contractors have learned this lesson the hard way after renting equipment and breaking ground prematurely.
The most immediate consequence is a stop-work order from your local council. Once issued, all construction must cease immediately, leaving you with idle rental equipment that you’re still paying for daily. You’ll also face substantial fines that typically start at several thousand dollars and increase for repeat violations or serious breaches.
Beyond financial penalties, councils have the legal authority to demand demolition of any work completed without approval. Imagine hiring an excavator, pouring a foundation, or building a deck extension only to be forced to tear it all down at your expense. This isn’t just inconvenient—it means paying twice for materials, labor, and tool rentals while achieving nothing.
Insurance complications present another serious risk. Most policies won’t cover damage or liability related to unapproved construction work. If someone gets injured on your worksite or neighboring properties suffer damage, you could be personally liable for hundreds of thousands in damages. This makes following proper construction safety measures even more critical when working with approved plans.
Future property sales can also be jeopardized. Unapproved structures must be disclosed to buyers, and many will walk away from properties with compliance issues. Banks may refuse financing on properties with unauthorized construction, severely limiting your buyer pool and forcing significant price reductions.
The bottom line? Waiting for approval before scheduling tool rentals might feel frustrating, but it’s infinitely cheaper than paying fines, demolition costs, and legal fees while watching your project grind to a halt.
How Approved Plans Affect Your Tool Hire Timing
Getting your site plan approved should happen before you commit to tool rentals. Here’s why timing matters and how to coordinate everything efficiently.
The approval process typically takes 2-8 weeks depending on your local council and project complexity. Booking equipment before approval is a costly mistake many builders make. If your application gets delayed or requires modifications, you’ll either pay for idle tools or face rebooking fees and availability issues.
Start by submitting your site plan application as early as possible. Once lodged, ask your council for a realistic timeframe. Use this waiting period productively by researching equipment needs, comparing rental options, and reading community reviews from others who’ve completed similar projects. This preparation ensures you’re ready to move quickly once approval comes through.
When approval is imminent (your council contacts you or the estimated timeframe approaches), contact your tool hire provider to check availability and reserve equipment for specific dates. Most reputable hire companies allow short-notice bookings, but specialized machinery for tasks like safe excavation practices may need advance scheduling, particularly during busy construction seasons.
For subcontractors, share your approval timeline upfront. Experienced tradies understand approval delays and will appreciate honest communication rather than last-minute cancellations.
Pro tip from the community: Consider booking equipment with flexible start dates once you receive conditional approval. Many hire centres offer this option, giving you security without wasting rental days. Always confirm cancellation policies before committing, protecting yourself if unexpected approval delays occur.
Common Mistakes to Avoid
Even experienced builders and homeowners can stumble when navigating site plan approvals. One of the most common mistakes is assuming approval isn’t required for smaller projects. Many people believe that minor extensions, sheds, or landscaping changes don’t need council review, but local regulations often specify strict requirements regardless of project size. Always check with your local council first.
Another frequent error is making changes after approval without seeking amendments. Your approved site plan is a legal document, and any deviations—even seemingly minor ones like relocating a fence line by a metre—can result in stop-work orders and fines. If circumstances change during construction, submit an amendment application before proceeding.
Failing to check easements, covenants, and zoning overlays before applying causes significant delays. These legal restrictions might prohibit certain types of construction or require additional approvals. Community members often share experiences about discovering easements too late in the planning process, resulting in costly redesigns.
Starting work too soon is perhaps the costliest mistake. Some property owners order equipment or begin excavation immediately after submitting their application, assuming approval is guaranteed. Wait until you have written approval before scheduling excavators, concrete pumps, or waste management services. This patience protects your investment and keeps your project compliant. Remember, approval timelines vary, so factor this waiting period into your project schedule from the outset.
Securing an approved site plan isn’t just a bureaucratic hurdle—it’s the foundation of a successful building project. Before you commit to tool rentals or break ground, taking the time to obtain proper approvals protects your investment and keeps your project on track. Many DIYers and professionals have learned the hard way that skipping this step leads to costly delays, fines, and even demolition orders. The good news? Doing your due diligence upfront is straightforward when you understand the process. Check with your local planning department early, submit complete documentation, and wait for that official approval before scheduling equipment deliveries. This preparation might feel like it’s slowing you down, but it actually accelerates your timeline by preventing mid-project shutdowns. Proper planning truly saves both money and stress in the long run. Remember, the community of builders who share their experiences consistently emphasizes one point: respect the approval process, and your project will run smoother from start to finish.
Related Posts

Post a Comment