
**Understanding Your Climate Control Options: A Practical Guide**
Your home’s climate control system represents one of the largest investments in comfort and energy costs you’ll make—typically accounting for 40-50% of total household energy use. Whether you’re evaluating a struggling 15-year-old furnace, planning a complete HVAC overhaul, or simply seeking better efficiency, understanding the fundamental differences between systems directly impacts your comfort, budget, and installation complexity.
Modern climate control extends far beyond basic heating and cooling. Today’s homeowners choose between central forced-air systems, ductless mini-splits, heat pumps, radiant floor heating, and hybrid combinations—each requiring different tools, expertise levels, and maintenance commitments. A central AC installation might demand specialized refrigerant gauges and vacuum pumps, while a ductless system needs precision drilling equipment and electrical knowledge. Understanding these requirements upfront prevents costly mid-project surprises.
This guide cuts through industry jargon to deliver straight answers about system types, realistic DIY feasibility assessments, and honest cost breakdowns. We’ve incorporated real experiences from homeowners and tradespeople who’ve tackled these projects, highlighting which tools you’ll actually need (and which you can rent affordably), where professional help becomes non-negotiable, and how to evaluate options based on your home’s specific layout, regional climate, and budget constraints. Whether you’re a seasoned contractor or a first-time homeowner, you’ll find actionable insights that translate directly into smarter climate control decisions.
What Is a Home Climate Control System?
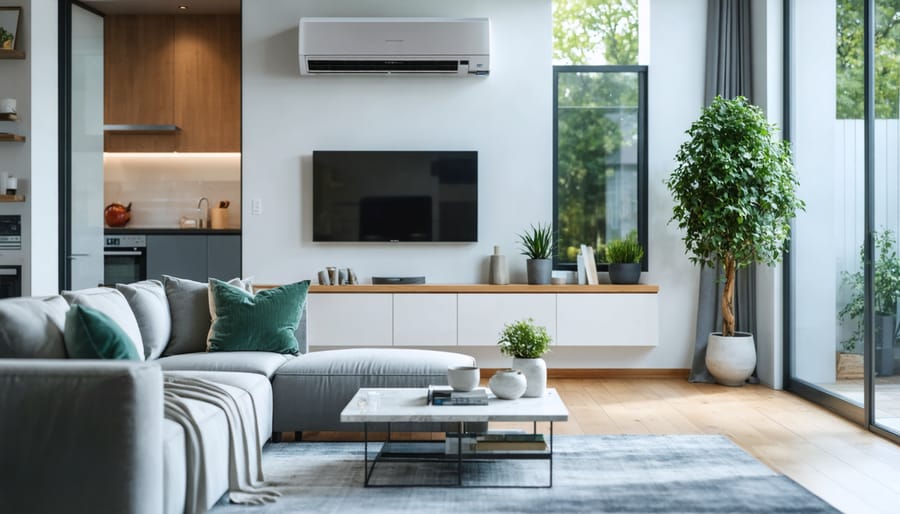
A home climate control system is an integrated network of equipment that regulates temperature, humidity, and air quality throughout your living space. Unlike basic heating or cooling units that simply blast hot or cold air, a proper climate control system works intelligently to maintain consistent comfort levels in every room while managing energy consumption.
The confusion often starts here: many homeowners think their standalone air conditioner or heater qualifies as a “system.” The difference lies in integration and control. A true climate control system coordinates multiple components working together—your heating unit (furnace, heat pump, or boiler), cooling equipment (air conditioner or evaporative cooler), thermostat or control panel, ductwork or distribution network, and often ventilation and filtration components.
Think of your thermostat as the brain. Modern programmable or smart thermostats monitor conditions and signal when heating or cooling is needed. The ductwork acts as the circulatory system, delivering conditioned air where it’s needed. Your heating and cooling units are the muscle, doing the actual temperature adjustment work.
A common misconception is that climate control systems are exclusively for large homes or require professional installation. While upgrading HVAC systems benefits from professional expertise, many maintenance tasks and even component installations fall within DIY capabilities—especially with proper tool rental access.
Another myth: these systems only control temperature. Modern climate control also manages humidity levels, filters airborne particles, and ensures proper ventilation. This comprehensive approach explains why proper systems deliver superior comfort compared to standalone units, even when both reach the same temperature reading on your thermometer.
Types of Home Climate Control Systems
Central HVAC Systems
Central HVAC systems distribute heated or cooled air throughout your home via a network of ducts. A furnace or heat pump handles heating, while an air conditioning unit manages cooling—both connected to a central thermostat for unified control. Air circulates through supply ducts to individual rooms and returns through separate ducts for reconditioning.
**Best Use Cases:** Ideal for whole-home comfort in medium to large houses, especially during new construction or major renovations when ductwork installation is most feasible. Perfect for climates with extreme seasonal temperature swings requiring both heating and cooling.
**Pros:** Consistent temperature control across all rooms, improved air quality with filtration options, increased home value, and quiet operation since equipment stays in basements or utility areas.
**Cons:** Higher upfront installation costs ($5,000-$12,000+), ongoing maintenance requirements, potential energy loss through ductwork, and difficult retrofitting in homes without existing ducts.
**Tool Requirements:** Professional installation typically requires sheet metal tools, duct crimpers, and refrigerant gauges. DIY maintenance involves basic tasks like filter changes (no special tools needed) and seasonal inspections. Consider renting a shop vacuum for duct cleaning or digital multimeters for troubleshooting thermostat issues. Always consult local codes—refrigerant work requires certification.
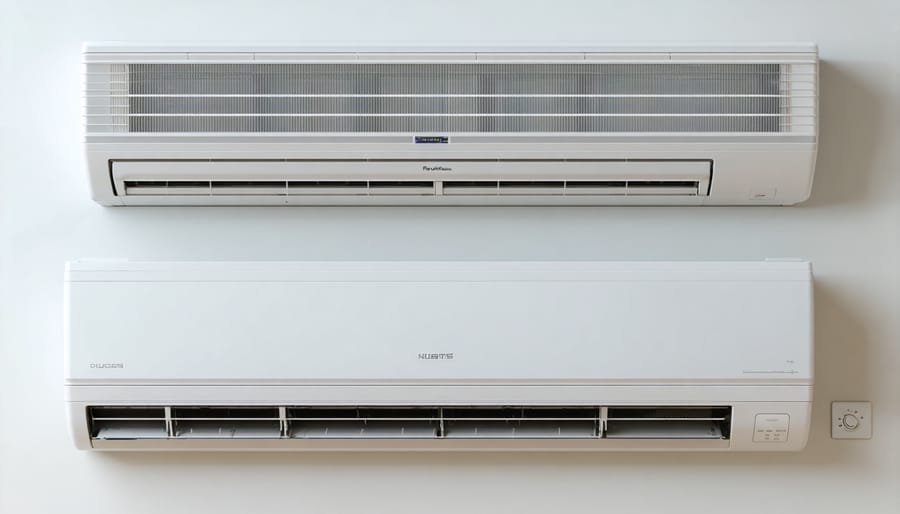
Ductless Mini-Split Systems
Ductless mini-split systems offer a flexible alternative to traditional HVAC, particularly suited for older homes without existing ductwork, room additions, or spaces where running ducts isn’t practical. Unlike portable air conditioning units, mini-splits provide permanent heating and cooling through an outdoor compressor connected to one or more indoor air handlers via refrigerant lines.
These systems operate by transferring heat rather than generating it, making them highly energy-efficient. The outdoor unit compresses refrigerant, which travels through small conduit lines to indoor units mounted on walls or ceilings. Each indoor unit can be controlled independently, allowing customized temperature zones throughout your home.
Mini-splits are notably DIY-friendly compared to central systems, though proper installation requires specific tools and skills. You’ll need a core drill for creating the conduit hole (typically 3-4 inches), a vacuum pump to remove air and moisture from refrigerant lines, manifold gauges for pressure testing, and torque wrenches for securing connections. A stud finder, level, and mounting hardware round out the essentials.
Many homeowners successfully tackle the mounting and basic setup but hire professionals for refrigerant charging—a task requiring certification. Tool rental centres typically stock the specialized equipment needed, making professional-quality installation more accessible without significant upfront investment.
Heat Pumps
Heat pumps offer a dual-purpose solution for home climate control, providing both heating and cooling through a single system. Unlike traditional furnaces that generate heat, heat pumps transfer thermal energy from one place to another—extracting warmth from outdoor air (even in cold weather) and moving it indoors during winter, then reversing the process in summer.
The energy efficiency advantage is significant: heat pumps can deliver three times more heating or cooling energy than the electrical energy they consume. This translates to lower utility bills, with many homeowners reporting 30-50% savings compared to conventional systems. Modern cold-climate models now perform efficiently even in temperatures below freezing, expanding their geographic suitability beyond traditionally mild regions.
Installation requires careful planning and specialized equipment. Essential tools include a vacuum pump for evacuating refrigerant lines, manifold gauges for pressure testing, torque wrenches for secure connections, and concrete core drilling equipment for line sets passing through walls. Most DIYers handle the indoor unit mounting and electrical rough-in, but refrigerant handling legally requires EPA certification—consider partnering with a licensed technician for this critical step.
Community reviews consistently highlight the importance of proper sizing calculations and professional line set installation to maximize efficiency and system longevity.
Radiant Heating Systems
Radiant heating systems deliver warmth through floors or ceilings using heated water tubes or electric cables embedded beneath surfaces. Unlike forced-air systems, radiant heat warms objects and people directly, creating consistent temperatures without noisy ductwork or blowing air that stirs up dust.
Consider radiant heating when renovating existing spaces, building new construction, or dealing with rooms where traditional heating falls short. It’s particularly effective in bathrooms, basements, and open-concept living areas. Homeowners with allergies appreciate the lack of airborne particles, while those seeking energy efficiency value the lower operating temperatures needed for comfort.
Installation complexity varies significantly. Electric mat systems offer simpler DIY-friendly options for smaller areas, while hydronic (water-based) systems require professional expertise due to plumbing and boiler integration. You’ll need specialized tools including concrete saws, manifold wrenches, tubing cutters, and thermal imaging cameras to verify proper heat distribution.
Community reviews consistently highlight the importance of proper subfloor preparation and insulation—cutting corners here dramatically reduces system efficiency. Professional installers recommend renting laser levels and concrete grinders for surface preparation rather than purchasing these specialized tools outright.
Smart Climate Control Systems
Smart thermostats like Nest and Ecobee represent the latest evolution in climate control, learning your preferences while cutting energy costs by up to 23%. These systems integrate with existing HVAC equipment and connect via Wi-Fi for smartphone control. Most DIYers can handle installation in under two hours with basic tools: a screwdriver, wire stripper, and voltage tester for safety. Before purchasing, verify compatibility with your current system—check whether you have a C-wire (common wire) for power, as older homes may lack this connection. Community reviews consistently highlight that proper wire identification prevents installation headaches. If your system lacks a C-wire, you’ll need an adapter kit or may want to consult a professional for rewiring.
Choosing the Right System for Your Home
Selecting the right climate control system starts with understanding your home’s unique needs. Think of this process as matching a solution to your specific situation rather than simply choosing the most popular or expensive option.
**Assess Your Home’s Physical Characteristics**
Begin by measuring your home’s total square footage, including ceiling heights. Systems are rated by the area they can effectively heat or cool, typically measured in BTUs (British Thermal Units) for heating and tons for cooling. A general rule: you’ll need approximately 20 BTUs per square foot, but this varies significantly based on other factors.
Next, evaluate your insulation quality. Check your attic, walls, and crawl spaces. Poor insulation means your system works harder and costs more to operate. Many homeowners discover that upgrading insulation before installing a new system actually allows them to choose a smaller, more affordable unit.
**Consider Your Climate Zone**
Australia’s diverse climate zones dramatically impact system selection. Homes in tropical Queensland have vastly different needs than properties in temperate Tasmania. Your local climate determines whether you need heating-focused, cooling-focused, or balanced systems. Research your area’s temperature extremes and humidity levels—these directly influence system capacity requirements.
**Budget Realistically**
Factor in both upfront costs and ongoing expenses. While central systems offer whole-home comfort, they require significant installation investment. Split systems provide zone-specific control at lower initial costs. Remember that cheaper systems often mean higher energy bills. Calculate your total cost of ownership over five to ten years, including maintenance and energy consumption.
For those considering AC installation considerations, particularly in new homes, understanding these factors early prevents costly mistakes.
**Energy Efficiency Goals**
Check energy star ratings—higher numbers mean lower running costs. Modern inverter technology costs more initially but can reduce energy consumption by 30-50% compared to older systems. If sustainability matters to you, consider systems with lower environmental impact refrigerants.
**Get Community Input**
Before finalizing your decision, consult online reviews and community forums. Real user experiences often reveal long-term performance issues or unexpected benefits that manufacturer specifications don’t capture. Local tradespeople can also provide valuable insights about which systems perform best in your specific area and which ones they commonly service.

Essential Tools and Equipment for Installation and Maintenance
Basic Hand Tools
Every climate control installation or repair job starts with the right hand tools. **Adjustable wrenches** (ranging from 6 to 12 inches) are essential for tightening and loosening pipe fittings, mounting brackets, and securing outdoor unit components. A quality **screwdriver set**—including both flathead and Phillips head in various sizes—handles everything from thermostat installations to access panel removal.
A **torpedo level** ensures your wall-mounted units and thermostats sit perfectly straight, preventing drainage issues and maintaining professional appearance. Don’t overlook your **measuring tape** (25-foot minimum), which is crucial for spacing requirements, ductwork measurements, and ensuring proper clearances around equipment as specified by manufacturer guidelines.
According to community feedback, investing in magnetic-tip screwdrivers saves considerable frustration when working in tight spaces behind units. Many DIYers report that a **hex key set** also proves invaluable for modern system assemblies. These basic tools form your foundation—master them before moving to specialized equipment.
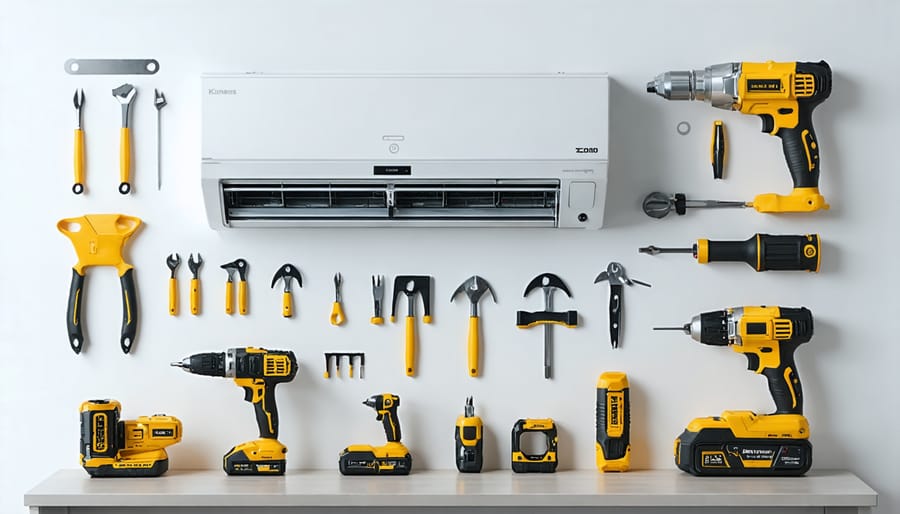
Power Tools and Heavy Equipment
Installing climate control systems requires specialized power equipment that many DIYers don’t keep on hand. Heavy-duty hammer drills are essential for creating mounting holes through concrete or masonry, while reciprocating saws help cut through studs and joists for ductwork installation. You’ll also need a quality vacuum pump—a critical tool for evacuating refrigerant lines when working with AC units or heat pumps.
For ductwork modifications, sheet metal shears and crimping tools become necessary, though these can be awkward to use without practice. Hole saws in various diameters make clean penetrations for refrigerant lines through exterior walls.
Here’s the reality: purchasing all this equipment for a one-time project rarely makes financial sense. A professional-grade vacuum pump alone can cost $300-500, and quality hammer drills run $150-300. That’s why rental options shine for these installations. Most tool rental centers offer daily or weekly rates that let you access commercial-grade equipment for a fraction of the purchase price.
Community members consistently report that renting specialized tools not only saves money but also ensures you’re working with properly maintained, calibrated equipment—especially important for vacuum pumps and torque wrenches where precision matters.
Diagnostic and Testing Equipment
Accurate diagnostics are essential for climate control work, but specialized testing equipment often carries hefty price tags. A **multimeter** measures electrical continuity, voltage, and amperage—critical for troubleshooting thermostat and compressor issues. **Manifold gauges** connect to refrigerant lines to measure system pressures, helping identify charging problems or blockages. **Electronic leak detectors** pinpoint refrigerant leaks that visual inspections might miss.
For one-time repairs or seasonal maintenance, renting these tools makes financial sense. A quality manifold gauge set costs $150-$400, while rental rates typically run $15-$30 daily. Similarly, electronic leak detectors retail for $100-$500 but rent for around $20-$40 per day. This approach lets you access professional-grade equipment without the storage hassles or concerns about infrequent tools deteriorating between uses. Many DIYers in our community recommend renting diagnostic equipment first—if you find yourself needing it regularly, then consider purchasing.
Safety Equipment
Working with climate control systems demands proper protection—this isn’t optional. Heavy-duty work gloves shield your hands from sharp metal edges and refrigerant exposure, while safety goggles protect against debris and chemical splashes. When handling refrigerants or insulation materials, a quality respirator prevents inhaling harmful particles and fumes. For rooftop installations, fall protection harnesses are life-savers, literally. According to community reviews on our platform, many DIYers initially skip safety gear to save money, only to regret it after minor injuries delay their projects. Professional tradespeople consistently emphasize that renting proper safety equipment costs far less than medical bills or project setbacks. Remember: protecting yourself enables you to complete the job safely and efficiently.
DIY vs. Professional Installation: What You Need to Know
Understanding your limits as a DIYer is crucial when tackling climate control installations. While some tasks are perfectly manageable with the right tools and preparation, others demand professional expertise—and knowing the difference can save you thousands in repairs and ensure your family’s safety.
**What Homeowners Can Realistically Handle**
Basic thermostat replacements and smart thermostat installations typically fall within most DIYers’ skillsets, requiring only basic electrical knowledge and common hand tools. Air filter changes, vent cleaning, and basic maintenance checks are also straightforward weekend projects. According to community feedback from experienced DIYers, installing window air conditioning units and portable climate systems presents minimal risk when following manufacturer guidelines carefully.
**When to Call the Professionals**
Central HVAC installations, refrigerant handling, and ductwork modifications require professional certification for good reason. Working with refrigerants demands EPA certification—it’s not just recommended, it’s legally required. Gas furnace installations involve serious safety hazards including carbon monoxide risks and require licensed professionals in virtually all jurisdictions. Similarly, electrical work beyond basic thermostat wiring often exceeds code-compliant DIY territory.
**Permit Requirements Matter**
Many homeowners discover too late that major climate control installations require building permits. Central air conditioning, furnace replacements, and significant ductwork changes typically need inspection approval. Skipping permits can void equipment warranties, complicate insurance claims, and create headaches during home sales. Check your local building department’s requirements before starting any major project.
**Warranty Considerations**
Most manufacturers require professional installation to maintain equipment warranties. Review warranty terms carefully—DIY installation might save money upfront but could cost significantly more if equipment fails prematurely. Many user reviews emphasize this hard-learned lesson.
**Skills Assessment Checklist**
Before deciding, honestly evaluate your experience with electrical systems, comfort working at heights, access to proper tools, and ability to troubleshoot problems. Community members consistently recommend starting small: master basic maintenance before attempting installations, and never compromise on safety equipment or proper tool selection.
Common Maintenance Tasks You Can Handle Yourself
Regular maintenance keeps your climate control system running efficiently and prevents costly breakdowns. Here are essential tasks you can confidently tackle yourself, with most requiring just basic tools and a Saturday morning.
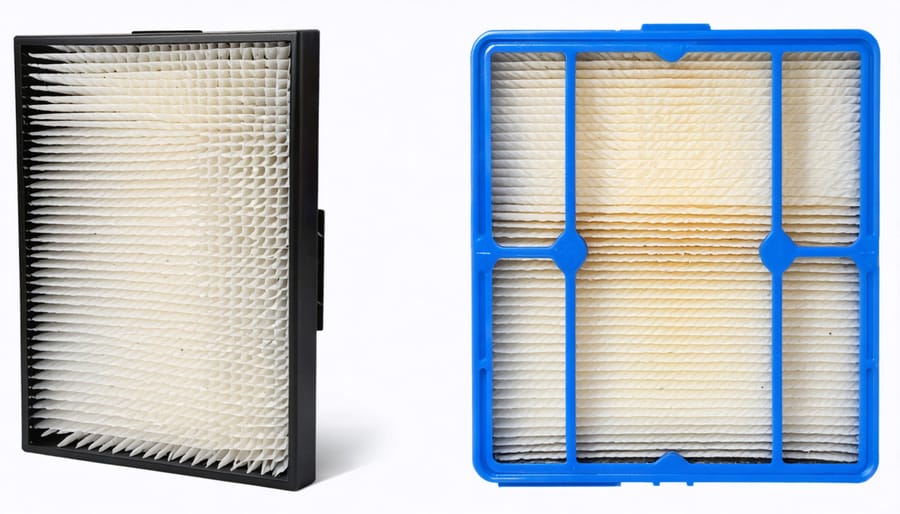
**Changing Air Filters (Monthly to Quarterly)**
This is the single most important maintenance task. Locate your filter—typically behind a return air vent or inside the air handler unit. Note the size printed on the frame edge, turn off your system, then slide out the old filter. Check the arrows on the new filter’s frame; they indicate airflow direction toward the unit. Dirty filters force your system to work harder, increasing energy bills by up to 15%.
**Cleaning Condenser Coils (Twice Yearly)**
Your outdoor unit’s coils collect dirt, grass clippings, and debris that reduce efficiency. First, shut off power at the disconnect box near the unit. Remove any large debris by hand, then gently spray the coils from inside-out using a garden hose—never a pressure washer, as high pressure can bend the delicate fins. For stubborn buildup, apply coil cleaner (available at hardware stores) following package directions. This simple task can improve efficiency by 5-10%.
**Thermostat Calibration Check**
Place an accurate thermometer next to your thermostat and compare readings after 15 minutes. If they differ by more than a degree, your thermostat may need recalibration or replacement. Many modern programmable thermostats include calibration settings in their menus. Ensuring accuracy prevents your system from overcooling or overheating.
**Seasonal System Inspections**
Before peak summer and winter, inspect visible ductwork for gaps or disconnections, check that vents aren’t blocked by furniture, and ensure your outdoor unit sits level on its pad. Clear vegetation to maintain two feet of clearance around outdoor units. Listen for unusual noises when the system runs—grinding, squealing, or banging often signals problems requiring attention.
While these tasks are DIY-friendly, comprehensive aircon servicing by professionals should happen annually to address refrigerant levels, electrical connections, and internal components.
**Community Tip:** Many DIYers recommend photographing your system’s wiring and components before any maintenance. These reference photos prove invaluable if something gets disconnected accidentally.
Cost Considerations and Money-Saving Tips
Understanding the financial investment required for climate control systems helps you make informed decisions that balance upfront costs with long-term savings. Here’s what to expect and how to maximize your budget.
**System and Installation Costs**
Central air conditioning systems typically range from $3,500 to $7,500 installed, while ducted heating runs between $4,000 and $10,000 depending on home size. Split systems offer more affordable entry points at $800-$3,500 per unit installed. Evaporative coolers provide budget-friendly cooling from $500-$2,500 installed. Professional installation generally accounts for 30-50% of total project costs.
**Tool Investment Decisions**
For one-time installations, renting specialized tools makes financial sense. Professional-grade vacuum pumps cost $500-$1,200 to purchase but rent for $30-$50 daily. Refrigerant recovery machines rent for around $40-$60 daily versus $800+ to buy. Manifold gauge sets, torque wrenches, and pipe benders are similarly cost-effective as rentals. Purchase basic tools you’ll reuse for maintenance—multimeters, inspection mirrors, and screwdriver sets.
**Energy Savings Projections**
Upgrading to energy-efficient systems can reduce cooling and heating costs by 20-40% annually. A household spending $1,800 yearly on climate control could save $360-$720 with modern, properly sized equipment. Regular system tune-ups maintain these efficiencies, preventing the 5% annual degradation common in neglected systems.
**Available Incentives**
Government rebates significantly offset installation costs. The Victorian Energy Upgrades program offers rebates up to $1,000 for efficient air conditioners and heaters. Federal Small-scale Technology Certificates provide additional solar incentives. Many electricity retailers offer interest-free payment plans for efficient systems. Check your state’s energy department website for current programs—incentives change regularly and can reduce your investment by 15-30%.
Community reviews suggest allocating 10-15% of system costs as an annual maintenance budget to protect your investment and maintain warranty coverage.
Real User Experiences and Community Insights
According to feedback from our community, the most common mistake DIYers make with climate control installations is underestimating the importance of proper sizing. “I thought bigger was always better,” shared Mike T., a homeowner from Colorado. “Turns out an oversized unit cycles on and off constantly, wasting energy and wearing out components faster.” Professional HVAC technicians in our network consistently recommend having a Manual J load calculation performed before selecting any system—a step that prevents costly do-overs.
When it comes to tools, community members emphasize that quality manifold gauges and vacuum pumps make the difference between frustration and success. Several contractors noted that renting professional-grade refrigerant recovery equipment saved them hundreds of dollars compared to purchasing entry-level models that struggled with larger systems. “The rental vacuum pump pulled down to proper micron levels in half the time my cheap one did,” reported installer James P.
Ductwork modifications emerged as an unexpected challenge across multiple project reports. Users consistently advised budgeting extra time for sheet metal work and emphasized the value of renting quality tin snips, crimpers, and duct stretchers. “I learned the hard way that hand-cutting ductwork with cheap tools results in jagged edges and poor seals,” noted DIYer Sarah K.
The consensus on DIY feasibility? Simple thermostat upgrades and filter maintenance are weekend-friendly projects, but refrigerant work legally requires certification. Many community members recommend the hybrid approach: handle the preparatory work yourself—mounting brackets, running electrical conduit, and preparing the installation site—then hire a licensed professional for the technical connections and startup.
Selecting and installing a home climate control system represents a significant investment in your comfort and energy efficiency, but success depends on honest preparation and the right resources. Before diving into any installation project, take time to realistically assess your skill level. These systems involve electrical work, refrigerant handling, and precise ductwork—tasks that require both technical knowledge and specialized tools. There’s no shame in recognizing when a project exceeds your current abilities; even experienced DIYers often partner with licensed HVAC professionals for critical components like electrical connections and refrigerant charging.
The tools required for climate control work aren’t items most homeowners need regularly, making rental an economical choice. From manifold gauge sets and vacuum pumps to torque wrenches and duct crimpers, accessing professional-grade equipment without the purchase price can make ambitious projects financially viable. Research tool rental options in your area and compare availability before committing to a timeline.
Safety cannot be overstated when working with climate control systems. Always disconnect power at the breaker, use proper personal protective equipment, and follow manufacturer guidelines precisely. Refrigerant handling requires EPA certification for legal compliance, and improper electrical work poses fire and shock hazards.
Connect with others who’ve tackled similar projects through community forums and review platforms. Real experiences from fellow DIYers provide invaluable insights about common pitfalls, tool performance, and realistic timelines. These community-driven resources help you make informed decisions about whether to proceed independently or hire professional help.
Take the first step by exploring available tools and reading installation experiences shared by your peers—preparation today prevents costly mistakes tomorrow.
Related Posts

Post a Comment