
Measure your kitchen’s three walls carefully before committing to a U-shaped layout—you’ll need at least 10 feet of width to avoid a cramped, claustrophobic workspace where multiple people can’t move comfortably. This configuration wraps cabinetry around three continuous walls, creating maximum storage and counter space while keeping everything within arm’s reach of a central work triangle.
Map out your corner solutions first when planning cabinet placement. The two 90-degree corners in a U-shape present your biggest challenge and opportunity—lazy Susans, pull-out shelves, or magic corner units prevent that awkward dead space where items disappear forever. Professional installers consistently report that homeowners who skimp on quality corner hardware regret it within months.
Calculate your walking corridor width next. The National Kitchen and Bath Association recommends maintaining 4-5 feet between opposing cabinet runs. Anything less creates bottlenecks; anything more breaks the efficiency that makes U-shaped kitchens brilliant for serious cooking. This measurement dictates whether you’re choosing the best kitchen cabinets in standard depths or need custom sizing.
Reserve one entire wall for your primary work zone—typically the wall opposite the kitchen entrance—installing your sink, stove, or primary prep area here with uninterrupted counter space. The two perpendicular walls then become specialized stations for specific tasks, storage, or appliances, creating a workflow that reduces unnecessary steps by up to 70% compared to galley layouts.
What Makes a Kitchen Layout U-Shaped?
The Basic Configuration
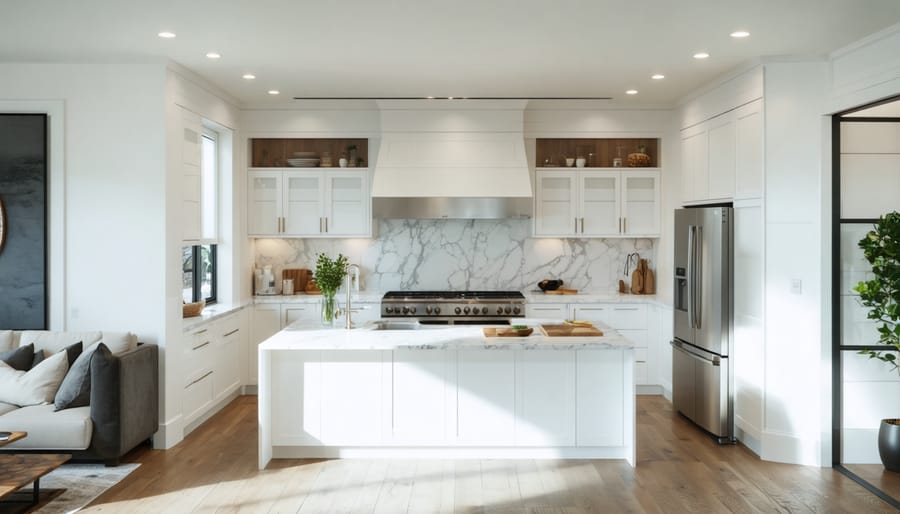
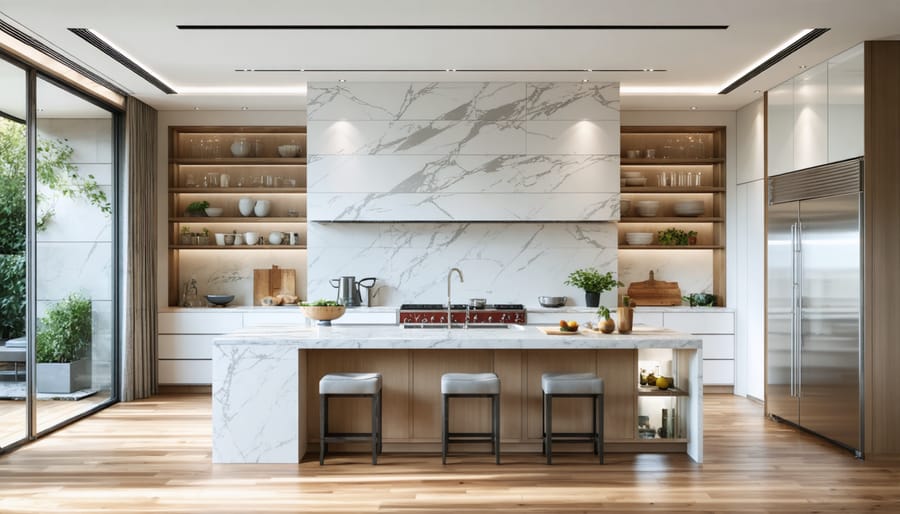
A U-shaped kitchen features cabinets along three adjacent walls, creating a horseshoe configuration that wraps around the cook. This layout typically includes two perpendicular walls connected by a third wall or peninsula, with the open end serving as the main entry point.
The most common setup positions the sink on one wall, the cooktop on another, and the refrigerator on the third, forming an efficient work triangle. In smaller spaces, a peninsula—a partial wall extending from one side—can replace the full third wall while maintaining the U-shape’s functionality.
**Minimum Space Requirements**
To function comfortably, U-shaped kitchens need at least 8 feet of width between opposing cabinet runs. This provides adequate clearance for opening doors, drawers, and appliances simultaneously. Kitchens narrower than 6 feet feel cramped, while those exceeding 12 feet create excessive walking distances between work zones.
Each wall section typically requires 3-4 feet of cabinet space minimum, though 5-8 feet per wall works best for storage and counter workspace. Homeowners consistently report that 9-10 feet between cabinet faces offers the sweet spot—roomy enough for multiple cooks without wasting steps.
U-Shape Variations You’ll Actually Encounter
Not all U-shaped kitchens look identical—the layout adapts based on your available space and how you’ll use it.
**Compact U-Shapes** work brilliantly in smaller kitchens, typically measuring 8×8 feet or less. These tight configurations maximize every inch but require careful planning to avoid the “too many cooks” problem. You’ll want to keep the distances between opposing cabinets at least 4 feet to maintain comfortable workflow. Many DIYers find success using narrower base cabinets (15-18 inches deep instead of the standard 24 inches) on one wall to prevent the space from feeling cramped.
**Open U-Shapes** feature one side partially open, often leading to a dining area or living space. This variation creates a peninsula rather than a closed loop, making the kitchen feel more connected to adjacent rooms. Community members frequently praise this setup for its social aspect—you can chat with family while cooking without feeling isolated.
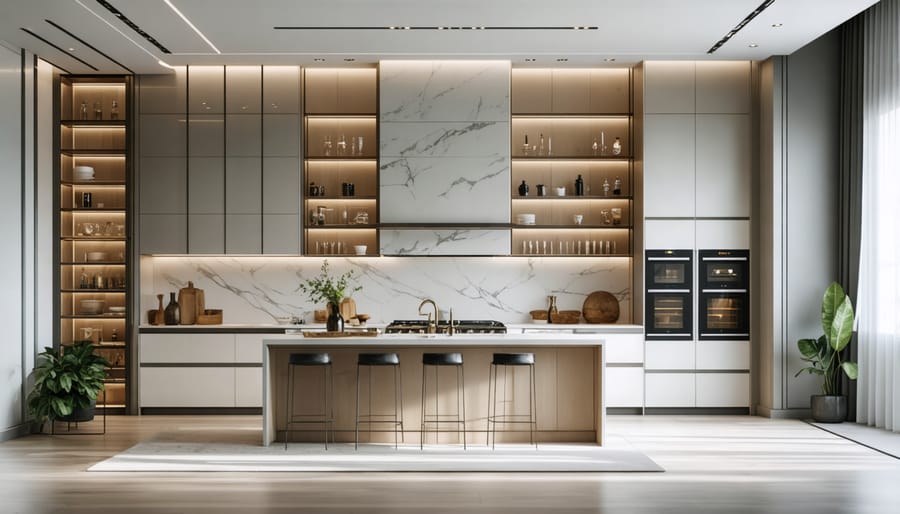
**U-Shapes with Islands** represent the luxury option when you’ve got square footage to spare. The island sits within the U, typically leaving 42-48 inches of clearance on all sides. According to user feedback, this arrangement works exceptionally well for families where multiple people cook simultaneously, though it requires at least 150 square feet of kitchen space to avoid feeling cluttered.
The Real Advantages of U-Shaped Cabinet Layouts
Maximum Storage and Counter Space
The U-shaped layout delivers unmatched storage capacity by utilizing three full walls of cabinetry—essentially tripling your organizational options compared to single-wall kitchens. This configuration provides continuous counter space interrupted only by appliances, giving you multiple work zones for meal prep, cooking, and cleanup simultaneously.
For families managing bulk groceries or serious home cooks with extensive equipment collections, this layout solves the “where does everything go?” problem. You’ll have dedicated space for small appliances, specialized cookware, pantry items, and serving pieces without the cramped feeling of stacking everything into limited cabinets.
The corner sections, while sometimes requiring specialized solutions like lazy Susans or pull-out organizers, actually add valuable deep storage for items you don’t access daily. Community feedback consistently highlights how the abundance of lower cabinets reduces the need for step stools—a practical advantage when you’re juggling hot pans or armfuls of groceries.
The extended counter runs also mean you can designate specific zones: a baking station with flour and mixers, a coffee bar, or a homework spot that doesn’t interfere with dinner preparation. This flexibility makes the U-shape particularly valuable for households where multiple people need kitchen access simultaneously.
The Work Triangle Actually Works Here
The kitchen work triangle is a simple design principle: your three most-used work zones—the sink, stove, and refrigerator—should form a triangle with each leg measuring between 4 and 9 feet. This arrangement minimizes wasted steps while cooking and prevents crowded traffic flow.
U-shaped layouts naturally excel at creating this triangle because all three zones sit along adjacent walls within easy reach. Unlike galley or L-shaped kitchens where you might stretch across long distances, a U-shape keeps everything compact yet spacious. You can pivot from washing vegetables at the sink to chopping on the counter to cooking at the stove without taking more than a few steps.
The real advantage comes from having continuous counter space linking all three points. There’s always a landing spot for hot pots, grocery bags, or prep bowls as you move through cooking tasks. Many DIYers and professional kitchen fitters report this layout reduces the back-and-forth that makes cooking feel exhausting.
One caution from community feedback: avoid making the U too tight. If the distance between parallel cabinets drops below 4 feet, multiple cooks will bump into each other, defeating the triangle’s efficiency.
Privacy and Traffic Flow Benefits
The U-shaped layout creates a natural work zone that functions as a semi-enclosed space, effectively separating cooking activities from household foot traffic. This arrangement proves particularly valuable in open-plan homes where the kitchen flows into living or dining areas. The three-sided design establishes clear boundaries—family members and guests instinctively walk around the kitchen rather than cutting through your workspace.
For households with children or pets, this traffic control becomes a significant safety advantage. When you’re moving hot pans or sharp knives, the last thing you need is someone darting through your path. The U-shape creates a designated “chef’s zone” where you can work without constantly watching your back.
Many homeowners report that this layout also provides psychological privacy. Even without doors or walls, the surrounding cabinetry creates a defined area that feels somewhat separate from communal spaces. You’re still connected to conversations and activities in adjacent rooms, but there’s a subtle buffer that keeps the working kitchen organised and contained.
This design works especially well when the open end of the U faces away from main walkways, directing traffic naturally around the perimeter rather than through the centre of your workspace.
When U-Shaped Layouts Create More Problems Than They Solve
Space Requirements You Can’t Ignore
U-shaped kitchens demand respect when it comes to space. The absolute minimum dimension you’ll want is 10×10 feet, though 12×12 feet provides much more comfortable working conditions. In our community reviews, homeowners consistently report that anything smaller creates what one DIYer called “the galley gauntlet”—constantly shuffling sideways past family members.
The critical measurement is the distance between opposing cabinet runs. You need at least 4 feet of clearance, ideally 5 feet. Less than this, and you’ll struggle when the dishwasher or oven door is open. One professional contractor noted that clients with 3-foot clearances quickly regretted their layouts, describing a claustrophobic feeling during meal prep.
For kitchens under 10×10 feet, the U-shape simply swallows too much floor space. You’re better off with an L-shaped or galley layout. Multiple users confirmed this through trial and error—don’t repeat their expensive mistake. Remember that traffic flow matters too; if your kitchen serves as a hallway to other rooms, the U-shape blocks natural pathways and creates bottlenecks.
The Corner Cabinet Headache
Corner cabinets in U-shaped kitchens present a frustrating challenge that catches many homeowners off-guard. These deep, angled spaces where two cabinet runs meet often become black holes for forgotten cookware and expired groceries. The issue isn’t just inconvenience—it’s wasted money on cabinetry you can barely use.
Standard corner base cabinets can waste up to 50% of their interior space simply because you can’t reach the back without crawling inside. Items pushed to the rear become essentially irretrievable without unpacking everything in front.
Specialized solutions exist, but they significantly increase your budget. Lazy Susan systems typically add £150-£300 per corner, while pull-out carousel units or “magic corner” mechanisms can cost £400-£600 each. According to community feedback from renovation projects, these upgrades often represent 10-15% of total cabinet costs.
Before committing to a U-shape, honestly assess whether you’ll use these premium organizers or accept reduced accessibility. Some homeowners report that even with lazy Susans, corners remain their least-favorite storage spots. If budget is tight, consider whether an L-shaped layout might eliminate one problematic corner entirely while maintaining adequate storage and workspace.
Social Isolation Issues
One common complaint from U-shaped kitchen users is the “facing the wall” syndrome. When you’re prepping meals or washing up, you’re typically looking at cabinetry rather than interacting with family members or guests in adjacent living spaces. For households where the kitchen serves as a social hub—think families with young children who need supervision, or entertainers who prefer to chat while cooking—this layout can feel isolating.
However, this concern doesn’t apply universally. Many cooks actually prefer the focused, distraction-free environment a U-shape provides. If you’re someone who concentrates better without interruptions, or if your household typically gathers after meal preparation rather than during, the enclosed feel becomes an advantage rather than a drawback. The impact also diminishes in open-plan homes where the kitchen isn’t completely walled off, or when one leg of the “U” features a peninsula with bar seating that naturally creates a conversation zone while maintaining the efficient workspace.
Essential Planning Steps Before Installing U-Shaped Cabinets
Measuring Your Space Accurately
Accurate measurements are the foundation of successful U-shaped kitchen cabinet installation. Before ordering cabinets, you’ll need three critical dimensions: the length of each wall section, floor-to-ceiling height, and the distance from walls to any protruding obstacles like radiators or pipes.
Start by measuring each wall at multiple points—tops, middles, and bottoms—since walls are rarely perfectly straight. Record the smallest measurement for each wall to ensure cabinets fit properly. Don’t forget to measure door swing clearances; you’ll need at least 90cm of clearance for cabinet doors to open fully without hitting appliances or opposite cabinets.
For appliances, measure not just width but also depth and required ventilation space. Refrigerators typically need 5-10cm clearance at the back, while dishwashers require specific height and depth allowances. Mark electrical outlets, plumbing connections, and gas lines on your floor plan—relocating these adds significant cost to renovation planning.
Common measurement mistakes include forgetting to account for skirting boards, assuming square corners (use a carpenter’s square to check), and measuring from uneven floors.
For precision, consider tool rental options like laser measures, which eliminate human error and make solo measuring easier. A quality level is essential too—finding the right tools upfront prevents costly cabinet adjustments later. Double-check every measurement before ordering; cabinet manufacturers typically don’t accept returns for measurement errors.
Designing the Work Triangle
The work triangle—connecting your sink, stove, and refrigerator—forms the backbone of kitchen efficiency. In a U-shaped layout, you’ll want to position these three elements on different walls to create smooth workflow without excessive walking.
**Distance Guidelines That Actually Work:**
– Keep each leg of the triangle between 4 and 9 feet
– Aim for a total triangle perimeter between 13 and 26 feet
– Maintain at least 4 feet of clearance between opposite counters
Most homeowners find success placing the sink at the base of the U (often under a window), with the stove on one side wall and the refrigerator on the other. This prevents traffic crossing your cooking zone and keeps the fridge accessible to family members without disrupting meal prep.
**Real-World Tip from the Community:** One contractor shared that positioning the refrigerator nearest the kitchen entrance reduces congestion during busy cooking times, as household members can grab items without entering your workspace.
Avoid placing all three work zones on a single wall—this defeats the efficiency advantage of the U-shape. Similarly, don’t stretch distances beyond 9 feet, as you’ll waste energy constantly walking back and forth during meal preparation.
Planning for Utilities and Services
Getting your utilities mapped out before installing cabinets is crucial—relocating plumbing or electrical after installation can cost three to four times more than proper upfront planning.
In a U-shaped layout, your sink typically sits on one leg of the U, requiring both hot and cold water supply lines plus drainage. Position these connections where they’re accessible through cabinet backs rather than underneath floors wherever possible. Many DIYers in our community recommend photographing or sketching plumbing locations before cabinets go in—this simple step prevents accidental drilling through pipes later.
Electrical outlets need strategic placement at counter height on all three walls, spaced roughly every 1.2 metres to meet code requirements. Plan dedicated circuits for major appliances like dishwashers and refrigerators. If you’re adding under-cabinet lighting, run those wires before cabinets are mounted.
Gas lines for ranges or cooktops require professional installation but need early planning. Ensure your chosen appliance location allows proper ventilation—especially important in enclosed U-shaped kitchens where airflow matters.
Document everything with photos and measurements. Several community members shared stories of rushing this step only to discover blocked access panels or misaligned connections that required partial cabinet removal. Taking an extra day for utility planning saves weeks of frustration later.
Selecting Cabinets for U-Shaped Layouts
Base and Wall Cabinet Proportions
Standard base cabinets typically measure 24 inches deep and 34.5 inches tall, while wall cabinets run 12 inches deep with heights ranging from 30 to 42 inches. However, U-shaped kitchens often benefit from custom proportions, especially when dealing with tight corner areas or unusually shaped rooms.
The key challenge is balancing generous storage with adequate walkway space. Aim for a minimum of 4 feet between opposing cabinet runs—anything less creates that uncomfortable ‘boxed in’ sensation. If your space is tighter, consider reducing base cabinet depth to 21 inches on one wall, sacrificing some storage for breathing room.
According to community feedback from recent renovation projects, homeowners who prioritized walkway width over maximum storage reported significantly higher satisfaction. One DIY enthusiast noted that reducing wall cabinet depth from 12 to 9 inches on the shorter leg of their U-shape made the kitchen feel substantially more open without losing much practical storage.
For smaller U-shaped kitchens under 100 square feet, mixing standard and custom proportions—like full-depth cabinets on the longest wall and shallower units elsewhere—prevents the cramped feeling while maintaining functionality.
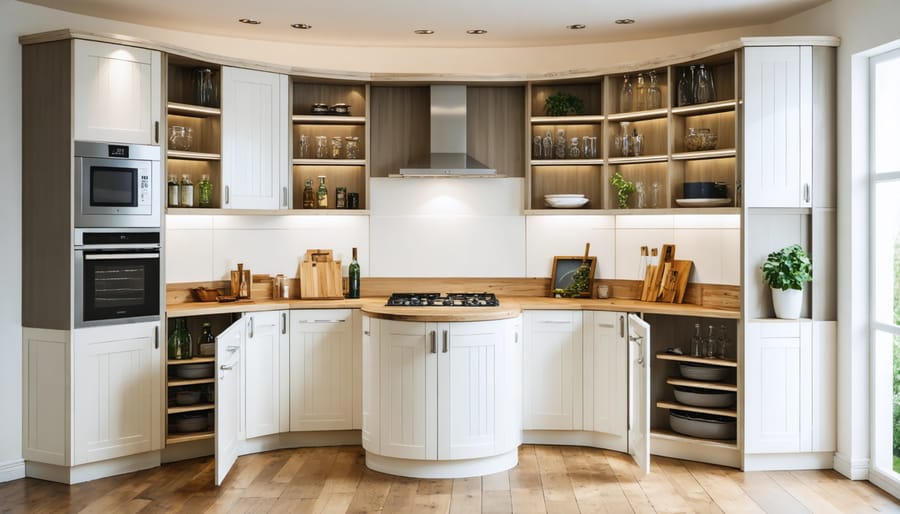
Corner Cabinet Solutions That Actually Work
Corner cabinets are the make-or-break feature of U-shaped kitchens, and homeowners have strong opinions about what actually works in daily use.
**Lazy Susans** remain the most popular choice according to community feedback. These rotating shelves make everything visible with a simple spin, though users warn that items can fall off during rotation if you’re not careful. They work best for storing bottles, canned goods, and lightweight items. The main complaint? That awkward dead space behind the spinning mechanism that’s impossible to access.
**Magic corner systems** earn high marks from professional installers and homeowners alike. These ingenious pull-out mechanisms bring back corner items to you, maximizing every centimetre of space. The downside is cost—they’re significantly more expensive than lazy Susans—and some users report that heavily loaded baskets can strain the hardware over time.
**Diagonal cabinets** are the budget-friendly option that divides opinion. While they’re easy to install and maintain, you’ll lose considerable storage space to the angled design. DIYers appreciate their simplicity, but many wish they’d invested more upfront for better functionality.
**Pull-out drawer systems** receive rave reviews for accessibility, especially from users with mobility concerns. Everything remains visible and within reach. However, they require precise installation and won’t retrofit easily into existing cabinets without professional modifications.
The consensus from our community? If budget allows, magic corners deliver the best long-term satisfaction. For those watching costs, a quality lazy Susan beats a diagonal cabinet for storage efficiency.
Material and Finish Considerations
U-shaped kitchens present unique lighting challenges that affect how cabinet finishes appear throughout the day. With three walls of cabinetry, you’ll encounter varying natural and artificial light angles that can highlight imperfections or create dramatic contrasts.
**Matte finishes** work exceptionally well in U-layouts, as they minimize glare from multiple light sources and hide fingerprints better than glossy options—particularly important on the frequently-accessed middle section of the U. Glossy finishes can create visual interest but may show wear more prominently where light hits perpendicular surfaces differently.
For material selection, consider maintenance accessibility. The inner corners of U-shaped layouts can be awkward to reach, so choose materials that don’t require frequent detailed cleaning. Thermofoil and laminate cabinets offer easy wipe-down maintenance, while painted wood may need periodic touch-ups in high-traffic areas.
**Community tip from installer feedback**: Light-colored materials in satin or semi-gloss finishes provide the best balance—they reflect enough light to prevent the enclosed feel of U-kitchens while remaining forgiving of daily wear. Darker finishes can make compact U-layouts feel cramped unless you have excellent overhead lighting.
Test samples in all three sections of your planned U-shape before committing, as the same finish can look remarkably different on perpendicular walls.
Installation Challenges Specific to U-Shaped Layouts
Tackling Corner Installations
Corner cabinets present the biggest challenge in U-shaped kitchen installations, but proper sequencing makes the job manageable. Start by installing your corner units first—they’re the anchor points that determine alignment for the entire layout.
**Essential Tools You’ll Need:**
For corner cabinet installation, gather a laser level (available for hire if you don’t own one), power drill, cabinet jack or adjustable support stands, and clamps. Many DIY enthusiasts recommend renting a cabinet jack rather than purchasing—it’s invaluable for holding units in place while you secure them, but you’ll only use it occasionally.
**Step-by-Step Installation Sequence:**
Begin by marking your level line around the entire kitchen using your laser level. Install the corner base cabinet first, shimming as needed to ensure it’s perfectly level and plumb. This unit sets the standard for everything else.
Next, work outward from the corner along each wall, installing adjacent cabinets and securing them together before attaching to wall studs. For upper cabinets, use adjustable support stands or recruit a helper—trying to hold cabinets while drilling is asking for trouble.
**Community Insight:**
User feedback consistently highlights one mistake: rushing the corner installation. As one experienced renovator shared, “I spent an extra hour getting that corner cabinet perfect, and it saved me three hours of adjustments later.”
When installing lazy Susans or pull-out corner solutions, install the cabinet first, then add the hardware. Test the mechanism before proceeding—fixing issues later means dismantling adjacent cabinets.
Ensuring Level Cabinets Across Three Walls
U-shaped kitchens amplify leveling challenges because you’re working across three connecting walls—any error compounds visually and functionally. Unlike galley or L-shaped layouts, imperfections become immediately obvious where cabinets meet at corners.
Start by checking your floor with a long spirit level (4-6 feet works best) along all three walls. Mark high and low spots clearly. Uneven floors are the norm in older homes, and ignoring them creates doors that won’t close properly and countertop gaps.
Shimming is your solution. Use plastic or composite shims—they won’t compress over time like wood. Begin installation at the highest point of your floor, then shim other cabinets up to match. Place shims at mounting points and wherever cabinets touch the floor, ensuring weight distributes evenly.
**Pro tip from our community:** One contractor recommends installing the corner cabinets first after establishing your level baseline, as they anchor both adjoining runs. This prevents the frustration of having perfectly level cabinets on one wall that don’t align when you reach the corner.
Check walls for plumb too—out-of-plumb walls create gaps behind cabinets. Use a plumb bob or laser level, and plan for scribing filler strips if walls lean significantly. Taking time here prevents costly adjustments later.
When to Call a Professional
Most DIYers can handle measuring, planning layouts, and assembling flat-pack cabinets with proper DIY tool rentals. However, call professionals for plumbing and electrical relocations, complex corner cabinet installations requiring precision cutting, and ensuring structural walls can support heavy upper cabinets. Professional installers also have specialized jigs for perfectly aligned doors across multiple cabinet runs—critical in U-shaped layouts where misalignment becomes obvious. If your kitchen requires load-bearing wall modifications or gas line adjustments, licensed tradespeople aren’t optional. Many homeowners successfully tackle the assembly while hiring pros just for technical connections and final leveling.
Real-World Examples and User Experiences
Success Stories and What Made Them Work
Real homeowners and contractors have shared their U-shaped kitchen transformations, offering valuable insights for your planning.
**Small Kitchen Success (8×10 feet)**
Sarah from Manchester converted her cramped galley kitchen into a functional U-shape by removing a pantry wall. “The key was keeping base cabinets to 60cm depth on one side to maintain a usable work triangle,” she explains. Corner lazy Susans proved essential for accessing everything without awkward reaching.
**Open-Plan Integration**
Contractor James frequently installs U-shaped layouts in open-concept homes. His advice? “Leave one end of the U open to the living area—it prevents the boxed-in feeling whilst maintaining excellent workflow.” He recommends glass-front cabinets on the open side to create visual flow.
**Accessibility Win**
The Patels redesigned their kitchen with accessibility in mind, installing pull-out shelves in lower cabinets and positioning their most-used items in the middle section. “We eliminated upper cabinets on one wall and added open shelving instead—much easier to reach and keeps the space feeling open.”
The common thread? Successful U-shaped kitchens balance storage maximization with maintaining adequate clearance and thoughtfully addressing those corner spaces.
Mistakes to Learn From
The community has shared valuable lessons from their U-shaped kitchen projects. One frequent regret involves underestimating the walkway width—several users reported creating aisles narrower than 1.2 metres, making the space feel cramped when multiple people work simultaneously. Always measure twice and account for fully extended drawers and appliance doors when calculating clearances.
Another common mistake is neglecting the “dead space” in corner cabinets. Many homeowners installed standard base units only to discover they couldn’t reach items at the back. The solution? Invest in corner cabinet solutions like lazy Susans or pull-out systems from the start rather than retrofitting later.
Poor lighting planning also tops the list, particularly under wall cabinets. One tradesperson noted: “Clients consistently forget to plan task lighting before installation, making it more expensive to add later.” Map out your electrical requirements during the design phase.
Finally, several users wished they’d considered appliance placement more carefully. Positioning the fridge at a peninsula end rather than mid-run improves workflow and prevents bottlenecks. Learn from these experiences to avoid costly redesigns.
U-shaped kitchen layouts excel in medium to large spaces where you need maximum storage and counter space. They’re particularly well-suited for households with multiple cooks, serious home chefs, or families who spend significant time in the kitchen. If your room measures at least 10 feet wide and you value having everything within arm’s reach, this configuration likely fits your needs perfectly.
However, alternatives may serve you better in specific situations. Galley kitchens work more efficiently in narrow spaces, while L-shaped layouts preserve an open feel for smaller rooms or open-plan living areas. If you prioritize socializing over cooking capacity, or if your kitchen measures under 8 feet in any direction, you’ll find other layouts more practical.
The decision ultimately depends on your space dimensions, cooking habits, storage requirements, and lifestyle preferences. Consider how many people typically use your kitchen simultaneously, whether you need workspace for multiple tasks, and if corner cabinet accessibility concerns outweigh the storage benefits.
**We’d love to hear from you!** Have you installed or worked with U-shaped kitchen layouts? What challenges did you encounter during planning or installation? Which corner cabinet solutions worked best for your situation? Share your experiences, photos, and practical advice in the comments below. Your real-world insights help fellow DIYers and homeowners make confident decisions about their kitchen projects. Whether you’re a seasoned tradesperson or tackling your first renovation, your perspective adds value to our community.
Related Posts

Post a Comment