Inspect your chimney yourself by renting professional-grade equipment that delivers clear views of creosote buildup, structural damage, and blockages without paying for expensive contractor visits. A basic inspection camera rental runs $50-75 per day compared to $300-500 for professional chimney repair St Petersburg services, making DIY inspection an economical choice for routine safety checks.
Rent a chimney inspection camera system with at least 30 feet of flexible cable, built-in LED lighting, and a minimum 720p resolution display screen to capture detailed images of flue conditions from top to bottom. Most hardware stores and equipment rental centers stock these systems specifically designed for narrow vertical spaces.
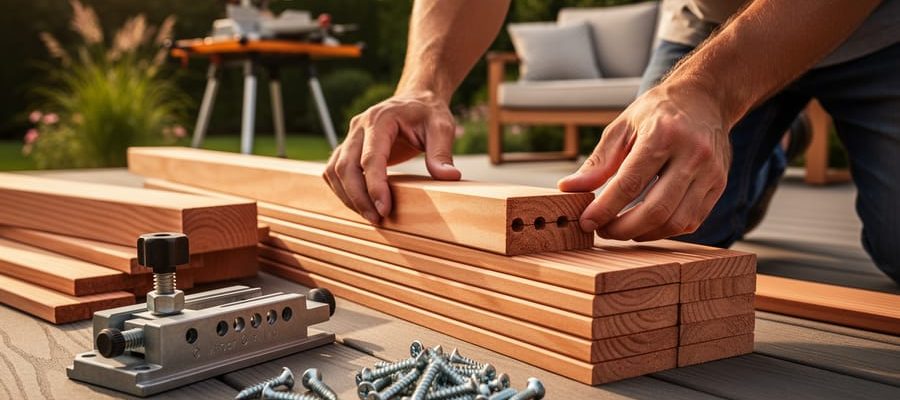
Combine your camera inspection with a wire chimney brush rental in the correct diameter for your flue size, measuring 6, 8, or 10 inches for most residential chimneys. This pairing lets you document pre-cleaning conditions, perform maintenance, then verify your work immediately.
Schedule your rental during dry weather when you can safely access your roof and allow 3-4 hours for a thorough first-time inspection. Document everything with photos or video recordings that create a baseline record for future comparisons and provide evidence if you need professional repairs later.
Understand that DIY inspection works best for routine maintenance checks between professional inspections, not as a replacement for certified evaluations required after chimney fires, earthquakes, or before real estate transactions. Rental tools give you the visibility professionals use, but interpreting complex damage patterns requires training that comes with experience and certification.
Why DIY Chimney Inspection Makes Sense (And When It Doesn’t)
Taking on your own chimney inspection can be incredibly rewarding, both financially and educationally. Most homeowners spend between $300-$600 on professional chimney inspections, while renting the necessary tools typically costs $50-150 per day. That’s a significant saving, especially if you only need a basic Level 1 inspection to verify your chimney is in good working order. Beyond the money saved, you’ll gain valuable knowledge about your home’s heating system and develop skills that serve you year after year.
DIY inspection works best for straightforward scenarios. If you have a simple, straight chimney with easy roof access and you’re comfortable working at heights, self-inspection is entirely feasible. Newer chimneys (less than 10 years old) without visible damage are ideal candidates for DIY evaluation. You’ll learn to identify common issues like creosote buildup, minor deterioration, or blockages before they become expensive problems. The advantages of hiring over buying inspection equipment make this approach even more practical for occasional use.
However, certain situations demand professional expertise. If you notice structural damage, water leaks, or white staining (efflorescence) on your chimney exterior, call a certified chimney sweep immediately. Multiple-flue chimneys, those with offset angles, or chimneys serving fireplaces that haven’t been used in years require professional assessment. Similarly, if you’re buying or selling a home, most insurance companies and real estate transactions require certified professional inspections.
Safety considerations are paramount. Working on roofs poses fall risks, so proper ladder safety and harness use aren’t optional. Carbon monoxide exposure is another serious concern when working with heating systems. If you have any medical conditions affecting balance or breathing, or if you’re simply uncomfortable with heights, professional inspection is the safer choice.
Community feedback consistently shows that homeowners successfully handle routine annual inspections but appreciate professional help for complex issues or major concerns.
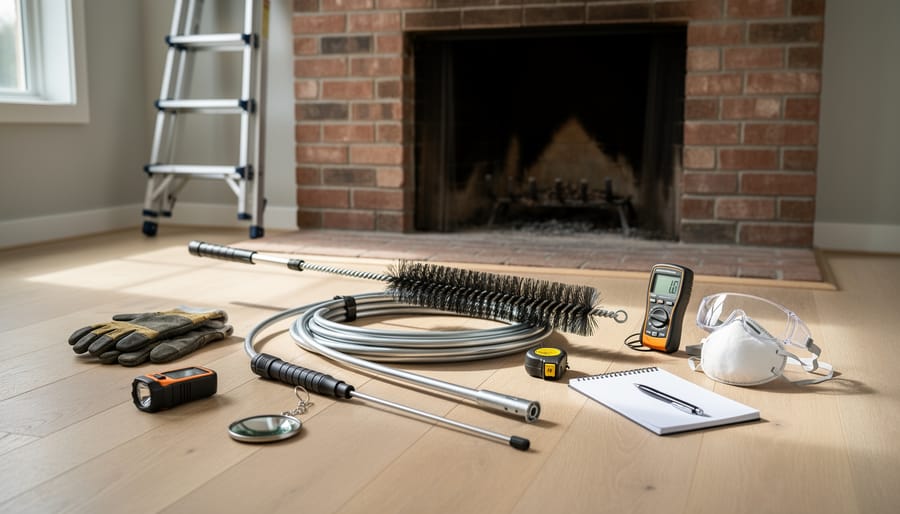
Essential Chimney Inspection Tools You Can Rent
Chimney Inspection Camera Systems
Chimney inspection camera systems give you eyes inside your flue without the guesswork. These specialized cameras reveal creosote buildup, cracks, blockages, and structural issues that aren’t visible from ground level. Understanding your rental options helps you choose the right system for your inspection needs.
Wireless inspection cameras are the most user-friendly option for DIY chimney inspections. These systems typically include a waterproof camera head attached to a flexible cable or pole, with video transmitted to a handheld monitor or smartphone app. They’re perfect for basic inspections of standard residential chimneys up to 30 feet. Expect to pay between 40 and 75 dollars per day for wireless systems. Look for cameras with at least 720p resolution, LED lighting for dark flues, and a recording function so you can review footage later.
Rod-mounted camera systems offer more control and reach for deeper inspections. These professional-grade setups use rigid or semi-rigid fiberglass rods that you extend section by section, similar to chimney sweep brushes. The camera attaches to the rod tip, allowing you to navigate curves and examine specific areas closely. Daily rental rates range from 75 to 150 dollars. Key features include adjustable camera angles, higher resolution (1080p or better), and measurement capabilities to gauge crack sizes or debris depth.
Drone-mounted cameras represent the newest inspection technology, primarily useful for examining chimney exteriors, caps, and crowns from above. While innovative, they’re less practical for interior flue inspections. Rental costs vary widely from 50 to 200 dollars daily, and you’ll need basic piloting skills.
Community feedback consistently emphasizes the importance of testing equipment before leaving the rental shop and downloading recorded footage immediately to avoid losing valuable inspection data.
Chimney Brushes and Cleaning Equipment
Rental centers typically stock chimney brushes in sizes ranging from 5 to 14 inches in diameter, with some locations offering specialized sizes up to 18 inches. Proper brush selection starts with measuring your flue’s interior dimensions. For round flues, measure the diameter; for rectangular or square flues, measure both dimensions. Choose a brush slightly larger than your flue (about 1/2 inch oversized) to ensure thorough cleaning contact with the walls.
Most rental packages include extension rods that connect together, allowing you to reach chimneys up to 30 feet tall. These rods come in either fiberglass or polypropylene materials. Fiberglass rods offer more rigidity for stubborn creosote removal, while flexible polypropylene rods work better for chimneys with bends or offsets.
Brush materials matter significantly for different chimney types. Wire brushes work effectively on clay tile or concrete flues but can damage metal liners. For metal chimneys, always request polypropylene or nylon brushes to prevent scratching. Masonry chimneys typically require stiffer wire brushes to tackle hardened creosote deposits.
Additional cleaning tools available for rent include shop vacuums with HEPA filters (essential for controlling soot), drop cloths, inspection mirrors, and creosote removal chemicals. Many rental centers offer complete cleaning kits that bundle these items together at discounted rates.
Community members frequently recommend testing your brush fit before climbing onto the roof. One reviewer noted, “I rented a 9-inch brush for my 8-inch flue, and it was perfect. The rental staff helped me confirm sizing, which saved a return trip.”
Safety and Access Equipment
Accessing your chimney safely is just as important as having the right inspection tools. Most rental centers offer complete safety equipment packages specifically designed for roof work and chimney inspections.
Extension ladders are essential, and rental shops typically stock models ranging from 24 to 40 feet. Look for ladders with stabilizer bars that prevent contact with gutters and provide stable positioning against your home’s exterior. Always ensure your ladder extends at least three feet above the roofline for safe mounting and dismounting.
Once on the roof, roof anchors and safety harnesses become critical. Roof anchors (temporary attachment points secured to your roof structure) work together with full-body harnesses and lanyards to prevent falls. These systems are straightforward to use, but rental staff should demonstrate proper fitting and attachment before you leave the store. Community reviews consistently emphasize that investing time in understanding these systems pays off in confidence and safety.
Personal protective equipment rounds out your safety arsenal. This includes non-slip work boots, protective eyewear to shield against falling debris, heavy-duty work gloves, and respirator masks for dealing with soot and creosote particles.
Never skip safety equipment to save money. Many rental centers offer bundled safety packages at discounted rates, making it affordable to protect yourself properly while conducting your chimney inspection.
Measurement and Documentation Tools
Accurate measurement and thorough documentation separate a basic chimney check from a professional-grade inspection. A moisture meter is essential for detecting water intrusion, which causes most chimney deterioration. These handheld devices identify damp spots in masonry that aren’t visible to the naked eye, helping you catch leaks before they become expensive repairs.
High-powered LED flashlights or headlamps illuminate dark chimney interiors where problems often hide. Rental packages typically include adjustable-beam models that let you switch between wide area lighting and focused spotlighting. Inspection mirrors, available in telescoping and angled varieties, help you see around bends and corners without climbing onto the roof.
Measuring tools like tape measures and digital calipers document flue dimensions, crack widths, and clearances from combustible materials. Many rental shops now offer complete documentation kits with cameras or tablets for photo logging. According to user reviews, having proper lighting and measurement tools makes the difference between guessing at problems and confidently identifying them. Pro tip from the rental community: always measure creosote buildup thickness at multiple points, as it accumulates unevenly throughout the chimney system.
Step-by-Step DIY Chimney Inspection Process
Pre-Inspection Preparation
Before you begin your chimney inspection, proper preparation will save you time and ensure better results. Start by reserving your inspection tools at least a few days in advance, especially during peak fall and spring seasons when demand is highest. Most rental shops offer 24-hour or weekend rental periods, so plan accordingly to maximize your time.
Check the weather forecast and choose a dry day with minimal wind. Rain makes roofs dangerous and wet conditions can obscure potential issues inside your chimney. Gather essential materials before starting: a flashlight, work gloves, safety goggles, a dust mask or respirator, and a notepad for documenting findings.
Familiarize yourself with what constitutes chimney damage. You’ll be looking for cracked or missing mortar joints, damaged flue tiles, creosote buildup (a black, tar-like substance), signs of water damage, and blockages from debris or animal nests. Review your rental equipment’s user manual beforehand, and don’t hesitate to ask the rental staff for a quick demonstration.
Finally, browse community reviews from other DIYers who’ve tackled similar projects. Their experiences often highlight common pitfalls and helpful tips that professional guides might overlook. This preparation groundwork ensures you’ll make the most of your rental period and conduct a thorough, safe inspection.
Exterior Chimney Inspection
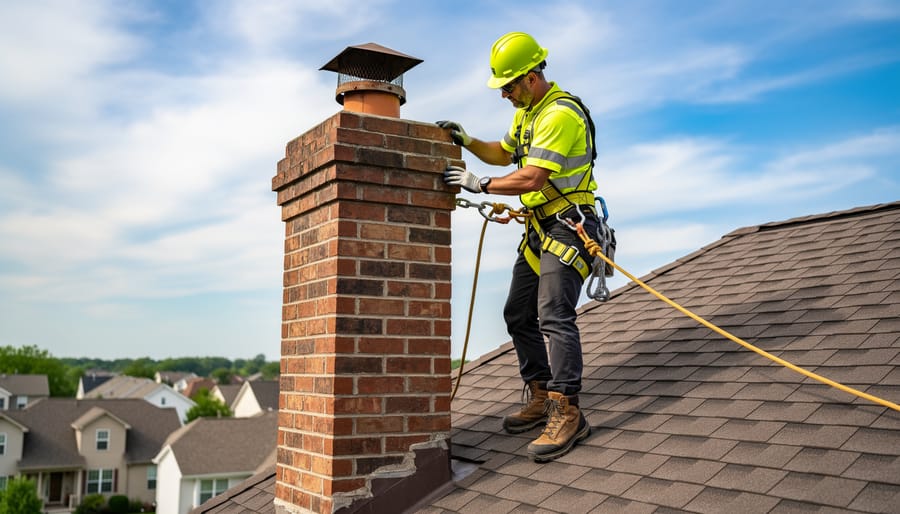
Before climbing anywhere, safety should be your top priority. You’ll need a sturdy extension ladder rated for your weight plus tools, safety harnesses, and non-slip work boots. Many rental centers offer ladder stabilizers and roof anchors alongside inspection tools, which are essential for preventing falls.
Start your exterior inspection from the ground using binoculars to assess overall chimney condition. Look for visible cracks, missing mortar, or leaning structures. This preliminary check helps you identify problem areas before ascending.
The chimney crown is the concrete top that seals your chimney. Inspect it for cracks or deterioration, as water infiltration here causes serious damage. Your rental flashlight with adjustable focus helps examine crown details even from ladder height.
Next, check the chimney cap, the metal cover that keeps rain and animals out. Ensure the mesh screening is intact and the cap sits securely. Rust, dents, or gaps indicate replacement needs.
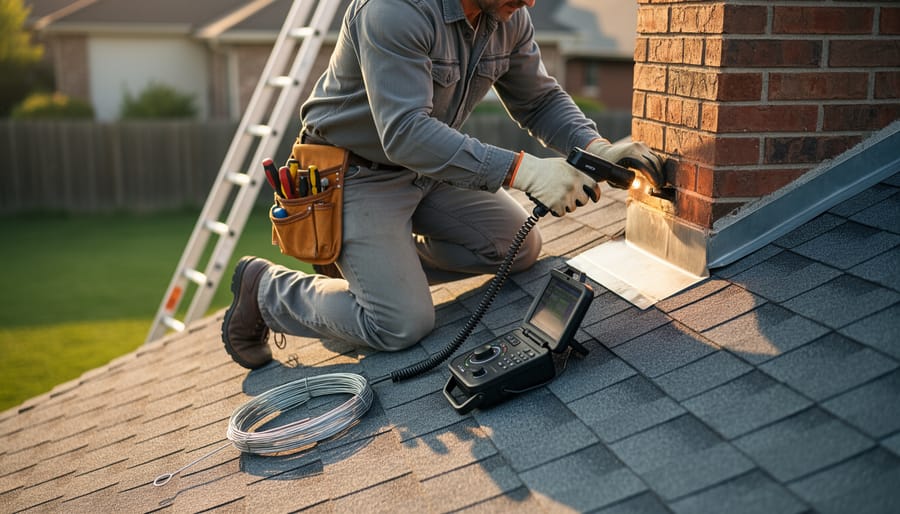
Flashing, the metal seal where your chimney meets the roof, requires close attention. Water leaks often originate here. Look for rust, separation from the chimney or roof, or damaged caulking. A rental moisture meter can detect hidden water damage around flashing areas.
Finally, examine the masonry from top to bottom. Crumbling mortar joints, called spalling, white staining from salt deposits, or loose bricks all signal problems. Take photos during your inspection to track changes over time and share with professionals if needed.
Many DIYers recommend having a second person spot your ladder and hand up tools. Community feedback consistently emphasizes that exterior inspections require patience and should never be rushed, especially in wet or windy conditions.
Interior and Flue Inspection
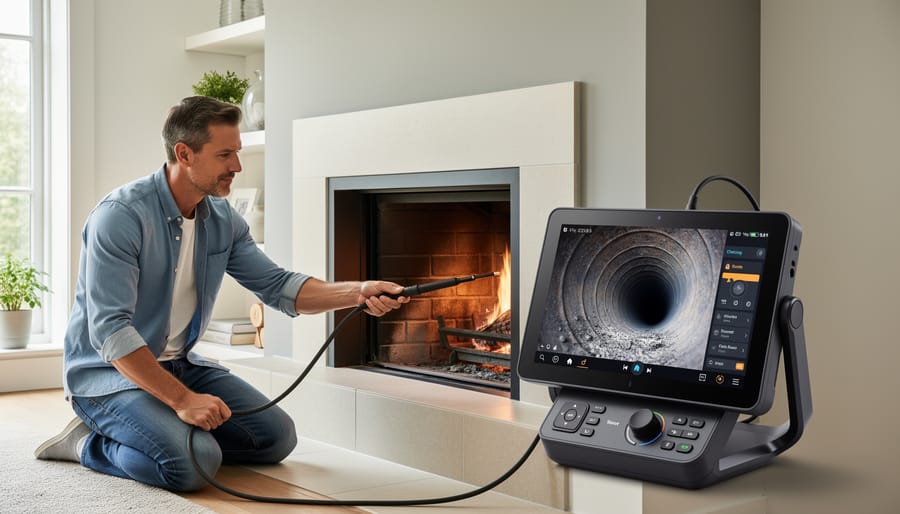
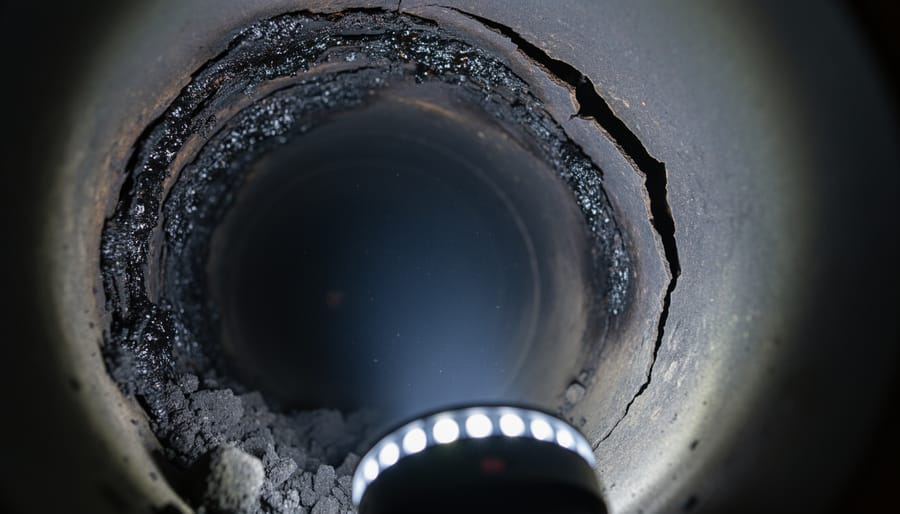
Once you’ve safely accessed your chimney from above, it’s time to conduct the interior inspection using specialized camera equipment. Modern chimney inspection cameras, available at most tool rental centers, feature flexible cables with high-resolution cameras and built-in LED lighting. These systems allow you to examine every inch of your flue liner without climbing inside.
Start by slowly lowering the camera down the flue, maintaining a steady pace to capture clear footage. Most rental cameras record directly to a screen or smartphone, making it easy to review footage multiple times. Position yourself securely on the roof using proper fall protection equipment, or conduct the inspection from the fireplace opening if accessible.
As you navigate the camera, watch for four critical issues. Creosote buildup appears as dark, crusty deposits on the flue walls—anything thicker than three millimeters (about the depth of a coin) requires professional cleaning. Cracks in the liner show as distinct lines, which may appear hairline-thin or wide enough to see daylight. Obstructions like bird nests, fallen bricks, or debris cast shadows and block the flue opening. Finally, structural problems such as separated tiles, missing mortar, or deteriorating masonry indicate serious concerns.
When reviewing camera footage, pause frequently and use zoom features to examine questionable areas closely. Many DIYers find it helpful to take screenshots or timestamp concerning sections for professional consultation. Remember that while camera inspections are excellent for identifying issues, interpreting complex structural problems requires expertise. If you notice significant damage or feel uncertain about your findings—similar to challenges with cleaning high areas safely—consult a certified chimney professional for verification and repair recommendations.
What to Look For: Common Chimney Problems Explained
Understanding what you’re looking at during your chimney inspection is just as important as having the right tools. Here are the most common problems you’ll want to identify, explained in straightforward terms.
Creosote buildup is perhaps the most critical issue to spot. This tar-like substance accumulates on the inside of your chimney when wood burns. It appears in three stages: first as a flaky, sooty deposit that’s relatively easy to brush off; second as a shiny, hardened coating; and third as a thick, tar-like glaze. Stage one requires cleaning but isn’t immediately dangerous. Stages two and three are serious fire hazards that demand professional removal. If you notice more than 1/8 inch of buildup at any stage, it’s time to take action.
Cracks in the flue liner might look like hairline fractures or significant breaks in the clay, metal, or concrete lining inside your chimney. These liners protect your home’s combustible materials from heat and direct flames to escape properly. Even small cracks allow heat and gases to reach areas they shouldn’t, creating fire risks and carbon monoxide concerns. Use your inspection camera to look for any separation between tiles or visible gaps.
Water damage shows up as white staining (called efflorescence), rust on metal components, deteriorating brick, or actual moisture inside the chimney. Water is your chimney’s enemy, causing freeze-thaw damage that accelerates deterioration. Look for water pooling at the base or dampness on interior walls adjacent to the chimney.
Animal nests and debris are exactly what they sound like. Birds, squirrels, and raccoons love chimneys. These blockages prevent proper ventilation and create fire hazards. You’ll spot them as collections of twigs, leaves, or other materials blocking the flue.
Deteriorating mortar appears as crumbling joints between bricks or missing chunks of mortar. This condition, called spalling, weakens the chimney’s structural integrity. Minor deterioration is manageable, but extensive damage requires professional masonry work.
Structural concerns include leaning chimneys, separated components, or bricks pulling away from the structure. These represent serious safety issues requiring immediate professional assessment before using the fireplace again.
Where to Rent Chimney Inspection Tools and What to Expect
Finding chimney inspection tools for rent is easier than you might think. Start by checking local equipment rental yards, hardware stores with rental departments, and specialty tool rental companies. Many now offer online booking systems where you can reserve equipment in advance and check availability in real-time.
Typical rental periods range from four hours to a full week, with most homeowners finding a 24-hour rental sufficient for a basic chimney inspection. Expect to pay between $30-$75 per day for inspection cameras, with higher-end equipment costing more. Basic inspection mirrors and brushes might only cost $10-$20 daily. Most providers require a deposit or credit card hold, typically 50-100% of the equipment value, which is refunded upon safe return.
Before committing to a rental, ask these essential questions: What training or instructions come with the equipment? Is there technical support if you encounter problems? What are the specific terms for damage or loss? Does the rental include all necessary accessories like extension cables or lighting attachments?
To ensure you get the right tools, provide your rental provider with specific details about your chimney. Measure the flue dimensions beforehand, note whether it’s masonry or metal, and mention any accessibility challenges. Ask to see the equipment’s user manual and request a quick demonstration if possible. Check community reviews online to see what other DIYers experienced with that particular rental location.
Make reservations at least a week ahead, especially during peak inspection seasons in spring and fall. Always inspect equipment thoroughly before leaving the store and document any existing damage with photos.
Safety First: Critical Precautions for DIY Chimney Work
Before you climb that ladder with your rented inspection camera, let’s talk about staying safe. Chimney work poses real hazards, and understanding these risks can prevent serious injuries or worse.
Fall prevention is your number one priority. Chimneys are high, roofs can be slippery, and one misstep changes everything. Always use a properly rated extension ladder that extends at least three feet above the roofline. Position it at a 75-degree angle (the base should be one foot away from the wall for every four feet of height). On sloped roofs, use roof brackets and planks to create a stable work platform. Never work alone—have someone on the ground to spot you and call for help if needed.
Respiratory protection is essential but often overlooked. Chimneys contain soot, creosote (a tar-like substance that builds up from burning wood), and potentially harmful particles. Wear an N95 or P100 respirator mask, not just a dust mask. These filter out fine particles that can damage your lungs. If you smell gas or notice excessive soot, stop immediately and call a professional.
When working with inspection cameras and lighting equipment, verify all electrical connections are secure and keep cords away from water or damp areas. Use battery-powered equipment when possible to reduce electrocution risks. Inside the chimney, you’re working in a confined space with limited ventilation—never spend extended periods peering up the flue without breaks.
Weather matters more than you think. Wind, rain, ice, or temperatures below freezing make DIY chimney work extremely dangerous. Reschedule if conditions aren’t ideal.
Know your limits. If your chimney is severely damaged, hasn’t been inspected in over five years, or if you’re uncomfortable with heights, hiring a certified chimney sweep is money well spent. Community reviews consistently show that professionals catch issues DIYers miss, potentially saving you from costly repairs or dangerous situations down the road.
Community Insights: Real Experiences from DIY Chimney Inspectors
We reached out to our community of DIYers who’ve tackled their own chimney inspections, and their insights prove invaluable for anyone considering this route.
Mark from Portland shared his experience: “I rented a basic inspection camera for $45, thinking I’d save hundreds. What I didn’t realize was how difficult it would be to interpret what I was seeing. After two hours, I still wasn’t confident about creosote buildup levels.” His takeaway? Rent the camera along with a printed reference guide showing different damage types and buildup stages.
Sarah in Michigan had better luck: “I picked up a chimney brush kit and inspection mirror from my local rental shop. The staff walked me through proper technique, which made all the difference. My flue was relatively straight, so the inspection went smoothly. Total cost was $35 versus the $200 quote I got from a pro.”
Common mistakes our community identified include underestimating inspection time (budget at least 2-3 hours for first-timers), inadequate lighting when using cameras, and failing to document findings with photos. Several members emphasized that rental cameras with recording capability are worth the extra $10-15 daily fee.
Jessica’s advice resonated with many: “Don’t skip the safety gear rental. I thought I could get by without a proper respirator, but the dust and soot were overwhelming. Spent an extra $8 on a quality mask and it was completely worth it.”
The consensus? DIY inspection works best for routine maintenance checks in straightforward chimney designs. If you spot anything concerning or have a complex multi-flue system, community members strongly recommend calling a certified professional for a thorough evaluation.
Renting chimney inspection tools offers a cost-effective alternative to hiring professionals for routine maintenance checks. With the right equipment—a chimney camera, inspection mirror, flashlight, and basic cleaning tools—many homeowners can successfully assess their chimney’s condition. The rental approach works best for straightforward inspections where you’re checking for obvious blockages, creosote buildup, or visible damage.
However, knowing your limitations is essential. If you discover significant cracks, structural issues, heavy creosote deposits, or anything concerning, stop and call a certified chimney sweep immediately. Similarly, if your chimney hasn’t been inspected in several years or you’ve experienced performance issues like smoke backing up into your home, professional expertise is non-negotiable.
Safety must remain your top priority throughout the process. Always work with a partner, use proper protective equipment, and never attempt repairs beyond your skill level. Community reviews from fellow DIYers can provide valuable insights into which rental tools work best and what challenges to expect.
For annual maintenance checks on well-maintained chimneys, DIY inspection with rental tools makes practical sense. Just remember that professional inspections should still occur every few years to ensure nothing gets missed.
Related Posts
Post a Comment