
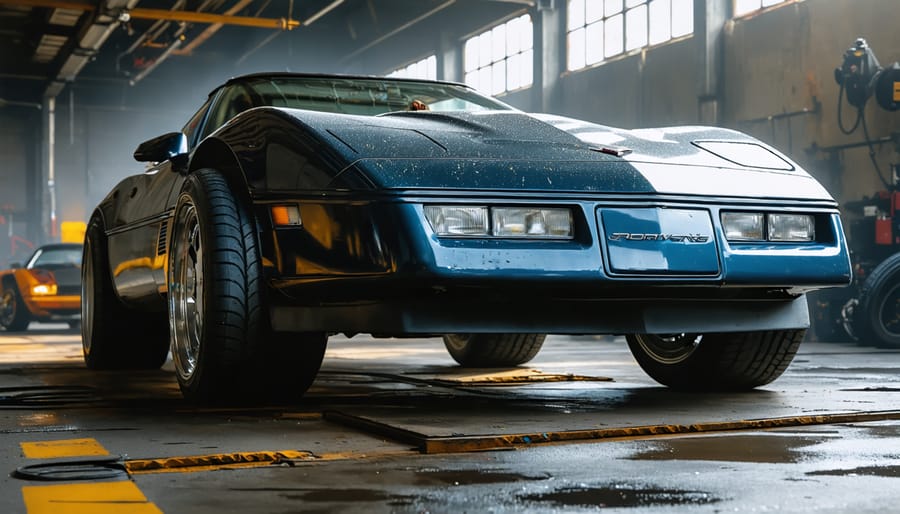
Converting a C4 Corvette to 4×4 capability requires sourcing a compatible transfer case designed for longitudinal engine layouts, typically from Ford Broncos or F-150s from the 1980s-90s, which can mate to the C4’s rear-mounted transmission through custom adapter plates. The factory 4L60 automatic transmission works better for this conversion than manual options due to its stronger torque capacity and availability of conversion kits.
Identify your transmission type first. C4 Corvettes (1984-1996) came with either the 4+3 manual or 4L60/4L60E automatic. The automatic versions handle the additional stress of 4×4 conversions more reliably, especially when you’re planning aggressive off-road use. The manual transmission requires extensive modification to the bellhousing and crossmember, adding complexity and cost.
Source a Dana 300 or NP205 transfer case for maximum durability. These heavy-duty units bolt to custom adapter plates available from specialty manufacturers. You’ll need fabrication equipment including plasma cutters, MIG welders, and hydraulic presses to modify the transmission tunnel and create custom driveshaft mounting points. The floor pan requires cutting and reinforcement to accommodate the transfer case height.
Calculate driveline angles carefully before cutting. The C4’s low ride height means achieving proper universal joint angles demands precision measurements. Expect to invest 60-80 hours for a complete conversion if you’re experienced with drivetrain work, or 120+ hours for first-time builders. Budget $3,000-$6,000 for parts alone, excluding the transmission, transfer case, and axles.
Community feedback consistently emphasizes test-fitting components before permanent modifications and consulting experienced builders through Corvette forums to avoid common pitfalls like inadequate ground clearance or driveshaft vibration issues.
Understanding the C4 Transmission in 4×4 Applications
What Makes the C4 Transmission Different
The C4 transmission, originally designed by Ford in the 1960s, earned its reputation as a lightweight, compact automatic transmission perfect for street performance vehicles. What sets it apart is its simple three-speed design with a 2.46:1 first gear, 1.46:1 second gear, and 1.00:1 third gear ratio. This straightforward configuration means fewer parts that can fail, making it easier to work on and more reliable under stress.
Weighing in at just 130 pounds when dry, the C4 is significantly lighter than many comparable transmissions. Its compact case measuring roughly 18 inches long makes it an attractive option when space is tight. The transmission was never factory-designed for four-wheel drive applications, which is why conversions require specific adapter kits and transfer case modifications.
Despite its street performance origins, the C4 has become popular in 4×4 conversions for several practical reasons. Its aluminum case keeps weight down, which matters when you’re already adding the extra pounds of four-wheel drive components. The transmission can handle up to 250 horsepower in stock form, and with proper upgrades like performance clutch packs and hardened planetary gears, it can support much more.
The parts availability is another major advantage. Since Ford produced millions of C4 units across multiple vehicle lines through 1986, finding replacement components or used cores for rebuilding remains relatively easy and affordable. This accessibility makes the C4 an economical choice for DIY builders and professional shops alike, even though the conversion process requires careful planning and the right equipment to execute properly.
Common Challenges in Off-Road Environments
When you take a stock C4 transmission off the pavement and into demanding 4×4 terrain, several critical issues quickly surface. Understanding these challenges helps you decide whether to upgrade components or consider alternatives before problems arise.
Heat buildup ranks as the primary enemy of C4 transmissions in off-road applications. Crawling over rocks, navigating steep inclines, and frequent gear changes generate excessive friction and heat. Stock C4 cooling systems, designed for highway cruising, struggle to dissipate this thermal load. Without adequate cooling upgrades, transmission fluid breaks down rapidly, losing its protective properties and leading to clutch pack degradation and seal failure.
Torque multiplication stress presents another significant concern. Off-road driving demands sustained low-speed power delivery that places continuous strain on internal components. The stock clutch packs and bands in a C4 weren’t engineered for the prolonged slipping conditions encountered during technical rock crawling or mud bogging. This extended engagement period accelerates wear on friction materials, sometimes reducing their lifespan by half compared to street driving.
Case integrity issues also emerge under severe off-road conditions. Ground clearance limitations make the transmission vulnerable to impact damage from rocks and obstacles. The aluminum case can crack from direct strikes, while mounting points may stress and flex during articulation, potentially causing internal misalignment.
Filter and fluid contamination occurs more frequently in dusty or muddy environments. Even small breaches in seals allow contaminants to enter, creating an abrasive mixture that accelerates wear throughout the transmission’s internal passages and valve body. Regular inspections become essential for maintaining reliability in these harsh conditions.
Signs Your C4 4×4 Transmission Needs Enhancement
Performance Red Flags to Watch For
Recognizing transmission problems early can save you from costly repairs down the road. Here are the key warning signs that your C4 4×4 transmission needs attention:
Slipping gears is one of the most common red flags. You’ll notice the transmission unexpectedly shifting up or down, or the engine revving without corresponding acceleration. This often indicates worn clutch packs or low transmission fluid levels.
Overheating is particularly problematic in 4×4 conversions due to increased stress. If your transmission temperature gauge consistently runs hot (above 200°F) or you smell burning fluid, immediate inspection is necessary. Overheating can warp internal components and break down transmission fluid rapidly.
Rough or delayed shifts indicate internal wear or adjustment issues. When you experience hard clunks during gear changes or noticeable delays between shifting, the valve body or bands may need servicing. This is especially common in conversions where the torque converter wasn’t properly matched to the new application.
Reduced power transfer means your vehicle struggles to accelerate or feels sluggish, even when the engine sounds healthy. This suggests internal slippage or torque converter problems.
Strange noises like whining, grinding, or buzzing point to bearing wear, gear damage, or insufficient lubrication. Don’t ignore these sounds – they typically worsen quickly under 4×4 loads.
Community feedback consistently emphasizes addressing these symptoms immediately rather than waiting, as minor issues escalate rapidly in modified transmissions.
When Stock Components Aren’t Enough
Stock C4 4×4 transmission components work well for everyday driving and light off-road adventures, but certain conditions quickly expose their limitations. Understanding when you’ve outgrown factory specifications helps prevent costly failures and ensures your safety on challenging terrain.
Heavy hauling creates the first pressure point. If you’re regularly towing trailers exceeding 3,000 pounds or carrying substantial cargo in your bed, the stock clutch packs and bands face accelerated wear. Community feedback consistently shows premature slippage in these scenarios, with many users reporting issues around 40,000 miles versus the typical 80,000-mile expectancy.
Extreme terrain demands more from every component. Rock crawling, deep mud navigation, and steep incline climbing generate heat and stress that factory coolers and seals weren’t designed to handle. One user shared their experience: “After three Moab trips, my transmission started slipping in second gear. The upgrade should’ve happened before the damage.”
Competitive use absolutely requires enhancement. Whether you’re racing, participating in organized trail runs, or engaging in serious mud bogging, stock components simply won’t survive repeated high-stress situations. The torque converter, in particular, becomes a weak link under competition conditions.
If you’re experiencing delayed shifts, slipping, or overheating warnings during any of these activities, enhancement isn’t optional anymore—it’s necessary maintenance to prevent complete transmission failure.
Essential C4 Transmission Enhancement Options

Torque Converter Upgrades
Upgrading your C4 4×4 transmission’s torque converter can dramatically improve off-road performance, especially in challenging low-speed situations. Understanding your options helps you make the right choice for your specific needs.
A high-stall torque converter is designed to allow your engine to reach higher RPMs before engaging the transmission fully. Think of it as giving your vehicle a running start before the power transfers to the wheels. For off-roading, a converter with a 2,000-2,500 RPM stall speed provides excellent low-speed torque multiplication when you’re crawling over rocks or through mud. The higher stall lets your engine build more power before moving the vehicle, which translates to better control in technical terrain.
Lockup modifications offer another performance boost. Stock C4 converters typically don’t feature lockup capability, but aftermarket options do. A lockup converter mechanically connects the engine directly to the transmission at cruising speeds, reducing heat buildup and improving fuel efficiency during highway driving between trail destinations.
When selecting a converter, consider your engine’s power output and your typical off-road conditions. Many DIYers report that pairing a 2,200 RPM stall converter with moderate engine modifications creates an ideal balance for both trail performance and daily driving. Installation requires specialized tools, including a transmission jack and dial indicator for proper setup. Community feedback consistently emphasizes the importance of professional balancing to prevent vibration issues that could damage your upgraded transmission.
Valve Body Modifications
Upgrading your C4 4×4 transmission’s valve body can dramatically improve shift performance and durability in demanding off-road conditions. The valve body acts as the transmission’s control center, directing hydraulic fluid to engage gears, so modifications here directly impact how your vehicle responds.
Manual valve body conversions are popular among serious off-roaders because they eliminate the computer’s role in shifting, giving you complete control over gear changes. This conversion removes the automatic shifting mechanism, requiring you to manually select each gear like a standard transmission but without a clutch pedal. The benefit is immediate, positive shifts and the ability to hold gears through challenging terrain without unwanted upshifts.
Shift kit installations offer a middle ground for those wanting improved performance while keeping automatic operation. These kits modify the valve body’s internal passages and spring pressures to create firmer, faster shifts that reduce clutch slippage and heat buildup. Most kits include detailed instructions and can be installed with basic hand tools, though a clean workspace and transmission jack are essential for valve body removal.
Improved hydraulic flow modifications involve enlarging certain passages and installing upgraded separator plates with better fluid routing. These changes ensure consistent pressure delivery to clutch packs, especially important when running larger tires or towing. Many experienced builders recommend combining these modifications for maximum reliability in 4×4 applications.
Cooling System Enhancements
Heat management is critical when running a C4 4×4 transmission under demanding off-road conditions. Stock cooling systems often struggle with the increased loads from larger tires, steep inclines, and constant gear shifting that 4×4 applications demand.
Installing an external transmission cooler is one of the most effective upgrades you can make. These auxiliary coolers mount in front of your radiator and significantly increase cooling capacity. Look for units rated for at least 20,000 BTU, with stacked-plate or tube-and-fin designs offering the best heat dissipation. Many DIYers report temperature drops of 30-50 degrees Fahrenheit after installation.
Upgraded aluminum transmission pans provide another layer of protection. Unlike stock stamped steel pans, aluminum versions feature cooling fins that increase surface area and improve heat transfer. They also hold an extra quart or two of fluid, which helps maintain consistent temperatures during extended trail runs.
Temperature monitoring systems give you real-time data to prevent damage before it occurs. Aftermarket transmission temperature gauges install easily through existing ports and alert you when fluid temperatures exceed safe operating ranges. Most professionals recommend keeping transmission fluid below 200 degrees Fahrenheit for longevity, with anything above 240 degrees requiring immediate attention. Community feedback consistently ranks temperature monitoring as essential insurance for modified transmissions.
Internal Component Strengthening
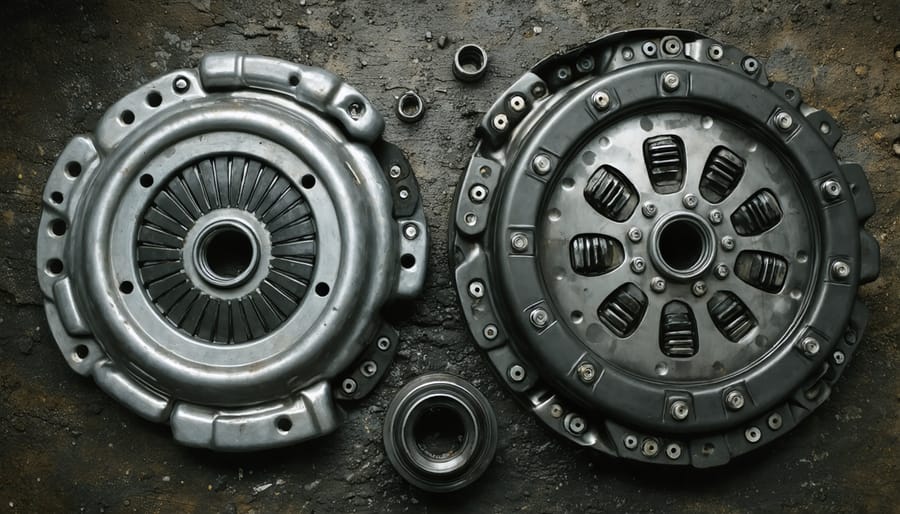
When upgrading your C4 transmission for 4×4 applications, reinforcing internal components is essential to handle increased torque loads and off-road stress. Start with clutch pack upgrades, which involve adding more friction discs or replacing stock materials with high-performance alternatives like Kevlar or carbon fiber. These provide better heat resistance and grip under demanding conditions.
Hardened gears are another critical upgrade. Factory gears may not withstand the constant strain of low-range crawling or sudden load changes on rough terrain. Opt for case-hardened or shot-peened gear sets that resist wear and prevent tooth failure. Many transmission shops offer these as complete kits.
Improved bands, typically made from reinforced steel with enhanced friction material, ensure firmer shifts and longer service life. They’re particularly important for preventing slippage during heavy towing or rock crawling.
Heavy-duty planetary gear sets distribute power more effectively across multiple pinions. Look for units with larger bearings and reinforced carriers. These handle shock loads better than stock components, reducing the risk of catastrophic failure during extreme use. When selecting 4×4 parts and accessories, always verify compatibility with your specific C4 model and intended application. Community reviews often highlight which brands deliver real-world durability versus marketing claims.
Tools and Equipment You’ll Need for the Job
Basic Tool Requirements
Working on a C4 4×4 transmission requires having the right equipment on hand before you start. Beyond the essential tools found in most garages, transmission work demands specialized items to ensure safe and accurate installation.
You’ll need a comprehensive socket set with both metric and standard sizes, ranging from 8mm to 24mm. A quality torque wrench is non-negotiable, as transmission bolts require precise tightening specifications, typically between 20 and 40 foot-pounds depending on the fastener location. Consider renting a beam-style or digital torque wrench if you don’t own one.
A transmission jack or lift adapter makes handling the 150-pound transmission infinitely safer and prevents back injury. Dial indicators and feeler gauges help measure critical clearances and end play during assembly. Keep a catch pan handy for fluid drainage, along with rubber gloves and safety glasses.
Round out your toolkit with penetrating oil, thread locker, gasket scraper, and inspection mirror. A digital caliper proves useful for measuring shaft diameters and bearing clearances. Many professionals in our community recommend having a parts washing station available, though this can be improvised with a large tub and degreaser for smaller operations.
Specialized Equipment Worth Hiring
Working on a C4 4×4 transmission conversion requires specialized equipment that most DIYers won’t have in their garage. Rather than making expensive purchases for a one-time job, consider these essential tool rental options that will save money and deliver professional results.
A transmission jack is non-negotiable for safely removing and installing the transmission. These specialized jacks support the weight (around 90kg) while allowing precise positioning during installation. Standard floor jacks simply won’t provide the stability needed.
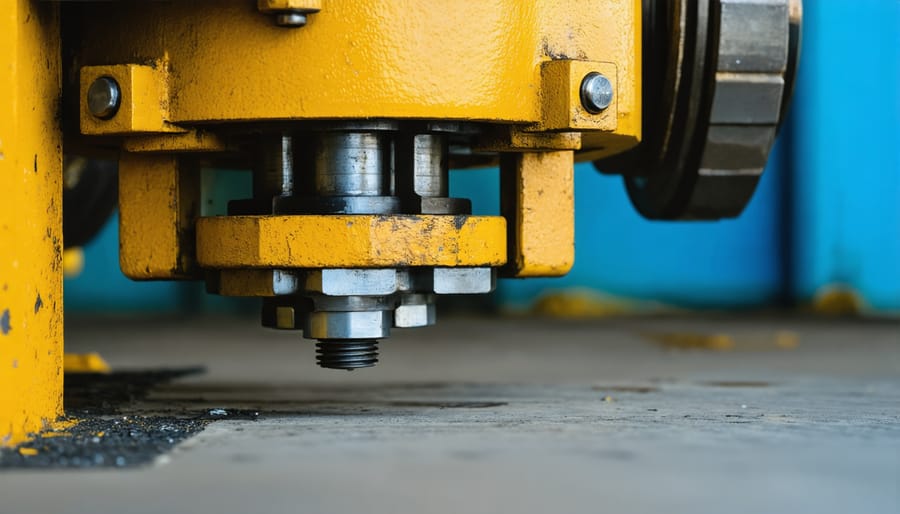
Hydraulic presses are essential for installing bearings, seals, and bushing work. Attempting these tasks without proper pressure control risks damaging expensive components. Look for a 12-ton capacity minimum.
Quality bearing pullers and separator sets prevent damage when removing old bearings from shafts and housings. These come in various configurations, so confirm availability for your specific transmission model.
Finally, professional diagnostic scan tools help verify electronic compatibility and identify issues before and after installation. Many rental shops now stock advanced scanners that once cost thousands of dollars, making them accessible for weekend projects while ensuring accurate troubleshooting throughout your conversion process.
Step-by-Step Enhancement Process
Preparation and Safety Considerations
Before tackling a C4 4×4 transmission project, proper preparation is essential for both safety and success. Start by assembling appropriate safety equipment including heavy-duty work gloves, safety glasses, steel-toed boots, and a quality respirator mask for working with transmission fluids. Your workspace should be well-ventilated, level, and spacious enough to accommodate the vehicle on jack stands with clearance for maneuvering heavy components underneath.
Ensure you have multiple jack stands rated for your vehicle’s weight, never relying solely on a hydraulic jack. The transmission itself weighs 150-200 pounds when full, so a transmission jack is crucial for safe removal and installation. Keep a dedicated drain pan capable of holding at least six quarts for fluid collection.
Transmission fluid is hazardous and requires proper disposal. Never pour it down drains or onto the ground. Contact local recycling centers or automotive shops that accept used fluids. Many communities offer free hazardous waste collection days specifically for this purpose.
Disconnect the battery before beginning work to prevent electrical shorts. Allow the transmission to cool completely if recently driven, as fluid temperatures can exceed 200 degrees Fahrenheit.
Removal and Inspection
Before attempting removal, disconnect the battery and position the vehicle on a level surface with jack stands rated for the weight. Safety first: use wheel chocks and never rely solely on a jack. You’ll need a transmission jack (available at most tool rental centers), socket sets, drain pans, and penetrating oil for stubborn bolts.
Start by draining the transmission fluid completely into an appropriate container. Mark all electrical connections with tape before disconnecting to simplify reinstallation. Remove the driveshaft, noting its orientation for proper reinstallment. Disconnect the shifter linkage, speedometer cable, and any vacuum lines. Support the engine with a jack before unbolting the crossmember.
The C4 4×4 transmission weighs approximately 150 pounds, so proper lifting equipment is essential. Carefully lower the unit, watching for any remaining connections. Community members consistently report that taking photos during disassembly saves hours during reassembly.
Once removed, perform a visual inspection. Check for metal shavings in the fluid, which indicate internal wear. Examine the torque converter for cracks or damage. Inspect all seals and gaskets for deterioration. Test the input shaft for excessive play. Based on your findings and intended use, you can determine whether a full rebuild, specific component replacement, or upgrade path makes the most sense for your project goals.
Installation and Testing
Proper installation begins with thoroughly cleaning all mating surfaces and inspecting the bellhousing for cracks or damage. Torque the bellhousing bolts to manufacturer specifications, typically 35-40 ft-lbs in a cross-pattern sequence to ensure even pressure distribution. This prevents warping that could cause alignment issues or premature wear.
Before installation, verify the transmission cooler is adequate for increased torque loads. Most 4×4 conversions require an upgraded cooler with a minimum 20,000 GVW rating. Use the correct transmission fluid specified for your build—most enhanced C4 units perform best with synthetic ATF such as Dexron VI or Mercon V. Fill capacity is approximately 12 quarts including the torque converter, but always verify your specific configuration.
Install the driveshaft with new U-joints torqued to 15-20 ft-lbs, checking for proper phasing to minimize vibration. Double-check all electrical connections, particularly the neutral safety switch and speedometer sender.
During the critical break-in period, drive conservatively for the first 500 miles. Avoid hard acceleration, towing, or sustained high RPM operation. Change the fluid and filter at 500 miles to remove metal particles from gear mesh seating. Monitor fluid temperature during break-in; anything above 200 degrees Fahrenheit indicates potential cooling system inadequacy.
Community feedback consistently emphasizes double-checking torque converter bolt tightness at 100 miles, as initial settling can cause slight loosening.
Cost Breakdown: What to Expect
Understanding the financial commitment of a C4 4×4 transmission project helps you plan effectively and avoid surprises. Here’s a realistic breakdown of what you’ll encounter.
The transmission itself represents your largest expense. A used C4 transmission in good condition typically ranges from $300 to $800, while professionally rebuilt units run $1,200 to $2,500. If you’re adapting it for 4×4 use, expect additional costs for the adapter kit ($400-$900) and transfer case ($500-$1,500 depending on whether you choose used or new).
Labor costs vary significantly based on your approach. Professional installation by a transmission specialist runs $1,500 to $3,000, factoring in the complexity of integrating a C4 into a 4×4 application. DIY enthusiasts can save substantially here, though you’ll need proper equipment.
Tool rental becomes essential for home mechanics. A quality transmission jack rental costs approximately $30-$50 per day, while specialty tools like torque wrenches and alignment tools add another $20-$40 daily. Plan for 2-3 days of rental time for a thorough job. Engine hoists, if needed for better access, run about $40-$60 per day.
Supporting components add up quickly. Budget $150-$400 for a new torque converter, $50-$150 for transmission fluid and filter, and $100-$300 for miscellaneous hardware, gaskets, and seals. Custom driveshaft modifications may require another $200-$500.
Ongoing maintenance costs remain reasonable. Expect to spend $80-$120 annually on fluid changes and inspections. Keep $200-$300 in reserve for unexpected seal replacements or minor adjustments during the first year as everything settles in.
Total project costs typically range from $2,500 for budget-conscious DIY builds to $7,000+ for professional installations with premium components.
Real-World Performance: User Experiences
Real-world feedback from the C4 4×4 community reveals both inspiring successes and valuable cautionary tales. Mike T., a Colorado-based fabricator, documented his six-month C4 conversion journey on popular off-road forums. His biggest lesson? “Don’t cheap out on the adapter plate quality. My first attempt using a budget adapter resulted in misalignment issues that took weeks to diagnose.” After switching to a precision-machined adapter and properly shimming the transfer case, Mike reports smooth operation across 15,000 miles of mixed terrain.
Professional mechanic Sandra R. shared before-and-after data from three client builds. Pre-conversion vehicles averaged 18 MPG highway; post-conversion numbers dropped to 14-15 MPG due to increased drivetrain friction and weight. However, her clients unanimously praised the improved traction in snow and mud conditions. Sandra emphasizes proper driveshaft balancing: “We saw vibration complaints disappear once we invested in professional balancing equipment rather than relying on eyeball measurements.”
DIY enthusiast James K. tackled his conversion in a home garage over four weekends. His advice centers on tool selection: “Rent quality transmission jacks and alignment tools. I tried using a floor jack initially and nearly dropped the assembly. The right equipment made the second attempt straightforward.” James also recommends creating a detailed photo log during disassembly, which proved invaluable during reassembly when factory service manuals lacked 4×4-specific guidance.
Common challenges reported across user groups include transfer case mounting interference with exhaust systems, requiring custom heat shielding or rerouting. Several users noted that electronic speedometer recalibration proved trickier than anticipated, with some resorting to aftermarket speed calibrators to resolve inaccurate readings. The consensus among successful converters? Plan for 20-30 percent more time and budget than initial estimates, test-fit components before final welding or drilling, and join online communities where experienced builders offer real-time troubleshooting advice. These shared experiences demonstrate that while C4 4×4 conversions demand patience and precision, the payoff in capability makes the effort worthwhile.
Maintenance Tips to Maximize Your Enhancement
Once you’ve invested in upgrading your C4 4×4 transmission, protecting that investment requires diligent maintenance. Proper care ensures your enhanced components deliver reliable performance for years to come.
Establish a fluid change schedule that’s more frequent than stock recommendations. Upgraded transmissions work harder, generating additional heat and stress. Change your transmission fluid every 15,000 to 20,000 miles, or annually if you regularly tackle challenging off-road terrain. Always use the manufacturer-recommended fluid type, as your upgraded components may require specific formulations different from standard C4 specifications.
Perform monthly visual inspections of your transmission and surrounding components. Check for fluid leaks around seals, gaskets, and cooler lines. Inspect the transmission pan for dents or damage from trail obstacles. Look for loose mounting bolts and verify that all electrical connections remain secure and free from corrosion.
Monitor your transmission temperature gauge closely during operation. If you notice temperatures consistently running higher than normal, investigate immediately. This could indicate low fluid levels, a failing cooler, or internal component wear.
Pay attention to early warning signs that demand immediate attention. Delayed engagement when shifting into gear, unusual noises like whining or grinding, or harsh shifting patterns all signal potential problems. Catching these issues early prevents minor problems from becoming expensive failures.
Document your maintenance activities, including fluid changes, inspections, and any repairs. This record helps identify patterns and proves invaluable if warranty claims arise. When your transmission isn’t in use, practice storing equipment properly to prevent environmental damage. Community forums often share maintenance schedules and troubleshooting tips from users with similar setups, providing real-world insight into keeping your enhanced transmission performing optimally.
Upgrading your C4 transmission for 4×4 applications requires careful planning and the right approach. Whether you’re converting a Corvette transmission for off-road use or maintaining an existing setup, success depends on understanding your specific requirements and working methodically through each stage. The investment in quality components, proper tools, and thorough preparation pays dividends in performance and reliability.
Before starting your project, honestly assess your mechanical skill level and available workspace. Some enthusiasts thrive on complete DIY builds, while others benefit from tackling smaller maintenance tasks and leaving complex modifications to professionals. There’s no shame in seeking expert help for specialized procedures like case machining or custom adapter fabrication.
Remember that the community of 4×4 transmission builders is an invaluable resource. Share your experiences, ask questions, and learn from others who’ve completed similar projects. Their real-world insights often highlight solutions you won’t find in manuals.
For those needing specialized equipment, explore tool rental options rather than purchasing rarely-used items. Transmission jacks, torque wrenches, and hydraulic presses can significantly impact project cost when bought outright. Plan your timeline, gather quality parts, rent the tools you need, and approach your C4 4×4 transmission project with confidence and patience.
Related Posts

Post a Comment