
Choose Z-Wave devices bearing the official certification logo to ensure compatibility across brands—unlike proprietary systems, Z-Wave operates on a standardized wireless protocol that lets your door locks, motion sensors, and cameras communicate seamlessly regardless of manufacturer. Install a Z-Wave hub as your system’s central brain, positioning it centrally in your home for optimal signal range of up to 30 meters between devices, with each component acting as a signal repeater to extend coverage throughout larger properties.
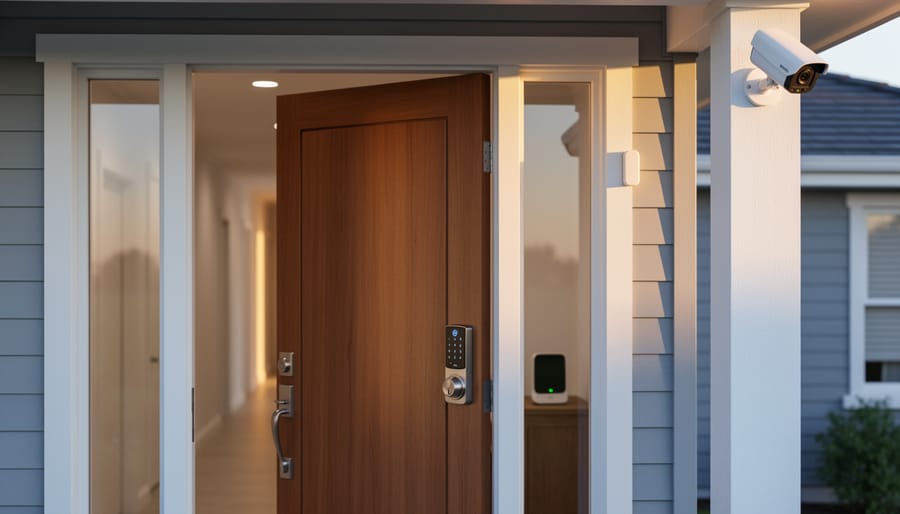
Start with perimeter protection by mounting Z-Wave door and window sensors on entry points, pairing them with smart locks that send instant notifications to your smartphone when someone enters. These battery-powered sensors install in minutes using adhesive strips or basic screws, requiring no electrical experience or professional installation fees. Add motion-activated cameras at vulnerable spots like driveways and back doors, selecting models with night vision and weatherproof ratings if mounting outdoors.
Configure automation rules through your hub’s smartphone app to create layered defense—program lights to switch on when motion is detected, sirens to sound if doors open while armed, or locks to engage automatically at specific times. This approach mirrors essential security measures used by businesses but scales perfectly for residential properties.
Z-Wave systems cost 30-50% less than professionally monitored alternatives while offering DIY flexibility that lets you expand gradually. Community forums consistently praise the technology’s reliability, with users reporting years of stable performance and minimal false alarms when sensors are properly positioned away from heat sources and pet pathways.
What Makes Z-Wave Different from Standard Home Security
The Mesh Network Advantage
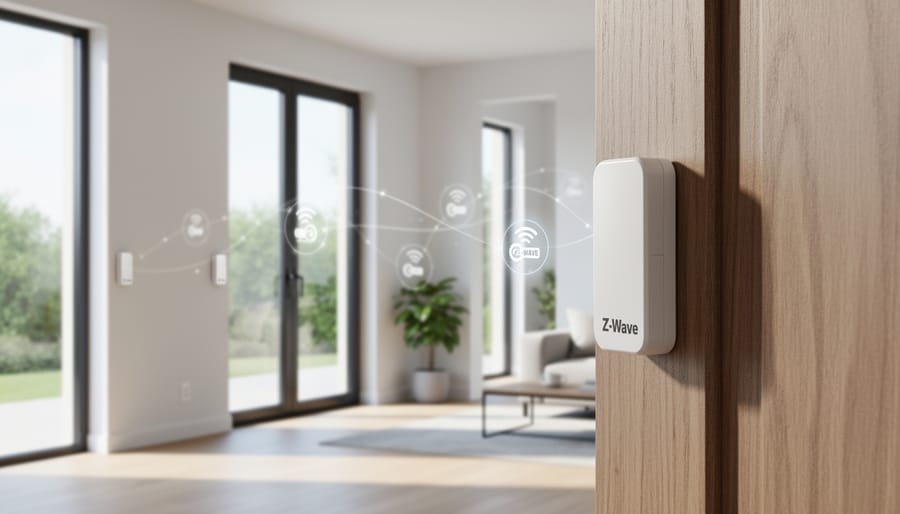
Z-Wave’s mesh network is what sets it apart from traditional wireless security systems. Instead of each device communicating directly with a central hub, Z-Wave devices talk to each other, creating multiple pathways for signals to travel. Think of it like a relay race – if one device can’t reach the hub directly, it passes the signal through nearby devices until it arrives.
Here’s a practical example: your front door sensor might be too far from the hub in your basement, but it can send its signal to a hallway motion detector, which then relays it to a smart plug in the living room, finally reaching the hub. This “hopping” happens instantly and automatically.
The real-world benefit? Fewer dead zones and more reliable performance. One homeowner in our community shared that adding just two Z-Wave smart plugs throughout their 2,500 square foot home eliminated connection issues with their garage door sensor. Each Z-Wave device you add (up to 232 devices) strengthens the entire network, extending its range organically. This self-healing network even routes around devices that are offline or experiencing interference, ensuring your security system stays connected when it matters most.
Battery Life and Power Efficiency
One of Z-Wave’s biggest advantages for home security is its exceptional power efficiency. Unlike Wi-Fi security devices that constantly communicate with your router and drain batteries quickly, Z-Wave operates on a low-power radio frequency specifically designed for smart home applications. This means your door sensors, window contacts, and motion detectors can run for years on a single battery rather than months.
In practical terms, a typical Z-Wave door sensor can last 2-5 years on a coin cell battery, while comparable Wi-Fi sensors often need replacement every 3-6 months. This translates to less maintenance, fewer midnight battery changes, and lower ongoing costs. Community reviews consistently highlight this as a major benefit, especially for hard-to-reach sensors installed in high windows or outdoor locations.
The low power consumption also means Z-Wave devices generate less heat and operate more reliably in extreme temperatures. For DIY installers, this reliability is crucial because you won’t be constantly troubleshooting connection issues or climbing ladders to swap batteries. When planning your security system, factor in that fewer battery changes means more time enjoying your protected home rather than maintaining it.
Essential Z-Wave Security Components for Your Home
Smart Door and Window Sensors
Z-Wave door and window sensors work by detecting when a contact point breaks between two magnetic components. When a door or window opens, the sensor immediately sends a wireless signal to your Z-Wave hub, which can trigger alerts, activate cameras, or sound alarms. These battery-powered devices are among the simplest Z-Wave components to install yourself, typically requiring just adhesive mounting or two screws.
Basic Z-Wave contact sensors range from £15-30 each, while premium models with additional features like temperature monitoring or tamper alerts cost £35-50. When planning your installation, you’ll need basic tools like a screwdriver, drill for harder surfaces, and a spirit level for proper alignment. Many DIY users recommend testing sensor placement before permanent mounting to ensure reliable signal strength to your hub.
Community feedback consistently highlights the importance of checking battery life indicators and choosing sensors with low-battery alerts. Look for models with a minimum 2-year battery life and ensure they’re compatible with your existing Z-Wave hub. Professional installers suggest starting with entry points on your ground floor before expanding to upper levels, making the system easier to troubleshoot during initial setup.
Motion Detectors and Glass Break Sensors
Motion detectors typically offer 90 to 180-degree coverage patterns and work best when mounted in room corners at seven to eight feet high. Position them to monitor entryways and hallways where intruders must pass, avoiding direct sunlight or heating vents that can trigger false alarms. For Z-Wave motion sensors, you’ll need a drill with masonry bits for hard surfaces, a level to ensure proper angle alignment, and appropriate anchors for your wall type.
Glass break sensors detect the specific frequency of breaking glass and should be placed within 25 feet of protected windows. Mount these on walls opposite the windows rather than directly on the glass itself. One sensor can typically monitor multiple windows in the same room.
Community feedback highlights the importance of testing coverage patterns before permanent installation. Walk through your detection zones at different angles to verify sensor response. Many DIYers recommend using removable adhesive strips initially to experiment with placement before drilling mounting holes. Remember that pet-immune sensors can prevent false triggers if you have animals under 40 pounds.
Smart Locks and Access Control
Z-Wave smart locks represent one of the most practical home security improvements you can tackle yourself. Popular options include the Yale Assure Lock, Schlage Encode, and Kwikset SmartCode series, which retail between $200-$400 and work with most standard deadbolt preparations.
For installation, you’ll need basic tools: a Phillips-head screwdriver, tape measure, and potentially a hole saw if retrofitting doors without existing deadbolt cutouts. Most Z-Wave locks fit standard door preparations with 2-1/8 inch bore holes and 1-inch cross bores, making them straightforward replacements for traditional deadbolts.
Community feedback highlights the importance of checking door thickness compatibility before purchasing, as some models only accommodate doors between 1-3/8 and 1-3/4 inches thick. Users also recommend testing battery life and keeping spare batteries on hand, as most Z-Wave locks run on four AA batteries lasting 6-12 months depending on usage frequency.
Security Cameras with Z-Wave Integration
While Z-Wave excels at connecting sensors and smart locks, camera integration requires understanding that most security cameras don’t use Z-Wave directly. Instead, they typically connect via Wi-Fi but can be controlled through your Z-Wave hub using compatible bridge devices or smart home platforms like SmartThings or Hubitat.
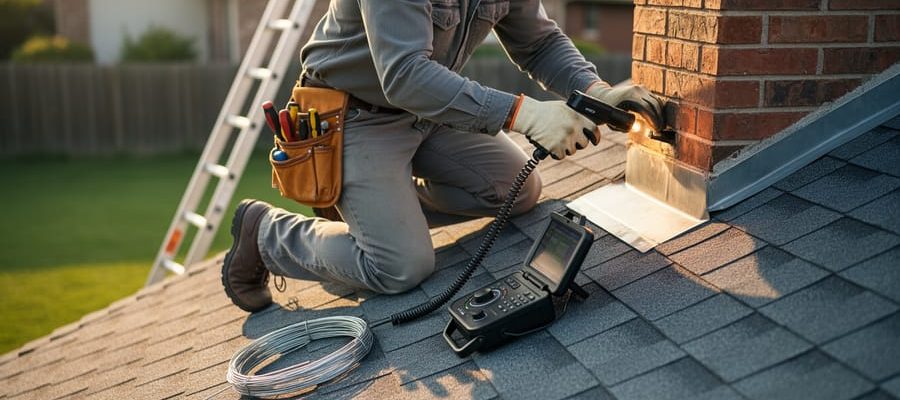
For DIY installation, you’ll need specific mounting tools depending on your camera type and surface. Essential equipment includes a power drill with masonry bits for brick or concrete, a stud finder for interior walls, a level to ensure proper camera alignment, and appropriate screws or wall anchors. Outdoor installations often require weatherproof junction boxes and cable management tools like fish tape for running wires through walls.
Community feedback highlights that dome cameras typically need hole saws for recessed mounting, while bullet cameras are more forgiving for first-time installers. Many DIYers recommend testing camera angles with temporary mounting before drilling permanent holes. Consider renting specialized tools like rotary hammers for extensive outdoor installations or cable fishing kits for multi-camera setups. Always verify your camera’s power requirements—some Z-Wave-compatible systems use Power over Ethernet (PoE), eliminating the need for separate electrical work and simplifying installation considerably.
Installing Your Z-Wave Security System: A DIY Approach
Planning Your Security Layout
Start by conducting a walk-through of your home to identify vulnerable entry points. Check all ground-floor windows, doors (including garage and basement entries), and any secluded areas where intruders might access undetected. Note which rooms contain valuables and consider sight lines from the street.
Create a simple floor plan sketch marking priority zones. Most homeowners need door and window sensors on all ground-floor access points and any upper-floor windows accessible via porches or trees. Motion sensors work best in hallways and main living areas where intruders must pass through. Place cameras at front and back entrances, covering package delivery zones.
Determine your Z-Wave hub placement first, as it coordinates all devices. Position it centrally to maximize the mesh network range, typically 100 feet per device in open space but less through walls. Remember that Z-Wave devices act as signal repeaters when mains-powered, extending your network naturally.
Community feedback consistently recommends starting with essential sensors before adding convenience features. A basic setup includes entry sensors, one motion detector, and a siren. You can always expand later since Z-Wave systems grow with your needs. Many DIYers suggest testing sensor placement temporarily with painter’s tape before permanent installation to ensure proper coverage and signal strength.
Tools You’ll Need (and Where to Hire Them)
Installing a Z-Wave home security system requires minimal specialized equipment, making it an accessible DIY project. For mounting sensors and hubs, you’ll need a cordless drill with assorted bits, a level, and a tape measure. While Z-Wave devices are wireless and don’t require hardwiring, if you’re integrating wired components like cameras, cable fish tape helps route wires through walls cleanly.
A multimeter is essential for testing power connections and troubleshooting. For proper placement testing, consider hiring a Z-Wave signal strength meter to ensure optimal device communication before permanent installation. Many community members recommend having a stud finder to securely mount control panels and cameras to wall framing rather than just drywall.
Most standard tools like drills and basic hand tools are available at your local hire shop if you don’t own them. Specialized equipment like cable fishing kits or network testing tools can be hired for just the installation period, saving money compared to purchasing. Safety gear including safety glasses and gloves should always be worn when drilling or working at heights. Many DIYers in our community suggest hiring a ladder or work platform for ceiling-mounted sensors rather than improvising with household furniture for safer installation.

Installation Steps and Safety Tips
Installing Z-Wave security devices is straightforward for most DIY enthusiasts, though proper planning ensures reliable performance. Before starting any installation, review DIY electrical safety guidelines, particularly when working with powered sensors or control panels.
Begin by mapping your home’s layout and identifying optimal sensor locations. Door and window sensors should mount on the frame rather than moving parts, typically 15-20cm from the edge. Motion detectors work best in corners at 2-2.5 meters height, avoiding direct sunlight or heating vents that trigger false alarms.
Most Z-Wave devices use adhesive backing or require minimal drilling. If drilling into walls, always check for electrical wiring and plumbing first using a stud finder with wire detection. Mark your drill points carefully and wear safety glasses. When working near existing wiring, follow essential safety considerations and turn off power at the breaker if uncertain.
After physical installation, pair each device with your Z-Wave hub following the manufacturer’s inclusion process. Most systems require pressing a button on both the hub and device within range. If devices fail to pair, check battery orientation and ensure they’re within 10 meters of the hub during setup.
Common troubleshooting includes weak signal issues, often resolved by adding Z-Wave repeaters or repositioning devices. Users report that testing each sensor immediately after installation prevents frustration later. Document each device’s location and battery type for future maintenance.
Setting Up Your Z-Wave Hub and Network

Choosing the Right Hub for Your Needs
Selecting the right Z-Wave hub is crucial for building a reliable home security system. Think of the hub as your system’s brain—it coordinates all your devices and lets you control them from one place.
Popular options include SmartThings, which offers excellent compatibility with various brands and straightforward setup that appeals to DIYers. Hubitat Elevation provides local processing without relying on cloud services, giving you faster response times and continued operation during internet outages. Ring Alarm’s hub integrates seamlessly if you’re already using Ring cameras, while Home Assistant suits tech-savvy users wanting maximum customization.
For security applications, prioritize these features: battery backup to keep your system running during power cuts, local processing for faster alarm responses, and strong encryption standards. Check that your hub supports Z-Wave Plus (the latest generation offering better range and battery life) and verify compatibility with the specific sensors and locks you plan to install.
Community reviews consistently highlight that reliability trumps fancy features for security. A hub that consistently triggers alerts and responds to commands beats one with dozens of integrations that occasionally fails. Before purchasing, read real user experiences about stability and whether the manufacturer provides regular security updates—essential for protecting your home network from vulnerabilities.
Pairing Devices and Creating Automation
Adding Z-Wave devices to your network is straightforward when you follow the correct process. Start by positioning your Z-Wave controller in a central location, then access its pairing mode through the manufacturer’s app or control panel. Place the new device (sensor, lock, or camera) within a few metres of the controller during initial pairing to ensure a strong connection. Press the device’s pairing button as instructed in its manual, usually indicated by a flashing LED light confirming communication.
Once paired, test each device immediately before permanent installation. Move sensors to their final locations one at a time, checking signal strength through your controller app. Remember that Z-Wave creates a mesh network, meaning devices relay signals between each other, improving reliability as you add more components.
Creating security automations enhances your protection significantly. Set up lighting triggers so exterior lights activate when motion sensors detect movement after dark. Configure door and window sensors to send instant alerts to your phone when breached. Many users in our community recommend linking smart home security systems with automated door locks that engage when you arm the system. Start with simple automations, then expand based on your household’s patterns and security needs.
Real-World Performance: What Users Are Saying
Real-world feedback from Z-Wave security system users reveals a consistently positive experience, particularly among DIY installers who appreciate the technology’s flexibility and reliability. Community forums and review sites show that homeowners who tackled installation themselves report high satisfaction rates, with many praising the straightforward pairing process and intuitive setup.
Common praise points center around system reliability. Users frequently mention that Z-Wave devices maintain stable connections even in larger homes, with the mesh networking capability ensuring signals reach distant sensors. One recurring theme in reviews is the absence of monthly monitoring fees when self-monitoring, which resonates strongly with budget-conscious homeowners. Many users also highlight the ability to expand their systems gradually, adding sensors and devices as their needs and budgets allow.
However, challenges do emerge in user testimonials. Range limitations in homes with thick walls or metal construction appear most frequently, though experienced DIYers have found practical solutions. Adding Z-Wave Plus range extenders or strategically placing devices to create stronger mesh networks typically resolves these issues. Some users initially struggled with device compatibility, learning the importance of verifying that all components use the same Z-Wave frequency for their region.
Professional tradespeople installing systems for clients note that explaining the technology to homeowners becomes easier when demonstrating the physical devices. They recommend starting with a basic hub and a few sensors to let clients experience the system before committing to a full installation.
The community consensus suggests that patience during initial setup pays dividends. Users who spent time properly positioning devices and testing connections before finalizing installations reported fewer headaches and more reliable long-term performance. Online forums and manufacturer support channels provide valuable troubleshooting resources when questions arise.
Maintenance and Troubleshooting Your System
Maintaining your Z-Wave security system requires minimal effort but ensures reliable performance. Start by establishing a battery replacement schedule for wireless sensors. Most motion detectors and door sensors use standard AA or CR123A batteries that last 1-2 years. Keep a log of installation dates and set calendar reminders six months before expected replacement to avoid unexpected failures.
Network health monitoring is essential for optimal performance. Access your Z-Wave controller’s diagnostic tools monthly to check signal strength for each device. Look for weak connections (below 50% signal strength) that might indicate interference or distance issues. If you notice connectivity problems, consider hiring a Z-Wave signal analyzer from your local tool rental shop to identify dead zones and plan repeater placement strategically.
Common troubleshooting issues include devices dropping offline, delayed response times, and failed automations. Begin by power-cycling your Z-Wave hub and waiting 2-3 minutes for the network to rebuild. If specific devices remain unresponsive, perform a Z-Wave network heal through your controller interface, which optimizes communication routes between devices.
For persistent problems, exclude the problematic device from your network and re-add it following manufacturer instructions. Position devices within 30 feet of the controller or nearest repeater for best results. Community reviews consistently highlight that updating firmware regularly prevents many connectivity issues, so enable automatic updates when available or check manufacturer websites quarterly for updates.
Cost Breakdown: DIY vs. Professional Installation
When weighing DIY versus professional installation for your Z-Wave home security system, understanding the full cost picture helps you make the right choice for your situation.
For a typical DIY installation, expect to spend between $300-$800 on equipment, depending on your home’s size and the number of devices you need. A basic starter kit including a hub, door sensors, motion detectors, and a smart lock runs around $400. You’ll likely need basic tools you already own: a drill, screwdrivers, and a ladder. If you need to rent specialized equipment like a network cable tester or stud finder, add $20-50 to your budget. The biggest investment is time—plan for 4-8 hours for initial setup and configuration, plus additional time learning the system through trial and error.
Professional installation typically costs $500-$1,500 on top of equipment expenses. This includes labor, expertise, and often a warranty on the installation work. You’ll save significant time, usually completing the job in 2-4 hours with professionals handling the technical details. Many installers also provide system training and ongoing support.
According to community feedback from DIY enthusiasts, the learning curve can be steep but rewarding. One homeowner reported spending an entire weekend on installation but gained valuable knowledge for future modifications. Tradespeople often find DIY straightforward given their existing skillset.
Consider your technical comfort level, available time, and budget. DIY saves money upfront but requires patience and problem-solving ability. Professional installation offers convenience and immediate functionality, making it worthwhile for those valuing time over cost savings.
Z-Wave technology offers a reliable, secure, and expandable foundation for modern home security systems. Its mesh network architecture ensures consistent communication between devices, while bank-level encryption protects your data from unauthorized access. The compatibility across hundreds of manufacturers means you can customize your system exactly to your needs without being locked into a single brand. For DIY enthusiasts and homeowners, installing a Z-Wave security system is entirely achievable with proper planning, the right tools, and patience to follow manufacturer instructions. Remember to map your home layout before purchasing devices, test signal strength during installation, and take advantage of the modular nature of Z-Wave to start small and expand over time. Whether you’re securing a single entry point or building a comprehensive whole-home system, the investment in quality components and careful installation pays dividends in peace of mind. We’d love to hear about your Z-Wave security journey. Share your installation experiences, tips, or questions in our community section below to help fellow DIYers make informed decisions and troubleshoot challenges together.
Related Posts
Post a Comment