
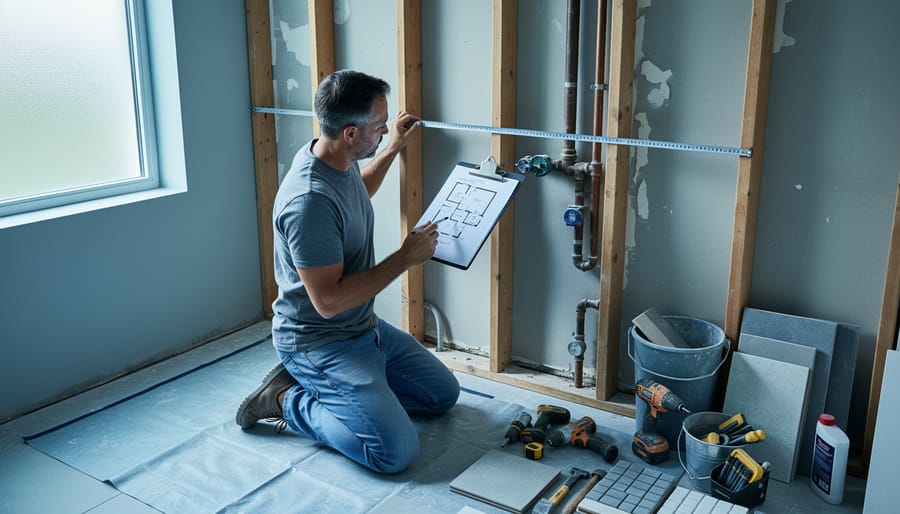
Start by mapping every fixture, surface, and utility line in your current bathroom on graph paper or a digital floor plan tool. Measure twice—capturing exact dimensions of walls, doorways, windows, plumbing locations, and electrical outlets—because a single miscalculation can derail your entire renovation timeline and budget. This visual inventory reveals structural constraints, identifies potential problems like outdated wiring or water damage, and establishes the foundation for realistic design decisions.
Establish a working budget that allocates 20% more than your initial estimate for unexpected issues. Break costs into categories: demolition, plumbing, electrical, materials, labor, and tools. Calculate whether purchasing or renting specialized equipment makes financial sense—most homeowners save 40-60% by renting tile saws, demolition hammers, and wet vacuums for short-term projects rather than buying tools they’ll use once. Factor in permit fees early, as many jurisdictions require inspections for electrical and plumbing work that can add weeks to your schedule.
Create a phased timeline working backwards from your target completion date. Sequence tasks logically: demolition, rough plumbing and electrical, inspection, installation, finishing, and final fixtures. Research permit requirements through your local building department before ordering materials—some renovations need approved plans before work begins. Identify which tasks require licensed professionals versus DIY-friendly work you can tackle yourself, recognizing that strategic professional help on complex plumbing or electrical prevents costly mistakes that amateur attempts often create.
Why Planning Makes or Breaks Your Bathroom Renovation
A bathroom renovation can transform your home, but statistics reveal a sobering reality: nearly 40% of homeowners report significant regret about their renovation decisions, with most issues tracing back to inadequate planning. The difference between a successful project and a costly nightmare often comes down to the hours spent preparing before the first tile is removed.
Poor planning typically manifests in predictable ways. Budget overruns top the list, with the average bathroom renovation exceeding initial estimates by 20-30% when proper planning is skipped. Homeowners frequently discover hidden plumbing issues mid-project, face unexpected structural problems, or realize their dream fixtures won’t fit the actual space. These surprises don’t just cost money—they add weeks or months to completion times.
The common pitfalls extend beyond finances. Rushed planning often leads to poor ventilation decisions that cause mold problems later, inadequate storage that frustrates daily use, or lighting choices that make the space impractical. Many DIYers also underestimate the specialized tools required, leading to equipment purchases they’ll use once or subpar results from using inappropriate tools.
Thorough planning flips this script entirely. Homeowners who invest time in detailed preparation typically complete projects within 10% of their original budget and timeline. They identify potential problems while solutions are still inexpensive, make informed material choices that balance quality and cost, and secure the right tools through rental options rather than expensive purchases.
The planning phase also builds confidence. Understanding the full scope helps you realistically assess which tasks you can tackle yourself and where professional help makes sense. You’ll create accurate material lists, avoid multiple hardware store trips, and prevent the project fatigue that causes many renovations to stall incomplete. Simply put, every hour spent planning saves three hours of problem-solving during construction.
Assess Your Current Bathroom and Define Your Goals
Document What You Have
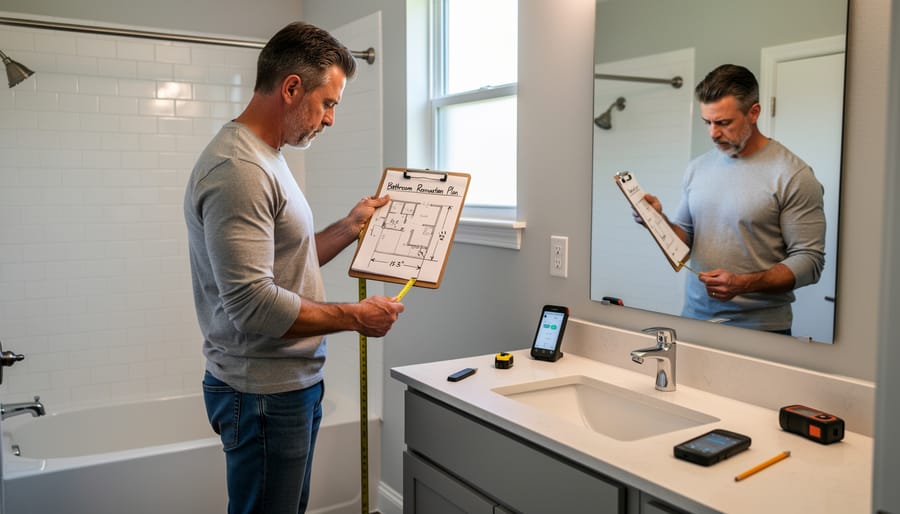
Before tearing out a single tile, you need a clear picture of your existing bathroom setup. Start by measuring the entire space—length, width, and ceiling height—along with the exact placement of your toilet, sink, shower or tub, and any windows or doors. These measurements become your blueprint for planning.
Next, grab your smartphone and photograph everything. Capture wide shots of the whole room from multiple angles, then take close-ups of each fixture, the areas behind your toilet and vanity, visible pipes, electrical outlets, light switches, and ventilation fans. Don’t forget to document what’s behind access panels if you have them. These photos serve as reference points throughout your project and help when consulting with professionals or ordering materials.
Create a simple inventory list noting the age and condition of existing fixtures, the type of flooring and wall materials currently installed, and any visible plumbing or electrical components. Identify where your main water shutoff valve is located and test it to ensure it works properly. Check for signs of water damage, mold, or structural issues like soft flooring or cracked tiles—these problems need addressing in your renovation plan.
This documentation process might seem tedious, but it prevents costly mistakes and helps you communicate clearly with contractors or staff at tool rental centers about exactly what equipment you’ll need for demolition and installation.
Identify Problems and Priorities
Start by making a clear distinction between what you need and what you want in your bathroom renovation. Needs typically include addressing water damage, fixing broken fixtures, improving ventilation, or resolving plumbing issues—problems that affect functionality and safety. Wants might cover aesthetic upgrades like new tiles, modern lighting, or a freestanding bathtub. Understanding this difference helps you allocate your budget effectively.
Tackle structural issues first. Examine your bathroom for signs of moisture damage, mould, outdated electrical wiring, or inadequate drainage. These problems must be addressed before any cosmetic work begins, as they affect the longevity and safety of your renovation. If you discover issues with plumbing or electrical systems, these become immediate priorities regardless of your initial renovation objectives.
Create a prioritized list by ranking items from essential to desirable. Essential items might include repairing a leaking shower, replacing a non-functional toilet, or fixing ventilation. Mid-priority items could be updating old vanities or improving storage. Lower-priority items are purely aesthetic choices that can be adjusted based on budget availability. This structured approach ensures critical repairs receive adequate funding while allowing flexibility for upgrades. Community feedback from fellow renovators often highlights that addressing foundational problems first prevents costly rework later.
Set Realistic Expectations
Before diving into your bathroom renovation, take an honest look at what you can realistically accomplish. Start by evaluating your space constraints—you can’t add square footage without major structural work, so focus on optimizing what you have. Your budget will be your biggest reality check. A basic bathroom refresh might cost $3,000-$7,000, while a full renovation can easily exceed $15,000-$25,000 depending on finishes and labor.
Assess your skill level honestly. Simple tasks like painting, installing towel bars, or replacing cabinet hardware are perfect DIY projects that save money. However, plumbing modifications, electrical work, and tile installation require precision and often licensing. One botched plumbing job can cost thousands in water damage repairs.
Consider a hybrid approach: tackle demolition and finishing touches yourself while hiring licensed professionals for technical work. Renting specialized tools instead of buying them makes trying new skills more affordable and less risky. Community reviews from other renovators can help you gauge which tasks are truly DIY-friendly and which warrant professional help.
Remember that even professionals encounter unexpected issues like hidden water damage or outdated wiring. Build contingency time and budget into your plans—typically 10-20 percent extra for both. Setting realistic expectations from the start prevents frustration and helps you make informed decisions throughout your renovation journey.
Create a Budget That Actually Works
Breaking Down Renovation Costs
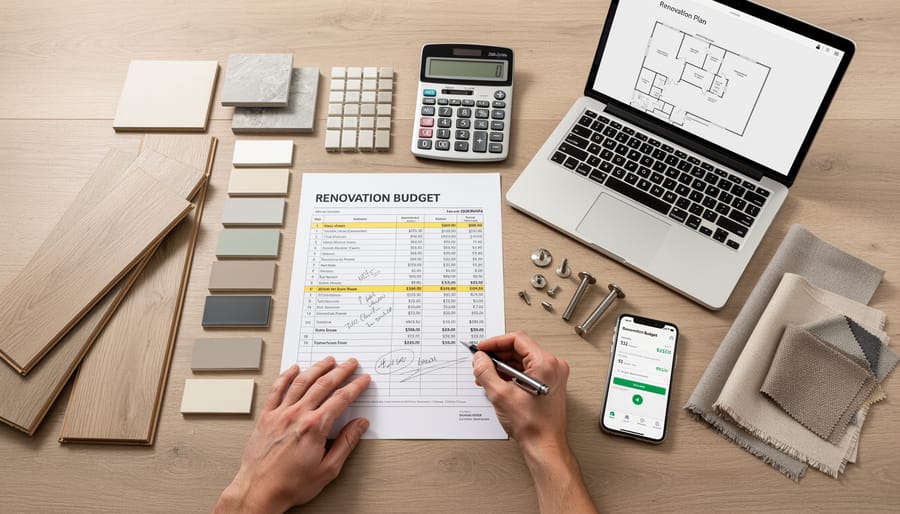
Understanding where your renovation dollars go helps you plan realistically and avoid budget surprises. Here’s how typical bathroom renovation costs break down:
Labor typically consumes 40-50% of your total budget. This includes plumbers, electricians, tile setters, and general contractors. Materials and fixtures account for another 30-40%, covering everything from tiles and grout to vanities and toilets. The remaining 10-20% should be reserved for unexpected expenses—and trust us, something unexpected always comes up, whether it’s outdated plumbing that needs replacing or hidden water damage behind walls.
For different renovation scales, expect these price ranges:
Basic refresh (cosmetic updates only): $3,000-$8,000. You’re repainting, replacing fixtures, and updating accessories without moving plumbing.
Mid-range remodel (layout stays the same): $10,000-$25,000. New tiling, vanity, toilet, shower/tub, lighting, and flooring with professional installation.
High-end renovation (potential layout changes): $30,000-$60,000+. Premium materials, custom cabinetry, luxury fixtures, and possible structural modifications.
One often-overlooked cost-saver: renting specialized tools instead of hiring for every task. Many DIY-friendly portions of bathroom renovations become affordable when you rent professional-grade equipment for just the days you need them, potentially reducing your labor costs by 20-30% on tasks you can confidently handle yourself.
The 20% Contingency Rule
Bathroom renovations rarely go exactly as planned. Hidden water damage behind tiles, outdated plumbing that needs replacement, or structural issues you discover once walls are opened can quickly drain your budget. This is why experienced renovators always add a 20% contingency fund to their total project cost. If your bathroom renovation estimate is $10,000, set aside an additional $2,000 specifically for unexpected expenses.
This buffer isn’t pessimism—it’s smart planning based on real-world experience. Community feedback from homeowners who’ve completed renovations shows that those without contingency funds often had to pause projects mid-way or make compromises they later regretted. Even well-planned renovations encounter surprises, especially in older homes where electrical wiring might not meet current codes or subfloors may need reinforcement.
Keep your contingency fund separate from your main budget and resist the temptation to use it for upgrades. If you’re fortunate enough to avoid major issues, you can decide at project completion whether to invest in that premium fixture you originally skipped or simply bank the savings.
Save Money Through Strategic Tool Rental
Your bathroom renovation budget shouldn’t be consumed by tools you’ll only use once. Strategic tool rental can redirect hundreds or even thousands of dollars toward high-quality materials and fixtures that actually add lasting value to your space.
Consider the specialty equipment most bathroom renovations require. A professional-grade tile saw typically costs $300-$800 to purchase but only $40-$70 to rent for a weekend. That difference alone could upgrade your shower fixtures from builder-grade to premium quality. Similarly, demolition hammers, moisture meters for detecting hidden water damage, and drain snakes for plumbing inspections are essential but expensive to own.
Before making any tool purchases, create two lists: items you’ll use repeatedly during the project and beyond, versus specialized equipment needed for specific tasks. Basic tools like drills, levels, and measuring tapes justify ownership. However, grout removal tools, pipe threaders, or drywall lifts rarely earn their purchase price for a single renovation.
Community reviews from fellow DIYers consistently highlight rental savings as a game-changer. One homeowner shared how renting instead of buying freed up $600 that went toward a rainfall showerhead she’d originally cut from her budget. Another noted that rental centers often provide brief tutorials on proper equipment use, adding educational value to the cost savings.
When planning your timeline, coordinate rental periods carefully. Reserve tools only when you’re ready to use them immediately, avoiding unnecessary daily charges. Many rental centers offer weekly rates that provide better value than daily rentals for longer tasks like tile installation.
Design Your Layout and Choose Materials
Optimize Your Bathroom Layout
Your bathroom layout determines how functional and comfortable the space will be, so getting it right during planning saves costly mistakes later. Start by mapping your existing plumbing locations—toilets, sinks, showers, and tubs connect to drain and supply lines that are expensive to relocate. Keeping fixtures near their current positions can save hundreds or even thousands in plumbing costs.
Measure your space carefully and account for minimum clearances. Building codes typically require at least 15 inches from the toilet centerline to any wall or fixture, 21 inches of clear space in front of toilets and sinks, and 30 inches of standing room in shower areas. These aren’t just recommendations—they’re legal requirements and practical necessities for comfortable use.
Consider the bathroom work triangle: the relationship between your toilet, sink, and shower or tub. Position these elements to create efficient movement patterns without wasted steps. In smaller bathrooms, wall-mounted toilets and floating vanities can create the illusion of more space while improving cleaning access.
Before finalizing your layout, think about door swing direction, storage placement, and towel bar locations. Sketch multiple configurations if possible, and walk through each scenario mentally. Many DIYers find that creating a scaled floor plan using graph paper or free online tools helps visualize traffic flow and identify potential problems before demolition begins.
Select Durable, Moisture-Resistant Materials
Your bathroom renovation’s longevity depends heavily on material selection. Start with moisture-resistant materials designed specifically for wet environments.
For flooring and walls, porcelain or ceramic tiles remain top choices due to their water resistance and durability. Look for tiles with a Porcelain Enamel Institute (PEI) rating of 3 or higher for floor applications—this indicates they can handle moderate to heavy foot traffic. Non-porous materials prevent water penetration and mold growth, essential for maintaining a healthy bathroom environment.
Waterproofing is non-negotiable. Install a waterproof membrane behind shower and tub areas before tiling. This barrier protects your wall structure from moisture damage that leads to costly repairs down the line. Many community members recommend RedGard or Schluter systems based on real-world experience.
When selecting fixtures, prioritize quality over trendy designs. Solid brass or stainless steel faucets outlast cheaper alternatives. Check user reviews from fellow DIYers who’ve tested products in their own homes—community-driven feedback often reveals durability issues not apparent in product descriptions.
Balance budget constraints by investing heavily in hidden infrastructure like waterproofing and plumbing, then save on visible elements like decorative tiles or vanity hardware. Quality foundations prevent expensive repairs, while cosmetic elements can be upgraded later without major reconstruction.
Create a Design Mood Board
A design mood board helps you visualize how your bathroom elements will work together before you commit to purchases. Start by gathering physical samples like tile chips, paint swatches, and hardware finishes from home improvement stores. Arrange these materials together under your bathroom’s lighting conditions to see how colors and textures interact throughout the day.
Digital tools like Pinterest, Houzz, or free mood board apps let you compile inspiration photos and product images in one place. Take photos of your sample arrangements and add them to your digital board alongside fixtures, vanities, and accessories you’re considering. This creates a complete visual reference you can share with contractors or fellow DIYers for feedback.
Check how your selections coordinate by placing samples side-by-side. Does the grout color complement your tile? Do the faucet and cabinet hardware finishes match your vision? Many DIYers discover potential clashes at this stage, saving costly returns later. Share your mood board in online renovation communities to gather insights from others who’ve completed similar projects. Their real-world experience often reveals practical considerations you might have missed during planning.
Build Your Project Timeline and Schedule
Map Out the Renovation Sequence
Getting your renovation sequence right prevents costly do-overs and ensures each trade can complete their work without obstruction. Here’s the logical flow that professional contractors follow.
Start with demolition, removing old fixtures, flooring, and wall coverings. This messy phase comes first so debris doesn’t damage new installations. Once the space is stripped bare, address any structural issues like rotted subfloors or damaged framing—these hidden problems must be fixed before moving forward.
Next comes rough-in work. This is when plumbers and electricians install pipes, drains, wiring, and outlets behind the walls. These systems need to be in place and inspected before walls are closed up. Many homeowners don’t realize that plumbing rough-in determines where fixtures can go, which is why finalizing your layout beforehand is critical.
After rough-in inspections pass, install insulation and moisture barriers, then close up walls with drywall or cement board. Cement board goes anywhere tile will be installed since it resists moisture better than standard drywall.
Now you’re ready for finish work in this order: flooring first (so wall tile can overlap and prevent water seepage), then wall tiling, followed by fixture installation like the vanity, toilet, and shower doors. Paint before installing fixtures when possible to avoid masking and overspray issues.
Finally, add finishing touches like mirrors, towel bars, and lighting fixtures. This sequence minimizes the risk of damaging completed work and ensures inspectors can access what they need to see at each stage.
Plan for the No-Bathroom Period
Living without a functional bathroom requires careful planning to minimize inconvenience. Start by identifying how many bathrooms your home has—if you have multiple bathrooms, renovate one at a time to maintain access to essential facilities. For single-bathroom homes, establish clear alternative arrangements before demolition begins.
Communicate your timeline with family members so everyone understands the disruption period. Consider these practical solutions: arrange access to a neighbor’s or relative’s bathroom for morning routines, install a temporary outdoor shower if weather permits, or set up a basic washing station in another room with running water. Some homeowners rent portable toilet units for extended renovations lasting several weeks.
Stock up on essentials like wet wipes, hand sanitizer, and disposable items to reduce trips to alternative facilities. Create a hygiene station with a large water container, basin, and towels in a convenient location.
Schedule the most disruptive work phases during times when family members are away at work or school. If possible, plan major demolition for a long weekend when you can stay elsewhere. Many DIY renovators find that breaking the project into shorter phases—even if it extends the overall timeline—makes the bathroom-free period more manageable than one extended outage.
Keep a realistic buffer in your schedule, as bathroom projects often take longer than anticipated.
Identify Required Tools and Equipment
Essential Tools for Each Renovation Phase
Breaking down your bathroom renovation by phase helps you gather the right tools at the right time, saving money and storage space. Here’s what you’ll need for each stage.
During demolition, you’ll require a pry bar for removing trim and fixtures, a hammer or reciprocating saw for breaking up tile, and a shop vacuum for cleanup. Heavy-duty work gloves and safety goggles are non-negotiable here. A dumpster or heavy-duty waste bags will handle debris removal efficiently.
For plumbing work, basic tools include an adjustable wrench, pipe wrench, and plumber’s putty. If you’re tackling more complex installations, consider renting a pipe threading machine or PEX crimping tool rather than purchasing these specialized items you’ll rarely use again.
Tiling requires a wet saw for cutting tiles to size, which is definitely worth renting unless you plan multiple projects. You’ll also need trowels for spreading thin-set, tile spacers for consistent grout lines, a grout float, and a sponge for cleanup. A manual tile cutter works for straight cuts on smaller jobs.
Finishing tools include paintbrushes, rollers, a caulking gun for sealing edges, and a drill with various bits for installing fixtures and accessories. A laser level ensures perfectly straight installations and is available at most rental centers.
Remember, renting expensive specialty tools like wet saws, reciprocating saws, and power augers makes financial sense for one-time renovations. Check your local rental center for package deals that bundle commonly paired tools together.

Don’t Forget Safety Equipment
Bathroom renovations involve multiple hazards that require proper safety equipment before you begin. During demolition, wear safety glasses or goggles to protect your eyes from flying debris, dust masks or respirators (N95 or better) to prevent inhaling particles, heavy-duty work gloves, and steel-toed boots. A hard hat becomes necessary if you’re removing ceiling fixtures or working overhead.
Chemical exposure is common when removing old caulk, adhesives, or applying new finishes. Always work in well-ventilated areas—rent an industrial fan or air mover if your bathroom lacks windows. Keep a first aid kit accessible and have emergency contact numbers posted.
For power tool operation, use hearing protection when running demolition equipment, tile saws, or drills for extended periods. Ground fault circuit interrupter (GFCI) outlets are essential when using electrical tools near water sources. Before starting any demolition, turn off water supply lines and electricity to the bathroom at your circuit breaker.
If you’re working with mold remediation, upgrade to a P100 respirator and disposable coveralls. Never skip safety equipment to save time—injuries will delay your project far longer than putting on protective gear.
Reserve Tools in Advance
Once you’ve identified which tools you’ll need for your bathroom renovation, book them as early as possible—ideally two to three weeks before your scheduled start date. Popular equipment like tile saws, demolition hammers, and wet-dry vacuums often get reserved quickly, especially during peak renovation season in spring and summer.
Start by calling rental centers to confirm availability for your specific dates. Ask about their cancellation policies in case your timeline shifts unexpectedly. Many rental companies offer multi-day or weekly rates that provide better value than daily rentals, which is perfect for phased bathroom projects.
Create a staggered reservation schedule that aligns with your project phases. For example, book demolition tools for week one, plumbing equipment for week two, and finishing tools for the final stages. This prevents paying for idle equipment and keeps your workspace less cluttered.
Before finalizing reservations, check community reviews from other renovators who’ve used the same rental location. Their feedback often reveals important details about equipment condition, pickup procedures, and customer service quality that can impact your project flow. Request confirmation numbers and save all booking documentation where you can easily access it during your renovation.
Get the Right Permits and Prepare for Inspections
Know What Requires Permits
Understanding permit requirements early in your planning prevents costly delays and legal headaches. Not all bathroom work requires permits, but knowing the difference is essential before you start.
Projects that typically require permits include moving or adding plumbing fixtures like toilets, sinks, or showers, as these involve changes to your home’s water and drainage systems. Any electrical work beyond simple fixture replacements—such as adding new outlets, installing heated floors, or upgrading your electrical panel—requires permits and licensed electricians in most areas. Structural modifications like removing walls, enlarging doorways, or changing window sizes always need approval since they affect your home’s integrity.
Simple cosmetic updates generally don’t require permits. These include replacing vanities, installing new mirrors, painting, changing light fixtures (without new wiring), updating faucets, and swapping out toilets or sinks in their existing locations.
Permit requirements vary by location, so always check with your local building department during the planning phase. Many homeowners assume permits are optional, but unpermitted work can complicate home sales, void insurance claims, and result in fines. Most building departments offer online resources or phone consultations to clarify what your specific project needs. Factor permit costs and inspection timelines into your budget and schedule—permits typically cost between 100 and 1,000 dollars depending on project scope.
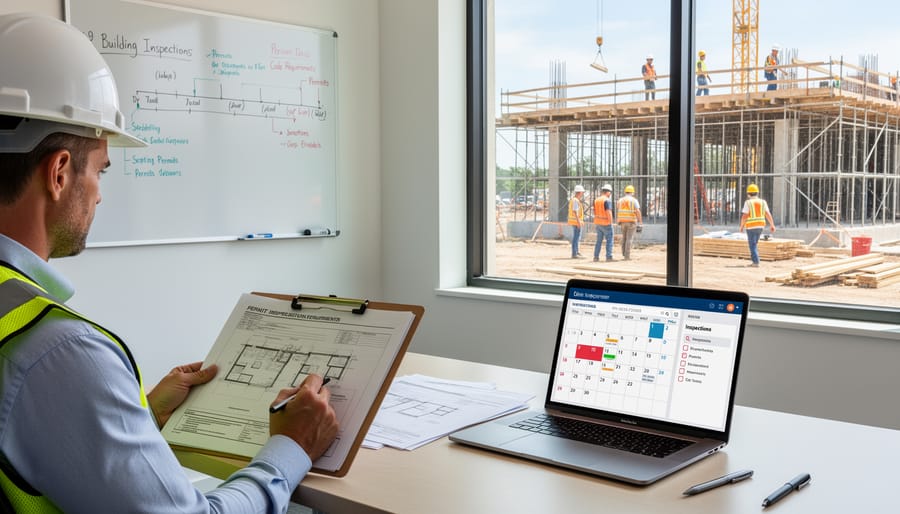
Schedule Inspections Strategically
Timing inspections correctly prevents costly delays and rework. Schedule your first inspection after rough plumbing and electrical work is complete but before covering walls. This typically occurs 3-5 days after installation, giving your inspector availability to review exposed systems. Call your local building department early in the week to avoid weekend backlogs.
Before each inspection, verify all work matches your approved permit plans. Take photos documenting completed work from multiple angles as backup records. Ensure the work area is clean, well-lit, and accessible so inspectors can easily evaluate everything without obstacles.
Plan for a final inspection after installing fixtures, flooring, and finishes. Most jurisdictions require 48-72 hours notice, so coordinate this timing carefully with your project schedule. Keep your contractor or yourself available during inspection windows to address questions immediately.
If an inspection fails, ask the inspector for specific correction details in writing. Address issues promptly and reschedule within a few days. Community feedback shows that maintaining open communication with inspectors and being prepared with documentation significantly reduces approval delays and keeps renovation timelines on track.
Create Your Final Action Plan
Now that you’ve worked through budgets, timelines, design decisions, and tool requirements, it’s time to consolidate everything into a single, actionable renovation plan. This final step transforms your research into a practical roadmap you can follow with confidence.
Start by creating a master checklist that sequences every task in order. Break your renovation into distinct phases: demolition, rough plumbing and electrical work, installation, finishing touches, and post-renovation cleanup. Under each phase, list specific tasks with their estimated duration, required tools, and responsible parties—whether that’s you, hired professionals, or family members helping out.
Next, develop a decision tree to help you determine when to proceed and when to pause. Ask yourself: Do I have all necessary permits approved? Have I confirmed delivery dates for major fixtures? Are my tool rentals booked for the correct dates? Is my budget still realistic with a 15-20 percent contingency buffer? If you answer no to any of these questions, pause and address the gap before moving forward.
Create a communication plan if you’re coordinating multiple tradespeople. Schedule who works when, ensuring plumbers complete rough-ins before tilers arrive, and electricians finish before vanity installation. Build in buffer days between trades to accommodate unexpected delays.
Document your material specifications in one place—tile dimensions, paint colours, fixture model numbers, and quantities. This prevents costly ordering mistakes and ensures consistency throughout the project.
Finally, establish weekly review points where you’ll assess progress against your timeline and budget. This helps you catch problems early when they’re easier and cheaper to fix. Keep all receipts, permits, and warranty information in a dedicated folder—you’ll thank yourself later if issues arise or when it’s time to sell your home.
A successful bathroom renovation doesn’t happen by chance—it’s the direct result of thorough planning, careful preparation, and having the right resources at your fingertips. By taking the time to assess your space, create a realistic budget, develop a detailed timeline, and identify the tools you’ll need, you’ve already positioned yourself for a smoother, more cost-effective project.
Remember that you’re not alone in this journey. Thousands of DIYers and professional tradespeople have tackled bathroom renovations before you, and their experiences can be invaluable. Before purchasing or renting tools, take advantage of community-driven reviews from fellow renovators who’ve actually used the equipment on projects just like yours. These real-world insights help you avoid costly mistakes and choose solutions that truly work.
Whether you’re a first-time DIYer or a seasoned professional, accessing the right tools without the hefty price tag of ownership makes renovation projects more achievable. Tool rental solutions allow you to work with professional-grade equipment while keeping your budget intact for the materials and finishes that matter most.
As you move forward with your bathroom renovation, lean on the planning framework you’ve built, stay flexible when unexpected challenges arise, and don’t hesitate to seek advice from the renovation community. Your careful preparation has laid the groundwork for success—now it’s time to bring your vision to life with confidence.
Related Posts

Post a Comment