Moisture and temperature don’t just coexist in your walls—they interact in ways that can make or break your building project. Hygrothermal performance describes how water vapor and heat move through building materials simultaneously, creating conditions that either protect your structure for decades or lead to mold, rot, and costly repairs within years.
Understanding this relationship matters because every construction decision you make—from insulation type to vapor barrier placement—affects how moisture behaves inside your walls. Get it wrong, and condensation forms where you can’t see it, damaging timber frames, corroding metal fasteners, and creating health hazards. Get it right, and your building stays dry, durable, and energy-efficient regardless of weather conditions outside.
The principles apply whether you’re renovating a single room or constructing energy-efficient buildings from the ground up. Australian climates present unique challenges, from tropical humidity in Queensland to alpine freeze-thaw cycles in Victoria, making hygrothermal planning essential rather than optional.
This guide breaks down complex building science into practical knowledge you can use immediately. You’ll learn how to assess moisture risk in your specific climate, select appropriate materials, and install them correctly to prevent problems before they start. We’ll cover the testing equipment available for hire, explain when professional help becomes necessary, and share real-world examples from DIYers and tradespeople who’ve tackled hygrothermal challenges successfully.
What Hygrothermal Actually Means (Without the Engineering Jargon)
Let’s strip away the complexity and get to what hygrothermal actually means. The word itself gives us a helpful clue: hygro relates to moisture or water, while thermal refers to heat or temperature. Put them together, and hygrothermal simply describes how moisture and temperature interact within your building’s structure.
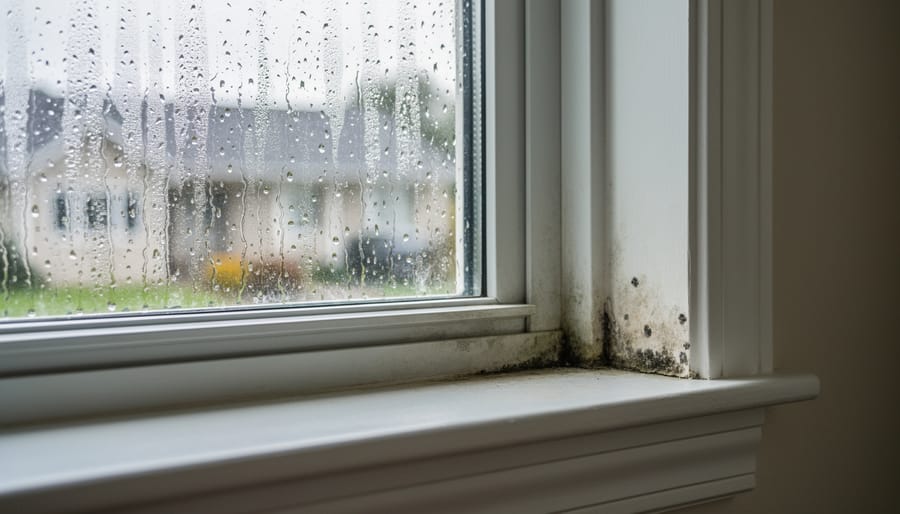
Here’s why this matters for your home or worksite: moisture and heat are constantly on the move through your walls, floors, and ceilings. They don’t exist in isolation. When warm, humid air meets a cold surface, you get condensation. Think about those water droplets that form on your windows during winter mornings, or that persistent dampness on an exterior wall. That’s hygrothermal behavior in action.
The temperature difference creates what building professionals call a driving force. Warm air holds more moisture than cold air, so when your heated indoor air moves through the wall cavity and hits the colder exterior layers, the moisture can condense inside the wall itself. You might not see it happening, but over time, this hidden moisture can lead to mould growth, wood rot, and deteriorating insulation performance.
Consider a common scenario: you’re running a space heater in your workshop during winter. The warm air increases the indoor humidity from your breath, any wet materials, or even just normal activities. This moisture-laden air naturally wants to move toward the colder outdoors through any gaps, cracks, or porous materials. Without proper vapor control and insulation, that moisture gets trapped in the wall assembly where temperatures drop below the dew point.
Understanding hygrothermal principles isn’t just academic knowledge. It directly affects how you approach insulation projects, ventilation upgrades, and even simple repairs. Getting it wrong means risking structural damage and unhealthy indoor conditions. Getting it right means creating durable, comfortable spaces that perform well year-round.
The Real Costs of Getting Moisture and Temperature Wrong
Hidden Damage You Can’t See
The most troubling aspect of hygrothermal problems is that serious damage often progresses completely out of sight. While you might notice a damp patch on your wall, the real issue is typically what’s happening behind it.
When warm, moisture-laden air meets cooler surfaces inside your wall cavities, condensation forms on framing members, sheathing, and insulation. This hidden moisture creates the perfect environment for mold growth and wood rot. Unlike a visible leak that prompts immediate action, this process can continue for months or even years before you notice anything wrong.
Insulation performance degrades significantly when wet. Fiberglass insulation, for example, can lose up to 40% of its thermal resistance when moisture content increases by just a few percentage points. Even worse, once wet, some insulation types struggle to dry out completely, creating ongoing issues that compromise your home’s energy efficiency and comfort.
Structural timber members face an even greater threat. Wood rot fungi thrive in consistently damp conditions, silently consuming load-bearing studs, joists, and sill plates. By the time visible signs appear—sagging floors, cracked drywall, or musty odors—the damage may require extensive and costly repairs.
Community feedback from homeowners consistently highlights one frustration: discovering major structural problems during renovation work that could have been prevented with proper hygrothermal design. Understanding moisture movement patterns helps you identify vulnerable areas before invisible damage becomes a visible crisis.
Energy Bills That Keep Climbing
When moisture accumulates inside your walls, roof, or floor assemblies, it doesn’t just create potential structural problems—it directly attacks your wallet through higher energy bills. Here’s what happens: wet insulation loses its effectiveness dramatically. Studies show that insulation with just 5% moisture content can lose up to 50% of its thermal resistance. That means your heating and cooling systems work overtime to compensate for compromised insulation performance.
The problem compounds during temperature extremes. In winter, moisture in wall cavities creates thermal bridging—essentially cold pathways that bypass insulation entirely. During summer, the reverse happens, allowing heat to penetrate more easily. Both scenarios force your HVAC system to run longer cycles, consuming more energy.
Community feedback from renovators consistently highlights this issue. One homeowner reported a 30% increase in heating costs before discovering moisture had saturated their ceiling insulation. After addressing the hygrothermal issues with proper ventilation and vapour barriers, their bills returned to normal within one season. Understanding how moisture and temperature interact in your building envelope isn’t just academic—it’s essential for maintaining energy efficiency and controlling ongoing costs.
Core Principles of Hygrothermal Design in Sustainable Buildings
Vapor Barriers vs. Vapor Permeable Materials
Understanding when to use vapor barriers versus vapor permeable materials is crucial for managing moisture effectively in your building project. The choice depends largely on your climate zone, building type, and construction method.
Vapor barriers are impermeable sheets (typically polyethylene plastic) that completely block moisture movement. These work best in cold climates where you need to prevent warm, moist interior air from condensing inside wall cavities during winter. Think of homes in northern regions where heating dominates most of the year. Install vapor barriers on the warm side of insulation—inside the wall in cold climates. Common applications include traditional stud-frame walls with fiberglass or mineral wool insulation.
Vapor permeable materials, on the other hand, allow moisture to pass through while still providing weather protection. These “breathable” materials include certain house wraps, specialized membranes, and sustainable building materials like wood fiber boards. They’re ideal for mixed climates or situations where moisture needs to escape from wall assemblies. This prevents trapped moisture that could lead to mold and rot.
For hot, humid climates, avoid interior vapor barriers entirely. Moisture drive happens from outside in, so you need materials that let walls dry inward. Many builders in these regions use permeable interior finishes with proper exterior weather barriers.
Mixed climates present the trickiest scenarios. Here, vapor-variable membranes shine—they adjust permeability based on humidity levels, blocking moisture when needed and allowing drying when beneficial.
A practical rule: if you’re unsure, consult local building codes and experienced contractors in your area. Their community-driven insights reflect what actually works in your specific conditions, not just theoretical ideals.
Thermal Bridging and How It Creates Moisture Problems
A thermal bridge is essentially a shortcut for heat to escape your building—think of it as a highway for temperature moving through your walls, roof, or floor. These occur wherever materials that conduct heat easily (like metal or concrete) create an uninterrupted path through your insulation. Common culprits include metal studs in wall framing, concrete columns penetrating through insulated walls, steel lintels above windows, and even poorly installed insulation that leaves gaps.
Here’s where hygrothermal problems start: when warm, moisture-laden indoor air meets a cold surface created by a thermal bridge, condensation forms. Picture your cold drink on a summer day—that’s the same physics at work in your walls. Metal studs are particularly problematic because they’re excellent heat conductors. In winter, they create cold spots on your interior wall surface where moisture in the air condenses. Concrete columns running through insulated walls do the same thing but on a larger scale.
The real trouble begins when this condensation happens repeatedly or goes unnoticed inside wall cavities. That persistent moisture creates perfect conditions for mold growth, wood rot, and structural deterioration. You might notice discolored patches on walls, peeling paint, or a musty smell—all signs that thermal bridging has created moisture problems.
Visual indicators include those telltale condensation patterns that appear in geometric lines matching the framing behind your walls. If you’ve ever seen vertical streaks of dampness or mold following a regular pattern on a wall, you’re likely seeing the thermal bridge effect in action. Professional thermal imaging cameras can reveal these problem areas before visible damage occurs, making them invaluable tools for serious building assessments.
Practical Tools and Materials for Better Hygrothermal Performance
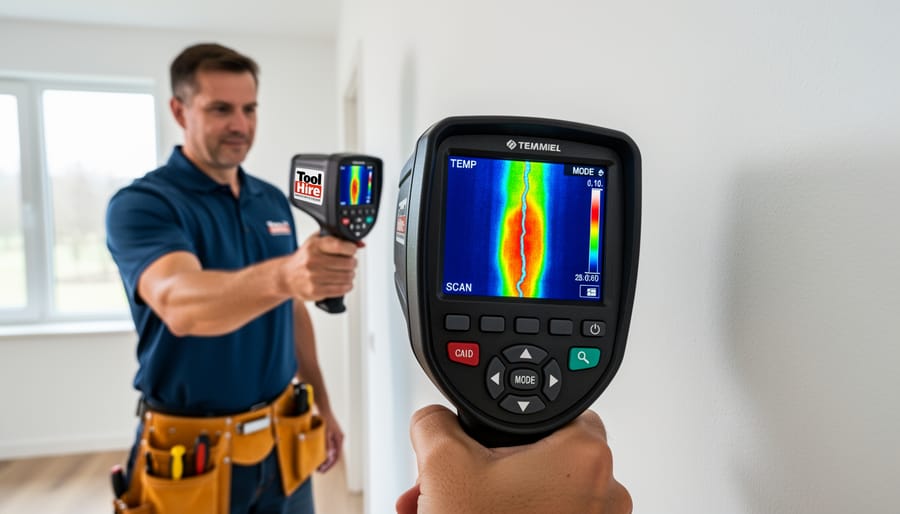
Moisture Meters and Thermal Imaging Cameras
Identifying hygrothermal problems early can save you thousands in repairs and prevent long-term structural damage. Two essential diagnostic tools make moisture and temperature issues visible: moisture meters and thermal imaging cameras.
Moisture meters work by measuring the water content in materials like timber, plaster, and masonry. Pin-type meters use two electrodes inserted into the surface, whilst pinless versions scan without causing damage. They’re invaluable for checking suspected damp areas, verifying materials are dry enough before installation, and monitoring problem zones over time. Readings typically show percentages, with wood above 20% moisture content considered at risk for rot and decay.
Thermal imaging cameras detect temperature variations across surfaces, revealing hidden moisture problems, thermal bridges, and insulation gaps that aren’t visible to the naked eye. These cameras display heat signatures in colour-coded images, making cold spots from water infiltration or air leakage immediately apparent. During renovation, they help verify the effectiveness of insulation and identify areas where condensation might occur.
Both tools are available through tool hire services, making professional-grade diagnostics accessible for single projects without the investment of purchasing. Many community members report that hiring these devices for periodic checks during construction phases helped them catch issues before they became costly problems. When hiring, ask for basic training on interpreting readings to get the most value from your rental period.
Modern Insulation Materials That Manage Moisture
Today’s modern insulation materials are specifically engineered to handle both thermal performance and moisture management, making them ideal for hygrothermal-conscious projects. Understanding your options helps you choose the right solution for your specific conditions.
Spray foam insulation creates an air-tight seal that simultaneously insulates and acts as a vapour barrier. Closed-cell spray foam offers superior moisture resistance and structural support, though it requires specialized application equipment including spray foam rigs and personal protective gear. Many tool hire centres now stock spray foam kits suitable for DIY projects, though larger jobs typically need professional equipment and trained operators.
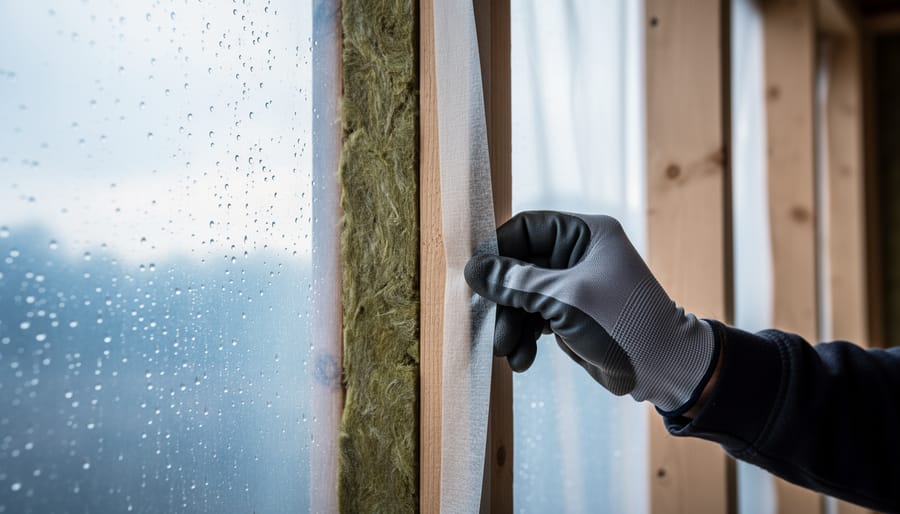
Mineral wool, made from rock or slag fibres, naturally resists moisture absorption while maintaining excellent thermal properties. Unlike traditional fibreglass, mineral wool doesn’t lose insulating value when exposed to humidity. Installation requires basic tools like sharp knives, measuring tapes, and safety equipment including dust masks and gloves. The material’s semi-rigid nature makes it easier to fit tightly around obstacles, reducing thermal bridging.
Rigid foam boards with moisture-resistant facings provide reliable performance in high-humidity areas. These boards cut cleanly with standard saws and can be installed using adhesives or mechanical fasteners.
For any insulation project, essential safety equipment includes respirators, protective eyewear, and appropriate clothing. Moisture meters help verify proper conditions before installation, while thermal imaging cameras can identify problem areas post-installation. Most equipment is available through tool rental services, making professional-grade hygrothermal management accessible to serious DIYers undertaking significant projects.
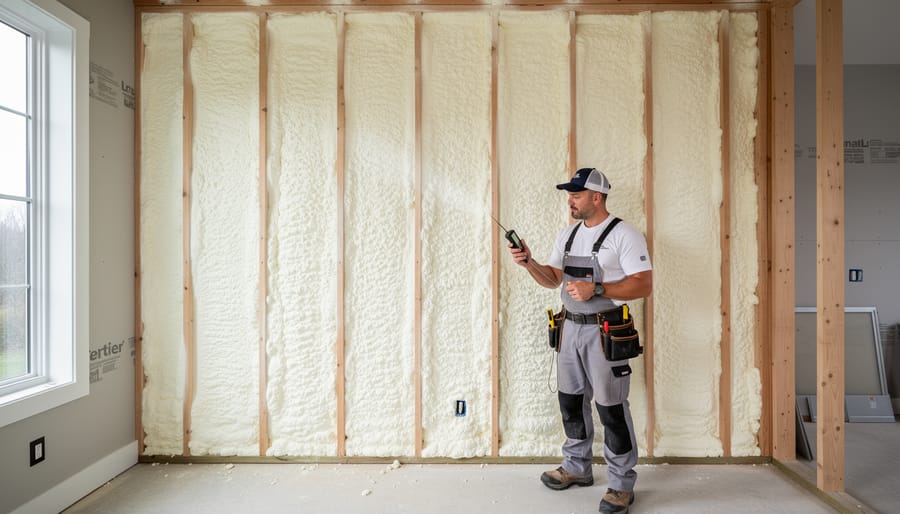
Step-by-Step: Applying Hygrothermal Principles to Common Projects
Renovating an Older Home Without Creating Moisture Traps
Renovating older homes presents unique hygrothermal challenges because these buildings weren’t designed with modern moisture management principles in mind. The key is improving thermal performance without trapping moisture inside wall cavities or creating new condensation problems.
Before starting any renovation, assess how your home currently manages moisture. Older homes often rely on natural ventilation through gaps and breathable materials like lime mortar and single-pane windows. While inefficient, this “leakiness” allows moisture to escape. Sealing everything tight without adding proper ventilation creates a recipe for mold and structural damage.
When upgrading insulation, avoid simply stuffing modern materials into old wall cavities. Different insulation types have varying vapor permeability, and choosing the wrong one can trap moisture against cold surfaces. Breathable insulation options like wood fiber, sheep’s wool, or mineral wool often work better in older construction than foam boards or spray foam, which can act as vapor barriers in the wrong locations.
Safety warning: Before disturbing walls, ceilings, or insulation in homes built before the 1980s, have materials tested for asbestos. Older vermiculite insulation may contain asbestos fibers, and disturbance without proper protective equipment and containment poses serious health risks. Similarly, lead paint on trim and walls requires specific handling protocols.
Improve ventilation simultaneously with insulation upgrades. This might mean installing trickle vents in window frames, adding mechanical extraction in bathrooms and kitchens, or incorporating whole-house ventilation systems. Many renovation projects fail because homeowners address heat loss without considering the moisture that everyday activities generate.
Community feedback consistently emphasizes one principle: maintain the drying potential of building assemblies. Whatever moisture gets in, whether from inside or outside, needs a path to escape.
Building a Garden Office or Shed That Won’t Go Moldy
Building a garden office or shed might seem straightforward, but getting the hygrothermal details right makes the difference between a comfortable workspace and a damp, moldy disaster. The good news? With proper planning, you can create an outbuilding that manages moisture and temperature effectively.
Start with your wall assembly. The basic principle is creating a “breathing” structure that allows moisture to escape while keeping rain out. For a typical timber-framed shed, work from outside in: external cladding (timber boards or weatherboarding), a breathable membrane, insulation between studs, a vapor control layer, and internal lining boards. The breathable membrane lets moisture vapor pass through from inside to outside, while the vapor control layer on the warm side prevents moisture-laden air from reaching cold surfaces where condensation forms.
Material selection matters enormously. Choose insulation that won’t lose effectiveness when damp. Sheep’s wool and wood fiber insulation handle moisture better than mineral wool, though they cost more. For budget-conscious projects, mineral wool works fine if properly protected by your vapor control layer. Avoid impermeable materials like foil-backed boards directly against cold surfaces as they create condensation traps.
Ventilation is non-negotiable, especially if you’ll use heating. Without it, moisture from breathing, making tea, or even just existing has nowhere to go. Install adjustable air vents low on one wall and high on the opposite wall to create cross-ventilation. For offices with computers generating heat, consider a small extractor fan on a humidistat controller that switches on automatically when moisture levels rise.
Ground preparation prevents rising damp. Build on a proper base with a damp-proof membrane beneath your floor structure, raised slightly above ground level. This simple step eliminates the most common moisture problem in outbuildings.
Before tackling wall assemblies, ensure your measurements are accurate and materials properly cut. Taking time with preparation prevents gaps where air leakage occurs, undermining your hygrothermal strategy entirely.
What Professionals Check (And What You Should Too)
When building professionals assess hygrothermal performance, they’re looking at how moisture and heat move through your building envelope. The good news? You can check many of these same factors yourself before problems develop.
Start with the visual inspection, which catches most obvious issues. Look for water stains on ceilings and walls, particularly near windows, in corners, and along exterior walls. Check for condensation on windows during cold weather—this signals potential vapor problems. Peeling paint, bubbling wallpaper, or musty odors all indicate moisture has found its way where it shouldn’t be. Use a moisture meter to verify suspicions; these affordable devices give you actual readings rather than guesswork.
Professionals use thermal imaging cameras to spot temperature variations that reveal insulation gaps, air leaks, and moisture intrusion. While professional-grade cameras cost thousands, rental options make this technology accessible for serious inspections. Cold spots in winter or hot spots in summer often indicate compromised building envelope performance.
Next, examine your vapor control layers. In attics, basements, and crawl spaces, check that vapor barriers are continuous, properly overlapped, and sealed at penetrations. A common mistake is installing barriers on the wrong side of insulation—they should face the warm side of your wall assembly in cold climates.
Ventilation assessment matters too. Bathrooms and kitchens need exhaust fans venting to the exterior, not just into attics. Check that soffit and ridge vents aren’t blocked by insulation. Proper airflow prevents moisture accumulation that even perfect vapor barriers can’t address alone.
Finally, document what you find. Take photos, note measurements, and track changes over seasons. Community-driven reviews from other homeowners facing similar challenges often provide practical solutions that supplement professional advice. This systematic approach helps you catch hygrothermal issues early, when fixes are simpler and far less expensive than major remediation work.
Understanding hygrothermal principles isn’t just about technical knowledge—it’s about protecting your investment and creating spaces that stand the test of time. Whether you’re planning a new build, tackling a major renovation, or simply upgrading your home’s insulation, considering how moisture and temperature interact within your building envelope can save you from costly repairs down the road and significantly improve your energy efficiency.
The difference between a building that performs well for decades and one that develops problems within years often comes down to proper hygrothermal design. Mold growth, wood rot, peeling paint, and sky-high energy bills are frequently symptoms of moisture management issues that could have been prevented with better planning. By applying the principles we’ve covered—controlling vapor diffusion, managing air leakage, choosing appropriate materials, and ensuring proper ventilation—you’re setting yourself up for long-term success.
For DIYers and homeowners, this doesn’t mean you need an engineering degree. It means asking the right questions: Where might condensation occur? Is my vapor barrier in the right place for my climate? Do I have adequate ventilation? These considerations matter whether you’re insulating an attic or finishing a basement.
Don’t hesitate to consult building science resources, seek feedback from experienced professionals in your area, or connect with others who’ve tackled similar projects. The upfront time spent understanding these principles pays dividends in comfort, health, and durability. Your building deserves thoughtful design that works with physics, not against it.
Related Posts