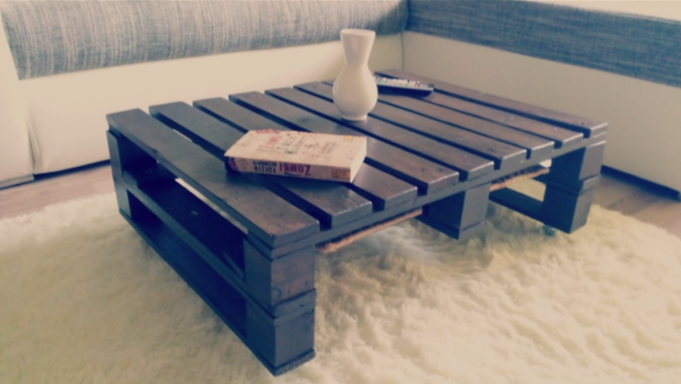
Last week we showed you one take on a diy pallet coffee table. This week, we’ll show you another!
Last weeks’ take on the concept was a complete transformation, very closely resembling what might be available in stores. This weeks’ version is more true to the idea of pallet design – taking the idea of a “pallet coffee table” almost completely literally.
In this blog post, we’ll show you how to create a classic diy pallet coffee table, one of the more common rustic accessories you see around today.
Materials
3x pallets
Carriage bolts
Caster wheels (optional)
Nails
Screws
Tools
Abrasive paper
Chisel
Glaze
Hammer
Paint brush
Saw
Screwdriver
Step 1: Preparing the pallets With a saw, cut the the first pallet in half as pictured. This part will be used as the top of your coffee table. Remove the slats from the second pallet with the help of a hammer and a chisel. Then, remove all the rusty nails. You can also use an iron saw but in this case, the nails would stay in the wood. You will need to keep aside two slats from this second pallet in order to strengthen the legs of the table. They will also act as a holder. You should cut these two slats to the length of your coffee table. 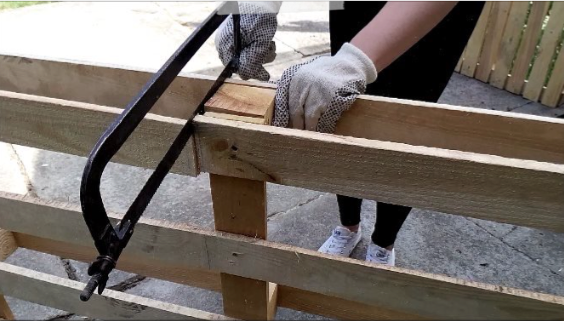 Step 2: Continuing construction Fix the removed slats with nails between the slats of the first pallet (top of your coffee table). Cut two borders from the third pallet to make the table legs. You need two of them
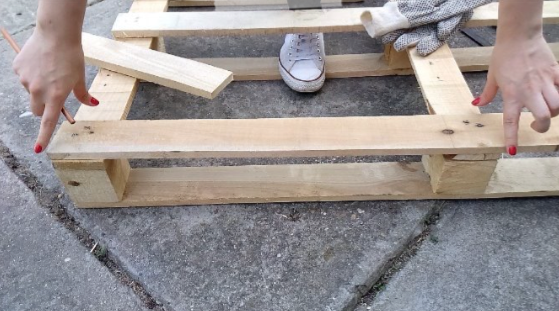
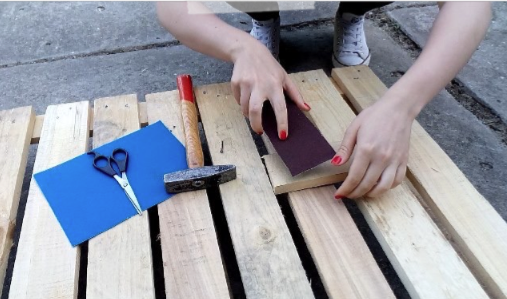 Cut a piece of abrasive paper – for an easy polishing use a small piece of slat previously cut. For an even easier polishing, use a grinder and smoothly polish the surface of the coffee table. After that, paint the surface with wood stain. Polish and paint the legs also. Make a hole with a drill where all the components will join each other. Use carriage bolts for durability of the coffee table and fix the parts. If using caster wheels, position them on the bottom of the table and fix them with screws.
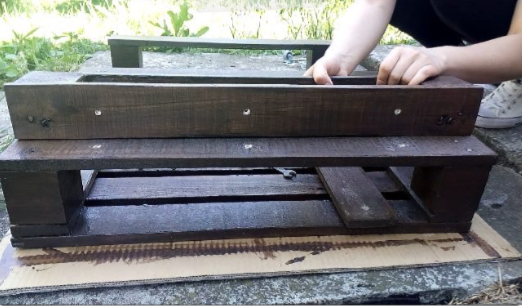
Related Posts
Post a Comment