
**Master your home’s hidden infrastructure by understanding household plumbing diagrams—visual blueprints that map water supply lines, drain systems, and fixture connections throughout your property.** These essential tools transform confusing pipe networks into clear, actionable references that prevent costly mistakes during repairs and renovations.
**Locate your main water shut-off valve first**—typically found where the municipal line enters your home—and trace both hot and cold supply lines to each fixture. Mark drain lines separately, noting their downward slope toward the main sewer connection, and identify vent pipes that prevent drain gurgling and sewer gas backup.
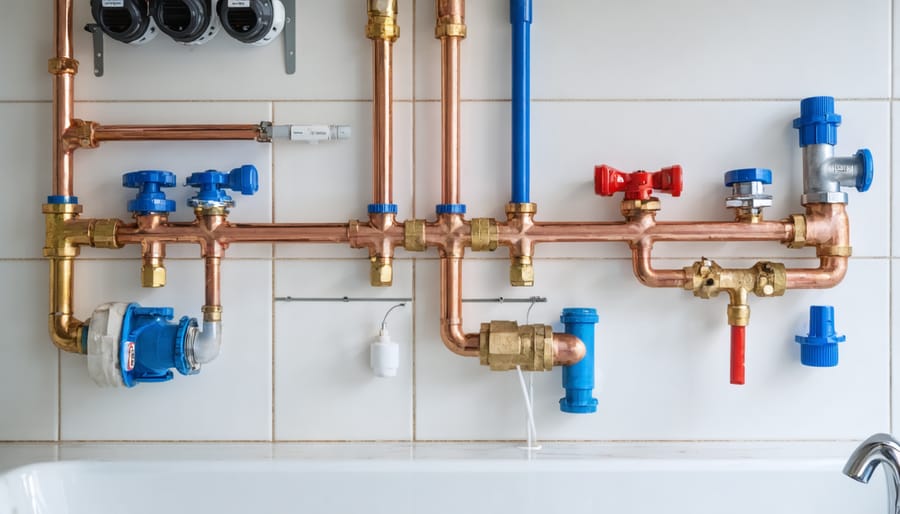
**Document pipe materials and sizes** using color-coding: blue for cold water, red for hot water, and black for drain lines. This visual system helps you quickly identify which sections use copper, PEX, PVC, or galvanized steel—critical information when planning repairs or determining compatibility with new fixtures.
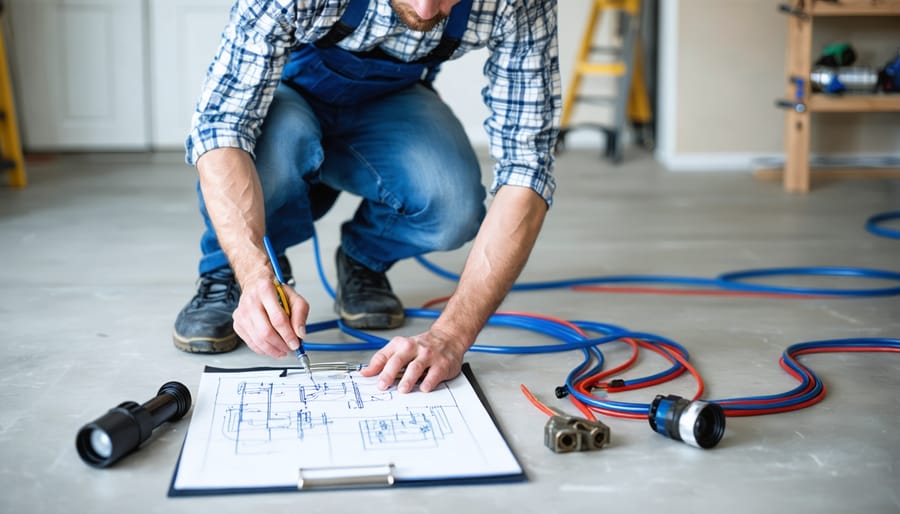
**Photograph junction points, crawl spaces, and behind-wall access panels** before creating your diagram, as these real-world references ensure accuracy. Professional plumbers emphasize that even basic hand-drawn diagrams save hours of exploratory work and prevent accidental punctures during wall modifications. Your completed diagram becomes an invaluable reference for emergency shut-offs, future DIY projects, and communicating effectively with contractors about your home’s specific configuration.
Why Every Homeowner Needs to Understand Their Plumbing Layout
Understanding your home’s plumbing layout isn’t just for professionals—it’s a practical skill that can save you significant time, money, and stress. When you know where your pipes run and how your system connects, you’re equipped to handle emergencies confidently and make informed decisions about repairs and upgrades.
**Faster Problem-Solving**
Imagine a pipe bursts at 2 AM. Homeowners who understand their plumbing diagram can immediately locate the main shut-off valve, stopping water flow within seconds. Without this knowledge, you might waste precious minutes searching while water damages flooring and walls—a scenario that often leads to costly water damage restoration.
**Cost Savings Through Knowledge**
One community member shared how their plumbing diagram helped them avoid a $400 service call. When their dishwasher wouldn’t drain, they traced the line on their diagram, identified the cleanout access point, and cleared the blockage themselves in 20 minutes. While complex issues still require professional plumbing solutions, understanding your system helps you distinguish between DIY-friendly tasks and jobs needing expert attention.
**Better Communication with Tradespeople**
When you can point to specific locations on your diagram and explain what you’ve already checked, plumbers work more efficiently. This shared understanding often reduces diagnostic time and labor costs.
**Renovation Planning Made Simple**
Adding a bathroom or outdoor kitchen? Your plumbing diagram shows where existing lines can support new fixtures and where you’ll need extensions, helping you plan realistic budgets and timelines before starting demolition.
The initial time invested in understanding your plumbing layout pays dividends throughout your homeownership journey.
The Basic Anatomy of Household Plumbing Systems
The Water Supply System: Getting Clean Water In
Fresh, clean water enters your home through the main water line, typically buried underground and connected to your municipal supply or well. This incoming water first passes through a water meter (if you’re on city water) that measures your usage, followed immediately by the main shut-off valve—your home’s most important plumbing control that stops all water flow in emergencies.
From here, the cold water supply splits into two paths. One branch feeds directly to fixtures like toilets, outdoor faucets, and the cold side of sinks and showers through supply pipes. The other route travels to your water heater, where it’s heated and distributed throughout the house via separate hot water lines.
Water pressure—measured in pounds per square inch (PSI)—pushes water through these supply pipes, typically maintaining 40-60 PSI in most homes. This pressure is what makes water flow when you open a tap. Supply pipes are usually copper, PEX (cross-linked polyethylene), or CPVC (chlorinated polyvinyl chloride), with diameters ranging from ½ inch to 1 inch depending on their purpose.
Understanding this flow helps you locate shut-off valves before starting repairs. Many homeowners use colored markers on their diagrams—blue for cold lines and red for hot—making the system easier to trace when planning projects or troubleshooting issues.
The Drainage System: Getting Wastewater Out
While your supply system brings fresh water in, the drainage system carries wastewater out—and it relies entirely on gravity to do the job. Understanding how this works helps you spot problems before they become major headaches.
**Drain pipes** slope downward at about ¼ inch per foot, guiding wastewater from fixtures toward your main sewer line or septic system. These pipes are typically larger than supply lines (1½ to 4 inches in diameter) to prevent clogs.
**Traps**—those U-shaped bends under sinks and toilets—hold standing water that blocks sewer gases from entering your home. If you’ve ever noticed a foul smell from an unused drain, the trap water has likely evaporated.
**Vent pipes** extend through your roof, allowing air into the system so water can flow freely. Without proper venting, drains gurgle and empty slowly due to vacuum pressure.
It’s helpful to distinguish between two types of wastewater: **gray water** comes from sinks, showers, and washing machines—relatively clean compared to **black water**, which contains sewage from toilets. Some homeowners even repurpose gray water for irrigation, though local codes vary.
Many DIYers share that understanding their drainage layout prevented costly emergency calls. Before tackling drain work, check community forums for real-world experiences and remember: when in doubt, consult a professional plumber.
Reading a Household Plumbing Diagram: A Room-by-Room Breakdown
Understanding Plumbing Symbols and Line Types
Reading a plumbing diagram becomes straightforward once you understand the basic symbols. **Solid lines** represent visible pipes—typically those running through walls or beneath floors—while **dashed lines** indicate pipes hidden behind finished surfaces or traveling underground. This distinction helps you visualize what’s accessible during repairs.
**Hot and cold water lines** use different markers: red or a single slash mark denotes hot water, while blue or double slashes indicate cold. **Valves** appear as small circles or butterfly shapes along pipe runs—these are your shut-off points during emergencies. Knowing their locations can save you from water damage.
**Fixture symbols** are often simplified icons: toilets appear as ovals, sinks as rectangles, and water heaters as labeled cylinders. **Pipe diameter** is usually noted in inches (½”, ¾”, etc.) beside the line.
Many DIYers and professionals in our community recommend photographing your diagram on your phone for quick reference during projects. One user shared: “Having symbols decoded on-site prevented me from cutting into the wrong pipe during my bathroom renovation.”
Keep this guide handy—understanding these basics transforms confusing blueprints into practical roadmaps for your plumbing system.
Kitchen Plumbing Layout
The kitchen contains some of the most complex plumbing connections in your home. Your diagram should clearly show **hot and cold supply lines** running to the sink faucet, typically with individual shut-off valves beneath the cabinet for easy maintenance access.
Below the sink, you’ll find the **P-trap**—that curved pipe section that prevents sewer gases from entering your home. Mark where your garbage disposal connects (if present), noting that it attaches directly to the sink drain and requires both plumbing and electrical connections.
**Dishwasher hookups** involve three key connections: a hot water supply line (often branching from the sink’s hot water valve), a drain line that typically connects to the garbage disposal or sink drain with an air gap to prevent backflow, and an electrical supply.
Most kitchens follow a **single-wall or L-shaped configuration**, with all plumbing concentrated along one or two adjacent walls. This layout minimizes pipe runs and simplifies troubleshooting. When creating your diagram, note the location of the main drain stack—usually a 3-inch vertical pipe that all kitchen drains ultimately connect to.
Bathroom Plumbing Configuration
Bathrooms are the most plumbing-intensive rooms in your home, with multiple fixtures requiring both supply and drain lines in close proximity. Each toilet needs a cold water supply line and a dedicated drain connection—typically 3-4 inches in diameter—that slopes toward the main waste stack. Sinks, showers, and tubs require both hot and cold supply lines, plus their own drain connections with P-traps to prevent sewer gases from entering your home.
The vent stack is crucial in bathroom configurations. This vertical pipe extends through your roof and allows air into the drain system, preventing vacuum conditions that would slow drainage and cause gurgling sounds. Most bathroom fixtures share a common vent stack, making strategic placement essential during installation.
Understanding your bathroom’s plumbing layout helps when planning renovations or troubleshooting issues. Many DIYers and professionals recommend photographing your configuration before wall closure and keeping diagrams for future reference. This knowledge proves invaluable when locating shut-off valves during emergencies or planning fixture upgrades without compromising existing drainage slopes and venting requirements.
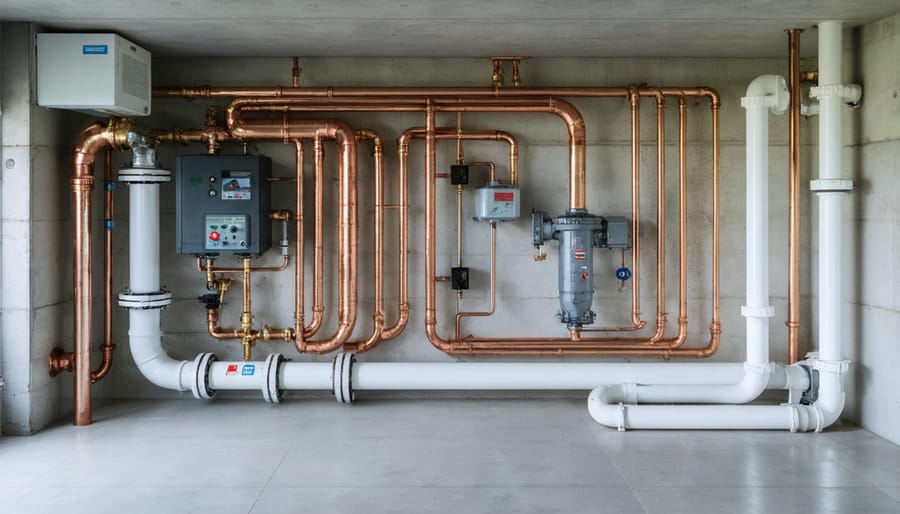
Utility Areas: Water Heater, Laundry, and Main Lines
The water heater serves as your home’s hot water hub, with cold water entering through a supply line and heated water distributing throughout the house via a separate hot water main. Most diagrams show the heater’s location, temperature-pressure relief valve, and drain connection—critical details for maintenance or emergency shutdowns.
Your washing machine connects to both hot and cold supply lines, typically with dedicated shut-off valves mounted on the wall behind the unit. These valves allow you to isolate the washer without affecting other fixtures—essential knowledge when hoses need replacing.
The main water shut-off valve is your emergency control point, usually located where the municipal line enters your home (basement, crawl space, or near the water meter). Mark this location clearly on your diagram and ensure everyone in your household knows where it is.
Outdoor connections like hose bibs (exterior faucets) and irrigation systems branch from your main supply lines. These often include separate shut-offs for winterization in cold climates, preventing freeze damage. Community members recommend photographing these connections and adding notes about seasonal maintenance schedules directly on your diagram for year-round reference.
Multi-Story Considerations
In multi-story homes, plumbing systems rely on vertical stacks—large pipes running from the basement through the roof. The main drain-waste-vent (DWV) stack handles waste from all levels, while supply lines branch horizontally from vertical risers. Understanding these vertical runs helps you trace problems between floors.
Upper floors face unique pressure challenges. Water pressure naturally decreases as it rises, sometimes requiring pressure-boosting pumps for adequate flow. Each floor typically connects to the stack through branch lines, with fixtures arranged back-to-back or clustered to minimize piping.
When reading diagrams, note how cleanouts are positioned at each floor level for maintenance access. Stack vents extend above the roofline to prevent sewer gases from entering living spaces—a critical safety feature many homeowners overlook until issues arise.
Creating Your Own Home Plumbing Diagram
Tools and Materials You’ll Need
Creating an accurate household plumbing diagram doesn’t require expensive equipment. Start with a **measuring tape** to record distances between fixtures and pipe runs—a 25-foot tape works for most homes. A **pipe locator** (available at Tool Hire locations) helps trace hidden pipes behind walls without invasive work. Keep a reliable **flashlight** or headlamp handy for inspecting dark crawl spaces and under sinks.
Your **smartphone or camera** is essential for documenting your plumbing system as you go. Many DIYers find these photos invaluable when referencing their work later. For sketching, traditional **graph paper** provides precise scaling, though free diagramming apps like MagicPlan or RoomSketcher offer digital alternatives that many users recommend in their reviews.
Budget-conscious homeowners can start with just a measuring tape and smartphone, gradually adding specialized tools as needed. Many Tool Hire members suggest renting pipe locators only when required, keeping project costs manageable while maintaining professional-quality results.
Tracing Your Pipes: A Detective’s Approach
Following your home’s pipes requires patience and systematic detective work. Start by identifying visible pipes in basements, crawl spaces, and utility areas—these serve as your roadmap anchors. Use a stud finder with pipe-detection capability to trace routes through walls, marking locations with painter’s tape as you go.
**Safety First**: Always assume pipes are pressurized. Before any investigation near joints or valves, identify your main water shut-off valve and ensure everyone in your household knows its location. Wear safety glasses when working overhead, and use a non-contact voltage tester near pipes to avoid hidden electrical lines.
To document your findings, snap photos at each junction and valve location. Note the pipe material (copper, PEX, or PVC), diameter, and direction of flow. Many DIYers find success using a simple sketch pad or smartphone app to create a basic floor plan, adding pipe routes as they discover them.
**Pro tip from the community**: One homeowner shared that turning on faucets while tracing helps identify which pipes carry water to specific fixtures—you can often feel vibrations or temperature changes through walls. This hands-on approach, combined with your growing diagram, creates an invaluable reference for future projects and emergencies.
Documenting and Storing Your Diagram
Once you’ve created your plumbing diagram, transform it into a lasting reference document. Digitize hand-drawn sketches using your smartphone’s scanning app or basic photo software—this creates backups and makes sharing with plumbers easier. Popular options include SketchUp for detailed 3D models, Microsoft Visio for professional layouts, or simple tools like Google Drawings for straightforward diagrams.
Store both digital and physical copies strategically. Keep a laminated version inside your electrical panel door or utility room, where it’s accessible during emergencies. Save digital files in cloud storage (Dropbox, Google Drive) so family members and emergency contacts can access them remotely. Many homeowners in our community recommend creating a home maintenance binder that includes the plumbing diagram alongside appliance manuals and contractor contacts.
Update your diagram whenever you make modifications—even minor ones like replacing a water heater or adding a hose bib. Date each revision and note what changed. This living document becomes invaluable for future renovations, helping you avoid costly mistakes and communicate clearly with tradespeople about your system’s unique configuration.
Putting Your Plumbing Knowledge to Work
Emergency Situations: Shutting Off Water Fast
When a pipe bursts or a fixture springs a leak, every second counts. Your household plumbing diagram becomes your emergency roadmap, helping you instantly locate the right shut-off valve before minor drips become major disasters.
Start by identifying two types of shutoffs on your diagram: **fixture-specific valves** (those small oval knobs under sinks and toilets) and your **main water shutoff** (typically near your water meter or where the supply line enters your home). For isolated issues like fixing leaky taps, turn off only the fixture valve. For larger emergencies, head straight for the main shutoff.
**Pro tip from the community:** Many homeowners color-code their diagram shutoffs with red markers and keep waterproof copies in multiple locations—one near the main valve, another in your utility room, and a digital version on your phone. Test each valve annually by turning it clockwise (righty-tighty) to ensure it functions smoothly when you need it most.

Planning DIY Projects and Renovations
A plumbing diagram transforms your renovation from guesswork into informed decision-making. Before replacing that outdated fixture or adding a second bathroom, your diagram reveals whether existing supply lines can handle increased demand and where drain lines actually run behind those walls.
For straightforward projects like swapping faucets or replacing toilet shut-off valves, a clear diagram empowers confident DIY work. You’ll know exactly which main valve to close and what size connections you’re working with. Community members often share that understanding their system prevented costly mistakes during kitchen upgrades.
However, your diagram also shows when professional help matters. If you’re rerouting main lines, working near gas connections, or your project requires building permits, call a licensed plumber. The diagram becomes a communication tool—you can show professionals exactly what you’re envisioning and get accurate quotes.
Safety first: always shut off water at the appropriate valve, and remember that some modifications require permits regardless of skill level. Your diagram isn’t just planning—it’s your project roadmap and future reference guide.
Better Communication with Professional Plumbers
Having a detailed plumbing diagram transforms conversations with professional plumbers. When you call for quotes, you can describe exact pipe locations, materials, and configurations, helping tradespeople provide more accurate estimates without lengthy on-site inspections. This saves you money on diagnostic time—plumbers typically charge $80-150 per hour just to assess problems.
Your diagram also helps you explain issues clearly. Instead of saying “there’s a leak somewhere,” you can specify “the cold water supply pipe near the second-floor bathroom shut-off valve is dripping.” This precision means plumbers arrive with the right tools and parts.
During repairs, reference your diagram to understand the work being done and why certain approaches are necessary. You’ll recognize when you’re encountering signs you need a plumber versus manageable DIY fixes. Many homeowners report that showing their diagram builds trust with contractors and prevents unnecessary work recommendations, as professionals see you’re informed about your system.
Common Plumbing Diagram Mistakes to Avoid
Even experienced DIYers can stumble when working with plumbing diagrams. One of the most common mistakes is confusing supply lines with drain lines—supply pipes carry pressurized fresh water to fixtures, while drain pipes rely on gravity to remove wastewater. Community members frequently report mixing these up, leading to misidentified shut-off valves during emergencies.
Another frequent error is overlooking vent pipes entirely. These critical components allow air into the drainage system, preventing siphoning and ensuring proper flow. User feedback shows many homeowners create diagrams that omit vents, only discovering their importance when drainage issues arise.
Scale and proportion also trip up many diagram creators. “I drew everything the same size and couldn’t tell my half-inch supply line from my three-inch drain,” one community member shared. Always note pipe dimensions clearly on your diagram.
Failing to update diagrams after renovations is another widespread issue. Your original diagram becomes obsolete after bathroom additions or kitchen remodels. Several users have learned this lesson the hard way when emergency repairs required accurate information that outdated diagrams couldn’t provide.
Finally, many people neglect to mark the main water shut-off valve prominently. This single oversight can cost precious time during plumbing emergencies. For more guidance on handling urgent situations, check out these practical plumbing tips.
Remember: a diagram is only useful if it’s accurate, legible, and accessible when you need it most.
Understanding your household plumbing diagram isn’t just about pipes and fixtures—it’s about taking control of your home maintenance with confidence. Whether you’ve mapped out your entire system or simply identified your main shut-off valve, you’ve taken an important step toward becoming a more capable homeowner.
Start small. Locate one key component this weekend, then build from there. Sketch it out, take photos, and create a reference that works for you. Every professional plumber started with the basics, and your growing knowledge will save you time, money, and stress when plumbing issues arise.
Ready to tackle your next plumbing project? Browse our range of plumbing tools available for hire, from pipe cutters to drain inspection cameras. Join our community forum to share your plumbing diagrams, ask questions, and learn from fellow DIYers and trade professionals. Your experience could help someone else solve their plumbing puzzle—and their tips might just inspire your next home improvement success.
Related Posts

Post a Comment