
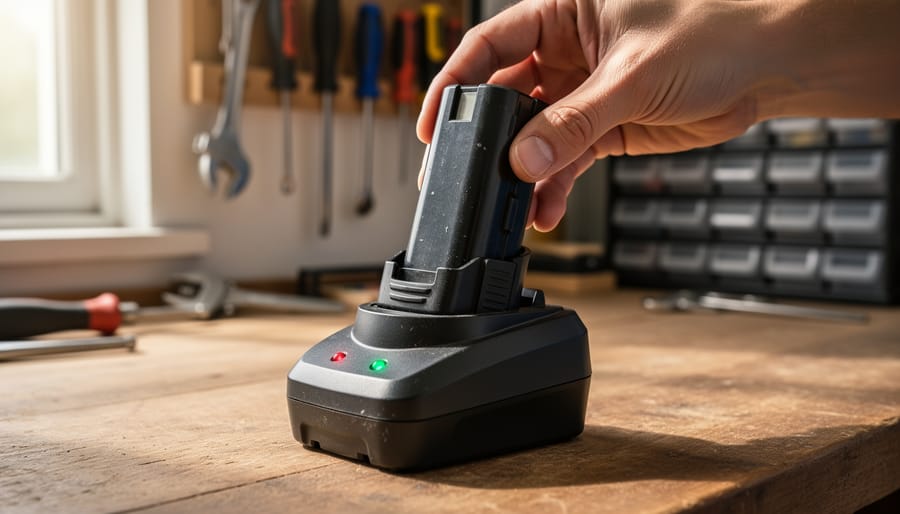
Match your charger to your battery type—NiCad, lithium-ion, and NiMH batteries each require specific voltage and chemistry compatibility, and using the wrong charger can permanently damage cells or create safety hazards. Check the battery label for voltage ratings (typically 12V, 18V, or 20V) and chemistry symbols before plugging in.
Remove batteries from the drill before charging to prevent overheating and extend tool life. Most modern chargers include indicator lights: solid red means charging, green signals full charge, and flashing red warns of problems like extreme temperature or defective cells.
Charge at room temperature between 50°F and 100°F for optimal performance. Cold batteries under 40°F won’t accept a full charge, while hot batteries above 120°F risk thermal damage. If your battery feels warm after use, let it cool for 15-30 minutes before charging.
Stop charging when the indicator shows complete—overcharging older NiCad batteries causes memory effect where they lose capacity, while overcharging lithium-ion batteries degrades their lifespan. Most quality chargers automatically switch to maintenance mode, but budget models may continue pushing current indefinitely.
Address common problems immediately: batteries that won’t charge after long storage often need several charge cycles to reactivate, rapidly dying batteries signal cell degradation requiring replacement, and chargers that stay red without progressing indicate connection issues or battery failure.
Why Your Cordless Drill Battery Dies Too Soon
You might think you’re doing everything right, but some everyday habits could be cutting your battery’s lifespan in half. Through conversations with dozens of tradespeople and DIY enthusiasts in our community, we’ve identified the three most damaging charging mistakes that plague cordless drill batteries.
The biggest culprit? Leaving your battery on the charger indefinitely. Mike, a carpenter from Portland, shared that he used to park his drill batteries on their chargers 24/7 for convenience. After noticing his year-old batteries holding barely half their original charge, he learned this constant charging creates heat buildup and keeps lithium-ion cells at 100% capacity, both of which accelerate degradation. Modern smart chargers help, but older models keep trickling power even after the battery is full.
Temperature extremes rank as the second major battery killer. Sarah, a weekend DIYer, stored her drill and charger in her garage where summer temperatures regularly hit 95°F. Her batteries degraded noticeably faster than expected. Both charging and storing batteries in temperatures above 80°F or below 40°F causes chemical reactions inside the cells to break down prematurely. The ideal range sits between 50°F and 77°F.
Overcharging with incompatible chargers rounds out the top three mistakes. Not all chargers work safely with all battery types, even within the same brand. Using a fast charger designed for larger amp-hour batteries on smaller ones generates excessive heat and can damage cells. Community member James learned this the hard way when he borrowed a colleague’s charger, only to find his batteries swelling slightly and losing capacity within months.
The good news? Once you understand these mistakes, they’re easy to avoid. Remove batteries from chargers once they reach full capacity, store them in climate-controlled spaces, and always use manufacturer-recommended chargers. These simple changes can double your battery’s effective lifespan.
Understanding Your Battery Type (And Why It Matters)
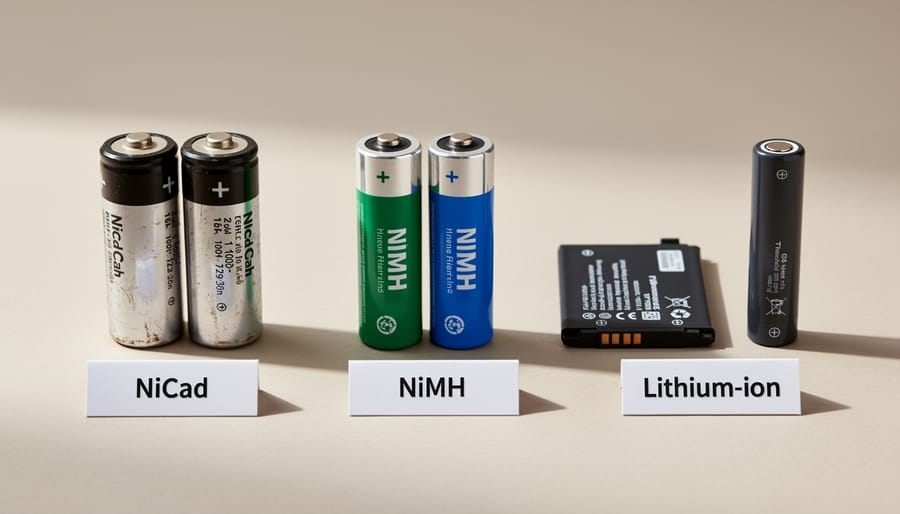
Lithium-Ion: The Modern Standard
Lithium-ion batteries have become the go-to power source for modern cordless drills, and for good reason. Unlike their older counterparts, Li-ion batteries don’t suffer from memory effect, meaning you can top them off at any time without worrying about reducing their overall capacity. This flexibility is a game-changer for busy professionals and weekend DIYers alike.
When charging Li-ion batteries, always use the manufacturer’s designated charger. These batteries typically charge faster than NiCad or NiMH options, often reaching full capacity in 30 minutes to an hour. Most chargers feature LED indicators that shift from red to green when charging is complete.
Temperature sensitivity is the main consideration with lithium-ion technology. Avoid charging in extreme conditions – the ideal range is between 50°F and 85°F. Charging a cold battery straight from your winter garage or a hot one from your car trunk can damage the cells and reduce lifespan. Many users in our community recommend letting batteries acclimate to room temperature for 15-20 minutes before charging.
The good news? Li-ion batteries hold their charge exceptionally well during storage, losing only about 2-3% per month compared to 20% for NiCad batteries.
NiCad and NiMH: Older But Still Common
Nickel-Cadmium (NiCad) and Nickel-Metal Hydride (NiMH) batteries may seem outdated compared to lithium-ion, but they’re still found in many cordless drills, especially older models and budget-friendly options. Understanding their unique charging needs will help you maximize their lifespan and performance.
The most important thing to know about NiCad batteries is the memory effect. This occurs when you repeatedly recharge the battery before it’s fully depleted. The battery essentially “remembers” the shorter cycle and reduces its overall capacity over time. To prevent this, let your NiCad battery discharge completely before recharging. Many users in our community recommend running the drill until it stops working, then charging it fully in one session.
NiMH batteries have largely improved on the memory effect problem, but they still benefit from occasional full discharge cycles. About once every 10 to 15 charges, let the battery drain completely before recharging. This helps recalibrate the battery’s power gauge and maintain consistent performance.
Both battery types require slower charging compared to lithium-ion. A standard charge typically takes three to five hours, and it’s normal for the battery to feel warm during this process. However, if it becomes hot to the touch, disconnect it immediately as overheating can damage nickel-based batteries.
One practical tip from experienced tradespeople: store these batteries partially charged, around 40 percent capacity, if you won’t be using them for extended periods. This prevents deep discharge that can permanently reduce their effectiveness.
The Right Way to Charge Your Drill Battery
Before You Plug In: Pre-Charging Checks
Before connecting your battery to the charger, taking a moment for regular safety inspections can prevent damage and potential hazards. Start by examining the battery casing for cracks, dents, or swelling, which indicate internal damage. Never charge a compromised battery, as it poses fire risks.
Next, inspect both the battery contacts and charger terminals for dirt, dust, or corrosion. Clean them gently with a dry cloth or soft brush. Dirty contacts reduce charging efficiency and can cause overheating. If you notice green or white buildup (corrosion), clean it carefully with a cotton swab dipped in rubbing alcohol.
Temperature matters significantly. Feel the battery with your hand. If it’s hot from recent use, let it cool to room temperature before charging. Most lithium-ion batteries charge best between 10°C and 30°C. Charging in extreme temperatures damages battery cells and shortens lifespan.
Finally, check that you’re using the correct charger designed for your specific battery model. Mismatched chargers can overcharge or undercharge, leading to performance issues or safety hazards. The manufacturer’s label on both battery and charger should match.
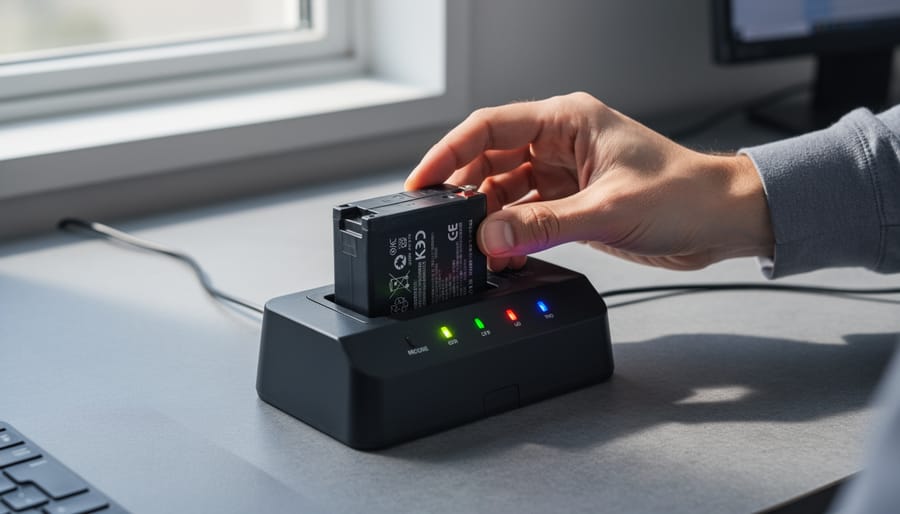
During Charging: What to Watch For
Once you’ve placed your battery on the charger, pay attention to the indicator lights—these are your primary communication tool. Most modern chargers use a red or flashing light to signal active charging, switching to solid green when complete. However, some manufacturers use different color schemes, so check your user manual if you’re uncertain about what the lights mean.
Choose your charging location wisely. Set up in a dry, well-ventilated area away from direct sunlight, heat sources, and flammable materials. A garage workbench or basement shelf typically works well. Avoid charging in enclosed spaces like closets or near windows where temperature fluctuations occur. The ideal ambient temperature range is between 50°F and 77°F.
Keep an eye on the battery during the first 15-20 minutes of charging. It’s normal for batteries to feel slightly warm, but they shouldn’t become hot to the touch. If you notice excessive heat, a burning smell, or unusual sounds like hissing or popping, disconnect the charger immediately. These are signs of potential malfunction or damage.
Many community members report that checking their batteries halfway through charging helps catch issues early. One user noted discovering a swollen battery this way, preventing potential damage to their charger.
If your charger displays an error light (often blinking red or yellow), consult your manual—this usually indicates a battery problem or temperature issue. Don’t leave batteries charging unattended for extended periods, especially overnight, even with automatic shut-off features. A quick visual check ensures everything’s progressing safely.
When to Remove the Battery from the Charger
Most modern cordless drill chargers include indicator lights that signal when charging is complete. Typically, a red or flashing light means the battery is still charging, while a solid green light indicates it’s fully charged. Once you see the completion signal, you can safely remove the battery immediately.
However, many of today’s smart chargers feature automatic shutoff technology, meaning they stop delivering power once the battery reaches full capacity. This makes it safe to leave your battery on the charger for extended periods without risking overcharge damage. Check your charger’s manual to confirm if it has this feature, as older models may not include this protection.
That said, even with smart chargers, it’s generally better practice to remove batteries after charging completes if you won’t be using them soon. Long-term storage on the charger can expose batteries to unnecessary heat cycles as the charger occasionally tops them off, which may gradually reduce battery lifespan over months of continuous connection.
For optimal battery health, remove the battery once charged and store it in a cool, dry place at around 40-50% capacity if you won’t use it for several weeks.
Critical Safety Rules for Charging Cordless Tool Batteries
Temperature and Ventilation Requirements
Temperature plays a crucial role in safe, effective battery charging. Most cordless drill batteries charge best between 50°F and 86°F (10°C to 30°C). Charging outside this range can damage cells, reduce battery lifespan, or create safety hazards. If your battery feels hot after use, let it cool to room temperature before charging—typically 15 to 30 minutes.
Proper ventilation prevents heat buildup during the charging process. Always charge batteries in open areas with good air circulation. Many users report in community forums that charging in well-ventilated garages or workshops produces the best results and longest battery life.
Never charge batteries in these locations: inside closed toolboxes, direct sunlight, near heat sources like radiators or stoves, or in damp basements and bathrooms. Moisture and extreme temperatures can cause internal damage or, in rare cases, thermal runaway. One community member shared how charging a battery on a hot car dashboard permanently reduced its capacity by half. Keep your charging station in a dry, temperature-controlled space away from flammable materials for optimal safety and performance.
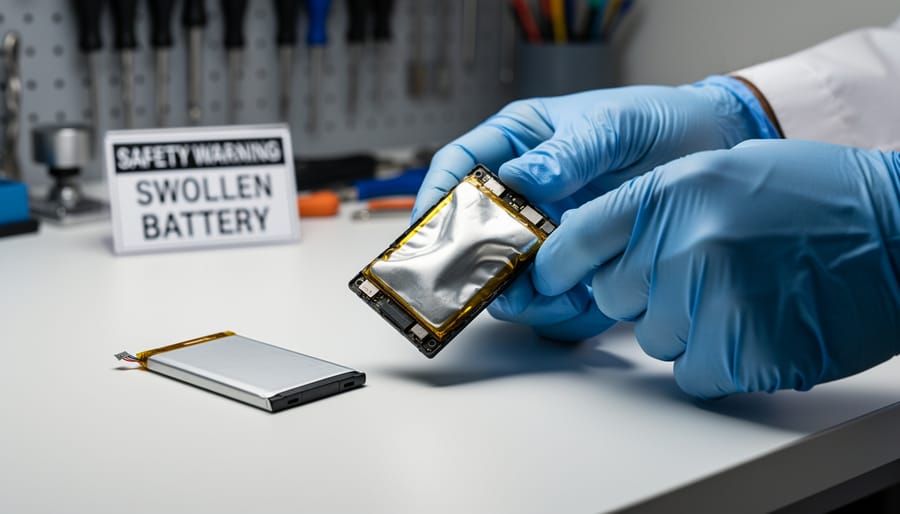
Warning Signs of Battery Failure
Recognizing the early signs of battery failure can prevent dangerous situations and equipment damage. A swollen or bulging battery is one of the most serious warning signs, indicating internal gas buildup that could lead to rupture. If you notice any swelling, stop using the battery immediately and place it in a fire-resistant container away from flammable materials.
Excessive heat during charging or use is another red flag. While batteries naturally warm up, they should never become too hot to touch. If your battery feels uncomfortably hot, disconnect it and allow it to cool in a well-ventilated area. Community feedback shows that overheating often precedes complete battery failure.
Watch for visible leaking or corrosion around the terminals. Battery acid or electrolyte leakage appears as white, crusty deposits or wet spots. Never touch leaking material with bare hands. Use gloves to remove the battery and place it in a plastic bag for proper disposal at a recycling center.
Other concerning signs include rapid discharge after full charging, failure to hold a charge, or unusual odors during charging. Many users report a distinctive chemical smell before battery failure. If you experience any of these symptoms, discontinue use immediately and consult your drill’s manual for specific safety procedures. Never attempt to repair damaged batteries yourself.
Using the Correct Charger
Using the wrong charger can create serious electrical hazards, potentially damaging your battery or even causing fires. Mismatched voltage or amperage can overcharge cells, leading to overheating and shortened battery life.
To verify compatibility, check three key details: the battery voltage (like 18V or 20V), the battery chemistry (NiCd, NiMH, or Li-ion), and the manufacturer. Most chargers are brand-specific, so a DeWalt charger won’t work with Makita batteries, even if the voltage matches.
If you’ve lost your original charger, contact the manufacturer directly or visit an authorized dealer. They can help you find the exact replacement model. Avoid generic chargers unless they’re explicitly certified for your battery model. Many community members report mixed results with third-party options, some work perfectly while others fail quickly or damage batteries.
Always keep your charger’s model number recorded somewhere safe for future reference.
Daily Habits That Extend Battery Lifespan
Your battery’s longevity isn’t just about how you charge it—daily habits make a massive difference. Here’s what experienced tool users recommend based on years of real-world testing.
Store batteries in a cool, dry place away from direct sunlight. Heat is battery enemy number one. According to community feedback, garages that reach extreme temperatures can cut battery life by 30-40%. If possible, bring batteries indoors during summer months. Ideal storage temperature sits between 10-25°C (50-77°F).
Don’t let batteries sit completely drained for extended periods. Lithium-ion batteries (Li-ion) perform best when stored at 40-50% charge if you won’t use them for more than a few weeks. This “partial charge” strategy prevents deep discharge damage, which is irreversible. Many pros mark their last-use date on batteries with tape to track storage time.
Rotate your batteries regularly if you own multiple packs. Using the same battery repeatedly while others sit idle creates uneven wear patterns. Professional tradespeople often number their batteries and cycle through them systematically. This simple habit ensures all batteries age at similar rates.
Clean battery contacts monthly with a dry cloth. Dust and debris create resistance, forcing the battery to work harder and generating excess heat. Some users report improved runtime just from keeping contacts clean—a maintenance task that takes seconds.
Avoid leaving batteries on the charger indefinitely once fully charged. While modern chargers include safety features, long-term charging can generate unnecessary heat cycles. Remove batteries when the indicator shows complete charging.
Incorporate battery care into your proper tool maintenance routine. Following maintenance schedules that work means checking battery health alongside other tool components.
Use your batteries regularly—they’re designed for active duty, not permanent storage. Monthly use, even for light tasks, keeps internal chemistry active and prevents capacity loss from prolonged inactivity.
What Real Users Say: Common Charging Mistakes and Solutions
We reached out to our community of contractors, weekend warriors, and DIY enthusiasts to learn what charging mistakes they’ve made and how they fixed them. Here’s what real users shared about their experiences.
One of the most common mistakes? Leaving batteries on the charger indefinitely. Mike, a residential contractor from Ohio, learned this the hard way: “I used to leave my batteries plugged in all week, thinking they’d always be ready. After a year, they barely held a charge.” The solution is simple – remove batteries once the indicator light shows they’re fully charged. Modern chargers have protection circuits, but constant trickle charging can still degrade battery chemistry over time.
Temperature issues came up frequently. Sarah, a furniture maker, noticed her batteries felt hot after charging in her garage during summer. “I moved my charging station to the basement where it’s cooler, and my batteries started lasting longer.” Keep charging areas between 50 and 85 degrees Fahrenheit for best results.
Several users mentioned the “death spiral” of deeply discharged batteries. When lithium-ion batteries sit unused for months and drain completely, they may not accept a charge. James, a home renovator, suggests: “If your battery won’t charge, try leaving it on the charger for 30 minutes, remove it for 10 minutes, then try again. Sometimes this kickstarts the charging cycle.”
Mixing old and new batteries was another lesson learned. Multiple users reported that pairing a worn-out battery with a fresh one in rotation led to inconsistent performance. The community recommendation is clear: replace batteries in pairs when possible and label them with purchase dates to track their age and performance together.
Proper battery charging isn’t just about keeping your cordless drill running—it’s about maximizing your investment and ensuring safe, reliable performance for years to come. By following the straightforward practices we’ve covered, from understanding your specific battery type to avoiding common mistakes like overcharging or exposing batteries to extreme temperatures, you’ll significantly extend battery life and maintain optimal power output. The cost savings alone make proper care worthwhile, as replacing batteries frequently can quickly add up.
Remember that each charging session is an opportunity to preserve your battery’s health. Always use the manufacturer-recommended charger, store batteries in moderate temperatures, and don’t leave them sitting discharged for extended periods. These simple habits translate directly into better tool performance and fewer frustrating mid-project power losses.
We’d love to hear from you! What charging tips have worked best in your experience? Have you discovered any tricks for reviving older batteries or preventing common issues? Share your insights, questions, and real-world experiences in the comments below. Your feedback helps build a stronger community where everyone benefits from collective knowledge. Whether you’re a weekend DIYer or seasoned professional, your perspective matters.
Related Posts

Post a Comment