
Trenchless pipe rehabilitation saves your yard, your time, and often your budget by repairing or replacing damaged underground pipes without excavating long trenches across your property. Instead of digging up entire sections of lawn, driveway, or landscaping, specialized equipment inserts new pipe liners or pulls replacement pipes through existing routes underground.
This technology solves a common homeowner dilemma: aging sewer lines, water mains, and drainage systems that crack, corrode, or collapse over time. Traditional repair methods require backhoes, extensive excavation, and weeks of restoration work. Trenchless methods complete most projects in days, leaving minimal surface disruption.
Two primary approaches dominate the field. Pipe lining creates a new pipe inside the old one using resin-coated materials that cure in place, essentially building a seamless inner tube. Pipe bursting fractures the deteriorated pipe while simultaneously pulling new pipe through the same path. Each method suits different pipe conditions, soil types, and access points.
Understanding these options matters because the right choice depends on your specific situation. Pipe diameter, damage severity, local soil conditions, and existing infrastructure all influence which approach delivers the best results. Professional assessment typically reveals whether trenchless methods work for your property, though some limitations exist. Extremely collapsed pipes, pipes with severe offset joints, or locations with limited access may still require traditional excavation.
The following guide breaks down how trenchless rehabilitation works, what equipment professionals use, realistic cost expectations, and when DIY approaches make sense versus calling specialists.
What Is Trenchless Pipe Rehabilitation?
How It Works: The Basic Principle
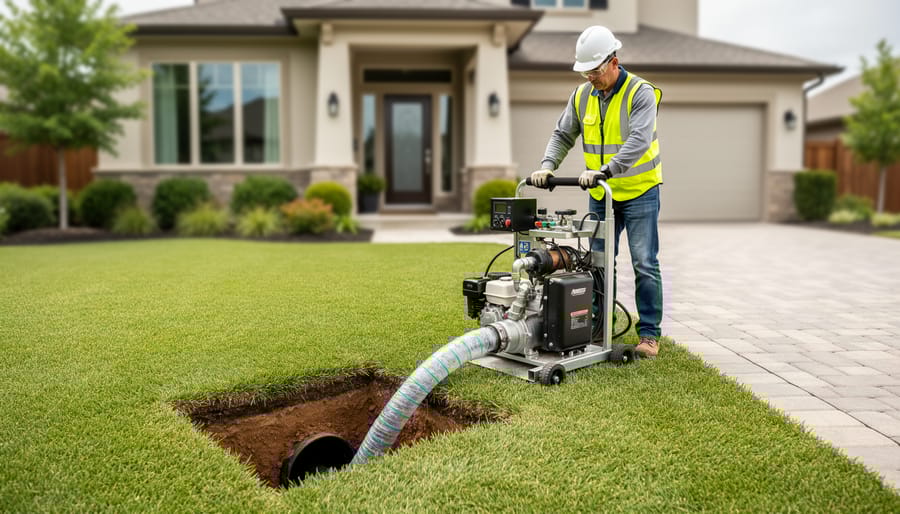
Think of trenchless pipe rehabilitation like patching a bike tire from the inside instead of replacing the whole tube. Rather than digging up your yard to access damaged sewer or water lines, this technology lets professionals repair pipes by working through existing access points like cleanouts or small entry holes.
Here’s the basic concept: a flexible liner coated with special resin gets inserted into your damaged pipe. Once positioned correctly, the liner is inflated using air pressure or water, pressing it firmly against the inside walls of the existing pipe. The resin then hardens through heat or UV light exposure, creating a smooth, durable new pipe within the old one. It’s similar to creating a cast inside a broken arm, except this cast becomes the permanent solution.
The beauty of this approach is that it addresses cracks, leaks, and deterioration without the massive disruption of traditional excavation. Your landscaping, driveway, and foundation stay intact. Most homeowners appreciate that a repair that once required backhoes and weeks of work can now often be completed in a single day with minimal surface disturbance.
When Trenchless Methods Make Sense
Trenchless pipe rehabilitation truly shines when traditional dig-and-replace methods would cause major disruption to your property. If your damaged sewer line runs beneath your concrete driveway, breaking up and re-pouring that surface could cost thousands in additional expenses. Repairing pipes without excavation preserves your driveway intact, saving both money and hassle.
Established gardens present another ideal scenario. Imagine you’ve spent years cultivating mature trees, decorative shrubs, and carefully designed landscaping. Traditional trenching would destroy root systems and obliterate your garden beds. Trenchless methods require only small access points at each end of the affected pipe section, leaving your landscaping undisturbed.
Pipes running under building foundations or alongside structural walls are particularly challenging with conventional methods. Excavating near foundations risks undermining structural support, potentially causing settling or cracking. Trenchless technology eliminates this concern entirely by working within the existing pipe pathway.
Urban properties with limited access also benefit significantly. Narrow side yards, pipes beneath extensions or patios, or lines running through neighbour’s properties become manageable projects rather than logistical nightmares. One homeowner in our community reviews shared how they rehabilitated a pipe running beneath their pool deck without draining or disturbing the structure.
Finally, consider winter conditions or busy commercial properties where minimizing downtime matters. Trenchless methods typically complete faster with substantially less site disruption, meaning businesses stay operational and homeowners maintain access to their properties throughout repairs.
The Main Types of Trenchless Pipe Rehabilitation
Cured-In-Place Pipe (CIPP) Lining
Cured-In-Place Pipe (CIPP) lining is one of the most popular trenchless rehabilitation methods, essentially creating a new pipe inside your old one. Here’s how it works: technicians insert a flexible liner tube saturated with special resin into the damaged pipe. Once positioned correctly, the resin is cured (hardened) to form a smooth, jointless pipe within the existing structure.
The liner itself is typically made from felt or fiberglass fabric that’s been impregnated with epoxy, polyester, or vinyl ester resin. Think of it like a soft tube that hardens into a durable new pipe once the curing process activates the resin. The beauty of this method is that it conforms to the existing pipe’s shape, including navigating bends and curves.
There are three main curing methods, each requiring different equipment:
Hot water curing involves circulating heated water (around 140-190 degrees Fahrenheit) through the liner for several hours. This method requires a boiler truck and recirculation equipment. It’s the most common approach for residential applications.
Steam curing uses pressurized steam instead of water, achieving faster cure times but requiring specialized steam generators. This method is typically reserved for larger commercial projects.
UV light curing is the newest technology, where a UV light train travels through the liner, curing it section by section in minutes rather than hours. This requires expensive UV equipment but offers significant time savings.
CIPP works best for pipes ranging from 4 to 110 inches in diameter and is ideal for repairing cracks, root intrusion, and corrosion. It’s not suitable for completely collapsed pipes or those with severe structural damage.
Cost-wise, residential CIPP lining typically ranges from $80 to $250 per linear foot, depending on pipe diameter and access difficulty. While the equipment needed (cameras, cleaning jetters, boilers, and inversion equipment) is specialized and expensive for homeowners to purchase, some rental centers now offer CIPP kits for smaller residential projects, making DIY attempts more feasible for determined homeowners with technical skills.
Pipe Bursting
Pipe bursting offers a powerful solution when your existing underground pipes are beyond simple lining repairs. This method literally breaks apart the old, damaged pipe while simultaneously pulling a new replacement pipe into the exact same space—all without digging a trench along the entire pipe run.
Here’s how it works: A bursting head, which looks like a cone-shaped metal tool slightly larger than the existing pipe, gets attached to the new pipe section. Using hydraulic or pneumatic power, this bursting head is pulled through the old pipe from an entry pit to an exit pit. As it moves forward, the head fractures and pushes the old pipe fragments outward into the surrounding soil, while the new pipe follows directly behind into the newly created space.
This method works best when you’re dealing with severely deteriorated pipes made from clay, concrete, or cast iron that can’t be saved through relining. It’s particularly effective for upsizing—installing a larger diameter pipe than the original—which you can’t accomplish with pipe lining methods.
The equipment requirements are substantial: a hydraulic pulling machine, the bursting head itself, and access to two excavation points at either end of the pipe section. You’ll also need a pipe fusion machine if you’re working with HDPE (high-density polyethylene) pipes, which are the most common replacement material.
Important limitations to consider: Pipe bursting doesn’t work well in extremely rocky soil or where there are nearby utility lines that could be damaged by the displacement force. The method requires more excavation than pipe lining—you’ll need those entry and exit pits—and the hydraulic equipment isn’t typically available at standard tool rental centers. Most homeowners hire specialized contractors for this job rather than attempting it as a DIY project.

Spray Lining and Coating
Spray lining and coating offers a minimally invasive solution that essentially creates a brand-new pipe interior without replacing the existing pipe. This method involves applying a liquid epoxy coating directly to the inside walls of damaged pipes using specialized spray equipment. The coating bonds to the existing pipe surface, sealing cracks, preventing leaks, and protecting against future corrosion.
The process begins with thorough pipe cleaning, typically using high-pressure water jets or mechanical tools to remove debris, rust, and buildup. Once cleaned and dried, technicians insert spray equipment through existing access points like cleanouts or small entry holes. The epoxy material is then sprayed evenly across the entire interior surface, creating a seamless, watertight barrier. The coating cures in place, usually within a few hours, forming a smooth, corrosion-resistant liner.
This technique works particularly well for pipes with widespread surface corrosion, pinholes, or general deterioration rather than severe structural damage. It’s commonly used in water supply lines, drain lines, and sewer pipes ranging from 2 to 36 inches in diameter.
Compared to CIPP or pipe bursting, spray lining requires less equipment and setup time, making it potentially more cost-effective for certain applications. The coatings typically last 30-50 years when properly applied. However, this method requires specialized equipment and trained operators, making it less suitable for DIY projects. Professional application ensures proper surface preparation, even coating thickness, and complete coverage—all critical factors for long-term performance and durability.
Slip Lining
Slip lining is one of the most straightforward trenchless rehabilitation methods, involving the insertion of a new, smaller-diameter pipe into the damaged existing pipe. Think of it like sliding a liner into a damaged garden hose—the new pipe becomes the functional water carrier while the old pipe remains in place as a protective outer shell.
The process begins by cleaning the existing pipe thoroughly, then feeding a continuous length of new pipe (typically high-density polyethylene or PVC) through the old one. The new pipe sections are joined either above ground before insertion or within the existing pipe using specialized equipment. Once in place, the space between the old and new pipes, called the annular space, is often grouted to provide structural support and prevent shifting.
The main advantage is simplicity—this method requires minimal specialized equipment and can often be completed quickly. It works particularly well for gravity-fed sewer lines and drainage systems where slight diameter reduction won’t impact performance.
However, the key disadvantage is that reduced diameter. You’ll lose some flow capacity, which may not be acceptable for pipes already operating near capacity. Slip lining also requires access points at both ends of the pipe section.
This method shines in applications like residential sewer laterals, storm drains, and industrial discharge lines where the diameter reduction (typically 10-20 percent) won’t compromise system performance.
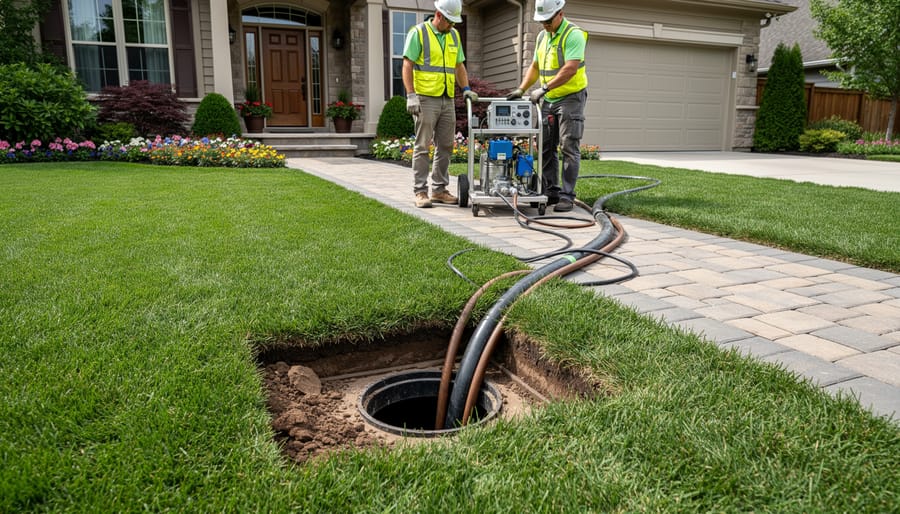
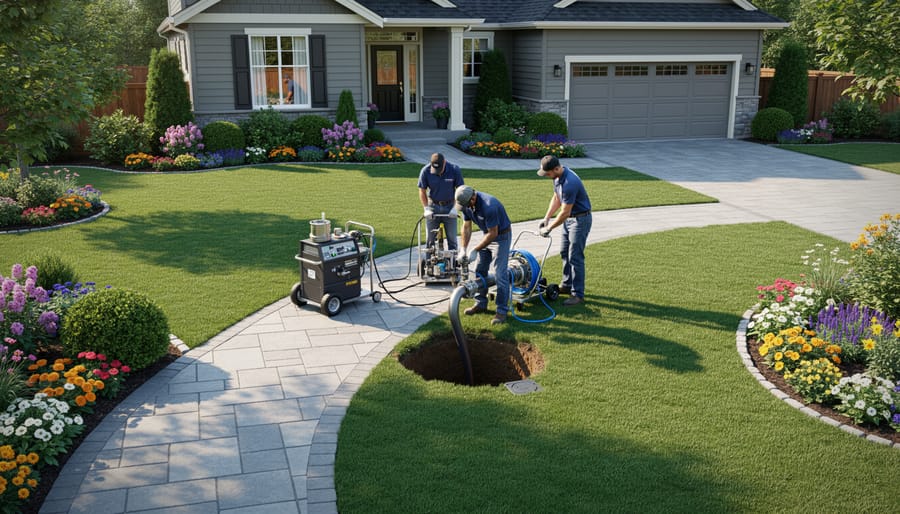
Tools and Equipment You’ll Need (Or Need to Hire)
Inspection Equipment
Before you can rehabilitate a pipe, you need to know exactly what you’re dealing with. CCTV pipe inspection cameras are essential for assessing damage, blockages, and overall pipe condition. These specialized cameras feature waterproof housings, powerful LED lights, and push cables ranging from 100 to 400 feet, allowing you to navigate through pipes from 2 to 36 inches in diameter.
For homeowners tackling a one-time project, rental is the practical choice. Expect to pay $200-$400 per day for a basic push camera system suitable for residential drain lines. Professional-grade units with recording capabilities and measurement overlays run $400-$800 daily. Many rental centers offer weekend rates that can save you 20-30% compared to daily pricing.
You’ll also need locating equipment to pinpoint problem areas from above ground. Basic pipe locators rent for $75-$150 per day and work in conjunction with your inspection camera to mark exact locations of damage.
According to user feedback in our community reviews, first-time users appreciate rental packages that include training videos and technical support. Always inspect the camera head and cable before leaving the rental center, and test the recording function if documentation is needed for insurance claims or contractor quotes.

Professional-Grade Equipment
Trenchless pipe rehabilitation relies on specialized equipment that’s quite different from typical DIY tools. CIPP (Cured-In-Place Pipe) installation rigs, for example, use calibrated pressure and heat systems to install resin-saturated liners inside damaged pipes. These machines require precise temperature control and timing—mistakes can result in incomplete curing or liner failure.
Pipe bursting equipment is equally complex, using hydraulic systems that can generate tens of thousands of pounds of force to fragment old pipes while simultaneously pulling new ones into place. Operating this machinery demands specific training and certifications that most homeowners simply don’t have access to.
Spray application systems for epoxy pipe coating present another challenge. These require industrial-grade compressors, specialized nozzles, and robotic crawlers to navigate pipe interiors while maintaining uniform coating thickness. The equipment cost alone often exceeds $50,000, making purchase impractical for one-time repairs.
While some smaller trenchless repairs might be DIY-friendly with rented equipment, professional-grade rehabilitation typically isn’t feasible without proper training. The learning curve is steep, safety risks are significant, and equipment rental companies often require proof of certification before releasing specialized trenchless machinery. For most homeowners, hiring trained professionals ensures the job is done correctly and safely.
Benefits of Trenchless Pipe Rehabilitation
Trenchless pipe rehabilitation offers several compelling advantages that make it an attractive option for property owners and professionals alike. Understanding these benefits can help you decide whether this modern approach is right for your project.
The most immediate benefit is minimal property disruption. Unlike traditional excavation methods that require digging trenches across your lawn, driveway, or landscaping, trenchless techniques work through small access points. This means your garden beds, concrete pathways, and mature trees remain intact. For homeowners, this preservation translates directly into significant cost savings since you won’t need to budget for extensive landscaping restoration, repaving driveways, or repairing damaged hardscaping after the work is complete.
Time efficiency is another major advantage. Traditional pipe replacement projects can take several days or even weeks, depending on the extent of excavation required. Trenchless rehabilitation typically completes in one to three days, minimizing disruption to your daily routine. For businesses, this faster timeline means less downtime and fewer lost revenue opportunities.
From an environmental perspective, trenchless methods generate considerably less waste and soil disturbance. The reduced need for heavy machinery means lower fuel consumption and fewer carbon emissions during the repair process. Additionally, because you’re rehabilitating existing pipes rather than disposing of old ones, less material ends up in landfills.
Cost considerations often favor trenchless solutions when you factor in the complete project scope. While the specialized equipment rental may initially seem expensive, remember you’re avoiding excavation costs, disposal fees, and restoration expenses. Many homeowners and contractors find the total project cost comparable to or lower than traditional methods.
For DIY enthusiasts considering tackling smaller projects, trenchless methods can be more accessible than full excavation work, though professional assessment is still recommended for most applications. The technology allows property owners to address pipe problems proactively before they escalate into emergency situations requiring extensive repairs.
Limitations and When to Choose Traditional Methods
While trenchless pipe rehabilitation offers impressive benefits, it’s not a universal solution. Understanding when traditional excavation makes more sense will save you time, money, and frustration.
Trenchless methods can’t fix severely collapsed pipes. If your pipe has crushed or caved in completely, there’s simply nothing for the liner to adhere to or for the bursting tool to work with. In these cases, excavation remains your only option. Similarly, pipes with significant bellying (sagging sections that create low spots where water pools) often require traditional replacement, as trenchless techniques can’t correct structural alignment issues.
The existing pipe material matters too. Orangeburg pipes (made from wood pulp and tar, common in homes built between 1940-1970) are notoriously problematic for trenchless repair because they deteriorate unpredictably. Cast iron pipes with extensive root intrusion may also need full replacement rather than rehabilitation.
Location factors play a role as well. Pipes running under structures, protecting pipes under landscaping, or mature trees might actually be better candidates for trenchless methods, but pipes in easily accessible open areas may be more economical to replace traditionally, especially if you’re planning other underground work simultaneously.
Cost considerations deserve honest evaluation. For very short pipe runs (under 10 metres), traditional methods might prove cheaper despite the disruption. Additionally, if your entire pipe system is nearing end-of-life, complete replacement could offer better long-term value than rehabilitating sections piecemeal.
Community feedback from contractors consistently emphasizes one point: get multiple professional assessments before deciding. Camera inspections are essential for determining whether your specific situation suits trenchless repair or requires traditional excavation.
DIY vs. Hiring a Professional: What You Need to Know
Safety Considerations
Trenchless pipe rehabilitation involves serious hazards that demand careful attention. Whether you’re a professional or exploring DIY options, understanding these safety considerations is essential before starting any project.
Chemical resins used in pipe lining release harmful fumes and can cause skin burns or respiratory issues. Always work in well-ventilated areas and wear appropriate personal protective equipment including chemical-resistant gloves, safety goggles, and respirators rated for organic vapors. Never skip this gear, even for quick tasks.
Confined space entry presents significant risks. Manholes and underground access points can contain toxic gases, lack oxygen, or trap workers. Professional gas monitoring equipment is mandatory, and confined space training isn’t optional—it’s a legal requirement in most jurisdictions.
Proper training extends beyond safety basics. Operating specialized equipment like CCTV cameras, curing systems, and resin mixers requires hands-on instruction. Many rental companies offer equipment demonstrations, which you should always take advantage of.
For homeowners considering DIY approaches, honestly assess your capabilities. Some trenchless methods are strictly professional-grade. Consult with experienced contractors and rental specialists who can evaluate whether your project suits DIY handling or requires professional expertise.
Cost Breakdown: What to Expect
Understanding the financial side of trenchless pipe rehabilitation helps you make informed decisions about your repair project. Let’s break down what you can realistically expect to spend.
For professional pipe lining installations, costs typically range from $80 to $250 per linear foot, depending on pipe diameter and accessibility. A standard residential sewer line repair of 50 feet might run between $4,000 and $12,500. Pipe bursting generally costs $60 to $200 per linear foot, with most homeowners paying around $6,000 to $15,000 for typical projects.
If you’re considering a DIY approach with rented equipment, pipe lining kits for smaller diameter pipes (4-6 inches) rent for approximately $200 to $500 per day, though this requires specific training. Materials including epoxy liners add another $40 to $80 per foot. Most rental centers recommend working with certified professionals for quality assurance.
Traditional excavation costs between $50 to $250 per linear foot but often includes additional expenses that drive up the total. You’ll face landscape restoration ($500 to $3,000), driveway or sidewalk repair ($1,000 to $5,000), and potential cleanup fees. A comparable traditional repair often totals $8,000 to $20,000 once all restoration work is factored in.
The real savings with trenchless methods come from avoiding these secondary costs. You’ll preserve your landscaping, maintain driveway integrity, and skip the hefty cleanup bills. Community reviews consistently highlight this advantage, with homeowners reporting 30 to 50 percent overall savings compared to excavation projects.
Keep in mind that complex situations like multiple bends, severe damage, or extremely corroded pipes may increase costs for either method. Always get multiple quotes and ask professionals about specific conditions affecting your property’s pricing.
Trenchless pipe rehabilitation offers a powerful alternative to traditional excavation methods, delivering real benefits for homeowners and professionals alike. Throughout this guide, we’ve explored how techniques like pipe lining and pipe bursting can save you time, money, and the hassle of tearing up your property. These methods minimize disruption to landscaping, driveways, and daily routines while often delivering repairs that last decades.
The key takeaway? Trenchless solutions aren’t suitable for every situation, but they’re incredibly effective for many common pipe problems. Before deciding on any approach, start with a proper camera inspection to understand what you’re dealing with. This assessment will reveal whether your pipes are candidates for trenchless repair and which specific method makes the most sense.
Consider factors like the extent of damage, pipe material, soil conditions, and yes, budget. While pipe relining costs may seem higher upfront compared to spot repairs, the long-term value and reduced collateral expenses often make it worthwhile.
Whether you’re a DIY enthusiast or a professional tradesperson, understanding your options empowers better decisions. For complex projects, consulting experienced professionals ensures optimal results. If you’re ready to tackle a trenchless project, explore equipment rental options that provide the specialized tools you need without the investment of ownership. Don’t let pipe problems overwhelm you—trenchless technology puts effective solutions within reach.
Related Posts

Post a Comment