
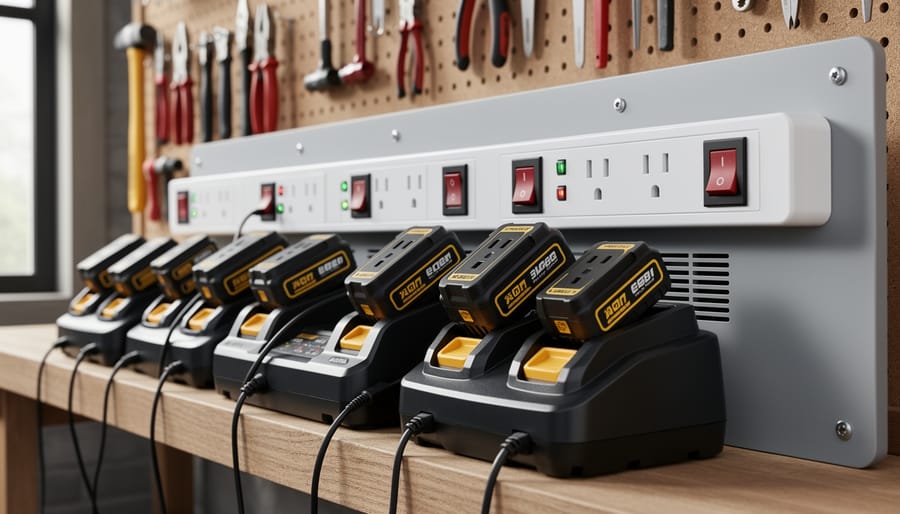
A dedicated charging station for your cordless tool batteries keeps multiple packs charged, organized, and ready while reducing fire risk and extending battery life through proper ventilation and temperature control. Setting one up takes about 30 minutes and requires basic wall mounting or shelf space, a multi-outlet power strip, and attention to three safety fundamentals: placing chargers on non-flammable surfaces away from heat sources, ensuring adequate airflow around each unit, and never stacking chargers or covering ventilation ports.
Most professionals and serious DIYers who own three or more cordless tools struggle with scattered chargers, forgotten batteries, and the frustration of reaching for a dead pack mid-project. A centralized station solves this by creating a single location where every battery rotates through charging on a predictable schedule. The payoff goes beyond convenience. Lithium-ion batteries degrade faster when charged in hot, enclosed spaces or left on chargers for weeks at a time. A properly designed station addresses both issues.
Based on feedback from our community of tradespeople and weekend builders, the most successful setups share common traits: clear labeling for each tool system, room for expansion as tool collections grow, and visual confirmation that batteries are actually charging. This guide walks through the materials, placement decisions, and ongoing habits that turn a shelf or wall into a reliable hub for your power tool ecosystem.
Key Takeaway: The five costliest mistakes are overloading circuits, using mismatched chargers, blocking ventilation around charging batteries, ignoring temperature warnings, and leaving batteries on chargers for days after they’re full, each accelerates battery degradation or raises fire risk.
What You’ll Need for Your Charging Station

Before you start drilling holes or mounting shelves, gather everything you need to build a charging station that protects your batteries and your workspace. Having the right materials upfront prevents mid-project trips to the store and ensures you don’t skip critical safety components.
Here’s what you’ll need, organized by category:
- Charging equipment: OEM or certified third-party chargers for each battery platform you own (DeWalt, Milwaukee, Makita, etc.), plus one spare charger for your most-used battery type
- Power infrastructure: Surge-protected power strip rated for at least 1800 watts, or dedicated 15-amp circuit if charging more than four batteries simultaneously
- Storage and organization: Wall-mounted rack, pegboard, or shelving unit with minimum 4-inch spacing between charger slots; clear plastic bins for storing charged versus depleted batteries
- Fire safety: Class C or ABC fire extinguisher (minimum 5-pound capacity), smoke detector with battery backup
- Labeling materials: Permanent markers, color-coded labels or tape, small whiteboard for rotation tracking
- Ventilation aids: Small USB or AC-powered fan if working in enclosed space; thermometer to monitor ambient temperature
- Mounting hardware: Appropriate screws, anchors, or brackets for your wall type; cable management clips or velcro straps
The total investment typically runs between £50 and £200 depending on how many battery platforms you’re supporting and whether you already own fire safety equipment. Don’t cheap out on the surge protector, a £15 power strip is far less expensive than replacing a £120 charger after a voltage spike.
If you’re charging lithium-ion batteries (which most cordless tools now use), the fire extinguisher isn’t optional paranoia. Thermal runaway events are rare but devastating, and having the right extinguisher within arm’s reach can prevent a small malfunction from becoming a house fire. Check that your extinguisher is rated for electrical fires before mounting it near your station.
Safety Warnings and Precautions
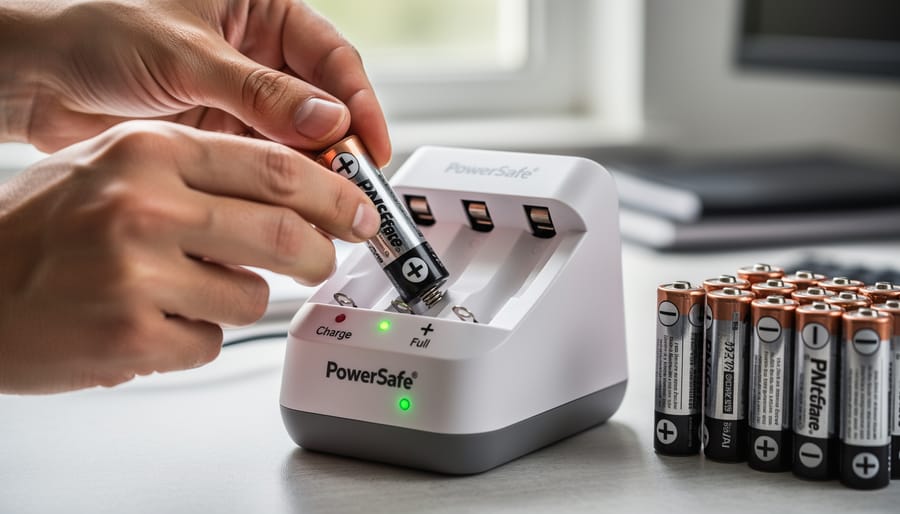
Charging cordless tool batteries carries real hazards that require your attention, not just awareness. Lithium-ion batteries, now standard in most cordless tools, store significant energy and can fail catastrophically if mishandled.
Warning: Never charge batteries that show signs of physical damage, swelling, or leaking, they pose an immediate fire and explosion risk and should be disposed of properly.
Fire represents the most serious workshop fire risk when charging batteries. Lithium-ion cells can enter thermal runaway, a self-sustaining reaction that produces intense heat and flames within seconds. Keep a Class C or ABC fire extinguisher within three metres of your charging station, and never position batteries near flammable materials like paper, sawdust, solvents, or compressed gas cylinders during charging.
Electrical overload causes most charging station failures. Calculate the total amperage your chargers draw and never exceed 80% of your circuit’s capacity. Using multiple chargers on a single power board without surge protection creates both fire and electrocution hazards.
Ventilation is not optional. Charging batteries release small amounts of gas, particularly when new or nearing end of life. Never charge batteries in sealed cabinets, confined spaces, or areas without air circulation. Your charging area needs either natural airflow or mechanical ventilation.
Temperature extremes damage batteries and increase danger. Charge only between 10°C and 35°C. Batteries that feel hot to touch after charging indicate a problem, stop using that battery or charger immediately and consult the manufacturer.
Never leave charging batteries completely unattended overnight or when leaving your workshop. Never use damaged charging cables, mix batteries and chargers from different manufacturers (even if they physically fit), or attempt to charge non-rechargeable batteries.
Choosing the Right Location
Picking where to set up your charging station matters just as much as how you build it. The wrong spot can shorten battery life, create fire risks, or turn charging into a daily hassle.
Temperature stability comes first. Your charging area needs to stay between 50°F and 86°F year-round. Garages that freeze in winter or turn into ovens in summer won’t cut it. Basements work well if they’re climate-controlled, but skip anywhere prone to dampness. Batteries charging in extreme cold won’t reach full capacity, while heat accelerates degradation and increases fire risk.
Ventilation separates safe stations from dangerous ones. Battery charging releases hydrogen gas and heat. Choose a space with natural airflow, a workshop with windows, a garage bay you can crack open, or a room with an exhaust fan. Avoid closets, enclosed cabinets, or tight corners where heat builds up.
You’ll need convenient access to dedicated power. Position your station within six feet of a grounded outlet to avoid extension cords snaking across walkways. If you’re charging six or more batteries regularly, plan for a 15-amp circuit that won’t power anything else simultaneously.
Keep minimum three feet from paint cans, solvents, sawdust piles, propane tanks, and other flammables. Wall-mounted stations work better than floor setups in cluttered shops, you gain clearance and reduce knock-over risks.
Think about your workflow too. Place the station where you naturally grab tools at the start of projects, not somewhere you’ll forget to check.
Step-by-Step Setup Process
Step 1: Prepare the Location
Start by clearing a 3-foot radius around your chosen location. Remove any flammable materials, rags, solvents, sawdust, or paper, since charging batteries generate heat and pose fire risks. Wipe down the surface with a damp cloth to eliminate dust buildup.
Next, verify your electrical capacity. Check your circuit breaker panel to confirm the circuit can handle multiple chargers running simultaneously. Most standard chargers draw 2-3 amps each, but rapid chargers can pull 5-8 amps. If you’re setting up six chargers, that’s potentially 48 amps on one circuit, well over the typical 15-amp household limit. Calculate your total draw and consider a dedicated 20-amp circuit if needed.
Test ventilation by holding a tissue near the area. It should flutter slightly, indicating airflow. If it doesn’t, position a fan to create cross-ventilation or choose a different spot with natural air movement.
Finally, ensure your mounting surface is level, stable, and non-flammable. Drywall, metal, or concrete work well. Avoid wood shelving unless it’s rated for heat resistance.
Step 2: Install Power Supply and Surge Protection
Start by determining the electrical load your charging setup will require. Add up the wattage of all chargers you plan to run simultaneously, most cordless tool chargers pull between 50 and 150 watts each. If you’re charging more than four batteries at once, consider installing a dedicated 15-amp or 20-amp circuit to avoid tripping breakers or overloading existing outlets.
Use a high-quality surge protector rated for workshop environments, not a basic household power strip. Look for models with at least 1,000 joules of surge protection and individual on/off switches for each outlet. This lets you power down specific chargers without unplugging everything. Mount the surge protector to the wall or workbench at chest height so you can easily see indicator lights and access switches.
Verify that your outlet is properly grounded by using a three-prong circuit tester before plugging in equipment. Battery chargers generate heat and draw steady current, making proper grounding essential for both fire prevention and electrical safety. If your workspace lacks grounded outlets, hire an electrician to upgrade the wiring rather than using adapters.
Position power cables to run along walls or under the charging shelf, securing them with cable clips every 12 inches. Keep cords off the floor where they create tripping hazards. If you must run temporary power, follow extension cord safety practices: use a heavy-duty 12-gauge cord rated for continuous use and inspect it monthly for damage.
Step 3: Arrange Chargers and Storage
With your power supply secured, arrange your chargers starting from the bottom shelf or workbench surface. Space each charger at least 15-20cm apart horizontally to prevent heat buildup, chargers generate warmth during operation, and crowding them reduces airflow around venting slots. If mounting chargers on pegboard or wall panels, use the manufacturer-supplied brackets and maintain similar spacing between units.
Group chargers by battery platform: dedicate one area to your Milwaukee M18 chargers, another to DeWalt 20V, and so on. This prevents accidentally inserting incompatible batteries and makes grabbing the right charger instinctive during busy work sessions. Label each charging zone clearly with the brand and voltage.
Create a two-tier system using shelves, bins, or dedicated storage solutions to separate charged batteries from depleted ones. Position charged batteries on your right (or top shelf) and empty batteries on your left (or bottom shelf), whatever feels natural for your workflow. Some users colour-code slots with tape: green for charged, red for needs charging. This simple visual system eliminates guessing and ensures you always grab a ready battery when heading to a job.
Step 4: Add Fire Safety Equipment
Once your chargers and storage are in place, install a Class C or ABC fire extinguisher within arm’s reach of your charging station, not tucked behind boxes or tools. Mount it on the wall at a comfortable height, around four to five feet up, where you won’t need to move obstacles to grab it. If you’re setting up in an enclosed space like a garage or basement workshop, add a smoke detector directly above or near the charging area. Test it monthly and replace batteries yearly.
Check that nothing blocks the path to your extinguisher. A charging station fire needs immediate response, and fumbling around shelves or extension cords wastes critical seconds. Keep the area in front of your safety equipment clear at all times, even when you’re tempted to stack batteries or drills there temporarily.
Step 5: Label and Organize
A simple labeling system prevents costly mistakes and keeps your charging routine efficient. Use a label maker or waterproof markers to identify each charger with its compatible battery voltage and brand, stick labels directly on the charger body where they won’t peel off from heat.
Create visual indicators for charge status using colored bins or tape: green for fully charged batteries, red for depleted ones awaiting charge, and yellow for batteries currently charging. This three-bin system eliminates guesswork when you’re rushing to grab batteries for a job.
Mark battery purchase dates on each pack with permanent marker. This helps you rotate older batteries into regular use first, preventing some from sitting idle while others get overworked. Number your batteries (1, 2, 3) and track charge cycles in a simple notebook or phone app, when battery 3 consistently fails to hold charge, you’ll have documentation showing it’s time for replacement rather than wondering if you’re imagining the problem.
Step 6: Establish Ventilation

Adequate airflow prevents dangerous heat accumulation and disperses gases that batteries release during charging. If your charging station is in an enclosed space, install a small ventilation fan to move air continuously, even a basic 6-inch exhaust fan improves circulation significantly. Position the fan to draw air across the chargers and batteries, not directly at them, which could cool components unevenly.
For stations in rooms with windows, open them during charging sessions to create natural cross-ventilation. Avoid placing your charging station inside closed cabinets or against walls that block airflow on all sides. If your setup is near an HVAC vent, position it so air currents pass over the charging area without directly hitting individual batteries, which maintains consistent temperature while preventing stagnant air pockets where heat concentrates.
Best Practices for Battery Care While Charging
Once your charging station is running, a few consistent habits will dramatically extend battery life and prevent the performance drop that comes from poor charging routines.
Charge level management is your first line of defense. Lithium-ion batteries, the standard in 2026 cordless tools, degrade faster when stored fully charged or completely drained. Ideally, pull batteries off the charger at around 80% for long-term storage and avoid letting them sit below 20% for extended periods. Most modern chargers stop at full capacity automatically, but leaving batteries on the charger for days creates heat stress that shortens lifespan. Charge what you need, then remove it.
Temperature matters constantly. Batteries charging in environments above 30°C (86°F) or below 5°C (41°F) suffer permanent capacity loss. If your workshop gets hot in summer or freezing in winter, move batteries to a climate-controlled area during charging. Touch the battery casing mid-charge, it should feel warm, not hot. Excessive heat signals a problem with the charger, battery, or ambient conditions.
Contact maintenance prevents charging failures. Dust, sawdust, and oxidation on battery terminals create resistance that slows charging and generates heat. Wipe contacts with a dry cloth weekly, and use a pencil eraser on stubborn corrosion, never sandpaper, which removes protective plating.
Here’s a simple maintenance rhythm to follow:
- Daily: Remove batteries once charged; check for unusual heat during charging
- Weekly: Clean battery and charger contacts; rotate stored batteries to prevent deep discharge
- Monthly: Inspect charger cables for damage; verify ventilation isn’t blocked; test oldest batteries under load
Manufacturer guidelines still rule. DeWalt, Milwaukee, Makita, and others publish specific charge/discharge cycles and storage voltages for their 2026 battery lines. Download the manual for each tool platform you own, some brands recommend periodic full discharge cycles, while others advise against it. When guidance conflicts with general advice, follow the manufacturer.
Rotation schedules keep all batteries healthy. If you have six batteries but regularly use three, the idle ones will self-discharge into damaging low-voltage states. Swap them monthly, even if it means charging batteries you don’t immediately need.
Testing and Verification
Once your charging station is assembled, run through these verification checks before you put it into regular use.
Plug in each charger and test it with a battery. The indicator lights should respond immediately, steady red, green, or flashing patterns that match the charger’s manual. If lights behave erratically or don’t illuminate at all, the charger may be faulty or the outlet undersized.
During the first charge cycle, check each battery and charger after 15 minutes. Touch the battery casing (not the contacts). It should be slightly warm, never hot enough to make you pull your hand away. If any battery becomes uncomfortably hot, unplug that charger and investigate whether you’ve paired incompatible equipment. Catching common charging mistakes early prevents damage.
Confirm that batteries reach full charge within the timeframe stated by the manufacturer, typically 30 to 90 minutes depending on capacity. A battery that never shows a full-charge indicator may signal a failing cell or charger malfunction.
Finally, walk through your fire safety checklist. Stand at the charging station and physically touch the extinguisher. Can you grab it in two seconds without moving obstacles? Is the smoke detector within earshot? If you have to think about where something is, reposition it now.
Common Mistakes and How to Avoid Them
Even experienced users make simple mistakes that shorten battery life or create safety risks. Overloading a single power strip with multiple high-wattage chargers trips breakers and can overheat outlets, check your circuit capacity and spread chargers across separate outlets or circuits when running several simultaneously. Mixing chargers and batteries from different brands or voltage platforms seems convenient but damages battery cells through incorrect charging profiles; always match the manufacturer’s charger to its specific battery chemistry and voltage.
Poor ventilation around chargers causes heat buildup that degrades lithium-ion cells faster. Leave at least three inches of clearance on all sides of each charger, and never stack chargers or cover them with cloth or paper. Ignoring the flashing error lights or temperature warnings on your charger means you might continue charging a damaged battery that could vent or swell. Stop immediately when you see error indicators and inspect the battery for damage, swelling, or unusual heat.
Leaving batteries on chargers indefinitely after they reach full charge, common in workshops where users forget to remove them, keeps cells at 100% capacity under trickle charge, which wears them out faster. Modern chargers often switch to maintenance mode, but older models don’t. Remove batteries within a few hours of the green light, or set a phone reminder if you charge overnight.
What to Do Next: Maintenance Schedule and Monitoring
A charging station isn’t a set-and-forget setup. Start with a weekly visual sweep, look for dust buildup on chargers, check that indicator lights function correctly, and confirm batteries feel cool to the touch after charging. Any charger running excessively hot or showing damaged cords needs immediate replacement.
Implement a quarterly maintenance routine for deeper checks. Test each charger with a known-good battery, inspect all electrical connections for corrosion or looseness, and verify your smoke detector battery. Use this time to rotate batteries that haven’t cycled recently, lithium-ion cells degrade faster when left unused at full charge for months.
Track battery performance in a simple log or spreadsheet. Note purchase dates, cycle counts if your charger displays them, and any capacity drops. When a battery only holds 60-70% of its original runtime, plan for replacement. Similarly, chargers that take significantly longer than specified or fail to reach full charge consistently should be retired.
As you add tools, reassess your station layout. More batteries mean revisiting circuit capacity, adding shelves, or upgrading to smart chargers that prevent overcharging. A station that worked for three batteries and two chargers might need redesign at ten. Adapt before you’re juggling loose batteries on your workbench again, that’s how organization breaks down and safety risks creep back in.
Frequently Asked Questions
Can I charge different battery brands on the same station?
Yes, but each battery must use its manufacturer’s designated charger, never mix and match chargers and batteries from different brands. Organize your station with clear labels so you don’t accidentally place a DeWalt battery on a Milwaukee charger, which can damage the battery or create a fire risk.
Is it safe to leave batteries charging overnight?
Modern chargers typically stop charging when batteries reach full capacity, but leaving them on the charger for extended periods can generate unnecessary heat and degrade battery life over time. Charge during waking hours when you can monitor the process, and remove batteries once they’re full.
How long can I store a charged battery before it needs recharging?
Most lithium-ion batteries self-discharge slowly and can sit for 3-6 months if stored at 40-60% charge in a cool, dry place. If you’re storing batteries long-term, check and top them up every few months to prevent deep discharge, which permanently reduces capacity.
My battery won’t charge, what should I check first?
Start with the basics: confirm the charger is plugged in and the outlet works, clean both battery and charger contacts with a dry cloth, and verify you’re using the correct charger for that battery model. If the battery is extremely hot or cold, let it reach room temperature before trying again.
These questions come up repeatedly in workshop conversations and online forums, especially from people new to managing multiple cordless tools. The multi-brand compatibility issue trips up beginners who assume chargers are interchangeable within the same voltage class, but proprietary battery interfaces mean you need the right charger for each brand family.
Overnight charging remains controversial. While newer chargers have automatic shutoff features, heat still builds up during the final charging phase and immediately after. Tradespeople who charge overnight report shorter battery lifespans compared to those who charge in the morning and remove batteries by afternoon. The inconvenience of daytime charging pays off in batteries that hold their capacity longer.
Storage duration matters more than most people realize. Batteries left fully charged or completely dead deteriorate faster than those maintained at partial charge. If you have seasonal tools or backups that sit unused, mark your calendar to check them quarterly rather than discovering a dead battery when you finally need it.
A well-organized charging station isn’t just about convenience, it directly impacts how long your batteries last and how safe your workspace remains. By following the setup steps, safety precautions, and maintenance practices outlined here, you’ll protect your investment in cordless tools while reducing fire risks and electrical hazards.
Your charging station will evolve as your tool collection grows, so revisit your setup periodically to ensure it still meets your needs. We’d love to hear how you’ve arranged your own charging area. Share photos of your setup, favorite organizational tricks, or lessons learned in our community forum, your experience helps fellow DIYers and tradespeople build safer, more efficient workspaces. If you’ve used charging accessories or storage solutions from our hire platform, leave a review to guide others toward the best options for their projects.
Related Posts