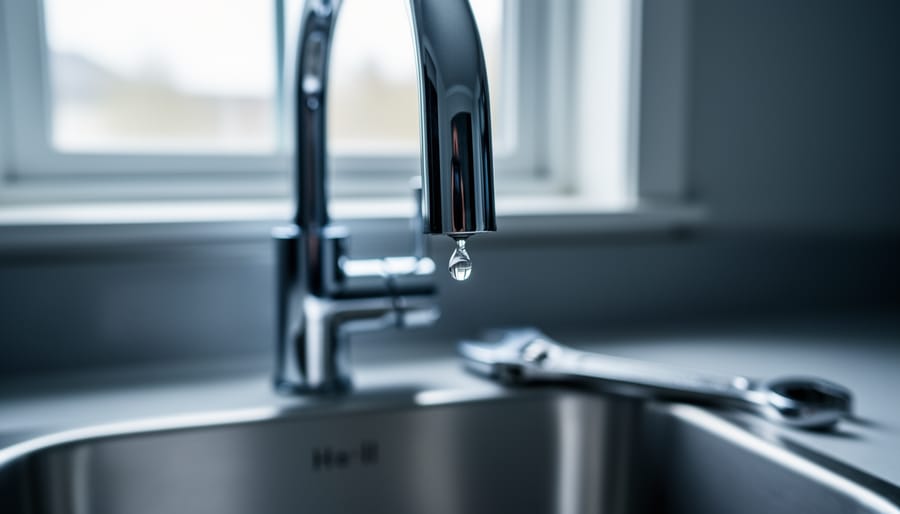
Recognize the warning signs before minor drips become major disasters. A dripping tap wastes up to 20,000 litres annually while slowly damaging your fixtures and inflating water bills. That persistent gurgling from your drain isn’t just annoying—it signals a partial blockage that could lead to complete pipe failure. Most Australian households face at least three plumbing issues yearly, yet many problems remain undetected until significant damage occurs.
Understanding common plumbing faults empowers you to act quickly, whether tackling DIY plumbing repairs or knowing when to call professionals. Leaking taps, blocked drains, running toilets, and low water pressure account for 80% of residential plumbing complaints. Each issue has distinct symptoms, causes, and solutions ranging from simple washer replacements to more complex pipe work.
This guide breaks down the seven most frequent plumbing problems Australian homeowners encounter. You’ll discover how to identify each issue through specific warning signs, understand the underlying causes, and learn which repairs suit confident DIYers versus those requiring licensed plumbers. We’ll outline essential tools for each job, realistic time estimates, and critical safety considerations—because knowing your limits prevents costly mistakes and potential injuries.
Whether you’re dealing with an emergency at 2am or planning preventative maintenance, recognising these common issues helps you respond effectively, minimise water waste, and protect your home from expensive damage. Let’s examine what’s really happening behind your walls, under your sinks, and within your pipes.
Dripping Faucets and Leaky Fixtures
What Causes Faucets to Drip
A dripping faucet might seem like a minor annoyance, but understanding what’s happening inside helps you tackle the problem effectively. Most taps contain internal components that create a watertight seal when you turn them off. Over time, these parts wear down, allowing water to slip through.
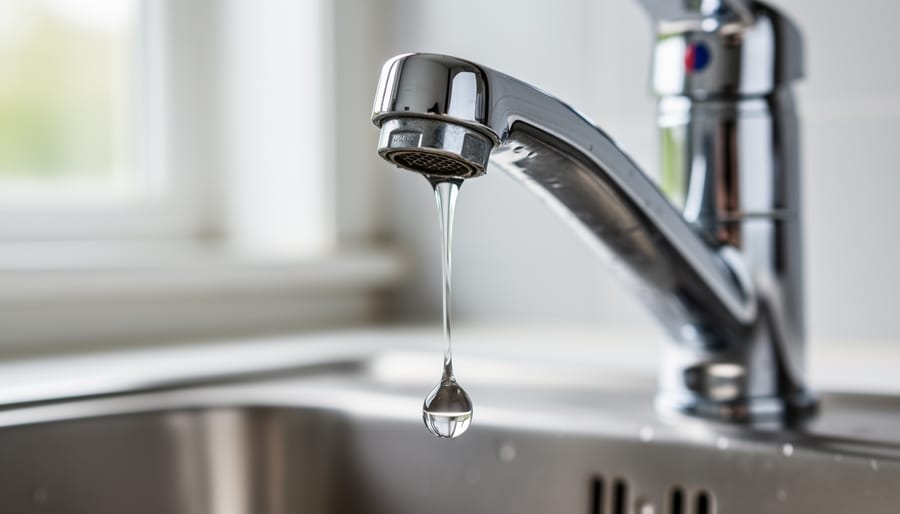
The most common culprit is a worn washer or O-ring. These small rubber or silicone rings sit inside the tap assembly, creating a seal against the valve seat (the part that stops water flow). With repeated use, they deteriorate, crack, or lose their shape, breaking that critical seal. In compression faucets (the traditional type with separate hot and cold handles), worn washers are almost always the issue.
Cartridge and ceramic disc faucets use different mechanisms but face similar problems. Their internal cartridges or ceramic discs can develop mineral buildup from hard water or simply wear out, causing leaks. Valve seats can also corrode or accumulate sediment, preventing proper closure.
Beyond the immediate frustration of that constant drip, ignoring the problem leads to leaky taps and high bills. The good news? Most dripping faucets are fixable with basic tools and replacement parts available at hardware stores.
Tools You’ll Need for the Fix
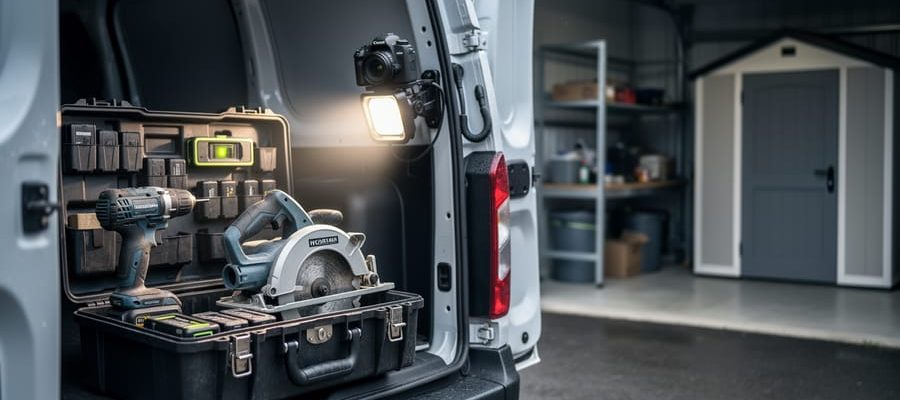
Tackling most common plumbing issues requires a basic toolkit that combines essential hand tools with specialized plumbing equipment. For blocked drains, you’ll need a cup plunger (available for purchase from £5) and potentially a drain snake or auger (hire from £15/day). Community members consistently recommend adjustable wrenches in multiple sizes—typically 8-inch and 12-inch—for working with various pipe fittings and nuts.
A pipe wrench is invaluable for gripping and turning threaded pipes, with 14-inch models being the most versatile option for home use. These can be hired from around £8 per day or purchased from £20. For leak repairs, keep plumber’s tape (PTFE tape) and pipe joint compound on hand, both inexpensive items under £5 that prevent future leaks at connections.
User reviews highlight the importance of having a basin wrench for reaching awkward tap connections under sinks—this specialized tool eliminates frustration and potential damage. A hacksaw with spare blades proves essential for cutting through corroded pipes, while an adjustable spanner provides additional grip options. Always have old towels and a bucket ready to catch water during repairs.
Quick Repair Steps
Before attempting any plumbing repair, turn off the water supply at the fixture shutoff valve or main water line to prevent flooding. Keep a bucket and towels nearby to catch residual water.
1. Identify the specific issue by observing symptoms like leaks, slow drainage, or unusual sounds.
2. Gather necessary tools including adjustable wrenches, plungers, pipe wrenches, and plumber’s tape. Consider hiring professional-grade equipment for stubborn problems.
3. For dripping taps, remove the handle using a screwdriver, replace worn washers or cartridges, and reassemble carefully.
4. Clear blocked drains by using a plunger first, creating a tight seal and pumping vigorously. If unsuccessful, try a drain snake (also called an auger) to break up clogs.
5. Fix running toilets by checking the flapper valve, adjusting the float arm, or replacing the fill valve assembly.
6. Tighten loose pipe connections with appropriate wrenches, but avoid over-tightening which can crack fittings.
Remember: if water pressure remains after shutoff, or you encounter corroded pipes, contact a licensed plumber immediately for safety.
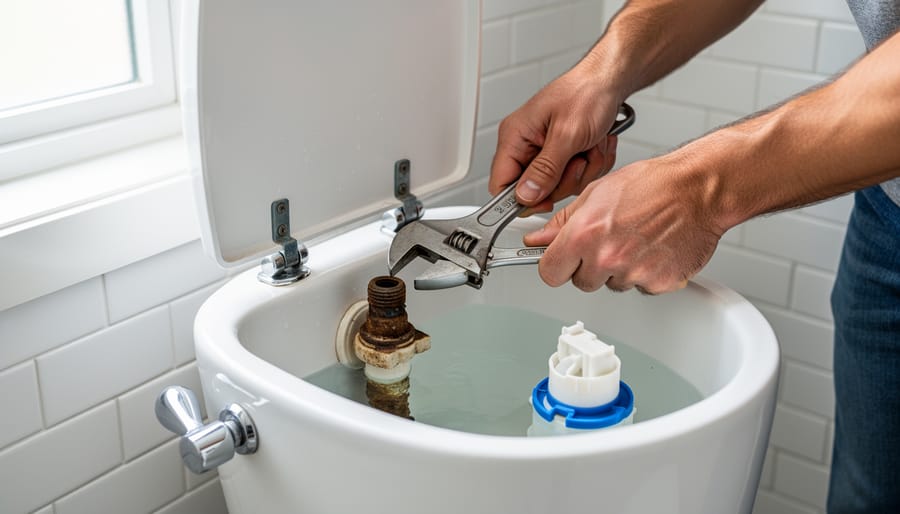
Running Toilets That Won’t Stop
Identifying the Problem Component
Before you can fix a running toilet, you need to identify which component is causing the problem. Start by removing the toilet tank lid and placing it safely aside. Flush the toilet and observe the mechanism as it refills.
First, check the flapper – that’s the rubber seal at the bottom of the tank that lifts when you flush. Add a few drops of food colouring to the tank water and wait 15 minutes without flushing. If colour appears in the bowl, your flapper isn’t sealing properly and needs replacing.
Next, examine the fill valve, which controls water entering the tank. Listen for a hissing sound, which indicates water continuously flowing through a faulty valve. You can also gently lift the float arm; if the water stops running, the fill valve likely needs adjustment or replacement.
Finally, inspect the chain connecting the flush handle to the flapper. It should have slight slack when at rest. If it’s too tight, the flapper won’t seal. If it’s too loose or tangled, the toilet won’t flush properly. Many community members report that chain issues are the easiest fixes, often requiring just a simple adjustment to the connection point.
The DIY Fix (And When to Get Help)
Most minor plumbing repairs are surprisingly manageable for DIY enthusiasts with the right approach and tools. Here’s a realistic breakdown of common fixes and when you might need backup.
Replacing tap washers is a great starter project. Turn off your water supply, remove the tap handle (usually a small screw under the cap), unscrew the headgear, and swap the old washer for a new one. Difficulty: Easy. Required tools include an adjustable spanner and screwdriver. This typically takes 15-30 minutes and saves you £50-80 in callout fees.
Unclogging drains with a plunger or drain snake is straightforward for most blockages. Create a tight seal with your plunger and use firm, rhythmic pushes. For stubborn clogs, a manual drain snake lets you physically break up the obstruction. Difficulty: Easy to moderate. Time investment: 20-45 minutes.
Replacing toilet flappers requires minimal skill. Empty the cistern, unhook the old flapper chain, remove the flapper from the overflow tube, and install the replacement. Difficulty: Easy. Most homeowners complete this in under 30 minutes.
However, know your limits. Call a professional for gas-related work, major pipe replacements, or anything involving your main water line. If you’ve attempted a repair twice without success, it’s time for expert help. Hidden leaks, sudden pressure drops, or sewage backups also warrant immediate professional attention. Remember, what seems like a simple fix can sometimes reveal larger underlying issues.
Clogged Drains and Slow Water Flow
Kitchen Sink Clogs
Kitchen sink clogs are among the most frustrating household plumbing issues, typically caused by grease buildup, food particles, and soap residue that accumulate in your drain pipes over time. When you pour cooking grease down the drain, it solidifies as it cools, creating a sticky coating that traps other debris. Food scraps, coffee grounds, and starchy substances like pasta or rice expand with water and contribute to blockages.
Your garbage disposal can become part of the problem rather than the solution if overloaded or used improperly. Never dispose of fibrous vegetables, eggshells, or large quantities of food at once, as these can jam the blades or create clogs further down the line.
Prevention is straightforward: scrape plates into the bin before washing, pour grease into a container for disposal, and run cold water for 30 seconds after using your garbage disposal to flush debris through. For existing clogs, try a plunger designed for flat surfaces or a drain snake before resorting to chemical cleaners. Many community members report success with natural solutions like baking soda and vinegar, though stubborn blockages may require professional equipment to clear effectively.

Bathroom and Shower Drain Problems
Bathroom and shower drains commonly clog due to hair accumulation and soap scum buildup, creating slow drainage or complete blockages. Hair combines with soap residue and body oils to form stubborn clogs that worsen over time.
For minor clogs, start by removing the drain cover and using a drain snake or zip-it tool to pull out hair and debris. Many DIYers find success with this simple mechanical approach. If the blockage persists, try pouring a mixture of hot water, baking soda, and vinegar down the drain, letting it sit for 30 minutes before flushing with more hot water. This natural solution breaks down soap scum without harsh chemicals.
Prevention is key: install drain guards to catch hair before it enters pipes, and clean them weekly. Flush drains monthly with hot water to dissolve soap buildup. Community members recommend the hair-catching mesh screens as game-changers for maintenance.
For stubborn clogs beyond reach, a motorized drain auger provides the power needed to clear deeper blockages. Always wear gloves when handling drain debris and ensure proper ventilation if using chemical cleaners.
Tools That Actually Work
Having the right tools on hand can mean the difference between a quick fix and an expensive plumber’s callout. Here’s what actually works, backed by real user experiences.
The humble cup plunger remains your first line of defense for sink and tub clogs. Community member Sarah M. shares: “I kept one under every sink after clearing three blockages in one month. Game changer.” For toilets, you’ll need a flange plunger with an extended rubber cup that creates a better seal.
When plungers fail, a drain snake (also called a drain auger) can reach clogs up to 25 feet deep. Manual versions work well for most household needs, though electric models save significant effort on stubborn blockages. User James K. notes: “Rented an electric snake for a kitchen drain and cleared years of buildup in minutes. Wish I’d done it sooner.”
For serious clogs or preventative maintenance, hydro-jetters use high-pressure water to scour pipe walls clean. These professional-grade tools are available for hire and particularly effective for grease accumulation and root intrusion. According to multiple reviews, they’re worth hiring annually for homes with older plumbing systems. Always wear safety glasses and gloves when operating any drain-cleaning equipment, and follow manufacturer guidelines carefully.
Low Water Pressure Throughout Your Home
Diagnosing the Source
Before attempting any repairs, it’s crucial to identify where your plumbing problem originates. Start by checking whether the issue affects your entire street or just your property. Ask neighbours if they’re experiencing similar problems, or contact your water provider to check for service interruptions in your area.
If the problem is isolated to your home, determine whether it’s affecting your whole house or specific fixtures. For water pressure issues, test multiple taps simultaneously throughout your home. Turn on the kitchen sink, bathroom tap, and outdoor hose at the same time. If all have low pressure, you likely have a whole-house issue, such as a partially closed main valve or sediment buildup in your pipes. If only one fixture is affected, the problem is localized to that area.
For temperature problems, check if all hot water outlets are affected. Issues across multiple fixtures might indicate problems with your water heater options or system. Single-fixture problems usually point to faulty tap washers or cartridges.
Document your findings as you test. This systematic approach saves time and helps you communicate effectively with professionals if needed.
Simple Fixes You Can Try
Before calling in a professional, these straightforward fixes often resolve frustrating water pressure and flow problems with minimal time and investment.
Start by cleaning your faucet aerators, those small mesh screens screwed onto tap ends. Over time, mineral deposits and sediment clog these components, reducing water flow. Simply unscrew the aerator (wrapping it with a cloth protects the finish), soak it in white vinegar for 30 minutes to dissolve buildup, then rinse and reinstall. This five-minute task frequently restores normal flow without any tools.
Showerhead replacement offers another quick win when cleaning doesn’t help. Modern low-flow models actually improve pressure while reducing water consumption. Turn off the water supply, use an adjustable wrench to remove the old showerhead by turning counterclockwise, wrap the shower arm threads with plumber’s tape, then hand-tighten the new unit. Most installations take under 15 minutes.
For whole-house pressure issues, locate your pressure regulator near the main water shutoff valve. This bell-shaped device has an adjustment screw on top. Using a pressure gauge (available at hardware stores), check your current pressure, then adjust the screw incrementally, testing after each quarter-turn. Ideal home water pressure runs between 45-55 PSI. Always make small adjustments and monitor results over several hours.
Water Heater Issues
Troubleshooting Temperature Problems
When your water isn’t hot enough or fluctuates between scalding and freezing, the culprit is usually your water heater. Start by checking your thermostat setting, which should typically be between 120-140°F for most households. If you have an electric water heater, you’ll find thermostats behind removable panels. For gas models, there’s usually a dial at the base of the tank.
If adjusting the temperature doesn’t help, inspect the pilot light on gas water heaters. A pilot light that won’t stay lit often indicates a faulty thermocouple (the safety device that detects the flame). This is a straightforward replacement job requiring basic hand tools, though you’ll need to turn off the gas supply first. Always follow manufacturer instructions and ventilate the area properly.
Electric water heaters rely on heating elements that can burn out over time. You can test these with a multimeter to check for continuity. Replacing a heating element requires draining the tank and removing the old element, but it’s manageable for confident DIYers with the right tools.
Safety note: Always shut off power or gas supply before attempting any water heater repairs. If you smell gas or notice water leaking from the tank itself, call a professional immediately rather than attempting a DIY fix.
Sediment Buildup and Flushing
Over time, minerals in your water supply—particularly calcium and magnesium—settle at the bottom of your hot water tank, creating a layer of sediment. This buildup acts like an insulating barrier between the heating element and the water, forcing your system to work harder and causing those unsettling popping or rumbling sounds as water bubbles through the sediment layer.
Left unchecked, sediment reduces your tank’s efficiency, increases energy bills, and can eventually lead to tank failure. While severe buildup might require professional intervention or even pipe relining for connected issues, regular flushing prevents these problems.
The flushing procedure is straightforward but requires caution. First, turn off the power supply—flip the circuit breaker for electric heaters or set gas units to pilot mode. Let the water cool for several hours to avoid scalding. Attach a garden hose to the drain valve at the tank’s base and run it to a suitable drainage area. Open the valve and flush until the water runs clear, typically 10-15 minutes.
Safety warnings are critical: never attempt flushing without cooling the tank first, as water can exceed 60 degrees Celsius. Wear protective gloves and ensure adequate ventilation if working with gas units. If you’ve never flushed your tank and it’s over five years old, consider consulting a professional first—aggressive flushing of heavily compacted sediment can dislodge chunks that block pipes or damage valves. Many DIYers recommend annual flushing as preventive maintenance, with community feedback suggesting this simple task significantly extends tank lifespan.
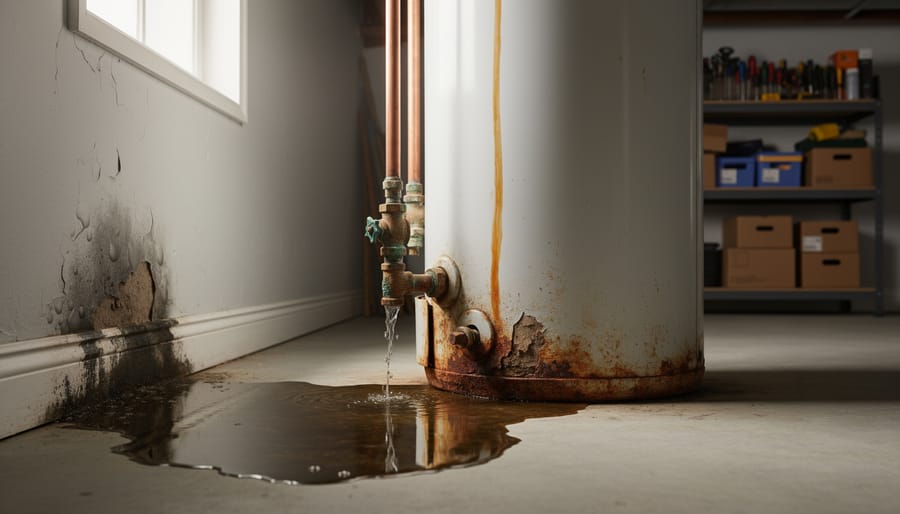
Pipe Leaks and Water Damage
Spotting Leaks Before They Become Disasters
Catching leaks early can save you thousands in water damage repairs. Start with regular visual inspections of your home’s plumbing hotspots: check under sinks, around toilets, near water heaters, and along exposed pipes in basements or crawl spaces. Look for telltale signs like water stains, discoloration on walls or ceilings, rust on pipes, or pooling water. Don’t forget to inspect pipe joints and connections, as these are common failure points.
For hidden leaks behind walls or under floors, a moisture meter is an invaluable tool. These handheld devices detect elevated moisture levels in materials like drywall, wood, and concrete. Many DIYers and homeowners hire moisture meters rather than purchase them outright, making leak detection affordable and accessible. Simply press the meter against suspected areas and watch for readings above normal ranges, typically indicated by LED lights or digital displays.
Pay special attention to unexplained increases in your water bill, the sound of running water when all taps are off, or musty odors that suggest hidden moisture. Community members frequently report that early detection using these simple techniques prevented major renovations. Regular quarterly inspections, combined with moisture meter checks when something seems off, create a solid prevention strategy that protects your home and your wallet.
Temporary Fixes and Permanent Solutions
When you discover a plumbing leak, understanding your options can save both water and money while you plan your next steps. Pipe clamps offer an excellent temporary solution for small leaks in accessible pipes. These adjustable metal bands with rubber gaskets wrap around the damaged section, creating a watertight seal. They’re particularly useful for hairline cracks or pinhole leaks, though they’re meant as a stopgap measure rather than a permanent fix.
Epoxy compounds provide another quick remedy for minor pipe damage. These two-part putties harden when mixed, forming a durable seal over small cracks or holes. Clean and dry the affected area thoroughly before application, then mold the epoxy around the damage. While epoxy can last months or even years on non-pressurized pipes, it’s still considered temporary for high-pressure water lines.
However, certain situations demand permanent solutions. If you notice widespread corrosion, multiple leaks in the same pipe section, or damage affecting more than a few inches, replacing the entire section is typically more cost-effective long-term. Persistent leaks that return after temporary repairs also signal the need for replacement. According to community feedback from experienced DIYers, attempting multiple temporary fixes often costs more in materials and time than investing in proper pipe replacement from the start.
Prevention Tips That Save Thousands
An ounce of prevention truly is worth a pound of cure when it comes to plumbing. By following a few simple maintenance practices, you can avoid costly repairs and extend the life of your plumbing system significantly.
Start with monthly visual inspections of all exposed pipes, checking for signs of corrosion, moisture, or small leaks. Look under sinks, around toilets, and near water heaters. Many of our community members report catching minor issues early simply by making this a regular habit, saving them from major water damage down the track.
Seasonal maintenance is equally important. Before winter hits, consider winterizing outdoor taps and pipes to prevent freezing and bursting. You can hire pipe freezing kits and insulation tools to protect vulnerable areas. During autumn, clear gutters and downpipes to ensure proper drainage away from your home’s foundation.
Proper disposal practices make a massive difference. Never pour grease, coffee grounds, or food scraps down drains. Install drain screens in sinks and showers to catch hair and debris. According to feedback from our DIY community, this simple step alone has prevented countless blockages.
Create a maintenance schedule that includes quarterly checks of your hot water system, annual drain cleaning, and regular testing of your home’s water pressure. High-quality inspection cameras and pressure gauges are available for hire, letting you perform thorough checks without the expense of purchasing specialized equipment.
When issues do arise beyond your comfort level, don’t hesitate to contact professional plumbing help. Knowing your limits is part of smart home maintenance, and catching problems early means professionals can often resolve them quickly and affordably.
Addressing plumbing issues promptly isn’t just about convenience—it’s a smart financial decision that can save you hundreds or even thousands in potential water damage and emergency repairs. A small leak left unattended can quickly escalate into structural damage, mould growth, and sky-high water bills. By taking the time now to assess your home for these common issues, you’re protecting your biggest investment.
Walk through your property with a critical eye. Check under sinks, inspect visible pipes, listen for running water when everything’s turned off, and test your water pressure. Many problems reveal themselves through subtle signs before they become emergencies.
Remember, you don’t need to own specialized tools to tackle most DIY plumbing repairs. Tool hire services make professional-grade equipment accessible and affordable, allowing you to take on projects confidently without breaking the bank.
We’d love to hear about your plumbing experiences. What issues have you encountered? Which DIY fixes worked for you? Share your stories and tips in the comments below—your insights could help a fellow homeowner avoid a costly mistake or gain the confidence to handle their first repair.
Related Posts

Post a Comment