Mix equal parts white vinegar and water in a spray bottle to create an all-purpose cleaner that cuts through grease, dissolves soap scum, and costs less than $2 per liter—a fraction of commercial alternatives. This simple formula works on countertops, mirrors, and tile surfaces, proving you don’t need harsh chemicals to achieve professional results.
Combine baking soda with liquid castile soap to form a paste that tackles stubborn bathroom grime and kitchen stains without scratching surfaces. The mild abrasive action of baking soda lifts dirt while castile soap provides gentle cleaning power, making this combination ideal for sinks, tubs, and stovetops.
Add 10-15 drops of essential oils like tea tree, eucalyptus, or lemon to your vinegar solution for natural antibacterial properties and a fresh scent that eliminates the vinegar smell once dry. This upgrade transforms basic cleaners into pleasant-smelling disinfectants suitable for deep cleaning projects throughout your home.
Store your DIY cleaners in clearly labeled spray bottles and note the mixing date, as most homemade solutions maintain effectiveness for 2-3 months. Keep ingredients separate until ready to use, and always test new formulas on inconspicuous areas first to ensure compatibility with your surfaces.
The recipes ahead organize cleaners by room and specific challenges, from dissolving mineral deposits to removing pet odors, giving you a complete arsenal of proven solutions backed by thousands of successful DIY community members.
Why DIY Cleaners Actually Work (The Science Made Simple)
You don’t need a chemistry degree to understand why your pantry staples clean just as well as store-bought products. The secret lies in simple chemical reactions that have been cleaning homes for generations.
Vinegar, which contains acetic acid, works by breaking down mineral deposits, dissolving soap scum, and cutting through grease. When you spray vinegar on a grimy surface, the acid loosens the bonds holding dirt in place, making it easy to wipe away. It’s also naturally antibacterial, tackling common household germs without harsh chemicals. The key is giving it time to work—let it sit for a few minutes before wiping.
Baking soda (sodium bicarbonate) acts as a mild abrasive and deodorizer. Its slightly gritty texture scrubs away stuck-on food and stains without scratching most surfaces. When mixed with water, it creates an alkaline solution that dissolves grease and neutralizes odors rather than just masking them. This is why it’s so effective in refrigerators and on stovetops.
Castile soap, made from plant oils, works like traditional soap by attaching to both water and oil molecules. Think of each soap molecule as having two ends—one that grabs grease and dirt, and another that rinses away with water. This dual action lifts grime from surfaces and carries it down the drain.
Here’s where chemistry gets fun: when you combine baking soda and vinegar, they create carbon dioxide bubbles. While the fizzing action looks impressive and can help dislodge debris in drains, these ingredients actually neutralize each other. For most cleaning tasks, use them separately for maximum effectiveness. Understanding this simple principle helps you clean smarter, not harder.
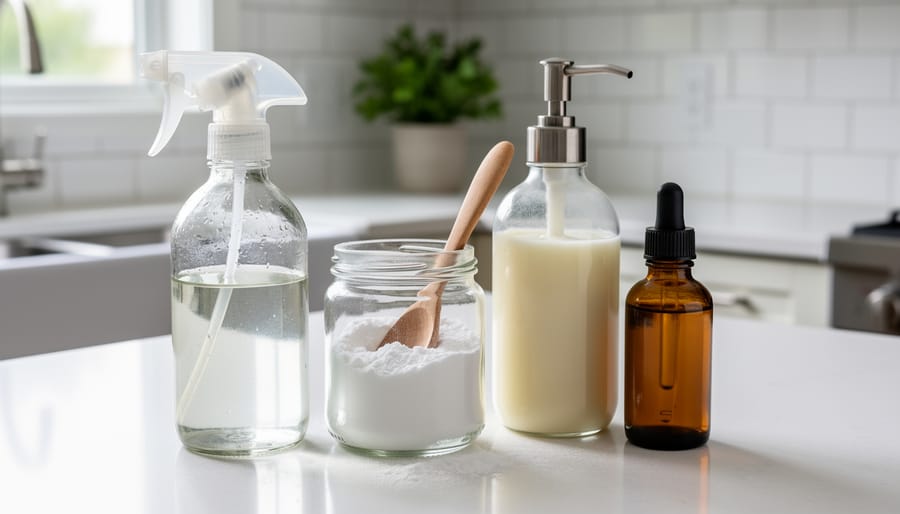
Essential Ingredients Every DIY Cleaner Needs
The Core Five Ingredients
Most effective DIY cleaners rely on just five pantry staples that tackle nearly every household cleaning challenge. White vinegar contains acetic acid, making it excellent for cutting grease, dissolving mineral deposits, and neutralizing odors. Use it for windows, countertops, and removing soap scum from bathroom surfaces.
Baking soda acts as a gentle abrasive that deodorizes and lifts stains without scratching. It’s perfect for scrubbing sinks, tubs, and stovetops, plus it neutralizes acidic odors in refrigerators and carpets.
Castile soap, a plant-based liquid soap, provides the cleaning power for dishes, floors, and general surface cleaning. A little goes a long way, and it rinses clean without leaving residue.
Lemon juice brings natural acidity and antibacterial properties to your cleaning arsenal. It cuts through grease, brightens surfaces, and leaves a fresh scent. Use it on cutting boards, faucets, and to remove hard water stains.
Essential oils like tea tree, lavender, and eucalyptus add natural fragrance and antimicrobial benefits to your cleaners. They’re optional but enhance both effectiveness and user experience. Start with 10-15 drops per 16-ounce spray bottle.
These five ingredients cost roughly $20-30 total and create dozens of cleaning solutions, saving you hundreds compared to commercial products while eliminating harsh chemicals from your home.
Tools and Containers You’ll Need
Getting started with DIY home cleaners requires just a few essential tools and containers that you likely already have at home. Keep several clean spray bottles on hand for different cleaning solutions—glass or high-quality plastic bottles work best and can be reused indefinitely. A set of measuring cups and spoons ensures accurate proportions for your recipes, while a small funnel makes transferring liquids mess-free.
Proper labeling is crucial for safety and organization. Use waterproof labels or permanent markers to clearly identify each cleaner’s contents and mixing date. Store your DIY cleaners in airtight glass jars or bottles away from direct sunlight to maintain their effectiveness.
For basic mixing, you’ll need a few mixing bowls and a whisk or spoon. Consider keeping dedicated containers separate from food preparation items to avoid any cross-contamination.
While DIY cleaners handle everyday cleaning beautifully, some deep cleaning tasks benefit from specialized equipment. Explore tool hire options for carpet cleaners, steam cleaners, or pressure washers that pair perfectly with your homemade solutions. This combination gives you professional-level results without the harsh chemicals or the expense of purchasing equipment you’ll use occasionally.
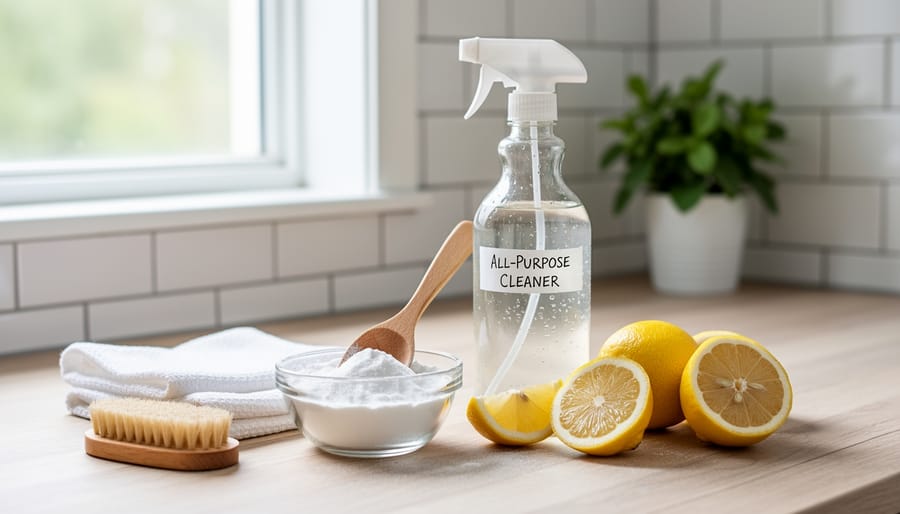
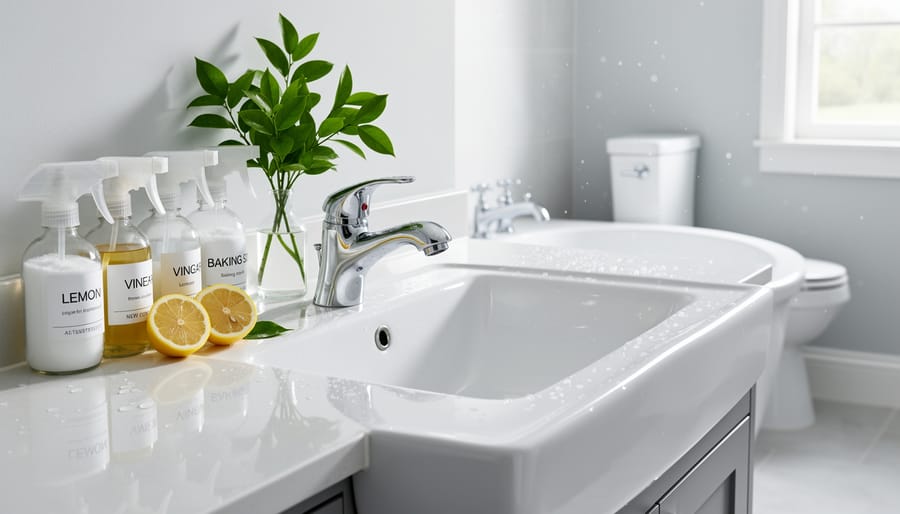
All-Purpose Cleaner That Rivals Store-Bought Brands
This versatile all-purpose cleaner works on countertops, appliances, glass, and most hard surfaces, delivering results comparable to commercial brands at a fraction of the cost. Community members report using this formula successfully for months, with many saying they’ll never return to store-bought versions.
What You’ll Need:
– 2 cups distilled water
– 2 tablespoons white vinegar
– 1 teaspoon castile soap (liquid soap made from vegetable oils)
– 10 drops essential oil (optional, for fragrance)
– 16-ounce spray bottle
Mixing Instructions:
Pour the distilled water into your spray bottle using a funnel to avoid spills. Add the white vinegar, which cuts through grease and disinfects naturally. Next, add the castile soap, being careful not to overmix as this creates excessive foam. If desired, add essential oils like lemon, tea tree, or lavender for a pleasant scent and additional antibacterial properties. Gently swirl the bottle to combine—avoid shaking vigorously.
Surface Compatibility:
This cleaner works safely on sealed granite, laminate, tile, glass, stainless steel, and painted surfaces. Avoid using it on natural stone like marble or unsealed wood, as the vinegar’s acidity can cause damage. Always test on an inconspicuous area first.
Storage and Shelf Life:
Store in a cool, dark place away from direct sunlight. This mixture stays effective for up to one month. Label your bottle with the mixing date and ingredients for safety. Users recommend making smaller batches more frequently rather than large quantities that sit unused.
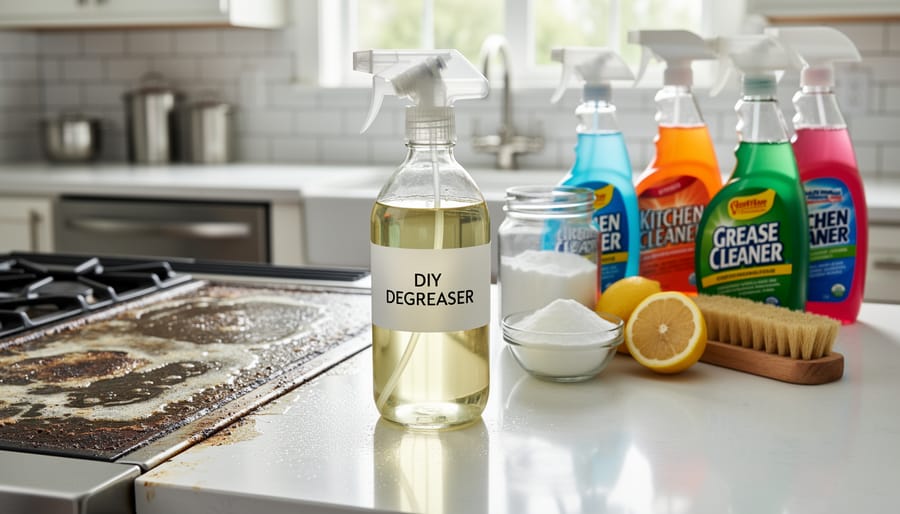
Kitchen-Specific Cleaners for Grease and Grime
Heavy-Duty Degreaser for Stovetops and Ovens
For baked-on grease that seems impossible to remove, this powerful paste tackles stovetops and oven interiors without harsh fumes. Mix half a cup of baking soda with just enough water to form a thick, spreadable paste. Apply generously to greasy areas, avoiding heating elements, and let sit for at least 15 minutes or up to several hours for stubborn buildup.
After the paste has done its work, spray white vinegar directly onto the baking soda. The fizzing reaction helps lift grime from surfaces. Use a non-abrasive sponge or cloth to scrub in circular motions, applying moderate pressure to stubborn spots. For vertical surfaces like oven doors, the paste may need to be thicker to prevent sliding.
Safety considerations are essential when cleaning ovens. Always ensure your oven is completely cool before applying any cleaning solution. Work in a well-ventilated area by opening windows or running an exhaust fan. Wear gloves to protect your hands from prolonged contact with cleaning agents, even natural ones. For self-cleaning ovens, check your manufacturer’s guidelines before using any cleaning products, as some surfaces have special coatings that shouldn’t be scrubbed.
Rinse thoroughly with warm water and wipe dry. This method costs under a dollar per cleaning compared to commercial oven cleaners that run five to ten dollars per use.
Natural Dish Soap and Dishwasher Detergent
For hand-washing dishes, combine 1 tablespoon of washing soda, 1 tablespoon of liquid castile soap, and 2 cups of water in a repurposed spray bottle. Shake before each use and spray directly onto dishes or sponge. This formula cuts grease effectively and costs approximately 15 cents per bottle compared to $3-4 for commercial brands.
For dishwasher detergent, mix 1 cup washing soda, 1 cup borax, and 1/2 cup citric acid. Use 1 tablespoon per load. The citric acid acts as a natural rinse aid, preventing water spots.
Water hardness significantly affects cleaning performance. If you have hard water (mineral-rich water that leaves white residue), increase the washing soda by 25% in both recipes. You can test your water hardness with inexpensive strips available at hardware stores or by checking your local water utility website.
Community feedback shows adding 5 drops of lemon essential oil to the hand soap recipe helps with stubborn grease, while white vinegar in the dishwasher rinse compartment boosts shine. Store the dishwasher powder in an airtight container to prevent clumping from moisture exposure.
Bathroom Cleaners That Actually Disinfect
Toilet Bowl Cleaner and Disinfectant
This powerful toilet cleaner harnesses natural ingredients to disinfect and deodorize without harsh chemicals. To make it, combine 1 cup of baking soda with 1/4 cup of citric acid or white vinegar, and add 10-15 drops of tea tree oil for its antibacterial and antifungal properties. Tea tree oil is a natural essential oil proven effective against common bathroom germs and mold.
For application, sprinkle the baking soda mixture around the bowl, including under the rim. Pour the vinegar directly over the powder, which will create a fizzing action that helps lift stains and grime. Add the tea tree oil drops last. Let the solution sit for 15-20 minutes to maximize disinfecting power, then scrub with a toilet brush and flush. For tough stains, apply the mixture before bed and scrub in the morning.
Use this cleaner once or twice weekly for regular maintenance, or more frequently for high-traffic bathrooms. Community members report excellent results with stubborn rings and mineral deposits. One user noted that consistency matters more than strength—regular cleaning prevents buildup better than occasional deep cleans.
Always ensure bathroom ventilation when cleaning, and never mix this recipe with commercial cleaners containing bleach, as dangerous fumes can result.
Mold and Mildew Spray
Bathroom mold and mildew thrive in damp environments, but this simple spray tackles both prevention and treatment effectively. Mix 1 cup of white vinegar with 1 cup of water in a spray bottle, then add 10-15 drops of tea tree oil, which acts as a natural antifungal agent. For stubborn mold on grout lines, create a paste using 2 parts baking soda to 1 part hydrogen peroxide (3% solution), apply directly, let sit for 10 minutes, then scrub with a stiff brush.
Always ensure proper ventilation when cleaning mold. Open windows and doors, and run your bathroom exhaust fan throughout the cleaning process and for at least 30 minutes afterward. The vinegar smell dissipates quickly once dry, but adequate airflow is essential for safety.
For prevention, spray shower tiles and grout after each use, letting the solution air dry without rinsing. This weekly maintenance routine prevents buildup and keeps surfaces cleaner longer. Community members report that consistent use reduces deep-cleaning frequency by half. If you’re dealing with extensive mold coverage exceeding 10 square feet, or if you have respiratory sensitivities, consult a professional rather than attempting removal yourself. Store your mold spray in a cool, dark place for up to one month.
Floor Cleaners for Every Surface Type
Different flooring materials require specific cleaning solutions to avoid costly damage. Here’s what works best for each surface type, along with critical warnings about what to avoid.
For hardwood floors, mix 1/4 cup white vinegar with 4 cups warm water and add 10 drops of essential oil if desired. This gentle solution cuts through dirt without leaving residue. Spray lightly on your mop rather than directly on the floor to prevent excess moisture. Never use ammonia, abrasive scrubbers, or excessive water on hardwood, as these cause warping, discoloration, and finish damage. For more detailed guidance on maintaining your wood surfaces, check out our comprehensive guide on hardwood floor cleaning.
Tile floors tolerate stronger solutions. Combine 1/2 cup white vinegar with 1 gallon of hot water and 2 tablespoons dish soap. This formula tackles grout grime effectively. Avoid oil-based cleaners on tile as they create slippery residue and attract dirt. For stubborn grout stains, make a paste with baking soda and water, apply with an old toothbrush, then rinse thoroughly.
Laminate flooring needs minimal moisture. Mix 1 cup white vinegar with 1 gallon warm water. Spray onto a microfiber mop and wring until barely damp. Never use wax-based products, steam mops, or wet mops on laminate, which can seep into seams and cause swelling.
Vinyl floors are the most forgiving but still require care. Use the same vinegar-water ratio as laminate, or add 2 tablespoons dish soap for extra cleaning power. Avoid abrasive scrubbers and undiluted vinegar, which can dull the finish over time.
Always test any cleaner in an inconspicuous area first, and remember that less liquid means safer cleaning for all floor types.
Specialty Cleaners for Common Household Needs
Beyond all-purpose cleaners, specific household challenges require targeted solutions. These specialty cleaners tackle common problems using ingredients you likely already have on hand.
For streak-free windows and mirrors, combine 2 cups water, ½ cup white vinegar, and ¼ cup rubbing alcohol in a spray bottle. The alcohol helps the solution evaporate quickly, preventing streaks. For stubborn spots or exterior windows, apply our glass cleaner techniques using slightly warmer water to cut through grime more effectively. Many users report this formula outperforms commercial brands at a fraction of the cost.
Wood furniture needs gentle care. Mix ¼ cup olive oil with 10 drops lemon essential oil for a nourishing polish. Apply sparingly with a soft cloth, buffing in the direction of the grain. This combination conditions wood while adding natural antibacterial properties. Test on an inconspicuous area first, as some finishes may react differently.
Carpet stains respond well to a paste made from 2 tablespoons baking soda, 1 tablespoon white vinegar, and 1 tablespoon dish soap. The mixture will foam initially, which helps lift stains. Apply to the affected area, let sit for 5 minutes, then blot with a damp cloth. Community feedback suggests this works particularly well on pet stains and coffee spills.
For fabric freshener, fill a spray bottle with 1 cup water, 2 tablespoons vodka or rubbing alcohol, and 15 drops of your preferred essential oil. The alcohol eliminates odours while the essential oils provide fragrance. Use on upholstery, curtains, or linens between washes. Always perform a spot test on delicate fabrics before full application.
Safety Tips and What Not to Mix
Creating your own cleaning solutions is rewarding, but mixing the wrong ingredients can create dangerous chemical reactions. The most critical rule: never combine vinegar (or any acid) with bleach. This combination produces toxic chlorine gas, which can cause severe respiratory damage. As community member Sarah M. shared, “I accidentally mixed these while cleaning my bathroom and had to evacuate my family for hours. The fumes were overwhelming.”
Similarly, avoid mixing bleach with ammonia, rubbing alcohol, or hydrogen peroxide. Each combination releases hazardous gases that can cause breathing problems, eye irritation, and in severe cases, life-threatening conditions.
Proper labeling is essential. Use waterproof labels on every bottle, clearly noting the ingredients and date created. Store all homemade cleaners in a dedicated cabinet away from children and pets, preferably in a locked space. Never reuse food containers for cleaners, as this creates dangerous confusion.
Ventilation matters significantly when using any cleaning product. Open windows and run exhaust fans while cleaning, especially in bathrooms and kitchens. Some users report that even natural ingredients like essential oils can trigger sensitivities in poorly ventilated spaces.
Keep baking soda and vinegar-based cleaners separate until use, as their fizzing reaction, while safe, reduces cleaning effectiveness when pre-mixed. Always test new solutions on inconspicuous surfaces first to prevent damage.
Community member James R. recommends wearing gloves even with natural cleaners: “Citrus-based solutions dried out my hands terribly before I started using protection.” Simple precautions ensure your DIY cleaning remains both effective and safe for your household.
Real Cost Breakdown: DIY vs. Store-Bought
Let’s look at the numbers that matter most: your wallet. Making your own all-purpose cleaner costs approximately $0.75 per 16-ounce batch, compared to $4-6 for commercial brands. That’s an 85% savings per bottle.
Annual savings add up quickly. If you replace five common household cleaners with DIY versions, expect to save $150-200 per year. A typical household using store-bought products spends around $250 annually on cleaning supplies, while DIY enthusiasts report spending just $50-75 on basic ingredients that make multiple batches.
Community members who track their savings share impressive results. Sarah from Oregon calculated $180 in annual savings after switching to homemade cleaners. “I bought one gallon of white vinegar for $3, and it lasted me six months,” she notes. Mark, a professional cleaner, reports saving $300 yearly while maintaining the same cleaning standards for his clients.
The startup cost is minimal. A basic supply kit including vinegar, baking soda, castile soap, and essential oils runs about $25-30 and produces enough cleaner for 6-12 months depending on household size.
Breaking down a common recipe: vinegar-based glass cleaner costs $0.40 per batch versus $3.50 for name brands. Make it weekly, and you’ve saved $160 annually on just one product.
Making your own home cleaners is simpler than you might think, and the benefits speak for themselves. You’ll save money, reduce your exposure to harsh chemicals, and minimize plastic waste—all while achieving sparkling clean results throughout your home. The recipes we’ve shared use basic pantry staples that cost a fraction of commercial products, and they work just as effectively when applied correctly.
If you’re new to DIY cleaning solutions, start small. Pick one or two recipes that address your most pressing cleaning needs, whether that’s an all-purpose spray for daily tidying or a bathroom cleaner for weekly deep cleans. As you gain confidence and see the results, you’ll naturally want to expand your homemade cleaning arsenal. Many community members find that once they start, they never go back to store-bought alternatives.
We’d love to hear from you. What recipes have you tried? Have you discovered any winning ingredient combinations or creative applications? Share your experiences and tips in the comments below—your insights help fellow DIYers succeed. Whether you’re tackling routine maintenance or planning to update your home, starting with cleaner, greener products makes every project better.
Related Posts

Post a Comment